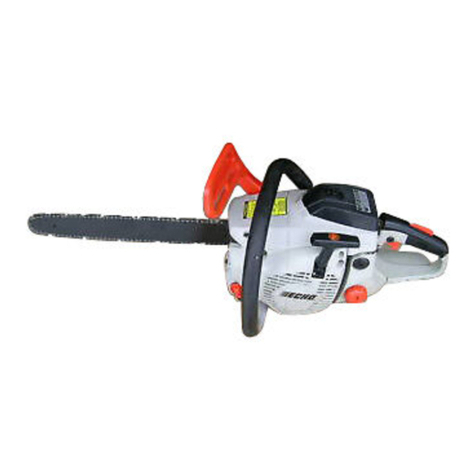
Echo CS-3400TYPE 1E User manual

Chain Saw
InstructionManual
MODELS : CS-3000 TYPE 1E
Serial Number 4034 & Up
CS-3400 TYPE 1E
Serial Number 3942 & Up
CS-3450 TYPE 1E
Serial Number 5120 & Up
WARNING DANGER
Readrulesforsafeoperationandinstructionscarefully.ECHOprovidesanInstruction
ManualandaSafetyManual.Bothmustbereadandunderstoodforproperandsafe
operation.
X7503202004 89865039234
09/01

2
RULES FOR SAFE OPERATION
A. Kickback Safety Precaution for Chain Saw Users
WARNING!
KICKBACKmayoccurwhen thenose ortip ofthe
guide bar touches an object, or when the wood
closesinand pinchesthe sawchainin thecut.
Tip contact in some cases may cause a lightning
fastreverse REACTION,Kicking theguidebarup
andbacktowards theoperator. Pinchingthesaw
chainalongthetopof theguide barmaypush the
guide bar rapidly back towards the operator. Ei-
therofthesereactionsmaycauseyoutolosecon-
trol of the saw which could result in serious per-
sonalinjury.
Donotrelyexclusivelyuponthesafetydevicesbuilt
intoyoursaw.Asachainsawuser,youshouldtake
several steps to keep your cutting jobs free from
accidentor injury.
1. With a basic understanding of kickback, you
canreduceoreliminatetheelementofsurprise.
Suddensurprisecontributestoaccidents.
2.Keep a good firm grip on the saw with both
hands, the right hand on the rear handle, and
theleft handonthefronthandle,whenthe en-
gineisrunning.Useafirmgripwiththumbsand
fingersencirclingthechainsawhandles.Afirm
grip will help you reduce kickback and main-
taincontrol of thesaw. Don’t’letgo.
3. Make sure that the area in which you are cut-
ting is free from obstructions. Do not let the
noseoftheguidebar contacta log,branch, or
anyotherobstruction whichcouldbe hitwhile
youareoperatingthesaw.
4. Cutathigh enginespeeds.
5. Donotoverreachorcutaboveshoulderheight.
6. Follow manufacturer’s sharpening and main-
tenanceinstructions forthe sawchain.
7. Onlyusereplacement barsandchains speci-
fiedby themanufacturerortheequivalent.
B. Other Safety Precautions
1. Donotoperateachainsawwithonehand!Se-
rious injury to the operator, helpers, bystand-
ers,oranycombinationof thesepersons may
resultfromone-handedoperation.Achainsaw
isintendedfortwo-handeduse.
2. Do not operate a chain saw when you are fa-
tigued.
3. Usesafetyfootwear; snug-fittingclothing; pro-
tectivegloves;andeye,hearing andheadpro-
tectiondevices.
4. Usecautionwhenhandlingfuel.Movethechain
sawatleast10feet (3m)fromthefuelingpoint
beforestartingtheengine.
5. Donotallowotherpersonstobenearthechain
sawwhenstartingorcuttingwiththechainsaw.
Keepbystandersand animals outofthe work
area.
6. Donotstartcuttinguntilyouhaveaclearwork
area,securefooting,andaplannedretreatpath
fromthe fallingtree.

3
7. Keepallpartsofyourbodyawayfromthesaw
chainwhen theengineisrunning.
8. Before you start the engine, make sure that
thesaw chainis notcontacting anything.
9. Carrythechainsaw withthe enginestopped,
the guide bar and saw chain to the rear, and
themufflerawayfromyourbody.
10.Donotoperate achainsaw that isdamaged,
improperly adjusted, or not completely and
securely assembled. Be sure that the saw
chain stops moving when the throttle control
trigger is released.
11. Shutofftheenginebefore settingthechain saw
down.
12.Useextremecaution when cuttingsmall size
brushandsaplingsbecauseslender material
may catch the saw chain and be whipped to-
wardyou orpull youoff balance.
13.When cutting a limb that is under tension, be
alert for spring back so that you will not be
struck when the tension in the wood fibers is
released.
14.Keep thehandles dry, clean,and freeofoil or
fuelmixture.
15.Operatethechain sawonlyin well-ventilated
areas.
16.Do not operate a chain saw in a tree unless
youhavebeen specificallytrainedto doso.
17.Allchainsawservice,otherthantheitemslisted
intheInstructionManualmaintenanceinstruc-
tions,shouldbeperformedbycompetentchain
saw service personnel. (For example, if im-
proper tools are used to remove the flywheel
or if an improper tool is used to hold the fly-
wheelin ordertoremovetheclutch,structural
damagetotheflywheelcould occurandcould
subsequentlycausetheflywheeltoburst.)
18.When transporting your chain saw, use the
appropriate guide bar scabbard.
19.SparkarrestermufflersapprovedtoSAEStan-
dard J335b are Standard on ECHO Chain
saws to reduce the possibility of forest fires.
Do not operate the chain saw with a loose or
defectivemuffler.Donotremovethesparkar-
resterscreen.
CONTENTS
Page
RulesforSafe Operation..................................................................................................2
TechnicalData .................................................................................................................4
Nomenclatureof Parts...................................................................................................... 5
PreparationforUse..........................................................................................................6
Fueland Lubricant............................................................................................................7
Operation.........................................................................................................................8
CuttingInstructions .........................................................................................................10
MaintenanceandCare...................................................................................................14
Chain and Guide Bar Combinations...............................................................................17
SettingtheSaw Chain....................................................................................................17
Troubleshooting..............................................................................................................19
Storage..........................................................................................................................20
Correct Use of Chain Brake ...........................................................................................21
ServicingInformation......................................................................................................24

4
ledoM E-1EPYT0003-SCE-1EPYT0043-SCE-1EPYT0543-SC
noisnemiDHxWxL mm022x532x062542x532x083
hcni7.8x2.9x2.016.9x2.9
x0.51
thgieWyrd,daehrewoPgk)bl1.7(2.3)bl3.7(3.3)bl5.7(4.3
rabediugdnaniahctuohtiW
enignEepyT
cc
rednilycelgnis,e
korts-owt,delooc-riA
tnemecalpsiD).ni.uc38.1(1.03).ni.uc30.2(4.33
roterubraC otengaM gulPkrapS retratS noissi
msnartrewoP
epytmgarhpaiD metsysIDC:otengamleehwylF A7-RMPBKGN retratslioceR hctulclagufirtneccitamotuA
leu
FoitarerutxiM.lioekorts-owtdnarbOHCEhtiwoitar1:05 ,lohoclalyhtemgniniatnocleufesutonoD.dedaelnuenatco98 .
EBTM%51rolohoclalyhte%01nahterom
yticapaCknaTretil).S.Uzolf6.8(52.0
liOniahcdnaraB)liorotomro(lioniahcdnara
bOHCE
yticapaCknaTretil).S.U.zo.lf5(51.0
rabediuG
niahcwaS
dradnatS.ni21dradnatS.ni41dradnatS.ni61
lanoitpO.ni
61,41lanoitpO.ni61,21lanoitpO.ni41,21
noitacirbuLpmupliocitamotuaelbatsujdA
dradnatS serutaef eldnaHpoTeldnah
lanoitnevnoC draugdnahraeR
,draugdnahtnorF ,ecivednoitarbiv-itnA ,ekarbniahC,tuokcollortnocelttorhT relffu
mrotserrakrapS,rehctacniahC
TECHNICAL DATA
* Technical data subject to change without notice.

5
CS-3450
NOMENCLATURE OF PARTS
CS-3000, CS-3400
IMPORTANT
Thissparkignitionsystem complies withCanadianICES-002.
1. Handguard
(Chainbrakeactuatinglever)
2. Throttlecontrollockout
3. Throttlecontroltrigger
4. Sprocketguard
5. Chaincatcher
6. Aircleanercover
7. Purgebulb
8. Guidebar
9. Sawchain
10. Fronthandle
11. On / Off switch
12. Rearhandguard
13. Fuel tank cap
14. Pull starter
15. Oil tank cap
16. Throttle control latch
17. Tipguard
18. Lanyardring
18

6
PREPARATION FOR USE
UP
Themachinemay be deliveredwithguide bar(A)andsaw
chain (B) separated. Install guide bar and saw chain as
follows:
WARNING DANGER
SawChain issharp!Alwaysweargloveswhen
handlingassembly,otherwiseseriouspersonalinjury
may result.
GUIDE BAR AND SAW CHAIN
• Follow the instructions enclosed with tip guard to
installguard to guidebar.
• Removetwoguide barnutsand removesprocket
guard(C).
• Mount guide bar (A) on studs, and slide toward
sprocket to make saw chain installation easier.
• Install saw chain (B) as shown, with cutters facing
forward.
NOTE
Chain brake must be in fully released position to
install sprocket guard to saw.
• Installsprocketguard(C), and tightenguidebarnuts
fingertight.
• Adjust saw chain tension, as instructed in “Adjust-
ment,ChainTension.”
ADJUSTMENT, CHAIN TENSION
• Loosentwoguidebar nuts.
• Turn the adjuster slot clockwise until the chain
touches the bottom of the bar.
• Hold the bar nose up and tighten the chain until there
is no clearance between the bar and chain.
• Tighten both guide bar nuts with bar nose held up, to
eliminateclearance.
• Pull the saw chain around the guide bar by hand.
Loosen the adjustment, if you feel tight spots.
• Start the engine and run at low speed. Stop and
readjust,ifnecessary.
CAUTION
1. All adjustments should be made cold.
2. Alwaysweargloves whenworkingonchain.
3. Do not operate with a loose chain.
C
B
A
A
B

7
FUEL STATEMENT
Gasoline - Use 89 Octane [R+M/2] (mid grade or higher)
gasoline known to be good quality. Gasoline may contain up to
15%MTBE(methyltertiary-butylether).Gasoholcontaining
methyl(wood)alcoholisNOTapproved.
Two Stroke Oil - A two-stroke engine oil meeting ISO-L-EGD
(ISO/CD13738)andJ.A.S.O.FC Standards, mustbeused.
Echo brand Premium 50:1 oil meets these standards. Engine
problemsdueto inadequatelubricationcaused byfailureto use
an ISO-L-EGD and J.A.S.O. FC certified oil, such as Echo
Premium50:1Two-strokeOil,willvoidthetwo-strokeengine
warranty. (Emissionrelatedpartsonlyarecoveredfortwo
years, regardless of two-stroke oil used, per the statement
listed in the EPA Phase I Emission Defect Warranty Explana-
tion.)
IMPORTANT
Echo Premium 2-Stroke Oil may be mixed at 50:1 ratio
for application in all Echo engines sold in the past regard-
less of ratio specified in those manuals.
MixingInstructions
1. Fillanapprovedfuelcontainerwithhalfoftherequired
amountofgasoline.
2. Add 2-stroke oil to gasoline.
3. Close container and shake to mix oil with gasoline.
4. Addremaininggasolineandremix.
5. Installfuelcontainer capandwipe anyspilledfuel from
containerandsurroundingarea.
IMPORTANT
Stored fuel ages. Do not mix more fuel than you expect to
use in thirty (30) days, ninety (90) days when a fuel stabi-
lizer is added.
Stored two-stroke fuel may separate.ALWAYS shake fuel
containerthoroughlybefore eachuse.
IMPORTANT
Spilled fuel is a leading cause of hydrocarbon emissions.
Some states may require the use of automatic fuel shut-
offcontainerstoreducefuelspillage.Contact yourECHO
dealerfororderinginformation.
CHAIN LUBRICANT
Properlubricationof the chainwhilein operation reducesfriction
between the chain and the guide bar to a minimum and assures
alongerservice life.
• Use high quality ECHO bar and chain oil for this purpose.
• Donotuseused or reclaimedoilto avoid variousoiler
problems.
• Usebarandchain oil ofthefollowing grades:
SAE NO. 30 ..... in summer
SAE NO. 10 ..... in winter or when cutting resinous trees.
• Whenrefueling,alsorefill chain oil.
50
FUEL AND LUBRICANT
Oil
Gasoline
FUELTANK OILTANK
Fuel Mix Chart
50:1
(U.S.) (METRIC)
GAS OIL GAS OIL
Gal. Fl. oz. Liter cc.
1
2
5
2.6
5.1
12.8
4
8
20
80
160
400
TANKINDICATION

8
CS-3450
CS-3000
CS-3400
A
OPERATION
WHEN THE ENGINE IS COLD
• Movechainbrake leverfullyforward toengagechainbrake
beforestarting.
• Fill the fuel tank with fuel.
• Fill the chain oil tank with lubricant.
• Turnswitch(A)to “RUN”position.
• Pull choke (B) all the way out (close position).
• Push purge bulb (C) 10 times.
• Pullstarterhandleseveral times until firstfiringsound.
(Holdmachinewithyour kneeorfoot.)
• Push choke (B) all the way in. (open position)
• Pullstarterhandleagain.
WHEN THE ENGINE IS HARD TO START
• Press throttle control lockout down while holding throttle
trigger, and push in throttle control latch.
• Pullstarterhandle.
• Whenenginestarts,immediately squeeze throttle trigger
to release the latch.
CAUTION
Clutch engages and chain will rotate when engine is started
with throttle control latch engaged.
After engine starts, release throttle trigger to idle engine.
Never use the throttle control latch for cutting.
Use only when starting the engine.
A
Securely hold the saw.
Make sure bar and chain are not touching anything when
starting the saw.
Do not pull starter rope out to the maximum possible position.
Do not allow recoil handle to snap back against the casing.
B
C

9
STARTING WARM ENGINE
• Ensure that there is fuel and chain oil in the tanks. (If fuel
tankwasemptied duringpreviousoperation,refill tankand
pushpurgebulb10 times.)
• Turnswitch(A)to “RUN”position.
• Pullstarterhandle.
• Choke may be used if necessary, but be sure to push it
back on first firing sound.
NOTE
If engine does not start after 5 pulls, use cold start
procedure.
RUNNING
• After engine starts, allow it to return to idle.
• Movechainbrake leverfullyrearward toreleasechain
brake.
• Squeeze throttle trigger with throttle control lockout
graduallytoincrease engine speed.
• Sawchainstarts rmoving whentheengine reaches
approximately4200rpm.
• Ensureproperacceleration andlubricationofchain and
bar.
• Do not run the engine at high speed unnecessarily.
• Be sure that saw chain stops moving when throttle trigger
isreleased.
STOPPING
• Release throttle trigger and turn switch (A) to STOP
position.
NOTE
If engine does not stop, pull choke out fully to stop
engine.
Checkandrepairstop switch beforestartingthe engine
again.
CS-3450
CS-3000
CS-3400
A
A
CS-3450
CS-3000
CS-3400
A
A

10
Kickback
GENERAL
CUTTING INSTRUCTIONS
[NOTE]
ReadtheECHO“CHAINSAWSAFETYMANUAL”includedwith
your chain saw for additional cutting and safety instructions.
In all circumstances the operation of the chain saw is a one-
man job. It is difficult at times to take care for your own safety,
so don’t assume the responsibility for a helper as well. After
youhavelearnedthe basic techniques ofusingthesaw,your
best aid will be your own good common sense...
The accepted way to hold the saw is to stand to the left of the
sawwithyourleft hand onthefront handlebar andyourright
handontherearhandle so you canoperatethethrottle trigger
withyourright index finger.
Before attempting to fell a tree, cut some small logs or limbs.
Becomethoroughlyfamiliarwith the controlsandthere-
sponses of the saw.
Start the engine, see that it is running properly. Squeeze the
trigger to open the throttle wide open and start the cut. If the
chainisproperlysharpened, thecuttingshouldbe relatively
effortless. It is not necessary to press down hard to make the
saw cut. Pushing the saw too hard will slow the engine and
cutting will actually be more difficult.
Somematerialmayadversely affectthehousingsof your
ECHOchainsaw.
(Example: Palm TreeAcid, fertilizer, etc.) To avoid housing
deterioration,carefullyremove allpackedsaw dustaround
clutchandguidebar areaandwashwith water.)
CAUTION
Do not let the tip of the bar touch anything while the engine is
running. At cutting speed the chain is moving, at a high rate of
speed. Should the tip contact a limb or log while the chain is
moving, the tip will be pushed upward with considerable force.
This is known as kickback. Avoid it!
CAUTION
Wearsuitablehearingprotectivedevice such as earmuffsorear
plugstoprotectagainstobjectionableoruncomfortableloudnoises.

11
2”
45°
2”
CAUTION
A falling tree can seriously damage anything it may hit - a
car, a house, a fence, a power line, or another tree.There
are ways to make a tree fall where you want it, so first
decidewherethatis!
Beforecutting,cleartheareaaroundthe tree.Youwillneed
goodfootingwhile workingandyou shouldbeableto work
the saw without hitting any obstacles. Next, select a path
of retreat. When the tree begins to fall you should retreat
awayfromthe directionoffallata 45degreeangle toavoid
the trunk kicking back over the stump.
Begin the cut on the side to which the tree is to fall. Cut a
notch about 1/3 of the way into the tree as shown. The
position of this notch is important since the tree will try to
fall “into” the notch. The felling out is made on the side
oppositethenotchandatalevel about2” abovethebottom
ofthenotch.Donottry to cut through tothenotchwiththe
fellingcut.The remainingwoodbetween thenotchcut and
felling cut (about 2”) will act as a hinge when the tree falls,
guiding it in the desired direction. When the tree starts to
fall,killtheengine, place thesawon the groundandmake
your retreat quickly.
To fell big trees with a diameter exceeding twice the bar
length, start the notching cuts from one side and draw the
saw through to the other side of the notch. Start the back
cutononesideof thetree,pivotingthesaw throughtoform
the desired hinge on that side.
Thenremovethesaw for thesecondcut.Insert the sawin
the first cut, very carefully so as not to cause kickback.
Thefinalcut ismadebydrawing thesawforward inthecut
to reach the hinge.
Limbing a fallen tree is much the same as bucking. Never
limbonthetree that youarestanding.When limbing, cau-
tion is the word. Be careful of the tip touching other limbs.
Always use both hands.
FELLING A TREE
DIRECTION
OFFALL
Direction of fall Hinge
Fellingcut
First cut
Notch
Second cut
One-third tree
diameter
LIMBING

12
Don’t cut with the saw overhead or the bar in a vertical posi-
tion. If the saw should kick back you may not have good
enoughcontrolto preventpossibleinjury.
Bucking is the sawing of a log or fallen tree into smaller
pieces. There are a few basic rules which apply to all
buckingoperations.
Keep both hands on the handles at all times.
Support logs if possible.
When cutting on a slope or hillside, always stand uphill.
Keepinmind that thewoodisheavy andthatitwill bendand
pinchthesawif improperlysupported.
The trunk will weaken at the point where you make the cut
unless the tree is lying on perfectly flat ground or supported
asshown.
If you make the cut with the tree on the ground, don’t let the
saw’s chain dig into the earth; it is harmful for the saw, and
you stand a good chance of being struck by flying debris. To
cutthetrunk, use thebuckingandtwo-cut sequenceshown.
The first cut should be no deeper than one-third the trunk
diameter.
WARNING: KICKBACK IS DANGEROUS
Kickback is generated when the rotation of the chain is ar-
rested for some reason. The most dangerous effect of this
actionoccurswhenthe nose ofthebar contacts anotherob-
ject, the chain is momentarily stopped and all the energy of
the engine throws the bar upwards and backwards towards
theoperator.
The chain saw industry and government agencies have at-
temptedtoprescribevarioussafety devices,but thebestpro-
tection is to avoid kickback.
Comply with the Safety Precautions as listed on page 2 of
this manual.
BUCKING
Uphillposition
FINISHCUT
FIRSTCUT Board or flat stones
KICKBACK
• Improper thrust cutting.
• When the bar nose hits another tree, etc.

13
INFORMATION
Kickback Safety Features
Thefollowingfeaturesare recommendedforthismodel asKickbackSafetyFeatures.
• Double Guard Low Kick Type Guide Bar orAsymmetrical Low KickType Guide Bar
Note: Your saw chain can be equipped with either of these bars.
Reduced nose
radius
NOTE
UseOregon®IntenzTM replacementguidebars.
Thefollowingguide barsmaybeconsidered tohaveequivalent kickbackenergy.
• Sprocket nose guide bars of the same length and nose radius, same pitch and having the same number of teeth.
• Ahard nose guide bar having the same length and nose radius as a sprocket nose bar.
• Low Kick Guard Link Type Saw Chain
Thelowkickguard link chainmustbemaintained correctly. Followinstruction“SETTINGTHECHAIN”in Instruction
Manual.
• Front Handle Guard
Thefronthandleguardmust be installed correctly andkeptingood condition.
• Chain Brake
Chainbrakemustbe maintainedcorrectly.Followinstruction“CORRECTUSEOF CHAIN BRAKE”inInstruction
Manual.
CAUTION!!
Theconsequencesof using improperreplacementcomponents andofremovingsafety devicesmayresult in serious
orfatalinjury
DoubleGuardBar

14
MAINTENANCE AND CARE
AIR FILTER
• Checkbeforeeveryuse.
• Pull choke (A) all the way out (close position).
• Loosenboltandremoveaircleaner(B)coverandfilter(C).
• Lightlybrushdustoff filter, andinspectfordamage.
A
B
C
D
E
F
G
H
J
AUTOMATICOILER
• Thedischargevolumeoftheautomaticoilerisadjustedto3
to4cc/mm(@7000rpm)priortoshipmentfromthefactory.
• Always check oil discharge when in use.
• Turn adjusting screw (D) counter-clockwise to increase oil
volume,clockwisetodecreaseoilvolume.
OIL STRAINER
• Checkperiodically.
- Do not allow dust to enter into oil tank.
- Cloggedoilstrainerwillaffectthenormallubricating
system.
- Pick it up through oil port.
- If the strainer (E) is dirty, wash it in gasoline.
- When the inside of the tank gets dirty, rinsing the tank
out with gasoline will clean it.
FUEL STRAINER
• Checkperiodically.
- Do not allow dust to enter fuel tank.
- Cloggedstrainerwillcausedifficultyinstartingengineor
abnormalitiesinengineperformance.
- Pickupthefuelstrainer(F)throughfuelinletportwitha
piece of steel wire, or the like.
- When the strainer is dirty, wash it in suitable cleaning
fluid.
- Whentheinsideofthefueltankisdirty,rinsingthetank
out with suitable cleaning fluid will clean it.
GUIDE BAR AND OIL HOLES
• Cleanaftereachuse
- Cleanthegrooves(G)oftheguidebarwith,forexample,
asmallscrewdriver.
- Clean oil holes (H) with a wire.
• Reverseguidebarperiodically.
SPROCKET
• A damaged sprocket (J) will cause premature damage or
wearof sawchain.
- Whenthesprockethaswornout0.5mm(.020”)ormore,
replace it.
• Check sprocket when you install new chain. Replace it if
worn.
• Cleansprocket,clutchandbarmountareabeforeinstallation
ofbar.
IMPORTANT
Some tree sap and resins are corrosive. Thoroughly wash the
guide bar and sprocket areas after each use, then coat metal
parts with light oil.

15
SPARK PLUG
• Checkperiodically
• Gap=0.65mm(.026”)
• Replace if either electrode is worn, or if the insulator
is fouled by oil or other deposits.
• Torque = 145 – 155 kg*cm (125 – 135 in. lb.)
CAUTION: Donotover-torque.
COOLING SYSTEM CLEANING
• Removesparkpluglead.
• Removemufflercover.
• Removerecoilstarterhousing.
• Use a stiff bristle cleaning brush (do not use a metal
brush)toremovedirtfromcylinderfinsinmufflerand
ignition coil areas.
CARBURETOR ADJUSTMENT
ENGINEBREAK-IN
Newenginesmustbeoperated aminimumdurationoftwo
tanksoffuelbreak-inbeforecarburetoradjustmentscanbe
made.Duringthebreak-inperiodyourengineperformance
will increase and exhaust emissions will stabilize. Idle speed
canbeadjustedasrequired.
HIGHALTITUDEADJUSTMENT
Highaltitudeadjustmentisnotrequiredforproperoperation
ofthisengine.

16
B
A
Beforestartingtheunit for adjustment,checkthefollowing
items:
• Thecorrectsparkplugmust be clean andproperly
gapped.
• Theairfilter elementmustbe cleanandproperly
installed.
• Themufflersparkarrestorscreenandexhaustport
must be clear of carbon.
• Thestandardbarandchaincombination(seepage4)
must be installed to the power head, and properly
tensioned.
1. Startengineandrunforseveralminutestoreach
operatingtemperature.
2. Stopengine.Removegrommetcover(A)over“H”and
“L”limiterneedles.
3. TurnHIspeedneedle(H)CCW(counterclockwise)to
stop.TurnLO speedneedle(L) CCW(counterclock-
wise) to stop.
4. IdleSpeedAdjustment.
• Start engine and turn “idle” speed adjustment screw
(B) CW until the saw chain begins to move, then turn
the screw CCW until saw chain stops moving. Turn
screw CCW an additional 1/4 turn.
5. Accelerate to full throttle for 2-3 seconds to clear
excess fuel from engine then return to idle. Accelerate
to full throttle to check for smooth transition from idle
to full throttle. If engine stops or stalls after full warm
upreturntheunitto yourauthorizedECHOdealerfor
repair.
6. Installgrommetcover(A)over“H”and“L”limiter
needles.
7. Check HI speed RPM at W.O.T. (Wide Open Throttle).
HIspeedRPM shouldbeset between10,500and
11,500RPM’s.
8. Check idle speed and reset if necessary. If a tachom-
eterisavailable, idle speedshouldbe set between
2,700and3,300 RPM’s.
CAUTION!
• When starting, idling adjustment speed should be
adjusted not to rotate the saw chain.
• Whenthereistrouble with thecarburetor,referto your
distributorordealer.

17
1/5
CHAIN AND GUIDE BAR COMBINATION
The following combinations may be used on CS-3000, CS-3400 or CS-3450.
*Reducednoseradiussymmetricalbars(Oregon®name—DoubleGuard)
WARNING DANGER
Useof replacementsawchainand/orguidebarotherthanthatspecified,oroperationwithoutthe“tip guard”inplace,may
cause severe kickback resulting in serious injury.
Onlyusesawchaindesignatedas,“LOW-KICKBACK,”thatmeetstheANSIB175.1-2000Standard,andtheEchoguidebar
specified.
SETTING THE SAW CHAIN
For setting saw chains, round file (4 mmø: 5/32”) and flat file are used.
• To keep correct position and correct angle, use the file holder.
-Roundfile andflatfileare availablefromyour EchoDealer.
• File cutters as below.
Type:91VG
HOLDFILEHOLDER
LEVEL
Depth
gauge
ONEFIFTHOFFILEDIAMETER
REMAINSABOVECUTTEREDGE
Tosharpenother types ofchains,follow chain manufacturer’s instructions
30°
PUSHFILEASSHOWN
Keep this angle
• Placethedepthgaugetool firmly on guidebarsothatdepth gauge protrudes. Then filetopofdepth gauge with flat file
until flat with top of the gauge tool.
- Besuretoround off thefrontedgeof the depthgauge.
Sharpen bottom
edge
Depth gauge
tool Remove
until flat
with tool
Round
off the
edge
Model Guide Bar Pitch
Gauge
Saw Chain
Number Kick Guard
Number
Length ECHO P/N
CS-3000
CS-3400
CS-3450
12 in.
14 in.
16 in.
*122374501
*142375201
*162375701
3/8 .050
3/8 .050
3/8 .050
91VG-45X
91VG-52X
91VG-57X
28949
28949
28949

18
30°
85° 60°
91
0.64 mm (0.025”)
Parallel
Number
indicates Chain
type
Number
indicates
Chaintype
91S
(SPROCKET)
(DRIVELINK)
• Properlyfiledcutters are shownbelow.
(Top plate angle) (Sideplateangle) (Top plate cutting angle) (Depth gauge)
• When setting of the chain is finished, soak it in oil and wash away filings completely before using.
• When chain has been filed on the bar, supply sufficient oil to it, rotate the chain slowly to wash away the filings before
usingagain.
• If the chain saw is operated with filings clogged in the groove, the saw chain and the guide bar will be damaged
prematurely
• If the saw chain becomes soiled with resin, for instance, clean it with kerosene and soak it in oil.
CHAIN TYPE AND SPROCKET PITCH
Sawchainshould be usedwithcorrespondingpitched
sprocket. To identify chain type and pitch of sprocket,
check as follows.
• Chain type number (A) is stamped on drive link.
• Sprocket pitch (B) is stamped on clutch drum.
AB

19
Fuelis not
reachingcarburetor
Fuelis not reaching
cylinder
Enginedoes not start(or, is difficultto start)
Enginecranks
Thereisfuel inthetank
Fuelisreaching carburetor
Fuelis reaching cylinder
Thereis spark athigh
tensioncordend
Thereis spark atplug
Startingprocedures
correct
Nosparkat high tension
cordend.
Nosparkat plug
Fueldoesnot
keeprunning
Acceleration
andlowspeed
function
defective
Carburetor
overflow
Enginedoes
notcrank
○○○○○
○○○
○○○
○○○
○○
○○○
○○○○○○
○○○○○
Fuel strainerclogged ...................................Clean.
Fuelpipe clogged ........................................ Clean.
Suctioninsufficient .......................................Make sufficient.
Strainerclogged .......................................... Clean.
Carburetoroutof order ................................. Disassembleandcheck.
C.D.I.moduledefective .................................Removeandreplace.
Ignitioncoildefective .................................... Removeandreplace.
Wireconnectiondefective .............................Reconnect.
High-tension cordconnection defective ......... Repairas necessary.
Switchisgrounded ....................................... Switchon.
Insulatorcracked .......................................... Replaceplug.
Sparkgapincorrect ...................................... Adjust.
Coveredwithcarbon .....................................Clean or replace.
Fouledwithfuel ............................................ Clean orreplace.
Startingprocedures incorrect ....................... Startcorrectly.
Lowandhighspeedneedle ...........................Readjust.
settingtoolean
Metering leverspring toostrong .................. Readjust.
Table 1
Fuelpumpdiaphragmdefective .....................Replace.
Fuelpassage clogged withdust ................... Disas-
sembleandclean.
Fuelleakingfrom fixing surfaces .................. Retightenall screws.
ofcarburetor
Airvalve,fueltankcapdoesnot
worknormally ...............................................Replaceor Clean.
Fuelpumpdoesnotoperate .......................... Checkimpulsedrilling.
Fuelinletneedlevalve clogged with dust .......Clean.
Meteringlever spring notplaced
indentoflever .............................................. Correct.
Mufflerstickywithfuel ................................... Fuel mixtureis too rich
Starttheengineseveral times
withchokerodfullyopenand
runat fast idleuntil engine
doesnotsmoke.
Bearing damaged .........................................Disassemble and replace.
Pistonand/orcylinderseized ........................ Disassemble andreplace.
Crankshaftworn ...........................................Disassembleand replace.
Crankshaftcontactingcrankcase .................. Disassembleandreplace.
TROUBLESHOOTING
Poorperformanceof the engineand/orcutting mechanismcannormally be preventedbycarefully followingthese
instructions.
Poorperformancecan easilybecorrectedeven byabeginner.
Whentheenginedoesnot function properly check thefollowingthree(3)points first.
• Istheengine compressionadequate?
• Is fuel system in good condition and is enough fuel being supplied?
• Is electrical system in good condition and is spark plug operating normally?
When there is serious trouble with the unit, do not try to repair it yourself but have your distributor or dealer do it for you.
FordetailedTROUBLESHOOTING refer totables1 and 2.Locatethe problem onthefollowing charts andrepairas
necessary.

20
Improperfuelused ....................................... Usefuel withcorrect mixingratio. Neveruse
gasolineofpoorquality.
Spark plugdefective (burnt) ..........................Replace.
Ouput(enginespeed)insufficient
Enginekeepsrunning,butchaindoesnotcut clean
Output(enginespeed)sufficient
Engine
overheated
Firingfunction
defective
Carburetor
defective
Other
troubles
Chaindoesnotcut
clean
Chainstops
(Clutch slips)
Chainpoorly
lubricated
Ascoolingfins clogged, air
doesnot passwell ........................................ Cleanfins.
Excessivedepositsin
combustionchamber.................................... Disassembleandremove carbon.
Plugdamagedorfouled ................................Replace or clean.
Comubstionpoordueto
defectivewiring ............................................ Check wiring.
High-speedneedlesettingincorrect .............. Readjust.
Carburetoroverflow .....................................RefertoTable 1.
Aircleanerclogged ...................................... Clean as necessary.
Compressioninsufficient
(pistonring stuck or worn out) ...................... Disassemble, checkand replace ifnecessary.
Cylinderchromiumplating peeled ................Replace cylinder
orworn out
Exhaustportcloggedwithcarbon .................Clean as necessary.
Throttleisnot fully open................................Readjust.
Chaintensionincorrect ................................ Adjust.
Chainwrongly set ........................................ Setcorrectly.
Depthincorrect ............................................ Readjust.
Chainsawpressedagainst
tree to firmly ................................................ Presslightly.
Clutchshoeworn out ....................................Replace.
Nooil intank ................................................ Refill.
Oildelivery incorrect....................................Adjust.
Oilcontaminatedwith dust ........................... Rinsetank andfill withnew oil..
Oilviscosity inappropriate ............................ Use oil with correct viscosity for summer or winter.
Table 2
STORAGE AFTER USE
• Inspect and adjust every part of the chain saw.
- Completely clean every part, and repair, if necessary.
- Apply thin coating of oil on metal parts to prevent rust.
- Remove chain and guide bar, apply sufficient oil coating and wrap them up in plastic.
• Drain fuel tank, pull starter slowly a few times to drain fuel from carburetor.
• Pour a small amount of clean two-stroke oil into spark plug hole, pull starter and crank engine until the piston is at TOP
DEAD CENTER.
• Store in a dry area, free from dust.
This manual suits for next models
3
Table of contents
Other Echo Chainsaw manuals

Echo
Echo CS-400 User manual

Echo
Echo DCS-5000 User manual

Echo
Echo CS-3000 User manual

Echo
Echo CS-4400 User manual

Echo
Echo CS-8001 Series Mounting instructions

Echo
Echo CS-8001(6digits)(36) Instruction Manual

Echo
Echo CS-370 User manual

Echo
Echo CS 2100 User manual

Echo
Echo CS-6702 Instruction Manual

Echo
Echo CS-302 User manual

Echo
Echo CS-440EVL Operating and installation instructions

Echo
Echo CS-3000 TYPE 1E User manual

Echo
Echo CS-8000 TYPE1-E User manual

Echo
Echo CS 410 User manual

Echo
Echo CS-3510 User manual

Echo
Echo CS-4010 User manual

Echo
Echo CS-4920 User manual

Echo
Echo CS-280E User manual

Echo
Echo CS-4400 Mounting instructions

Echo
Echo CS-660EVL User manual