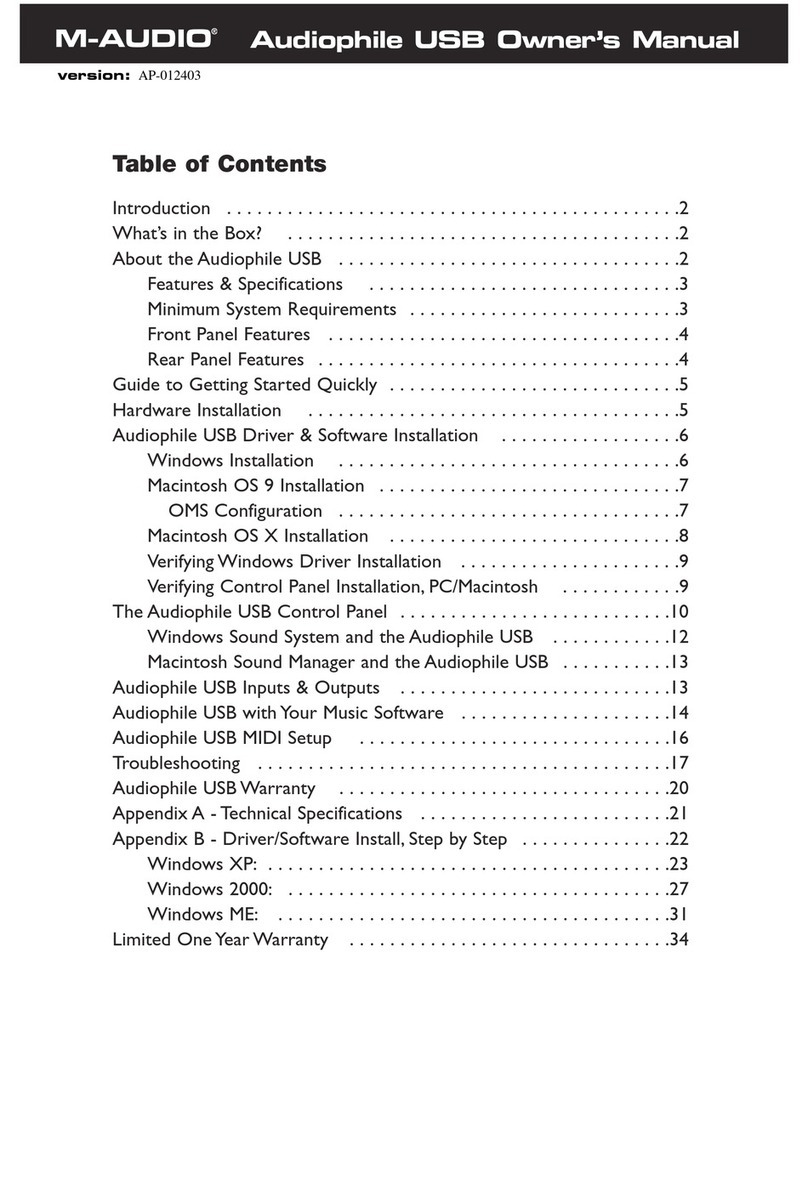
Echo LAYLA24 User manual

LAYLA
24
LAYLA
LapTop
GINA
24
MIA
™
MIAMIDI
™
Owner’s Manual Version 3.1.1 for Windows

Important Safety Instructions
1. Read Instructions - Be sure to read all of the safety and operating instructions
before operating this product.
2. Retain Instructions - The safety instructions and owner's manual should be
retained for future reference.
3. Heed Warnings - All warnings on your Echo product and in the Owner's
Manual should be followed.
4. Follow Instructions - All operating and use instructions should be followed.
5. Moisture - Water and moisture are detrimental to the continued good health of
your Echo product. Do not install or operate your Echo product near sources of
water or moisture such as sinks, damp basements, leaky roofs, etc.
6. Heat – Your Echo product should be situated away from sources of heat such as
heaters or radiators.
7. Power Sources - This unit should be operated only from the type of power
source indicated in this documentation or on your Echo product. If you are unsure
about the type of power at your location, contact your local power company.
8. Grounding – (Does not apply to Gina24, Mia, or MiaMIDI) Precautions should
be taken so that the grounding capabilities of the unit are not undermined. This
equipment is provided with a cord with an equipment grounding conductor and
grounding plug. This plug must be plugged into an outlet that is properly installed
and grounded in accordance with all local rules and ordinances. Do not modify the
plug provided with the equipment. If the plug will not fit into your outlet, have a
proper outlet installed by a qualified electrician.
9. Power Cord Protection – (Does not apply to Gina24, Mia, or MiaMIDI) Power
supply cords should be routed so that they are unlikely to be walked on or pinched
by items placed upon or against them. Pay particular attention to protecting the
plugs, outlets, and the point at which the cord exits your Echo product.
10. Servicing - Do not attempt to service this unit yourself, as opening the case
will expose you to hazardous voltage or other dangers. All servicing should be
referred to qualified service personnel.

11. Damage Requiring Service - Unplug this unit and refer it to a qualified
service technician when any of the following occur:
a) Objects have fallen or liquid has spilled into the unit
b) The product has been exposed to rain or water
c) The product does not operate normally or when a marked change in
performance is noticed
d) The product has been dropped or damaged in any way

Sending in your registration card – or registering online at http://www.echoaudio.com/support/register.php -
allows us to register key information so that we may handle problems faster and inform you of advance information
on upgrades and other news. Thanks in advance for filling out your registration card and sending it to us. We hope
you enjoy your Echo product.
Limited Warranty
Echo Digital Audio Corporation warrants this product, when purchased at an Authorized Echo Dealer in the United
States of America, to be free of defects in materials and manufacturing workmanship for a period of one year from
the date of original purchase. During the warranty period Echo shall, at its option, either repair or replace any
product that proves to be defective upon inspection by Echo. Final determination of warranty coverage lies solely
with Echo. Echo reserves the right to update any unit returned for repair, and reserves the right to change or
improve the design of the product at any time without notice.
This is your sole warranty. Echo does not authorize any third party, including any dealer or sales representative, to
assume any liability on behalf of Echo or to make any warranty for Echo.
Service and repairs of Echo products are to be performed only at the factory (see below) unless otherwise
authorized in advance by the Echo Service Department. Unauthorized service, repair or modification will void this
warranty.
To obtain factory service:
Contact Echo Digital Audio Corporation at (805) 684-4593, 9AM to 4PM Monday through Friday (Pacific Time).
If necessary, you will be given a return authorization number. Products returned without an RA number will be
refused. Echo may, at its option, require proof of the original date of purchase in the form of a dated copy of the
original authorized dealer’s invoice or sales receipt. Pack the product in its original shipping carton and attach a
description of the problem along with your name and a phone number where Echo can contact you if necessary.
Ship the product insured and freight prepaid to:
Echo Digital Audio Corporation
6450 Via Real Suite 1
Carpinteria, CA 93013
DISCLAIMER AND LIMITATION OF WARRANTY
Echo makes no other warranties, express, implied, or otherwise, regarding Echo products, and specifically disclaims
any warranty for merchantability or fitness for a particular purpose. The exclusion of implied warranties is not
permitted in some states and the exclusions specified herein may not apply to you. This warranty provides you with
specific legal rights. There may be other rights that you have which vary from state to state.
In no event will Echo be liable for any lost profits, or for any consequential, direct or indirect damages, however
caused and on any theory of liability, arising from this warranty and sale.

©2003 by Echo Digital Audio Corporation
6450 Via Real Suite 1
Carpinteria, CA 93013
Echo®, Layla®24, Layla LapTop®, Gina®24, Mia, and MiaMIDIare trademarks of Echo Digital Audio
Corporation.
ADATis a registered trademark of Alesis Corporation.
Windows®, Windows 98®, Windows Me®, Windows XP®, and Windows 2000® are registered trademarks of
Microsoft, Inc.

INTRODUCTION..................................................................................................9
WHAT YOU SHOULD HAVE RECEIVED IN THE BOX.............................................10
SYSTEM REQUIREMENTS .....................................................................................11
INSTALLATION.................................................................................................12
SYSTEM SOUNDS.................................................................................................12
VXD VS. WDM - DECIDING WHICH DRIVER TO INSTALL...................................12
INSTALLING THE PCI CARD FOR DESKTOP COMPUTERS......................................13
INSTALLING THE CARDBUS ADAPTER FOR LAPTOP COMPUTERS.........................16
CONNECTING TO LAYLA24’S RACK-MOUNT AUDIO INTERFACE..........................18
CONNECTING TO GINA24’S AUDIO INTERFACE ...................................................22
CONNECTING TO MIA..........................................................................................25
CONNECTING TO MIAMIDI.................................................................................27
USING AUDIO SOFTWARE.............................................................................29
GINA24 AND LAYLA24 .......................................................................................29
MIA AND MIAMIDI ............................................................................................32
VIRTUAL OUTPUTS - MIA AND MIAMIDI...........................................................33
CONSOLE3 (WDM)............................................................................................34
RUNNING THE CONSOLE......................................................................................34
CONSOLE WINDOW .............................................................................................34
BUS SELECT.........................................................................................................36
MASTER OUTPUT BUS CONTROL ..........................................................................36
ANALOG INPUTS..................................................................................................37
DIGITAL INPUTS ..................................................................................................38
PLAYBACK STRIPS...............................................................................................38
ADJUSTING PLAYBACK VOLUME.........................................................................39
CLOCK AND DIGITAL MODE SETTINGS..................................................................39
SYNCHRONIZING MULTIPLE DEVICES .................................................................40
CONSOLE SETTINGS ............................................................................................43
DRIVER ...............................................................................................................43
LOCKING THE SAMPLE RATE................................................................................44
SYNCHRONIZE WAVE DEVICES.............................................................................44
CONSOLE SESSIONS.............................................................................................45
DIGITAL I/O........................................................................................................46
GSIF...................................................................................................................47
ABOUT ................................................................................................................48
VXD CONSOLE – GINA24 AND LAYLA24...................................................49

CONSOLE CONTROLS...........................................................................................51
MONITOR CONTROLS ..........................................................................................51
OUTPUT CONTROLS.............................................................................................53
ADJUSTING MONITOR AND PLAYBACK LEVELS...................................................53
SETTING CLOCK SOURCES AND DESTINATIONS...................................................54
SYNCHRONIZING MULTIPLE DEVICES .................................................................55
THE FILE MENU ..................................................................................................58
THE PREFERENCES PAGE.....................................................................................59
DIGITAL I/O - SELECTING THE S/PDIF OUTPUT FORMAT...................................59
DIGITAL I/O - DITHER INPUT ..............................................................................61
GENERAL - SYNC WAVE DEVICES.......................................................................61
SAMPLE RATE LOCK ...........................................................................................61
VXD CONSOLE – MIA AND MIA MIDI ........................................................62
INPUT CONTROLS ................................................................................................64
MONITOR CONTROLS ..........................................................................................64
VIRTUAL OUTPUT CONTROLS .............................................................................66
OUTPUT CONTROLS.............................................................................................67
ADJUSTING MONITOR AND PLAYBACK LEVELS...................................................67
SETTING CLOCK SOURCES AND OUTPUT CONTROLS ...........................................68
SYNCHRONIZING MULTIPLE DEVICES .................................................................68
THE FILE MENU ..................................................................................................70
THE PREFERENCES PAGE.....................................................................................71
DIGITAL I/O - SELECTING THE S/PDIF OUTPUT FORMAT...................................71
DIGITAL I/O - DITHER INPUT ..............................................................................72
GENERAL - SYNC WAVE DEVICES.......................................................................72
SAMPLE RATE LOCK ...........................................................................................73
ADDITIONAL CONFIGURATION SETTINGS (VXD DRIVERS).............74
SHOW CONSOLE ON TASKBAR..............................................................................75
MONITOR DURING PLAYBACK .............................................................................75
SAW COMPATIBILITY MODE ...............................................................................75
MULTI-CLIENT AUDIO..........................................................................................76
DIRECTSOUND/GSIF SETTINGS ..........................................................................77
CONTACTING ECHO CUSTOMER SERVICE ............................................79
APPENDIX A: GENERAL TROUBLESHOOTING GUIDE ........................80
APPENDIX B: RESOLVING IRQ CONFLICTS - WINDOWS 98/ME......83
APPENDIX C: MULTI-CLIENT AUDIO FAQ...............................................90

APPENDIX D: WDM-WINDOWS DRIVER MODEL FAQ.........................93
APPENDIX E: AN INTRODUCTION TO DIGITAL RECORDING...........97
APPENDIX F: SPECIFICATIONS.................................................................103

Introduction – all products
Introduction
Thank you for choosing Echo Digital Audio. We think you’ll find your Echo
product to be an extremely flexible, high-performance tool for your computer-
based hard disk recording system.
9
Introduction – all products

Introduction – all products
What You Should Have Received in the Box
When you opened the box, you should have found the following:
A PCI card wrapped in an anti-static cover OR a
CardBus Adapter
An audio interface box (Layla24 and Gina24 only)
Four adhesive backed rubber feet (Layla24 and Gina24 only)
Four mounting screws with collars (Layla24 only)
An interface cable (Layla24 and Gina24 only)
Please note: The cable included with the Gina24 system is a shielded
audio cable that has been custom manufactured to exacting standards.
Use of any other cable, such as a computer printer cable, will
substantially reduce the system’s overall audio quality.
A power cable (Layla24 only)
An Esync cable (Gina24 only)
A MIDI-S/PDIF breakout cable (MiaMIDI only)
A CD-ROM containing:
Windows 98/Me/2000/XP Drivers
Macintosh Drivers
.PDF Users Guide
Demo versions of digital audio recording, editing, and processing
software from a variety of manufacturers
.
Quick Start Guide
10
Introduction – all products

Introduction – all products
System Requirements
In order to use Layla24, Gina24, Mia or MiaMIDI you’ll need the following:
A desktop computer with one of the following:
A genuine Intel Pentium processor and genuine Intel chipset OR
An AMD Athlon or Duron processor
A minimum 128Mb of RAM (256Mb highly recommended)
A fast, high-capacity IDE or SCSI hard disk drive
Windows 98/Me/2000/XP
Peripheral audio equipment, such as a mixer, microphones, studio monitors,
musical instruments, etc.
In order to use Layla24 LapTop, you’ll need the following:
A laptop computer with a Type II CardBus Slot
A minimum 128Mb of RAM (256Mb highly recommended)
A fast, high-capacity IDE or SCSI hard disk drive
Windows 98/Me/2000/XP
Peripheral audio equipment, such as a mixer, microphones, studio monitors,
musical instruments, etc.
11
Introduction – all products

Installation – all products
Installation
Complete installation consists of disabling Windows system sounds, deciding
which Echo driver you are going to use, installing the Windows drivers into your
system, installing the PCI or CardBus card, connecting the audio interface to the
card (Layla24 and Gina24) and, if necessary, installing a multitrack audio
recording/editing application.
System Sounds
We suggest that you turn off your Windows system sounds prior to installing your
Echo product. Because most system sounds are sampled at very low sample rates,
typically 11 to 22 KHz, each time they are played it will cause the sample rate
clock on your Echo product to reset to the slower speed.
To turn off the system sounds, first go to the Windows “Control Panel,” which can
be found under “Settings” from the “Start” button. On the control panel you will
find an icon titled “Sounds” or “Sounds and Multimedia”. After double clicking
on this icon, you will see a window labeled “Schemes” near the bottom of the
screen. Click on the small down arrow to the right of the combo-box, and select
the “No Sounds” option. Then, click on the Ok button.
VxD vs. WDM - Deciding Which Driver to Install
VxD and WDM are two different driver architectures for Windows. You only
have a choice between the two if you are using Windows Me. If you are using
Windows 98, you must use the VxD drivers. If you are using Windows 2000 or
XP you must use the WDM drivers.
For Windows Me you should use the VxD drivers, unless you fall under one or
both of the following two categories:
1) You are using an audio program such as Cakewalk’s SONAR, which takes
advantage of the WDM architecture to achieve low latencies.
12
Installation – all products

Installation – all products
2) You are using an audio program that uses an ASIO driver. In general, the
WDM ASIO driver provides higher performance than the VxD ASIO driver.
For a detailed discussion of the benefits and drawbacks of the WDM architecture,
please read Appendix F: WDM-Windows Driver Model FAQ.
Installing the PCI Card for Desktop Computers
Once you have verified that there are no problems with your system, it is time to
install the Echo PCI card into your computer.
1. Install the drivers. You should do this before inserting the PCI card. Insert
the Echo Install CD-ROM into your machine. The Main Install Window should
automatically appear; if it does not, simply go to “My Computer,” and double-
click on your CD-ROM drive icon. Now, select “Install Windows Drivers,”
and follow the on-screen directions.
2. Once you have installed the appropriate driver for your version of Windows,
turn your computer off.
IMPORTANT - Unplug your computer and detach all peripherals before
proceeding with the following steps.
3. Remove your computer’s cover. This operation differs from computer to
computer. Refer to your computer’s manual for a further explanation of this step
if necessary.
4. Select the PCI slot into which you will install the card. You may use any
available PCI slot in your computer for the card. Unscrew and remove the
bracket covering the expansion slot where you would like to install your Echo
product. Put the screw in a safe place, as you will need it later to complete the
installation.
5. Insure that you have fully discharged all static electricity from your body
before handling the card. This can be done through the use of a grounding strap
13
Installation – all products

Installation – all products
or, more simply, by touching your bare hand to the metal casing of the
computer’s power supply. (For this latter method to work, the computer must be
plugged in, though not turned on.) After you’ve discharged your static, unplug
the computer before proceeding to the next step.
6. Remove the card from its protective anti-static bag. Handle the card carefully by
its edges, and insert it into the selected expansion slot. Insure that the card’s
edge connector (the protruding edge with the gold leads) is seated firmly into the
slot. Centering the card over the slot and using a gentle rocking motion while
pushing downward into the slot generally works well. Be careful not to force the
card into the slot, or bend or twist it while it is being inserted, as this could result
in the card being damaged.
7. Now use the screw that you removed earlier, from the protective back plate, to
attach the metal bracket on the card to the computer’s rear panel.
8. OPTIONAL: (If you have Mia or MiaMIDI, skip this step.) An Esync cable
comes with Gina24, and can be used to daisy chain several 24-bit Echo cards
together. Esync is a proprietary form of super clock that allows you to sync
together multiple 24-bit Echo products. Simply attach the Esync cable to the
two-prong “Esync Out” connector on the Layla24/Gina24 PCI card, and attach
the other end to the “Esync In” connector on your Gina24 PCI card.
9. Replace the computer’s cover, and secure it. Reattach its power supply cord
and reconnect any peripherals that you may have removed prior to beginning the
installation.
10. (Layla24 and Gina24 only) Locate the audio interface box (Layla24 and
Gina24), the interface cable, and the power cable. Securely mount the interface
into your equipment rack (Layla24 only). If you will not be mounting the box in
a rack, remove the backing from the four rubber feet and place one in each
bottom corner of the interface unit. Then be sure to locate the rack-mount box in
a secure location.
Plug one end of the cable into the connector on the Echo PCI card that now
protrudes through the back panel of your computer, and secure the cable using
the built-in screws located on both sides of the connector. Attach the other end
14
Installation – all products

Installation – all products
of the cable to the connector on the rear of the interface labeled computer and
fasten the cable securely with the screws. Plug the power cable firmly into the
interface and a power socket, but do not turn on the interface at this time
(Layla24 only).
Caution: Never connect the rack-mount interface to the computer while either
the interface or your computer is turned on.
11. (MiaMIDI only) Now that MiaMIDI is plugged into your computer, you will
need to connect the MIDI-S/PDIF breakout cable to the back of the MiaMIDI
card. Take the breakout cable and plug it into the 7-pin DIN connector labeled
MIDI S/PDIF at the bottom of the PCI card bracket.
12. You can now attach external audio devices to the connectors. Information on
attaching external devices to your particular interface may be found in the
following sections.
13. (Layla24 only) Turn on your Layla24 audio interface box.
14. Turn on your computer. Once Windows starts, it should find new hardware
and begin to install the drivers. For most versions of Windows, this process is
entirely automatic. For Windows XP, you should select the option “Install the
software automatically,” and follow the on-screen directions.
Note: This version of the WDM driver has not been digitally signed by
Microsoft; for Windows 2000 and XP, you will need to confirm that you
want to install an unsigned driver.
15
Installation – all products

Installation – all products
Installing the CardBus Adapter for Laptop Computers
Once you have verified that there are no problems with your system, it is time to
install Layla24 LapTop into your laptop computer.
1. Install the drivers. You should do this before inserting the CardBus Adapter.
Insert the Echo Install CD-ROM into your machine. The Main Install Window
should automatically appear; if it does not, simply go to My Computer and
double-click on your CD-Rom drive. Now, select “Install Windows Drivers,”
and follow the on-screen directions.
2. Once you have installed the appropriate driver for your version of Windows,
turn your computer off.
3. Locate the rack-mount interface, the 9-pin interface cable, and the power cable.
Securely mount the interface into your equipment rack. If you will not be
mounting the box in a rack, remove the backing from the four rubber feet and
place one in each bottom corner of the interface unit. Then be sure to locate the
rack-mount box in a secure location.
4. Connect the cable. Before installing the card into the computer, connect the
cable between the card and the rack-mount chassis. Make sure the cable is fully
inserted into the card and that it “clicks” into place. You may have to wiggle it
a bit for this to happen.
5. Insert the LapTop adapter into your computer. Make sure the computer is
turned off. To install the card, insert it into any available CardBus slot. Next,
turn on the audio interface box.
6. Turn on your computer. Once Windows starts, it should find new hardware
and begin to install the drivers. For most versions of Windows, this process is
entirely automatic. For Windows XP, you should select the option “Install the
software automatically,” and follow the on-screen directions.
16
Installation – all products

Installation – all products
Note: this version of the WDM driver has not been digitally signed by
Microsoft; for Windows 2000 and XP, you will need to confirm that you
want to install an unsigned driver.
Once the driver is installed, a small “PCCard” icon will appear in the system “tray”
(usually on the lower right-hand side of the screen).
While it is possible to “hot-dock” the card by inserting it with the laptop powered
up, it is recommended the card only be inserted or removed with the power off. If
you have to remove the card with your computer turned on, the card must first be
disabled. To do this, click on the PCCard icon in the tray, and tell Windows to
stop the card. You will get a message when it is safe to remove it. Failure to
disable the card before removing it could potentially damage the card or the
computer.
17
Installation – all products

Audio connections – Layla24
Connecting to Layla24’s Rack-mount Audio Interface
The back panel of Layla24’s rack-mount audio interface contains a wide variety of
connections that allow great flexibility in the operation of Layla24. For optimal
performance with Layla24, it is critical to use the appropriate cabling and
connectors.
Analog Inputs and Outputs
Layla24 has eight analog inputs and eight analog outputs on the rear panel. The
input and output connections can accept unbalanced or balanced signals via ¼”
connectors. By default, the inputs and outputs are set to receive or send a +4 dBu
signal. You can also select –10 dBV for each individual input and output (see the
description of the console, below).
Layla24’s front panel has a ¼” headphone output jack with a corresponding
volume knob which monitors analog outputs 1 and 2.
18
Audio connections – Layla24

Audio connections – Layla24
The Computer Connector
Next to the analog inputs and outputs is a connector labeled COMPUTER. This
connector is known as a DB-9, and is similar to the serial port on a PC. It is the
point at which the audio interface connects to the Layla24 PCI card inside your
computer.
A cable was supplied with your Layla24 for this purpose. This custom made cable
is manufactured to certain specifications; if you need to replace it, you should only
use a replacement cable from Echo.
ADAT / S/PDIF Optical I/O
Next to the COMPUTER connector is a pair of connectors labeled OPTICAL, IN
and OUT. These connectors are used to transmit digital audio data among via an
optical signal.
You can use this port for ADAT (8 channels) or for optical S/PDIF (stereo) I/O.
Note: Layla24 is only capable of transmitting or receiving one type of
digital signal at a time. You must choose either ADAT optical or S/PDIF
(optical or RCA); you cannot use both simultaneously. The Digital Mode
Switch can be found in the Layla24 Console. For more information, refer to
the section of the manual that discusses the console.
19
Audio connections – Layla24

Audio connections – Layla24
S/PDIF
Next to the ADAT connectors is a pair of connectors labeled S/PDIF,IN and
OUT. These S/PDIF connectors are used to transmit digital audio data between
digital audio devices via an electrical signal. S/PDIF data can use the full 24-bit
sample width used internally on Layla24.
When connecting devices to the S/PDIF jacks on Layla24, the use of standard
analog RCA audio cables is not recommended. For reliable S/PDIF operation, 75-
ohm coaxial (RG59) video cables are recommended.
Word Clock
Next to the S/PDIF ports are the Word Clock connectors. These connectors allow
you to synchronize one Layla24 to another Layla24, Layla, or to other digital audio
devices.
The Word Clock I/O uses a BNC connector. As with the S/PDIF I/O, a shielded
75-ohm (RG-59) coaxial video cable should be used. BNC connectors are widely
used in the electronics industry for both video and computer networking. However,
computer networks use 50-ohm (RG-58) coaxial cables and not the 75-ohm (RG-
59) cable used by video. For reliable word clock operation, use only video grade
cables with Layla24.
20
Audio connections – Layla24
Other manuals for LAYLA24
1
This manual suits for next models
7
Table of contents
Other Echo Sound Card manuals
Popular Sound Card manuals by other brands
Edirol
Edirol FA-66 owner's manual
Rocket Fish
Rocket Fish RF-71SDCD Guide de l'utilisateur

Yamaha
Yamaha WF192 Online manual
Creative Technologies
Creative Technologies Sound Blaster manual
Conrad Electronic
Conrad Electronic USB-SoundBox 7.1 operating instructions
Optimus
Optimus UMX-LNK operating instructions

