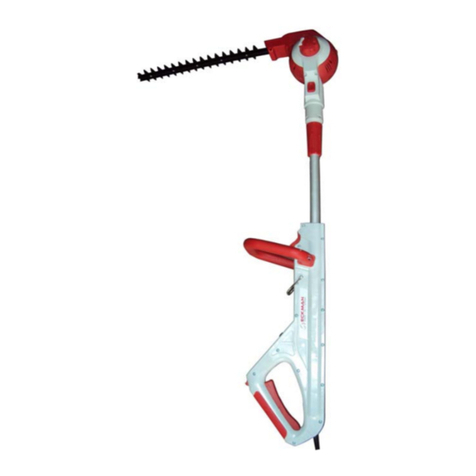
Eckman EKEMS2 User manual

4-IN-1 1200W EXTENDABLE ELECTRIC HEDGE TRIMMER, GRASS TRIMMER/
BRUSH CUTTER & CHAINSAW BRANCH LOPPER SET MODELEKEMS2
INSTRUCTION MANUAL
回
PLEASE READ AND SAVE THE INSTRUCTION MANUAL FOR FUTURE REFERENCE
Any questions please call the Eckman helpline on:0844 441 3011 or go to www.eckman.co.uk

- 1 -
Contents:
I. SYMBOLS / PICTURES MARKED ON THE PRODUCT OR USED IN MANUAL............2-3
II. GENERAL SAFETY INSTRUCTIONS.……..........................................................3-6
III. PARTS IDENTIFICATION...............................................................................................7-9
IV. TECHNICAL DATA...........................................................................................................10
V. ASSEMBLY...................................................................................................................10-11
VI. CHAINSAW LOPPER ATTACHMENT.........................................................................12-14
VII. HEDGE TRIMMER ATTACHMENT..................................................................................14
VIII. BRUSH CUTTER/GRASS TRIMMER ATTACHMENTS............................................14-16
IX.CONNECTION...................................................................................................................16
X. OPERATION......................................................................................................................16
XI. MAINTENANCE................................................................................................................17
XII.CLEANING & STORAGE..................................................................................................17
XIII. GUARANTEE...................................................................................................................17
XIV. EC DECLARATION OF CONFORMITY..........................................................................18
XV. EXPLODED VIEW & PARTS LIST...................................................................................19-20

- 2 -
I. SYMBOLS PICTURES MARKED ON THE PRODUCT OR USED IN MANUAL
Read the user manual before using the machine
WARNING!
Wear CE approved eye protection!
Wear CE approved ear and head protection!
Wear gloves to protect your hands.
Wear sturdy and high safety boots.
Before maintenance or repair –switch off the machine and unplug from mains
supply
Debris may be ejected –take care!
Keep the distance at least 10m from electrical lines when working with the pruner
Keep bystanders at a distance of no less than 15m from the
work area.
Note the direction of the rotation of the cutting tools.

- 3 -
Cutting length of chainsaw lopper 220mm
Cutting length of hedge trimmer 400mm
Cutting length of brush cutter 230mm
Cutting length of grass trimmer 400mm
WARNING: Read and understand all instructions. Deviation from these instructions can result in
serious injury.
II . GENERAL SAFETY INSTRUCTION
Proper safety precautions must be observed. Like all power equipment this unit must be handled
carefully. DO NOT EXPOSE YOURSELF OR OTHERS TO DANGER. Follow these general rules.
Do not permit others to use this machine unless they are thoroughly responsible and have read and
understood the machine manual and are trained in its operation.
●Always wear approved safety goggles for eye protection. Long hair should be tied back. Dress
properly, Do not wear loose clothing or jewelry that could become caught in moving parts of the
unit. Safe, sturdy, non-skid footwear should always be worn. It is recommended that legs and
feet be covered to protect from flying debris during operation.
● Inspect the entire machine for loose parts (nuts, bolts, screws, etc.). Repair or replace as
necessary before using the machine. Do not use any attachment with this power head other than
the ones recommended by our company. Serious injury to the operator or bystanders could result
as well as damage to the machine.
● Keep the handles clean and free from oil and lubricants.
● Always use the handles and shoulder strap provided when cutting.
● Never remove the lopper attachment lubrication oil tank cap while the engine is running.
● Never attempt to make motor adjustments while the unit is running and strapped to the
operator. Always make motor adjustments with the unit resting on a flat, clear surface.

- 4 -
●Do not use the unit if it is damaged or poorly adjusted. Never remove the machine’s guard. Serious injury
to the operator or bystanders could result as well as damage to the machine.
● Inspect the area to be cut and remove all debris that could become entangled in the nylon cutting head or
cutting blade.Also remove any objectsthat the unit may throwduring cutting.
● Keep children away. Onlookers should be kept at a safe distance from the work area, at least 15 metres
(50 feet)
● Never leave the machine unattended.
● Do not overreach. Keep proper footing and balance at all times. Do not run the unit while standing on a
ladder or on any other unstable footing location.
● Keep hands and feet clear of the nylon cutting head or blade while unit is in use.
● Do not use this type of machine for sweeping away debris.
● Do not use the unit when you are tired, ill or under the influence of medication ,drugsor alcohol.
● Use nylon cutting head which is free of damage. If a stone or any other obstacle is hit, stop the motor and
check the nylon cutting head.Abroken or unbalanced nylon cutting head must never be used.
FOLLOW INSTRUCTIONS FOR CHANGING ACCESSORIES.
● Ensure safe and proper performance of your product. These parts are available from your dealer. The
use of any other accessories orattachments may cause a potential hazard or injuryto the user, damage
to the machine and void this warranty.
● Clean the machine completely, especially, the oil tank of lopper attachment , and other attachments ;.
● Stay clear of other workers or bystanders by at least 15 metres /50 feet.
Whenever approaching an operator of the machine, carefully call theirattention and confirm that the
operator stops the engine. Be careful not to startle or distract the operator which can cause an unsafe
situation.
● Never touch the nylon cutting head or blade whenever the motor is running. If it is necessaryto replace
the protector or cutting attachment, be sure to stop the motor and confirm that the cutting device has
stopped running. Unplug from the mains supply.
● The machineshould be turned off when the machine is moved between work areas.
● Be careful not to hit the nylon cutting head against stones or the ground.
● Pay attention to loosening and overheating of parts. If necessary, have the machine serviced by an
authorized dealer. Never continue to operate a machine which may be malfunctioning.
● Never operate the machine in the rain and take special care just after the rain as the ground may be
slippery.
● If you slip or fall to the ground or into a hole, release the throttle lever immediately.
● Be careful not to drop the machine or hit it against obstacles.
● Make periodic inspections to assure safe and efficient operation. For a thorough inspection of your
machine or if in doubt, please contact a dealer.
● WARNING: The cutter area is still dangerous while the machine is coasting to a stop.
Intended use
Attention! Depending on the attachment that is used with this device it is only suitable for cutting
grass, hedges and branches. Any kind of usage that is not specified in this manual is herewith
prohibited and will invalidate your guarantee. We assume no liability for personal injuries and
material damages which were caused by improper use. This machine is not designed or guaranteed
for commercial use.
IMPORTANT INSTRUCTIONS AND RECOMMENDATIONS FOR ALLAPPLICATIONS

- 5 -
Before re-using the machine after any impact, check the machine for wear and tear or damage.
If necessary have the machine repaired.
Wear CEApproved eye and ear protection and if applicable a hard hat.
Periodically check and maintain the unit. Only have the unit repaired by an authorised expert.
Periodically check the condition of the accessories.
Always put the unit down and switch it off when you stop working or move to another spot.
Switch off and unplug the machine before crossing roads or gravel paths.
Use the machine only as described in this manual.
Periodically check that nuts, screws and other fastening elements are tightened firmly.
WARNING! The rotation or motion of the cutting tools will continue a while after switching off the
engine.
Safety instructions for hedge trimmers:
a) Keep all body parts away from the cutting blades. Do not try to remove clippings or hold
material you are going to cut with the blade running. Only remove trapped clippings when the unit is
switched off and unplugged. One careless moment while you are using the hedge trimmer could lead
to serious injuries.
b) Carry the hedge trimmer by the handle while the blade is idle. If you transport or store the
hedge trimmer always put on the protective cover. Careful handling of the unit reduces the risk of
injury..
c) Do not use the hedge trimmer in the rain.
d) Please wear work gloves, safety goggles, sturdy shoes and long trousers when using the
machine.
e) Always use both hands to hold the unit.
f) The unit is designed to trim hedges. Do not cut branches, hard wood or the like with this unit.
g) Do not attempt to release a blocked/jammed blade before switching off the unit and
unplugging.
h) Scan the hedge for hidden objects e.g. wire etc. before starting to work.
i) Always assume a secure standing position when operating the machine, especially if you use a
ladder.
Safety instructions for chainsaw:
a) Keep the cutting unit of the extendable pole saw at least 10 m away from electric lines.
b) Wear ear and head protection as well as long, durable clothes and sturdy, antiskid footwear.
c) If you are a beginner ask an experienced person for instructions before you work with the unit for
the first time on your own.
d) Do not use the unit when you’re feeling tired or sick or you are under the influence of medicine,
drugs or alcohol.
e) Frequently take a long break and change your position to avoid getting tired too soon.
f) Keep others, in particular children and even animals, away from the activity area.
g) Remove branches in sections.
h) When working overhead mind falling clippings and make sure that these cannot affect your work
or injure you. Remember that falling clippings could bounce of the ground.
ATTENTION! The extendable pole saw has the capacity to cut through branches which
could kill you and other people when falling down.

- 6 -
i) Before you start working remove any debris from the ground to avoid tripping.
j) Always stand in a secure position and keep your balance.
k) Always keep extension and connecting cables behind the saw or away from the cutting area.
l) Only use spare parts approved by the manufacturer, in particular with regard to the chain and
chain guide.
m) We highly recommend the use of an RCD (residual current detector) at all times. These are
inexpensive and available from all good hardware outlets.
n).When cutting a branch under tension, understand that the branch will bounce back so keep well out of
the way.
o)Kickback causes and prevention:
Kickback may take place when the saw bar point touches an item or when the wood bends and the saw chai
n gets stuck in the cutting.
In many cases, a contact with the bar point may lead to a situation when the operator unexpectedly bends b
ackward and as a result, the bar is ejected upward toward the operator .
Backlash is a result of inappropriate or wrong use can be prevented by appropriate preventive measures des
cribed below:Hold the saw firmly with both hands with thumbs and fingers embracing the chainsaw handles.
Avoid abnormal body posture and do not cut above the shoulder level. This will prevent a contact with the
bar point .
Safety instructions for grass trimmers and brush cutter:
Proper and safe use
a) Wear eye protection and gloves.
b) Never allow children or people who are not familiar with these instructions to use the machine.
c) Stop using the machine when people, in particular children or pets, are nearby. A minimum 15m
distance is recommended.
d) Only use the machine in daylight or bright artificial lighting.
e) Before starting to operate the machine and after any impact check for signs of wear and tear or
damages and have the necessary repairs carried out. Never use the machine when the
protection is damaged or missing.
f) Always keep hands and feet away from the cutting unit, especially when you switch on the
engine.
g) Treat the cutter that is used to cut the length of trimming line with care –you could injure yourself
with it. After you’ve pulled out a new thread always keep the machine in its normal working
position before switching it on.
h) Never use anything other than the correct nylon cutting line.
i) Never use spare parts and accessories not provided or recommended by the manufacturer.
j) Make sure that any ventilation holes are free from dirt. If required, use a vacuum to clear
obstructions.
WARNING! This power tool produces an electromagnetic field during operation. This field may under
some circumstances interfere with active or passive medical implants. To reduce the risk of serious
or fatal injury, we recommend persons with medical implants to consult their physician and the

- 7 -
medical implant manufacturer before operating this machine.
III.PARTS IDENTIFICATION
- Drive Unit:
1 Motor Housing Case
2.Throttle control Trigger
3.Trigger lockout
4.Main Cable (10m with fused UK plug)
5.“D”Handle
6.Hand Tighten Knob

- 8 -
- Tool attachments:
7 Chainsaw Pruner
8Brush cutter
9Grass trimmer
10 Hedge trimmer
11. Optional Extra Extension Pole

- 9 -
-Accessories:
19 Hand-Tighten Knobs
12
Protection
guard for line
trimmer/brush
cutter
13 Belt
14 Chain Saw
protection cover
15 Oregon bar
16 Oregon chain
17 Blade
18 Double line,
bump-feed Spool
20
21
22
23
24
25
20 Hexagon key
21 Blade retainer
22 Hexagon socket wrench
23 Blade retainer Nut
24 Inner flange
25 Inner flange

- 10 -
Before assembly firstly unpack and check all parts have been supplied. If you think any parts
are missing, check the packaging again before calling the Eckman helpline on 0844 441 3011.
IV. TECHNICAL DATA
ECKMAN Code/Factory Code
EKEMS2/SF7A214
Rated Voltage
230V~ 50Hz
Rated Power:
1200W
No Load Speed of Power Unit
5800rpm
Set Weight (without power cord)
9.04 kg
Power Unit
Weight of power unit(without power cord) :3.25kg
Overall length of power unit: 90cm
Hedge Trimmer Maximum Recommended
Twig Cutting Diameter
20mm / ¾”.
Extra Extension Pole
Length 100cm
Brush Cutter
No load speed:5800rpm Cutting diameter :400mm
Weight with 60cm pole approx.1.71kg
Grass Trimmer
Weight with 60cm pole approx.1.71kg
Chainsaw Pruner
Cutting length:220mm(10’’Oregon bar and chain)
Weight with 55cm pole approx.1.6kg
Hedge Trimmer
Cutting length:400mm
40cm long reciprocating blade with full blunt
extension protection
270 degree angle-adjustable
Weight with 40cm pole approx 1.93kg
Measured Sound Power
95 dB LWA
Guaranteed Sound Power
96 dB LWA
Vibration Level
6,749 m/s2
V. ASSEMBLY
It is necessary to fit the handle to the power unit and safety guard to the brush cutter/grass trimmer
accessory if you purchased this optional accessory set.
1) Fitting the “D”handle to power unit

- 11 -
The handle has two parts. First seperate the upper and lower parts by removing the four hex-bolts
using the hex key supplied.
The power unit handle has two black rubberized cover sections. The longer one is sponge rubber,
the shorter one is strong rubber. The longer which has a soft feel is firmly fixed and for hand grip use
only. Do not attempt to mount “D” handle on this section.
While the shorter is moveable on which “D”handle needs to mounted. Make sure there is no
movement when mounting “D”handle. (Photo 1)
2) Fitting the attachments(including 100cm extra extension pole) to the power unit:
Please note, check the inside of aluminium connectors and the inside/outside if the connecting
poles for any dirt, grit or aluminium swarf that may obstruct smooth connection .Brand new
connectors and tubes may be a little tight to begin with. Please wipe clean with a rag and then rub a
little oil or vaseline inside the connectors to ensure easy fitting and disconnection.
Press the lock button (Photo 2). Align the hole in the pole with the hole in the connector of power
unit . Push in the tube (either a tube already fitted to one of the attachments or the optional extra
extension tube) until you see and hear a click from the connector (see photo 3).Tighten the knob.
To disconnect:
Loosen the knob on the connector, push down the pole in the connector and at the same time press
the lock button.Pull out the attachment.
3) Fitting the belt :
Photo 4
Lock button
Photo 1
Photo 2
Photo 3

- 12 -
Clip to the power unit and adjust for length and comfort.
(Photo 4-5)
VI. CHAINSAW LOPPER ATTACHMENT
Assembly
This also need to be assembled and comprises the following parts:
WARNING:
BE SURE TO FILL THE OIL RESERVOIR WITH THE APPROPRIATE CHAIN OIL OTHERWISE
YOU WILL SEIZE AND BURN OUT THE CHAIN
IMPORTANT:
The chain must neither be too tight or too loose. You must be able to lift the chain a few mm
away from the bar.
Should you need to adjust the tension, check the procedure that follows.
Should you need to change the chain, check the procedure that follows.
Install the guide bar and the saw chain on the gear case as follows
Photo 6
Photo 4
Photo 5

- 13 -
WARNING
The saw chain has very sharp edges. Use protective gloves for safety.
1、Loosen the nut and remove the chain cover
2、Mount the guide bar then fit the saw chain around the bar and sprocket.(Photo 7)
WARNING
Pay attention to the correct direction of the saw chain(Photo 8)
3.Fit the chain tensioner unit into the lower hole of the guide bar, then install the chain cover and
fasten the mounting unit to finger tightness.
4、Adjust the chain tension by turning the tensioner screw until the chain sits comfortably and not
too tightly into the chain bar.(Photo 9)
(1) Tensioner nut
5、Mount the cover and tighten the knob securely. Then check the chain for smooth rotation
.(Photo 10)
Photo 7
Photo 8
Photo 9

- 14 -
WARNING
It is very important to maintain the proper chain tension. Rapid wear of the guide bar or the
chain coming off easily can be caused by improper tension. Especially when using a new
chain, take good care as it will expand when first used.
VII. HEDGE TRIMMER ATTACHMENT
This comes supplied fully assembled. For service-top up with a grease gun via the
grease nipples every 6 months/20hrs use.(Photo 11)
Adjusting the hedge trimmer
The cutting angle can but adjusted by loosening the locking ratchet adjustment.
Adjust the angle then lock the ratchet adjustment firmly in position.(Photo 12)
VIII. BRUSH CUTTER/GRASS TRIMMER ATTACHMENT
1) Assemble the safety guard
The safety guard is made up of three parts and require assembly.
First attach metal to the groove of the safety guard using four bolts supplied.
Cutting device
Cutting
guide bar
Blade
tooth
Gear
Control
handle
Photo 12
Photo 11

- 15 -
Attach shaft to the groove then mount plastic seat to tighten.
(See photo14-16)
2) Fitting the safety guard to the brush cutter
Mount two inner flanges to the safety guard then put on blade and blade retainer fixed by blade
retainer nut using hexagon socket wrench, You’ll need to line up the two holes in the side of the
cutting head assembly and insert the hex key in them to keep the blade still.(see photo 17-21)
Tighten Clockwise.
Photo 17
Photo 18
Photo 19
Photo 21
Photo 20
Photo 21

- 16 -
3) Fitting the safety guard to the grass trimmer
If you use the unit as a grass trimmer follow the instructions below:
1. Loosen the blade retainer nut clockwise and remove the blade retainer.
2. Mount the grass trimmer head and tighten it.(see photo 22-23)
Note: Please store the blade retainer and nut in a safe place.
WARNING! Do not use the line cutting head without the plastic guard.
IX. CONNECTION
This machine may only be connected to single-phase 230VAC 50Hz UK Mains outlet. Ensure
that the mains voltage is the same as the operating voltage indicated on the rating plate.
X. OPERATION
WARNING:
Do not use any attachments or accessories not recommended by the manufacturer of this
product. The use of attachments or accessories not recommended can result in serious
personal injury and invalidate your guarantee.
Switching on
Squeeze the trigger lockout, then squeeze the trigger.
Switching off
Release the trigger or the trigger lockout. Either will stop the machine.
(see photo 25)
Photo 22
Photo 23

- 17 -
NOTE: NEVER ATTEMPT TO LOCK A SWITCH IN THE ON POSITION.
XI. MAINTENANCE
Store the tool, instruction manual and accessories in a secure, dry place. In this way you will
always have the information ready to hand.
Remove dust and dirt regularly.
Re-lubricate all moving parts at regular intervals.
Never use caustic agents to clean plastic parts.
Never disassemble the tool and always have the trimmer maintained or repaired by a competent
person at an authorized service center.
. For service (chainsaw pruner/hedge trimmer attachment)-top up with a grease gun
via the grease nipples every 6 months/20hrs use. Please see photos as below (photo26-27)
XII. CLEANING & STORAGE
Keep ventilation slots of the machine always clean.
Clean the machine using a damp cloth and a vacuum for ventilation vents. Use a brush or scrubber
for hard to reach places. Do not use aggressive cleaning agents or solvents. They can attack the
plastic and metal parts of the machine.
Store the machine and its accessories in a dry and frost-free place out of direct sunlight. Always
Photo26

- 18 -
store the machine in a place out of the reach of children. The optimum storage temperature is
between 10 and 30°C.
XIII.GUARANTEE
This product is guaranteed for a period of 36 months from date of purchase. Any modification or misuse
of this machine will invalidate your guarantee. Your statutory rights remain unaffected.
EC DECLARATION OF CONFORMITY
The undersigned, as authorised by: ZHEJIANG SAFUN INDUSTRIAL CO.,LTD
Declares that the following equipment manufactured by ZHEJIANG SAFUN INDUSTRIAL CO.,LTD
has been tested and conforms to the Directive: -
EN 55014-1:2006/A2:2011 EN55014-2:1997/A2:2008
EN61000-3-2:2014 EN61000-3-3:2013
of the European Parliament and of the council on the approximation of the laws of the Member States relating to
the noise emission in the environment by equipment for use outdoors.
Equipment Category - (As defined in the Directive)
Product Name: 4 IN 1 ELECTRIC HEDGE TRIMMER
Model: SF7A214(ECKMAN MODEL NO.: EKEMS2)
The technical documentation is kept by: ZHEJIANG SAFUN INDUSTRIAL CO.,LTD
Add: 7 South MingyuanAVE,Economic Development Zone,Yongkang, Zhejiang China
The conformity assessment procedure followed was in according with Council Directive
(EN 55014-1:2006/A2:2011 EN55014-2:1997/A2:2008 EN61000-3-2:2014 EN61000-3-3:2013)
Guaranteed Sound Power Level: ------96dB
A copy of this certificate has been submitted to the European Commission and to EU Member State: the United
Kingdom
Jinhua , September,2015
(Manufacturing Factory Stamp)

- 19 -
IMPORTED BY ECKMAN CO.,LTD
ADD: 29 WELBECK STREET,LONDON W1G8DA, ENGLAND
12
Exploded View & Parts List
Table of contents
Other Eckman Trimmer manuals
Popular Trimmer manuals by other brands

Romus
Romus PROVINOL Operation manual

Craftsman
Craftsman WEEDWACKER Incredi-Pull 316.795861 Operator's manual
Craftsman
Craftsman WEEDWACKER Incredi-Pull 316.791870 Operator's manual

Makita
Makita EH 620 instruction manual
Ryobi
Ryobi PLT-2543 Owner's operation manual

Craftsman
Craftsman C944.514322 instruction manual
