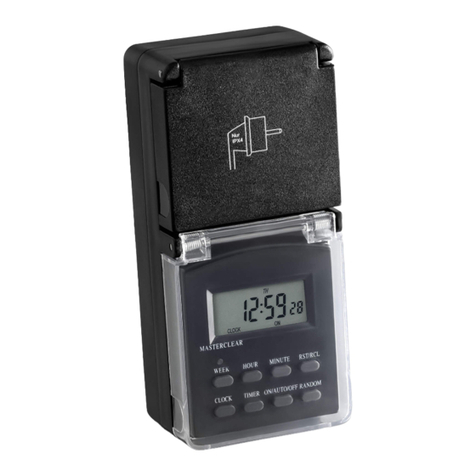
Eco 1001 804 572 User manual

OUTDOOR
HEAVY-DUTY TIMER
ITEM #1001 804 572
Safety Information
TROUBLESHOOTING
Installing the timer outdoors
Suitable for indoor/outdoor use-Store indoors while not in use. For temporary outdoor use.
NOTE:
* Before initial use, please plug your timer for at least 30 minutes to charge the internal battery. After
the LCD display appears, your unit will be ready for programming.
* The mounting nail or screw head must extend at least 3/16 in. out from the wall (nails or screws
not included).
* NOTE: The LCD display might turn off after a long time without use. Plug the timer into an outlet
once every 3 months to keep the battery charged.
LCD Layout:
2. Press the "SET" button to enter the hour setting. Press "+" or "-" buttons to set the current hour.
Be sure that AM or PM appears correctly.
3. Press the "SET" button to enter the minute setting, press the "+" or "-" buttons to set the current
minute.
4. Press the "SET" button to finish setting the current time and return to normal display.
5. While setting those processes above, press and hold the “SET” button to clear the setting and go
back to the original timer settings. While setting those processes above, press the “ ” button or
wait for 15 seconds to return back to the standby display.
MODE Setting
Press the “MODE” button to choose the desired mode.
ON, OFF, RDM Timer, AUTO Timer, AUTO CDS, AUTO CDS + TIMER as following listed.
Photocell Setting
Press the “MODE” button to select the photocell function.
Turn on the power at Dusk and turn off the power at Dawn automatically.
Illustration
ON
OFF
AUTO
AUTO
AUTO
RDM Security feature.
On at a random time,
and will remains ON
for 15 minutes.
Program and
Photocell
Up to 5 on/off events every day.
The on/off events are built-into this
product, turn ON at a random time and
the ON time is different each day,
creating a more “lived-in” look.
ON/OFF at your exact
programmed time.
ON at dusk, OFF at dawn.
On at dusk, OFF at your exact
programmed time.
Program
Setting
Photocell
Setting
Programand
Photocell
Setting
RemarkMode Explanation
The outputs remain always on.Always on
The outputs remain always off.Always off
ON/OFF program
at AUTO mode
Photocell
Program Setting
Make sure the current mode is at AUTO mode, then press and hold
"PROG" button for two seconds to begin program setting, using the "+" and
"-" buttons to adjust the setting.
1. Press the "+" or "-" button to set the correct day.
MO, TU, WE, TH, FR, SA, SU, MO TU WE TH FR, SA SU, MO TU WE TH FR SA SU(cycle).
2. Press the "SET" button to enter the hour setting. Press "+" or "-" buttons to set the desired hours
for your timer to turn on. Be sure that AM or PM appears correctly.
3. Press the "SET" button to enter the minute setting. Press the "+" or "-" buttons to set the desired
minutes for your timer to turn on.
4. Press “SET” button to enter the program OFF setting, the “1 OFF” will appear on the display.
Repeat steps 1 to 3 to set your desired OFF time, up to 8 on/off programs settings.
5. While setting the programs, press and hold the “SET” button to clear the set program time.
6. Once you complete the programs settings, press the “ ” button or wait for 15 seconds to restore
your programs to back the standby display.
Program and Photocell Setting
1. Press “MODE” to select “AUTO Program and photocell setting”, then
press and hold the “PROG” button for two seconds to set the off time.
2. Press the “+” or “-“ button to set the desired OFF day of the week program.
You can select each day individually, Monday to Friday, Saturday/Sunday, or an entire week to
have your timer turn on at dusk and off at the set time.
3. Press the “SET” button to enter the OFF time hour setting. Press the "+" or "-" buttons to set time.
Be sure to cycle through until AM or PM appears correctly.
4. Press the “SET” button to enter the OFF time minutes setting. Press the "+" or "-" buttons to set
time.
5. You can press the “SET” button to enter additional programs, up to 8 off program settings. While
setting the programs, press and hold the “SET” button to clear the set program time. Press the
“ ” button or wait for 15 seconds to store the program, and return back to the standby display.
WARNING: INSTALL THE CORD AND UNIT ABOVE GROUND LEVEL AT LEAST 2 FT WITH
THE RECEPTACLE FACING DOWNWARD.
Federal Communications Commission Interference Statement
This equipment has been tested and found to comply with the limits for Class B digital device,
pursuant to part 15 of the FCC Rules. These limits are designed to provide reasonable protection
against harmful interference in a residential installation. This equipment generates, uses and can
radiate radio frequency energy and, if notinstalled and used in accordance with the instructions, may
cause harmful interference to radio or television reception, which can be determined by turning the
equipment off and on, the user is encouraged to try to correct the interference by one or more of the
following measures:
•Reorient or relocate the receiving antenna.
• Increase the separation between the equipment and the receiver.
• Connect the equipment into an outlet on a circuit different from that to which the receiver is
connected.
• Consult the dealer or an experienced radio/TV technician for help.
This device complies with Part 15 of the FCC Rules.
Operation is subject to the following two conditions: (1) This device may not cause harmful
interference, and (2) this device must accept any interference received, including interference that
may cause undesired operation of the device.
FCC Caution: Any changes or modifications not expressly approved by the party responsible for
compliance could void the user's authority to operate this equipment.
Product Description
RATINGS:
125 VAC, 60 Hz, 15 A General Purpose, 15 A Resistive, 125 VAC 1000 W Tungsten,
500W Electronic Ballast, 120VAC 8.3A Standard Ballast, 1/3 HP.
1. MODE: Manual override and scroll between the timer status options.
2. (Time): Press and hold for two seconds to set current time.
3. PROG: Press and hold for two seconds to begin setting function.
4. SET/ : Setting confirm and clear setting.
5. < + >: To increase time and day setting.
6. < - >: To reduce time and day setting.
7. RESET: Reset all the functions.
8. Photo sensor: The sensor will sense for light and dark, and direct the timer to act accordingly.
9. Outlets: The three outlets located on the bottom of the timer allows the user to plug an array of
devices into it.
Installation Instructions
9
1
23
4
56
7
8
Timer
2 FT
Photo
sensor
Ground
1. Mount the timer onto a wall near a GFCI receptacle
with the timer’s photo sensor facing outward.
2. Hang the timer from the mounting nail or screw
using the slot on the back of the unit.
3. Plug the power supply cord into
the outlet.
Made in China
SAVE THESE INSTRUCTIONS!
Setting the Timer
Reset: There has a reset hole
under the dashboard. Insert a pin or
paperclip end into the hole to reset the
timer. This will clear all programmed settings.
Questions, problems ? Before returning to the store, call our toll free customer support line
8 a.m. - 6 p.m., EST, Monday - Thursday, 8 a.m. - 5 p.m., EST, Friday.
1-888-269-7316
Email: support@eco-plugs.net
Set Current Time
1. Press and hold the " " button for 2 seconds to enter the current time settings, press the "+" or
"-" button to set the correct day.
Problem Possible cause Corrective action
Lights do not
turn on at dusk.
Timer is not in a good area
for light meter to function as
there is too much ambient
light to detect darkness.
Move the timer to another location where there is no
ambient light.
Lights do not
turn on, even
when timer is
in “ON”
position.
Lights are not in “ON” position,
lights are not functioning, or
timer is not receiving power.
Be sure that lights are functional by plugging them directly
into the outlet. Be sure that lights are in “ON” position if they
have their own switch. Be sure that timer is receiving power -
the LED should light up when plugged into an outlet and put
in the “ON” position.
Lights are
flashing
(turning on
and off).
The timer is in Dusk to Dawn
mode, and the light from the
plugged-in lights is affecting
the light sensor.
Move the lights away from the timer, or reposition the timer
so that it does not face the lights.
AUTO Timer
or AUTO
Photocell and
Timer mode
programs are
not working.
1. Event programs improperly
set
2. Event set for current time
and has not yet been
through a full day cycle.
1. Make sure event programs are properly set up. Refer to
earlier instructions. Make sure the correct icons show on
the display after programming.
AUTO Timer: AUTO Photocell/Timer:
2. If programmed event is covering current time, a full day
cycle is needed for program to work. For example, if the
current time is 5 p.m. and event 1 is set for 4 p.m. to 6 p.m.,
the event will not automatically turn on until the next day to
start the program.
Size: W-21 x H-29.7/cm Front

TEMPORIZADOR PARA TRABAJOS
PESADOS EN EXTERIORES
ARTÍCULO NÚM.1001 804 572
Información de seguridad
Resolución de fallas
Instalación del temporizador en exteriores
Adecuado para uso en interiores y exteriores-Guarde en interiores mientras no esté en uso. Para uso temporal en
exteriores únicamente.
NOTA:
* Antes del uso inicial, enchufe el temporizador durante al menos 30 minutos para cargar la batería interna. Después de
que la pantalla se visualiza, la unidad está lista para programación.
* El clavo o tornillo de montaje debe sobresalir al menos 3/16 plg. de la pared (clavos o tornillos no incluidos).
* NOTA: es posible que la pantalla LCD se apague después de un período largo sin uso. Enchufe el temporizador en
un tomacorriente cada 3 meses para mantener cargada la batería.
5. Mientras ajusta esos procesos anteriores, presione y sostenga el botón “SET” para limpiar el ajuste y regresar a los
ajustes originales del temporizador. Mientras ajusta esos procesos anteriores, presione el botón “ ” o espere 15
segundos para regresar de nuevo a la pantalla de espera
Ajuste de la hora actual
1. Presione y sostenga el botón " " durante 2 segundos para ingresar los ajustes de la hora actual, presione el botón
"+" o "-" para ajustar el día correcto.
2. Presione el botón "SET" para ingresar el ajuste de la hora. Presione el botón “+” o “-“ para ajustar la hora actual.
Asegúrese de que aparezca correctamente AM o PM.
3. Presione el botón "SET" para ingresar el ajuste del minuto, presione los botones "+" o "-" para ajustar el minuto actual.
4. Presione el botón "SET" para terminar de ajustar el minuto actual y regresar a la pantalla normal.
Ajuste de la fotocelda:
Presione el botón “MODE” para elegir la función fotocelda. Enciende la energía en
Anochecer y la apaga en Amanecer automáticamente.
Ajuste de MODE (MODO)
Presione el botón “MODE” para elegir el modo deseado.
ON, OFF, RDM Timer, AUTO Timer, AUTO CDS, AUTO CDS + TIMER como se enumeran a continuación.
Ilustración
ON
OFF
AUTO
AUTO
AUTO
RDM
Característica de seguridad.
Enciende a una hora
aleatoria, y permanecerá
encendido durante 15
minutos.
Programa y fotocelda
Hasta 5 eventos on/ off cada día. Los eventos
on/off están incorporados en este producto,
enciende a una hora aleatoria y el tiempo de
encendido es diferente cada día, creando un
aspecto más "acogedor".
ON/OFF a su hora programada exacta.
ON al anochecer, OFF al amanecer.
ON al anochecer, OFF a su hora
programada exacta.
Ajuste del
programa
Ajuste de la
fotocelda
Ajuste de la
programa y
fotocelda
ObservaciónModo Explicación
Las salidas permanecen en encendido.Siempre encendido
Las salidas permanecen en apagado.Siempre apagado
Programa ON/ OFF
(encendido/apagado) en
el modo AUTO
Fotocelda
Ajuste del programa
Asegúrese de que el modo actual esté en el modo AUTO , luego presione y sostenga el
botón "PROG" durante dos segundos para comenzar con el ajuste del programa, usando los
botones "+" y "-" para ajustar el ajuste.
1. Presione el botón “+” o “–“ para ajustar el día correcto.
MO (LU), TU (MA), WE (MI), TH (JU), FR (VI), SA, SU (DO), MO (LU) TU (MA) WE (MI) TH (JU) FR (VI), SA SU
(DO), MO (LU) TU (MA) WE (MI) TH (JU) FR (VI) SA SU (DO)(ciclo).
2. Presione el botón "SET" para ingresar el ajuste de la hora. Presione los botones "+" o "-" para ajustar las horas
deseadas para que encienda su temporizador. Asegúrese de que aparezca correctamente AM o PM.
3. Presione el botón "SET" para ingresar el ajuste del minuto. Presione los botones "+" o "-" para ajustar los minutos
deseados para que encienda su temporizador.
4. Presione el botón “SET” para ingresar el ajuste OFF del programa, el “1 OFF" aparecerá en la pantalla.
Repita los pasos 1 al 3 para ajustar la hora OFF, hasta 8 ajustes de programas on/off.
5. Mientras ajusta los programas, presione y sostenga el botón “SET” para limpiar la hora de programa de ajuste.
6. Una vez complete los ajustes del programa, presione el botón “ ” o espere 15 segundos para restaurar sus
programas de nuevo a la pantalla de espera.
Ajuste del programa y la fotocelda:
1
. Presione “MODE” para seleccionar el "ajuste AUTO del programa y la fotocelda", luego
presione y sostenga el botón “PROG” durante dos segundos para ajustar el tiempo de
apagado.
2. Presione el botón “+” o “-“ para ajustar el programa del día de la semana de apagado deseado. Puede seleccionar
cada día de manera automática, lunes a viernes, sábado/domingo, o una semana entera para hacer que su
temporizador encienda al anochecer y se apague a la hora de ajuste.
3. Presione el botón “SET” para ingresar el ajuste de la hora de apagado. Presione los botones "+" o "-" para ajustar la
hora. Asegúrese de alternar hasta que AM o PM aparezca correctamente.
4. Presione el botón“SET” para ingresar el ajuste de minutos de apagado. Presione los botones "+" o "-" para ajustar la
hora.
5. Puede presionar el botón “SET” para ingresar programas adicionales, hasta 8 ajustes de programa de apagado.
Mientras ajusta los programas, presione y sostenga el botón “SET” para limpiar la hora de programa de ajuste.
Presione el botón “ ” o espere 15 segundos para guardar el programa, y regresar de nuevo a la pantalla de espera.
ADVERTENCIA: INSTALE EL CABLE Y LA UNIDAD SOBRE EL NIVEL DEL SUELO AL MENOS A 2
PIES CON EL RECEPTÁCULO APUNTANDO HACIA ABAJO.
Declaración de la Comisión Federal de Comunicaciones
Este equipo ha sido probado y se ha encontrado en cumplimiento con los límites correspondientes para un dispositivo
digital de la Clase B, conforme a la Parte 15 de las Reglas de la FCC. Estos límites están diseñados para brindar una
protección razonable contra la interferencia en una instalación residencial. Este equipo genera, usa y puede irradiar
energía de radio frecuencia y, si no se instala y usa de acuerdo con las instrucciones, puede causar interferencia dañina
a la recepción de radio o televisión, lo cual puede determinarse apagando y encendiendo el equipo, se recomienda al
usuario que trate de corregir la interferencia realizando uno o varios de los siguientes pasos:
•Cambiar de dirección o de lugar la antena receptora.
• Aumentar la separación entre el equipo y el receptor.
• Conectar el equipo en un tomacorriente en un circuito diferente de donde esté conectado el receptor.
• Consulte al concesionario o a un técnico de radio/TV con experiencia para que le ayude.
Este dispositivo cumple con la parte 15 de las reglas de la FCC.
El funcionamiento está sujeto a las siguientes dos condiciones: (1) este dispositivo no puede causar interferencia dañina
y (2) este dispositivo debe aceptar toda interferencia recibida, incluso la que puede causar un funcionamiento indeseado
del dispositivo..
Advertencia de la FCC: Los cambios o las modi�caciones a esta unidad que no sean aprobados en forma expresa por
la parte responsable del cumplimiento, pueden invalidar el permiso del usuario para operar el equipo.
Descripción del producto
CAPACIDADES NOMINALES:
125 VAC, 60 Hz, Propósito general 15 A, 15 A Resistivo, 125 VAC Tungsteno 1000W,
500W Balastro Electrónico, 120VAC 8.3 A Balastro Estándar, 1/3 HP.
1. MODO: Controle de forma manual y desplácese entre las opciones de estado del temporizador.
2. (Time/Hora): Presione y sostenga durante dos segundos para ajustar la hora actual.
3. PROG (PROGRAMAR): Presione y sostenga durante dos segundos para comenzar a ajustar la función.
4. SET (AJUSTAR)/ : Confirma y limpia el ajuste.
5. < + >: Para aumentar la configuración de hora y día.
6. < - >: Para reducir la configuración de hora y día.
7. RESET (Restablecer): Restablezca todas las funciones.
8. Fotosensor: El sensor detectará la luz y la obscuridad, e indica al temporizador a actuar como corresponde.
9. Tomacorrientes: Los tres tomacorrientes localizados en el fondo del temporizador permiten al usuario conectar un
arreglo de dispositivos en él.
Instrucciones de instalación
9
1
23
4
56
7
8
Temporizador
2 PIES
Fotosensor
Tierra
1. Monte el temporizador en una pared cerca de un receptáculo
GFCI con el fotosensor del temporizador apuntando hacia fuera.
2. Cuelgue el temporizador del clavo o tornillo de montaje
usando la ranura en la parte trasera de
la unidad.
3. Enchufe el cable de suministro
de energía en el tomacorriente.
Hecho en China
¡GUARDE ESTAS INSTRUCCIONES!
Ajuste del temporiazador
Reset (Reajuste): Tiene un agujero de reajuste
bajo el tablero. Inserte el extremo de un pasador
o un clip en el agujero para reajustar el temporizador.
Esto limpiará todos los ajustes programados.
¿Tiene preguntas, problemas ? Antes de regresar a la tienda, llame a Servicio
al Cliente lunes a jueves de 8 a.m. a 6 p.m., hora local del Este, viernes de
8 a.m. a 5 p.m., hora local del Este al 1-888-269-7316
Disposición del LCD:
Problema Causa Posible Acción Correctiva
Las luces no se
encienden al
anochecer.
El temporizador no está ubicado
en un área adecuada donde el
medidor de luz pueda funcionar,
ya que hay mucha luz en el
ambiente y no puede detectar
el anochecer.
Mueva el temporizador a otra ubicación donde no haya luz en el
ambiente.
Las luces no se
encienden, aun
cuando el
temporizador
está en la posic
ón de encendido.
Las luces no están en la
posición de encendido, las
luces no funcionan o el
temporizador no recibe
alimentación.
Asegúrese de que las luces funcionan enchufándolas directamente
al tomacorriente. Asegúrese de que las luces están en la posición
de encendido si tienen su propio interruptor. Asegúrese de que el
temporizador recibe alimentación: El LED debe encenderse cuando
se conecta en un tomacorriente y se coloca en la posición de
encendido.
Las luces
destellan (se
encienden y
se apagan).
El temporizador está en el
modo anochecer-amanecer y
la luz proveniente de las luces
enchufadas está afectando el
sensor de luz.
Aleje las luces del temporizador o reposicione el temporizador
para que no reciba las luces.
Los programas
de los modos
Temporizador
AUTOMÁTICO
o Fotocélula y
temporizador
AUTOMÁTICO
no funcionan.
1. Programas de eventos
definidos incorrectamente
2. El evento definido para la
hora actual aún no ha
pasado por un ciclo de día
completo.
1. Asegúrese de que los programas de eventos estén
correctamente definidos.Consulte las instrucciones anteriores.
Asegúrese de que los iconos correctos aparezcan en la pantalla
después de la programación.
Temporizador Temporizador/ Fotocélula
AUTOMÁTICO: AUTOMÁTICO:
2. Si el evento programado está cubriendo la hora actual, se
requiere un ciclo de día completo para que funcione el programa.
Por ejemplo, si la hora actual son las 5 p.m. y el evento 1 está
definido de 4 p.m. a 6 p.m., el evento no se activará
automáticamente hasta el día siguiente que se inicie el programa.
Back
Table of contents
Languages:
Popular Timer manuals by other brands
Aube Technologies
Aube Technologies TI040 Installation and user guide
RS
RS 328-336 Instruction leaflet
tams elektronik
tams elektronik Multi-Timer manual
United Automation
United Automation Infresco T 6.0kW User & installation manual
TECO
TECO TECO Timer H5CLR user manual
Leviton
Leviton Decora LTT15 installation instructions

