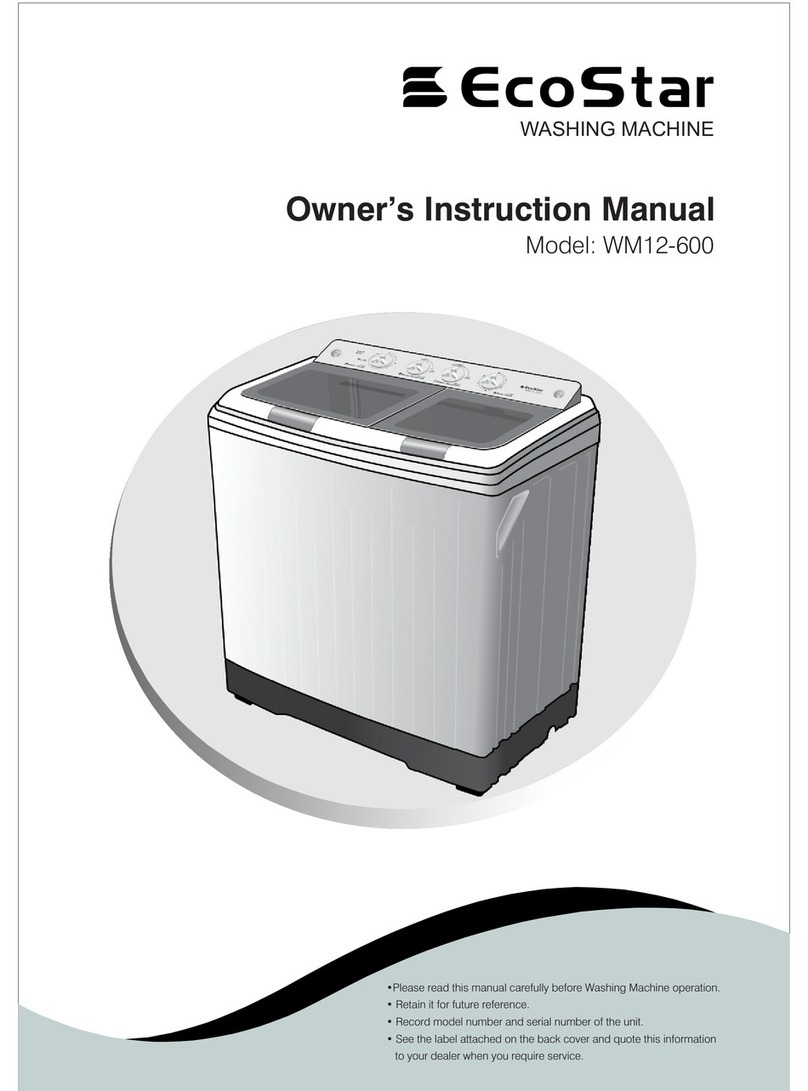
ECOSTAR WM08-700 Setup guide

•Please read this manual carefully before Washing Machine operation.
• Retain it for future reference.
• Record model number and serial number of the unit.
• See the label attached on the back cover and quote this information
to your dealer when you require service.
Owner’s Instruction Manual
Model: WM08-700 / WM12-700
WASHING MACHINE

READ THIS MANUAL CAREFULLY
You will find many helpful hints on how to use and maintain your washer properly. Just a little
preventative care can save a great deal of time and money over the life of washer. This manual will
guide to many answers to common problems and operations of washing machine.
Contents
Introduction
Before Starting to Wash
Additional Function
Program
Installation
Care and Maintenance
Troubleshooting
Specifications
Common Wash Problems
Troubleshooting
Malfunction Display and Solutions
AIR DRY
DELAY START Wash
Other Useful Functions
Placing and Leveling
Connecting Water Supply Hose
Installation of Drain Hose
Grounding Method
Cleaning and Maintenance
Safety Information
Parts Identification of the Washer
Function Information
Preparation Before Washing
Special Guide for Stain Removal
Function of each Button
01
04
05
06
08
09
11
12
13
14
15
16
17
18
20
21
22
23
Default Program Timers 24
Specs

Warning
Observe the following items in order to prevent from injuring yourself, others and the damage of property:
This graphic represents (forcible execution), and detailed forcible execution items will be
displayed inside the graphics.
This graphics represents (operation prohibited), and detailed prohibitive items will be displayed
inside the graphics.
This graphics represents(cause attention),and detailed cautions will be displayed inside the
graphics.
Please observe following contents of graphics.
!
Warning
Caution This will remind you that injury to people and damage to property may occur.
This indicates serious injury or death to human being may be caused.
This appliance is not intended for use by persons (including children) with reduced physical, sensory or
mental capabilities, or lack of experience and knowledge, unless they have been given supervision or
instruction concerning use of the appliance by a person responsible for their safety. Children should be
supervised to ensure that they do not play with the appliance.
No dampness No rinsing
小天鹅
小天鹅
No dismantling No touching
Please do not insert your hand and
take out clothes from inside the spin
barrel before it is fully stopped.
Please do not directly rinse the
machine with water when cleaning.
Please do not dismantle and assemble
the machine without authorization.
Please do not install the machine in
damp and raining environment to
avoid electric shocking, catching fire,
faults and distortion accidents.
Safety Information
Introduction
1

!
Prohibited
Prohibited
Pull out the plug
!
小天鹅
Prohibited
Smoke and fire prohibited
Earthing
Please do not let children climb the
machine or peer into the rotating spin
b arrel to avoid accidents.
It is prohibited to wash the clothes touching
with kerosene, gasoline, alcohol and other
flammable materials.
Please do not damage power flexible cord
and power plug to avoid electric shocking,
s h ort circuit and catching fire.
Please do not damage power flexible cord
and power plug to avoid electric shocking,
s h ort circuit and catching fire.
Regularly clean the power plug to remove
dust and dirt to avoid contact failure.
Please pull out plug from the socket if the
machine is not in use.
(earthing)
Please well connect the earth line of socket
to avoid electric shocking by accidental
leakage.
Please do not place on the washer burning
candle, mosquito-repellent incense,
cigarette and other flammable things, as well
as electric stove, air heating fan and other
heating sources.
Please insert the power plug tightly.
Warning
Introduction
2

!
Wet hands are prohibited
!
+
+
小天鹅
>50 C
Prohibited
Prohibited
小天鹅
Prohibited
!Prohibited
Please use correct power source. Please do not pull out or insert the plug
with wet hands to avoid electric shocking.
Please ensure that the water inlet pipe is
connected and the tap is opened before
washing clothes.
The water temperature shall not exceed
50℃ when washing with warm water.
Customers are not allowed to change the
power line without permission.
It is strictly prohibited to place children or
lay weights on the washer.
Please do not pull the electric cord when
pulling out the plug.
Please do not wash down jacket,
craincoat, fishing coat and similar
clothes in the washer.
Warning
Caution
Introduction
3

Top lid
Control Panel
Frame
Cabinet
Drain Hose
(For lower drain only)
Adjustable Leg
Adjustable Foot Knob
Upper Drain Hose
(For upper drain only)
Body
Accessories
Only for lower drain hose
Fixing ring is used
for the fixing in time of
the installation of the
lower drain hose.
Base cover
Self-tapping screw
Only for models including base cover
Water inlet hose assembly
Parts Identification of the Washer
Introduction
4

Use this Program for heavily soiled durable garments e.g overalls, jeans. Thick and heavy clothes or those which
are excessively dirty like jeans or working uniforms can be washed.
JEANS Wash
QUICK wash
QUICK WASH can be selected to wash lightly soiled clothes of less than 2.0 kg in a short time.
Our machines provides various washing methods which suits various conditions and types of laundry
Different types of laundry washing
Use this Program for everyday washing e.g sheets, towels, T shirts.
Function Information
ANTI - WRINKLE
As for not easily fading ,deforming , and non-waterproof clothes , can use the function to dry clothes without eating,
and to reach the result of being dried in a room.
DELAY START Wash is used to delay the finishing time of the operation. The number of hours to be delayed can be
set by the user accordingly.
When the user needs only SPIN, RINSE/SPIN, RINSE, WASH/RINSE, WASH, WASH/RINSE/SPIN,
SOAK/WASH/RINSE/SPIN
1 time rising is suitable for light contaminated clothes in order to save water.
The wash time is short ,rinses many time with high water level ,thoroughly wash away the garment.
AIR DRY
OPTION Washing
ECO Wash
DELAY START Wash
Introduction
5
Used for normal loads, this mode automatically selects the most appropriate conditions and completes the
sequence in one operation. The built-in fuzzy logic sensor detect the size of the load and the ideal wash power
and wash, rinse and spin times are set accordingly.
One Touch Smart Wash
Normal Wash

Care Labels
Look for a care label on your clothes. This will tell you about the fabric content of your garment
and how it should be washed.
Sort clothes into loads that can be washed with the same Wash cycle, Water Temperature and
spin speed.
Cloth Sorting for Wash
To get the best results, different fabrics need to be washed in different ways.
Check Cloths before Loading
(Heavy, Normal, Light)
COLOR (Whites, Lights, Darks)
LINT (Lint producers, Collectors)
Lint Producers
Lint Collectors
Dirt/SOIL Separate clothes according to the type and amount of soil
Separate white fabrics from colored fabrics.
Separate lint producers and lint collectors.
Terry cloth, Chenille, Towels, Nappies, Diapers
Synthetics, Corduroy, Permanent Press, Socks
Clear all pockets of cloth & make sure they are empty. Things such as nails, hair clips, matches, pens,
coins, and keys can damage both your washer and your clothes.
Repair any torn garments or loose buttons. Tears or holes may become larger during washing.
Remove belts, under wires, etc. to prevent damage to the machine or your clothes.
Pre-treat dirt and stains on cloths.
Make sure the clothes are washable in water.
Check the Washing instructions.
Remove tissues if found in pockets.
Caution
Do not wash or spin any item labeled or known to be water-proof or water-resistant, even if the product
care label on the item permits machine washing. Failure to follow these instructions could result in severe
damage to your laundry, your washer and/or property damage as a result of abnormal vibration of the washer.
- Examples of Water-proof or Water-resistant items include certain mattress pads, mattress covers, rain gear,
camping gear, skiing apparel, outdoor gear and similar items.
Pre-treatment of stains or heavy soil
Loading in Washing Machine
Pre-treat shirt collars and cuffs with a pre-wash product or liquid Detergent when placing them in the Washer.
Before washing treat special stains with bar soaps, liquid Detergent or a paste of water and grainy detergent.
Use a pre-treat soil and stain remover.
Treat stains AS SOON AS POSSIBLE. The longer they are left the harder they are to remove.
Do not wash fabrics containing flammable materials (Waxes, cleaning fluids, etc.)
Light weight and Large-sized clothing
Clothes like downs and Woolens are light weight, large and float easily. Use a nylon net and
Wash them in a small amount of Water. If the laundry floats during the Wash cycle, it may become
damaged. Use dissolved Detergent to prevent the Detergent from clumping.
Long length laundry items
Use nylon nets for long, DELICATE items. For laundry with long strings or long length, a net will
prevent tangling during washing. Fasten zippers, hook, and strings to make sure that these
items don’t snag on other clothes.
Nylon net is not supplied by EcoStar.
Fire Hazard
Never place items in the washer that are dampened with gasoline or other flammable fluids. No washer can completely remove oil.
Do not dry anything that has ever had any type of oil on it (including cooking oils). Doing so can result in death, explosion, or fire.
WARNING
Before Starting to Wash
Cloth Load Size
The WATER LEVEL should just cover the clothes. Adjust the load size accordingly, loosely load clothes no higher
than the top row of holes in the washer tub. To add items alter Washer has started, press Start button and submerge
additional items. Close the lid and press Start button again to restart.
Preparation Before Wash
Before Starting Wash
6

+
+
1
2
Adjust the adjustable foot to make the washer to be placed stable
Adjustable foot (extend when clockwise rotating and shorten when
counter clockwise rotating)
(Slightly incline the washer first and loosen the adjustable foot knob.
Adjust the adjustable foot so as to ensure four corners of washer be
steadily contacted with the ground. Then tighten the adjustable foot
knob and lock it. If the ground is obviously not flat, correction should be
made on the ground surface, otherwise the washer barrel will incline and
knock the cabinet). Foot Rotate clock wise
+
+
For one inlet hose
For two inlet hoses
+
+
+
+
Install the water inlet hose
3Connect the power source
4Turn on the water supply
5Put down the drain hose Gravity drain
6Put in clothes and suitable amount of washing powder for washing.
Before washing, please do take out coins, keys and other hard goods,
and zip up clothes tightly to prevent them and barrel from damage.
!NOTICE
Please follow the below step guide before starting washing
Preparation Before Wash
Before Starting Wash
7

Remove stains promptly.
Determine the kind of stain, then follow the recommended treatment in the stain removal chart below.
To pre-treat stains, use pre-wash product, liquid Detergent or paste made from detergent and water.
Use COLD Water on unknown stains because HOT Water can relief stains.
Check care label instructions for treatments to avoid on specific fabrics.
Check for color fastness by testing stain remover on an inside seam.
Rinse and Wash items after stain removal.
Adhesive tape, chewing gum,
rubber cement
Apply ice. Scrape off excess. Place stain face down on paper towels, saturate with prewash
stain remover or nonflammable dry cleaning fluid.
Baby formula, dairy products,
egg
Use product containing enzymes to pretreat or soak stains.
Beverages (coffee, tea, soda,
juice, alcoholic beverages)
Pretreat stain. Wash using COLD Water and bleach safe for fabric.
Blood Rinse with COLD water. Rub with bar soap. Or pretreat or soak with product containing
enzymes. Wash using bleach safe for fabric.
Candle wax, crayon Scrape off surface wax. Place stain face down between paper towels. Press with warm iron
until wax is absorbed.
Replace paper towels frequently. Treat remaining stain with pre-wash stain remover or
nonflammable dry cleaning fluid. Hand wash to remove solvent. Wash using bleach safe for
fabric.
Chocolate Pre-treat or soak in WARM water using product containing enzymes. Wash using bleach
safe for fabric.
Collar or cuff soil, cosmetics Pre-treat with pre-wash stain remover or rub with bar soap.
Dye transfer on white fabric Use packaged color remover. Wash using bleach safe for fabric.
Grass Pre-treat or soak in WARM water using product containing enzymes. Wash using bleach
safe for fabric.
Grease, oil, tar_(butter, fats,
salad dressing, cooking oils, car
grease, motor oils)
Scrape off residue from fabric. Pretreat. Wash using hottest water safe for fabric. For
heavy stains and tar, apply nonflammable dry cleaning fluid to back of stain. Replace
towels under stain frequently. Rinse thoroughly. Wash using hottest water safe for fabric.
Ink Some inks may be impossible to remove. Washing may set some inks. Use pre-wash stain
remover, denatured alcohol or nonflammable dry cleaning fluid.
Mildew, scorch Wash with chlorine bleach if safe for fabric. Or, soak in oxygen bleach and HOT Water before
Washing. Badly mildewed fabrics may be permanently damaged.
Mud Brush off dry mud. Pre-treat or soak with product containing enzymes.
Mustard, tomato Pre-treat with prewash stain remover. Wash using bleach safe for fabric
Nail polish May be impossible to remove. Place stain face down on paper towels. Apply nail polish
remover to back of stain.
Repeat, replacing paper towels frequently. Do not use on acetate fabrics.
Paint, varnish WATER BASED: Rinse fabric in cool Water while stain is wet. Wash. Once paint is dry, it
cannot be removed,
OIL BASED AND VARNISH: Use solvent recommended on can label Rinse thoroughly
before washing
Rust, brown or yellow
discoloration
For spots, use rust remover safe for fabric. For discoloration of an entire load, use
phosphate Detergent and non-chlorine bleach. Do not use chlorine bleach because it may
intensify discoloration.
Shoe polish LIQUID: Pre-treat with a paste of granular Detergent and Water. PASTE: Scrape residue from
fabric. Pre-treat with pre-wash stain remover or nonflammable dry cleaning fluid, Rub
Detergent into dampened area, Wash using bleach safe for fabric.
CLOTHS / STAIN TYPES & REMOVAL PROCESS
STAIN TREATMENT
Do not use or mix liquid chlorine bleach with other household chemicals such as toilet cleaners, rust removers, acid or products
containing ammonia. These mixtures can produce dangerous fumes which can cause serious injury or death.
To reduce the risk of fire or serious injury to persons or property, comply with the basic warnings listed below:
Read and comply with all instructions on stain removal products.
Keep stain removal products in their original labeled containers and out of children's reach. Thoroughly wash any utensil used.
Do not combine stain removal products, especially ammonia and chlorine bleach. Dangerous fumes may result,
Never wash items which have been previously cleaned in, washed in, soaked in or spotted with gasoline, dry cleaning solvents or
other flammable or explosive substances because they give off vapors that could ignite or explode.
Never use highly flammable solvents, such as gasoline, inside the home. Vapors can explode on Contact with flames or sparks.
WARNING
Special Guide to Stain Removal
Before Starting Wash
8

Function of Each Button
Before Starting Wash
9
Remain Time(mins)Remain Time(mins)
Press the button, by washing quantity select
water level position in drums. The indicator
lights move at each press on the button light
and flash in turn.
WATER LEVEL BUTTON
Press the button to preset delay time. Less
than 24 hours each press the button, the
delay time is edit and or, more than 24
hours each press the button, the delay
time is added six hours, after to 48 hours,
the preset indicator is come back origin
status. if always press the button, the
delay time will automatically change.
DELAY
Program can select fully automatic
program like:
PROGRAM
• Standard • Quick • Jeans
• Anti - Wrinkle • ECO • Air Dry
Wash: Press the button to select the
washing time.
Rinse: Press the button to select rinse.
the time of rinse.
Spin: Press the button to select
the time of spin.
WASH, RINSE & SPIN
Press the Water Level and
Spin
at the same time to lock buttons
on control panel.
Press the Water Level and
Spin at the same time again to
unlock buttons.
CHILD LOCK

Function of Each Button
Before Starting Wash
10
ON and OFF Button
Automatic Power
POWER
After power on, push “START/PAUSE”
button directly to One-key Washing. The
function will be canceled if other buttons,
such as water level, program, temperature
and function are pressed before. It will also
be invalid if there is water left in the inner
tube and the program will be directly set
into Normal with default water level 6.
Washing Machine will perform fuzzy
detection immediately by pushing
“Start/Pause” after power on and water
level and program will be selected
according to amount of clothing. During
the selecting, water level lamp is flashing
continuously, as digital display shows”--”,
at the same time, only power button is
effective. After detecting is completed,
program is chosen to “Quick” with
automatically setting water level 1/2/3 and
“Standard” with water level 4/5/56 also.
“Super Clean” with water level 7/8.
Program will run automatically when
checked out and finished program and
water level setting.
ONE TOUCH
SMART WASH
ECOECO
After program selection, press the button
to start. Press the button to pause in the
course of operation, press the button
again the program continues till the
program is finished.
START / PAUSE

Air Dry
Additional Function Program
11
On/Off
Press the PROGRAM button to further go into AIR DRY button to select the desired timing.
Press the POWER (ON/OFF) button to turn power on.
Press the START/PAUSE button.
Close the lid

Delay time means the preset beginning time of washing.
Press the “DELAY” button each time, the number on
the digital indication adds by “1”; After the number
reaches “24”, press the “Delay” button each time,
the number adds by “6”; After the number reaches
48, the light of delay time is turned off, and the delay
program return to original status.
Switch on the power button to turn power on.
Open the tap and lay the drain hose.
Put in the laundry and detergent.
Select the proper water level according to the quantity of clothes.
5.Select the functions and programs.
1
2
3
4
5
Press “DELAY” button to select the beginning time of washing.
6
Close the lid and press “START/PAUSE” button
7
Confirmation of the delay and inspection
After the delay function is started, the corresponding delay light will flash, and other lights are turned off.
1
After the delay function is started , press “ Delay” button continuously , you may inspect the preset
program and function. Loose the button , the program return to delay status.
2
Cancel the delay time, or alternate the delay time
Press “ Power” button to cancel the delay time.
1
2To change the delay time , cancel the delay time first, and then press “Delay” button to reset.
Delay Start Wash
Additional Function Program
12

When the machine is power on, press SPIN and WATER LEVEL at the
same time to set the CHILD LOCK, then this function is active, is
indicated 1 second every other 5 seconds.
Other Useful Functions
Additional Function Program
13
Child Lock
If you want to lock all the keys to prevent settings from being changed by a child, you can use the child lock option.
1Press the POWER (AUTO OFF) button
2Press the START/PAUSE button to start washing
• After all washing conditions are set according to the manual.
• Turn POWER ON
On/Off
Automatic power shut off
If the laundry is placed uneven before spinning, it is likely to cause vibration during spinning. The washing
machine has a function of adjusting imbalance. When working, the washing machine always inspects
operation state automatically. If the spinning vibration is too great, the washing machine automatically
starts the adjusting program to balance.
When the machine adjusts imbalance, rinse light will flash, and the machine will start to inject water to set
water level. The machine adjusts imbalance automatically for about 1 minute, then drains water, returns to
original spinning state. If the washing machine can adjust the imbalance twice. If the adjustment has no
function, it will alarm.
If the machine do not start to work within 10 minutes after powered on, it will power off automatically.
1
After end of operation and the buzzer sounding 6 times, it will power off automatically.
2
1
Adjusting for imbalance
2
If the power supply becomes off suddenly during operation, the machine remembers the current
operation state. When power is on, the machine returns to former operation state automatically.
1
Power Failure Memory
4Child UNLOCK
3Child LOCK
Remain Time(mins)Remain Time(mins)
Press both the SPIN and WATER LEVEL button simultaneously for CHILD UNLOCK.

n
1
Please ensure that all the tapes, safety packing, protective material has been removed before operating machine.
Place the machine on a flat and firm surface which allows proper clearance.
We suggest a minimum clearance of 2 cm to the right
side and left; sides of the machine for ease of
installation.
At the rear, a minimum clearance of 10 cm is
suggested.
If the washer is installed on uneven, weak or tilted floor causing excessive vibration, spin failure can
happen. lt must be placed on a firm and level floor to prevent spin failure.
NOTE
Open the lid and look from above to see if it seem in perfect center from all sides
Check that the machine is level
Leveling the machine
Lift the front of the washing machine and twist the Adjustable Leg until it's
placed in the center.
Caution
If the power is supplied from a cord extension set or generator, the cord extension set or electrical portable
outlet device should be positioned so that it is not exposed to splashing or ingress of moisture.
*Please check that Anti-Rat Cover (optional) is firmly fixed on Washing machine and screw properly
CORRECTWRONG
Top view of the Washing Mahine
Placing and Laveling
Installation
14

Installation
Before connecting the Water Supply Hose to the water tap, check the hose type and choose the correct instruction
here under.
Note that the Water Supply Hose supplied may vary from country to country, Make sure to connect the blue inlet
hose to the COLS water tap, and the orange inlet hose to the HOT water tap.
Connecting Water Supply Hose to water tape
Normal Type (Normal tap without thread & screw type inlet hose)
Untighten the screw of the connector so that the tap
can be placed in the middle
Untighten the screw
Fixing the connector to the tap
Push the upper connector up till the rubber packing is
in tight contact with the tap, then tighten the 4 screws.
Attach the water supply hose securely to
the connector
Push the water supply hose vertically upwards so that the rubber
seal within the hose can adhere completely to the tap
Check the connection of water supply hose and the connector
Fixing the connector to the water supply hose
Attach the water supply hose to the connector and then tighten it
by screwing it to the right
After connecting the hose, open the tap to check for any water
leakage.
If the water leaks, close the tap and start again from step 1.
The washing machine is to be connected to the water mains using new hose-sets and old hose sets should
not be reused.
Rubber Packing
Connector
Screw
Connector
Water Supply Hose
Connecting Water Supply Hose
Installation
15

1
Unpacking the Unit
Ÿ
Ÿ
Ÿ
Remove package and take out the bottom board of the
cabinet on the foam cover.
Open the lid of washer's door and take out accessories.
A trial operation or washing on the foamed cushion is
strictly forbidden.
Installation of drain hose
Completely sleeve the drain hose over the sewer.
Then fit the end of the drain to the outlet of the drain outlet of washing
machine.
Fix and tighten it with a hoop. ( As shown in the figure )
Make sure that its not loose as water might drip from loose outlet.
2
Placement of water drain hose for lower drain system only
Under 3m
Under 15 cm
If the water drain hose shall be
extended, its length shall not
exceed 3 meters, otherwise it will
affect the water discharging time.
The placed height of water drain
hose shall not exceed 15 cm
Do not bend or twist the
water drain hose and
place it under the washer
Before connecting the drain hose check your drain hose model and follow the instruction:
Installation of Drain Hose
Base foamed cushion
Installation
16

Earth wire should be connected.
If the earth wire is not connected, there is possible a danger of electric shock caused by the current leakage.
Grounding Method with Ground insert space Terminal
If the AC current outlet has a ground terminal, then separate
grounding is not required. Note that AC power outlet configuration
may differ from country to country.
Ground Terminal
Outlet with ground terminal
Most appliances recommend they be placed upon a dedicated circuit; that is, a single outlet circuit
which powers only that appliance and has no additional outlets. Overloaded wall outlets, loose or
damaged wall outlets, extension cords, frayed power cords, or damaged or cracked wire insulation are
dangerous. Any of these conditions could result in electric shock or fire. Practically examine the cord of
your appliance, and if its appearance indicates damage or deterioration, unplug it, discontinue use of
the appliance, and have the cord replaced with an exact replacement part by an authorized servicer.
Protect the power cord from physical or mechanical abuse, such as being twisted, kinked, pinched,
closed in a door, or walked upon. Pay particular attention to plugs, wall outlets and the point where the
cord exists the appliance.
Caution
Burying Copper Plate
Connect the Ground Wire to a Ground Copper Plate and bury
it more than 75 cm in the ground.
Ground Wire
75 cm
Ground Copper Plate
Ground
Wire
Short - circuit
Breaker
Connect the ground Wire to the socket provided exclusively
for Grounding.
If grounding methods described above are not possible, a
separate circuit breaker should be employed and installed by
a qualified electrician.
Caution
• To prevent a possible explosion, do not connect ground to a gas pipe.
• Do not connect to telephone wires or lightning rods, This may be dangerous during electrical storms.
• Connecting ground to plastic has no effect.
• Ground wires should be connected when an extension cord is used.
Grounding Method
Other Grounding Method
Using Ground Wire
Using a Short Circuit Breaker
Care and Maintenance
17

1
End of Program
Use gentle clothing to wipe off the water and dirt on the surface each time after using
the washing machine.
Detergent , propellant and other chemicals are not allowed to use so as to avoid any
damage to the plastic accessories.
If the drain filter is not cleaned at proper time (every 10 times of use),Drain problem could be caused.
Notes:
Drain the water out of the
pump, under which use a
container to collect
Loosen the pump cover
anti clockwise
ŸThe washing machine will send off the sound of “dou-dou” at the end of any program operation to remind you to
take out the laundry or operate it again.
ŸAfter the sound ,the washing machine returns to its power-off state with no display and all lights off.
ŸPlease shut off the tap, pull out the plug when not in use to avoid water leakage or the fire accidents
For MAGIC filter
Maintenance
To Clean the water inlet
After long time use, the water inlet mesh bag may be blocked with
smudginess, and should be cleaned according to the following steps:
1. Switch on the power, followed by shutting off the tap .
2. Let the washer works for 5 seconds so that water flows into the tub
through the water inlet hose. then turn off the power.
3. Unload the water inlet hose and clean the mesh bag, then restore
the water inlet assembly.
To Clean of the lint filter
After using the washing machine for a period, please clean it according
to the following steps:
1. Take out the lint filter.
2.Open the filter and wash it clean in the water.
3. Restore it and fix it.
For NORMAL filter
After using the washing machine for a period, clean it according to
the following steps:
1. Take off the lint filter.
2. Turn over the mesh bag and wash it clean in the water.
3. Restore and fix it.
To Clean of the Drain pump lint filter (only for having drain filter)
2 3 Take out the lint filter
45 6
Clean the filter Restore it and adjust
the convex place to
align at the pump hole.
Tighten the pump cover
clockwise
Cleaning and Maintenance
Care and Maintenance
18
This manual suits for next models
2
Table of contents
Other ECOSTAR Washer manuals
