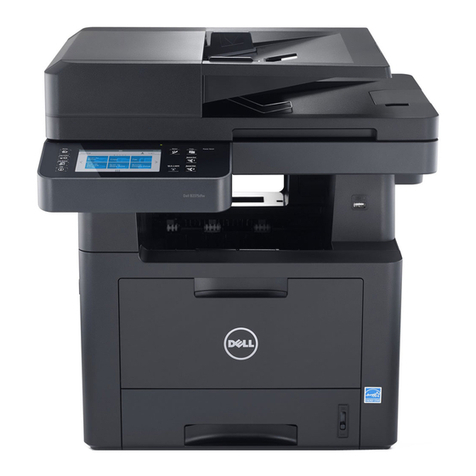
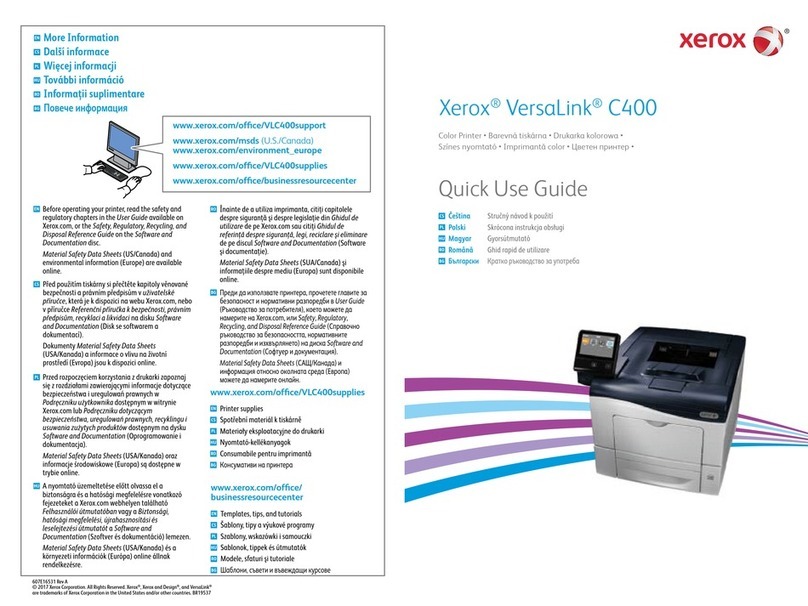
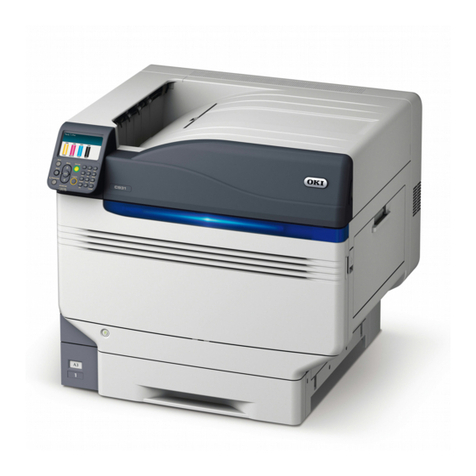
Ecosys ECOSYS M6035cidn User manual

ECOSYS M6035cidn
PRINT COPY SCAN
ECOSYS M6535cidn
PRINT COPY SCAN FAX OPERATION GUIDE

10-1
10 Troubleshooting
This chapter explains the following topics:
Regular Maintenance ....................................................................................................................................... 10-2
Cleaning ................................................................................................................................................. 10-2
Toner Container Replacement ............................................................................................................... 10-4
Waste Toner Box Replacement ............................................................................................................. 10-8
Replacing Staples ................................................................................................................................ 10-10
Troubleshooting .............................................................................................................................................. 10-11
Solving Malfunctions ............................................................................................................................. 10-11
Responding to Messages .................................................................................................................... 10-17
Adjustment/Maintenance ..................................................................................................................... 10-29
Clearing Paper Jams ........................................................................................................................... 10-35
Clearing a Staple Jam .......................................................................................................................... 10-49

10-2
Troubleshooting > Regular Maintenance
Regular Maintenance
Cleaning
Clean the machine regularly to ensure optimum printing quality.
Glass Platen
Wipe the inside of the document processor and the glass platen with a soft cloth dampened with alcohol or mild
detergent.
Slit Glass
When using the document processor, clean the slit glass surface and the reading guide with the dry cloth.
CAUTION
For safety, always unplug the power cord before cleaning the machine.
IMPORTANT
Do not use thinner or other organic solvents.
IMPORTANT
Do not use water, soap or solvents for cleaning.
NOTE
Dirt on the slit glass or the reading guide may cause black streaks to appear in the output.

10-3
Troubleshooting > Regular Maintenance
Paper Transfer Unit
The paper transfer unit should be cleaned each time the toner container and waste toner box are replaced. To maintain
optimum print quality, it is also recommended that the inside of the machine be cleaned once a month as well as when
the toner container is replaced.
Print problems such as soiling of the reverse side of printed pages may occur if the paper transfer unit becomes dirty.
Wipe away the paper dust on the registration roller and the paper ramp using the cloth.
CAUTION
Some parts are very hot inside the machine. Exercise caution as there is a risk of burn injury.
IMPORTANT
Be careful not to touch the transfer roller and transfer belt during cleaning as this
may adversely affect print quality.
Transfer Belt
Registration Roller
(Metal)
Transfer Roller
Paper Ramp

10-4
Troubleshooting > Regular Maintenance
Toner Container Replacement
When toner runs low, "Toner is low. (Replace when empty.)" appears in the touch panel. Make sure you have a new
toner container available for replacement.
When the touch panel displays "Toner is empty.", replace the toner.
Frequency of Toner Container Replacement
The life of the toner containers depends on the amount of toner required to accomplish your printing jobs. According to
ISO/IEC 19798 and EcoPrint switched off the toner container can print as follows (A4/Letter paper is assumed):
Toner Color Life of the Toner Container (Printable pages)
Black 12,000 images
Cyan 10,000 images
Magenta 10,000 images
Yellow 10,000 images
NOTE
• The toner container packed with the new printer has to fill up the system when operating the first time. Therefore
only 50% of the first toner kits can be used for printing. (For example: ECOSYS M6035cidn/ECOSYS M6535cidn
can print 6,000 Black & White images using the black starter toner container.)
• For the toner container, always use a genuine toner container. Using a toner container that is not genuine may
cause image defects and product failure.
• The memory chip in the toner container of this product stores information necessary for improving customer
convenience, operation of the recycling system for used toner containers, and planning and development of new
products. The stored information does not include information that makes it possible to identify individuals, and is
only used anonymously for the above purposes.
CAUTION
Do not attempt to incinerate parts which contain toner. Dangerous sparks may cause burns.

10-5
Troubleshooting > Regular Maintenance
Replacing the Toner Container
Installation procedures of the toner container is same for every color. The procedures here represent the yellow toner
container.
1
2
3
4
K
M
C
Y

10-6
Troubleshooting > Regular Maintenance
5
6
7
IMPORTANT
Do not touch the points shown below.
5~65~6

10-7
Troubleshooting > Regular Maintenance
8
9
NOTE
• If the Scanner Unit does not close, check that the new toner container is installed correctly (in step 7).
• Return the exhausted toner container to your dealer or service representative. The collected toner container will be
recycled or disposed in accordance with the relevant regulations.

10-8
Troubleshooting > Regular Maintenance
Waste Toner Box Replacement
When the waste toner box becomes full, immediately replace the waste toner box.
1
2
3
CAUTION
Do not attempt to incinerate parts which contain toner. Dangerous sparks may cause burns.

10-9
Troubleshooting > Regular Maintenance
4
5
NOTE
Return the exhausted waste toner box to your dealer or service representative. The collected waste toner box will be
recycled or disposed in accordance with the relevant regulations.

10-10
Troubleshooting > Regular Maintenance
Replacing Staples
Add staples to the optional manual stapler.
1
2
NOTE
If the Staple Unit runs out of staples, contact your dealer or service representative.

10-11
Troubleshooting > Troubleshooting
Troubleshooting
Solving Malfunctions
The table below provides general guidelines for problem solving.
If a problem occurs with your machine, look into the checkpoints and perform procedures indicated on the following
pages. If the problem persists, contact your Service Representative.
NOTE
When contacting us, the serial number will be necessary.
To check the serial number, refer to the following:
Display for Device Information (page 2-17)
Checking the Equipment's Serial Number (page 5-5)
Symptom Checkpoints Corrective Actions Reference
Page
An application does not
start.
Is the Auto Panel Reset time short? Set the Auto Panel Reset time to 30
seconds or more.
page 8-37
The screen does not
respond when the main
power switch is turned on.
Check the power cord. Connect both ends of the power cord
securely.
page 2-9
Pressing the [Start] key
does not produce copies.
Is there a message on the screen? Determine the appropriate response to
the message and respond accordingly.
page 10-17
Is the machine in Sleep mode? Select any key on the operation panel to
recover the machine from Sleep mode.
page 2-27
Blank sheets are ejected. Are the originals loaded correctly? When placing originals on the platen,
place them face-down and align them
with the original size indicator plates.
page 5-2
When placing originals in the document
processor, place them face-up.
page 5-3
―Check that the settings of the
application software.
―
Printouts are totally too light. Is the paper damp? Replace the paper with new paper. page 3-2
Have you changed the density? Select appropriate density level. page 6-12
page 8-39
Is the toner distributed evenly within the
toner container?
Shake the toner container from side to
side several times.
page 10-4
Is EcoPrint mode enabled? Disable [EcoPrint] mode. page 8-15
―Run [Drum Refresh]. page 10-29
―Run [Laser Scanner Cleaning]. page 10-34
―Make sure the paper type setting is
correct for the paper being used.
page 8-14

10-12
Troubleshooting > Troubleshooting
Printouts are too dark even
though the background of
the scanned original is white.
Have you changed the density? Select appropriate density level. page 6-12
page 8-39
―Run [Calibration]. page 10-34
Copies have a moire pattern
(dots grouped together in
patterns and not aligned
uniformly).
Is the original a printed photograph? Set the original image to [Photo]. page 6-13
Texts are not clearly printed. Did you choose appropriate image
quality for the original?
Select appropriate image quality. page 6-13
Black or color dots appear on
the white background when
white original is scanned.
Is the original holder or the glass platen
dirty?
Clean the original holder or the glass
platen.
page 10-2
Printouts are fuzzy. Is the machine being used in conditions
of very humid, or humidity or
temperature rapidly changes?
Use in an environment that has suitable
humidity.
―
―Run [Drum Refresh]. page 10-29
Images are skewed. Are the originals placed correctly?
When placing originals on the platen, align
them with the original size indicator plates.
page 5-2
When placing originals in the document
processor, align the original width guides
securely before placing the originals.
page 5-3
Is the paper loaded correctly? Check the position of the paper width
guides.
page 3-4
page 3-7
Symptom Checkpoints Corrective Actions Reference
Page

10-13
Troubleshooting > Troubleshooting
Irregular horizontal lines
appear in the image.
―Select the [System Menu/Counter] key
> [Adjustment/Maintenance] >
[Service Setting] > [MC] and increase
the adjustment value. Increase the
adjustment value 1 level at a time from
the current value. If there is no
improvement after the value is
increased by 1 level, increase by 1 level
again. If there is still no improvement,
return the setting to the original value.
―
The altitude is 1000 m or
higher and irregular
horizontal white lines appear
in the image.
―Select the [System Menu/Counter] key
> [Adjustment/Maintenance] >
[Service Setting] > [Altitude
Adjustment], and set to an elevation
one level higher than the current setting.
―
The altitude is 1000 m or
higher and dots appear in
the image.
―Select the [System Menu/Counter] key
> [Adjustment/Maintenance] >
[Service Setting] > [Altitude
Adjustment], and set to an elevation
one level higher than the current setting.
―
Paper often jams. Is the paper loaded correctly? Load the paper correctly. page 3-2
Is the paper of the supported type? Is it
in good condition?
Remove the paper, turn it over, and
reload it.
page 3-4
Is the paper curled, folded or wrinkled? Replace the paper with new paper. page 3-4
Are there any loose scraps or jammed
paper in the machine?
Remove any jammed paper. page 10-35
2 or more sheets are
overlaps when ejected.
(multi feed)
―Load the paper correctly. page 3-2
Printouts are wrinkled. Is the paper loaded correctly? Load the paper correctly. page 3-2
Is the paper damp? Replace the paper with new paper. page 3-2
Symptom Checkpoints Corrective Actions Reference
Page

10-14
Troubleshooting > Troubleshooting
Printouts are curled. Is the paper damp? Replace the paper with new paper. page 3-2
Cannot print. Is the machine plugged in? Plug the power cord into an AC outlet. ―
Is the machine powered on? Turn on the power switch. page 2-10
Are the USB cable and network cable
connected?
Connect the correct USB cable and
network cable securely.
page 2-8
Is the print job paused? Resume printing. page 7-10
Cannot print with USB
memory.
USB memory not
recognized.
Is the USB host blocked? Select [Unblock] in the USB host
settings.
page 8-34
―Check that the USB memory is securely
plugged into the machine.
―
Printouts have vertical lines.
Is the slit glass dirty? Clean the slit glass. page 10-2
―Run [Laser Scanner Cleaning]. page 10-34
Dirt on the top edge or back
of the paper.
Is the interior of the machine dirty? Clean the interior of the machine. page 10-3
Part of the image is
periodically faint or shows
white lines.
―Open and then close the rear cover. page 2-3
―Select the [System Menu/Counter] key
> [Adjustment/Maintenance] >
[Service Setting] > [MC] and decrease
the adjustment value. Decrease the
adjustment value 1 level at a time from
the current value. If there is no
improvement after the value is
decreased by 1 level, decrease by 1
level again. If there is still no
improvement, return the setting to the
original value.
―
―Run [Drum Refresh]. page 10-29
Print on the back of the
sheet is visible on the front.
―Set [Prevent Bleed-through] to [On]. page 6-19
page 8-15
Symptom Checkpoints Corrective Actions Reference
Page

10-15
Troubleshooting > Troubleshooting
Skewed-color printout. ―Run [Calibration]. page 10-34
―Run [Color Registration]. page 10-29
Colors appear different than
you anticipated.
Did you choose appropriate image
quality for the original?
Select appropriate image quality. page 6-13
Have you loaded color copy paper into
the paper tray?
Load color copy paper into the paper
tray.
―
―Run [Calibration]. page 10-34
―When making copies
Adjust the color balance.
page 6-15
―When printing from a computer
Adjust the color using the printer driver.
―
The previous image remains
and lightly printed.
―Select the [System Menu/Counter] key
> [Adjustment/Maintenance] >
[Service Setting] > [MC] and increase
the adjustment value. Increase the
adjustment value 1 level at a time from
the current value. If there is no
improvement after the value is
increased by 1 level, increase by 1 level
again. If there is still no improvement,
return the setting to the original value.
―
Symptom Checkpoints Corrective Actions Reference
Page

10-16
Troubleshooting > Troubleshooting
Cannot send via SMB. Is the network cable connected? Connect the correct network cable
securely.
page 2-8
Have the network settings for the
equipment been configured properly?
Configure the TCP/IP settings properly. page 8-26
Have the folder sharing settings been
configured properly?
Check sharing settings and access
privileges under the folder properties.
page 3-15
Has the SMB protocol been set to [On]? Set the SMB protocol setting to [On]. page 8-28
Has [Host Name] been entered
properly? *1
Check the name of the computer to
which data is being sent.
page 5-23
Has [Path] been entered properly? Check the share name for the shared
folder.
page 5-23
Has [Login User Name] been entered
properly? *1 *2
Check the domain name and login user
name.
page 5-23
Has the same domain name been used for
[
Host Name
] and [
Login User Name
]?
Delete the domain name and backslash
("/") from [
Login User Name
].
page 5-23
Has [Login Password] been entered
properly?
Check the login password. page 5-23
Have exceptions for Windows Firewall
been configured properly?
Configure exceptions for Windows
Firewall properly.
page 3-19
Do the time settings for the equipment,
domain server, and data destination
computer differ?
Set the equipment, domain server, and
data destination computer to the same
time.
―
Is the screen displaying Send error? Refer to Responding to Send Error.page 10-26
The color toner is empty. Do you want to continue printing in black
and white?
If the black toner is remained, the
machine continues printing in black and
white by selecting [Print in Black and
White] of [Color Toner Empty Action].
page 8-17
Cannot send via the e-mail. Is the E-mail send size limit set in the
SMTP server registered on the
machine?
Check the limit value is entered to "E-
mail Size Limit" of [E-mail] setting in
Command Center RX and change the
value as necessary.
page 2-53
The machine is emitting
steam in the area around the
paper ejection slot.
Check the room temperature to see if it
is low, or if damp paper was used.
Depending on the printing environment
and the paper's condition, the heat
generated during printing will cause the
moisture in the paper to evaporate, and
the steam emitted may look like smoke.
This is not a problem, and you can
continue printing. If the steam concerns
you, raise the room temperature, or
replace the paper with a newer, dryer
paper.
―
*1 You can also enter a full computer name as the host name (for example, pc001.abcdnet.com).
*2 You can also enter login user names in the following formats:
Domain_name/user_name (for example, abcdnet/james.smith)
User_name@domain_name (for example, james.smith@abcdnet)
Symptom Checkpoints Corrective Actions Reference
Page

10-17
Troubleshooting > Troubleshooting
Responding to Messages
If the touch panel or the computer displays any of these messages, follow the corresponding procedure.
A
B
NOTE
When contacting us, the serial number will be necessary. To check the serial number, refer to the following:
Display for Device Information (page 2-17)
Checking the Equipment's Serial Number (page 5-5)
Message Checkpoints Corrective Actions Reference
Page
Activation error. ―Turn the main power switch off and
on. If the error exists, contact
administrator.
page 2-10
Add the following paper
in cassette #.
Does the selected paper size
matches the paper size loaded in
the specified paper source?
Select [Continue] to continue
printing.
Select [Cancel] to cancel the job.
—
Is the indicated cassette out of
paper?
Load paper.
Select [Paper Selection] to select
the other paper source. Select
[Continue] to print on the paper in
the currently selected paper source.
page 3-2
Add the following paper
in the multi purpose tray.
Does the selected paper size
matches the paper size loaded in
the specified paper source?
Select [Continue] to continue
printing.
Select [Cancel] to cancel the job.
—
Is the indicated cassette out of
paper?
Load paper.
Select [Paper Selection] to select
the other paper source. Select
[Continue] to print on the paper in
the currently selected paper source.
page 3-7
Adjusting… ―The machine is under the
adjustment to maintain its quality.
Please wait.
—
Message Checkpoints Corrective Actions Reference
Page
Box is not found. ―The specified box cannot be found.
Job is canceled. Select [End].
—
Box limit exceeded.*1
*1 When Auto Error Clear is set to [On], processing resumes automatically after a set amount of time elapses. For details
on Auto Error Clear, refer to the following:
Auto Error Clear (page 8-39)
Is [End] displayed on the screen? The specified box is full, and no
further storage is available; Job is
canceled. Select [End]. Try to
perform the job again after printing
or deleting data from the box.
—

10-18
Troubleshooting > Troubleshooting
C
Message Checkpoints Corrective Actions Reference
Page
Calibrating… — The machine is under the
adjustment to maintain its quality.
Please wait.
page 10-34
Cannot connect to
Authentication Server.*1
*1 When Auto Error Clear is set to [On], processing resumes automatically after a set amount of time elapses. For details
on Auto Error Clear, refer to the following:
Auto Error Clear (page 8-39)
— Set machine time to match the
server's time.
page 2-24
— Check the domain name. page 9-2
— Check the host name. page 9-2
— Check the connection status with
the server.
—
Cannot duplex print on
the following paper.*1
Did you select a paper size/type
that cannot be duplex printed?
Select [Paper Selection] to select
the available paper. Select
[Continue] to print without using
Duplex function.
page 6-23
Cannot print the
specified number of
copies.*1
— Only one copy is available. Select
[Continue] to continue printing.
Select [Cancel] to cancel the job.
The machine may reproduce the
same originals by arranging the
following settings:
• Uncheck [RAM Disk] in the
[Device Settings] tab of the
printer's properties.
NOTE
If you unchecked the [RAM Disk],
check the [RAM Disk] again after
the printing is completed. If not,
print speed may be reduced.
—
Cannot process this
job.*1
―This job is canceled because it is
restricted by User Authorization or
Job Accounting. Select [End].
―
Cassette is not installed. ―Cannot feed paper. Set the cassette
indicated on the screen.
―
Check the toner
container.
— The toner container is not installed
correctly. Set it correctly.
page 10-4
Check waste toner box. — The waste toner box is not installed
correctly. Set it correctly.
page 10-8
Is the waste toner box full? Replace the waste toner box.
Cleaning the laser
scanner…
— The machine is under the
adjustment to maintain its quality.
Please wait.
―

10-19
Troubleshooting > Troubleshooting
E
F
H
I
Message Checkpoints Corrective Actions Reference
Page
Error occurred at
cassette #.
―Remove the indicated cassette.
Select [Next >] to follow the
instructions.
―
Message Checkpoints Corrective Actions Reference
Page
Failed to specify Job
Accounting.*1
*1 When Auto Error Clear is set to [On], processing resumes automatically after a set amount of time elapses. For details
on Auto Error Clear, refer to the following:
Auto Error Clear (page 8-39)
— Failed to specify Job Accounting
when processing the job externally.
The job is canceled. Select [End].
—
Failed to store job
retention data.
— The job is canceled. Select [End].
Insufficient free space in the Job
Box. Try to perform the job again
after printing or deleting data from
the Job Box.
—
Message Checkpoints Corrective Actions Reference
Page
High temperature.
Adjust room temp.
— Adjust the temperature and the
humidity of your room.
—
Message Checkpoints Corrective Actions Reference
Page
Incorrect account ID.*1
*1 When Auto Error Clear is set to [On], processing resumes automatically after a set amount of time elapses. For details
on Auto Error Clear, refer to the following:
Auto Error Clear (page 8-39)
— The account ID was incorrect when
processing the job externally. The
job is canceled. Select [End].
—
Incorrect box password. — The box password was incorrect
when processing the job externally.
The job is canceled. Select [End].
—
Incorrect Login User
Name or Password.*1
— The login user name or password
was incorrect when processing the
job externally. The job is canceled.
Select [End].
—
Inner tray is full of paper. — Remove paper from the inner tray.
Select [Continue] to resume
printing. Select [Cancel] to cancel
the job.
—
This manual suits for next models
1
Table of contents
