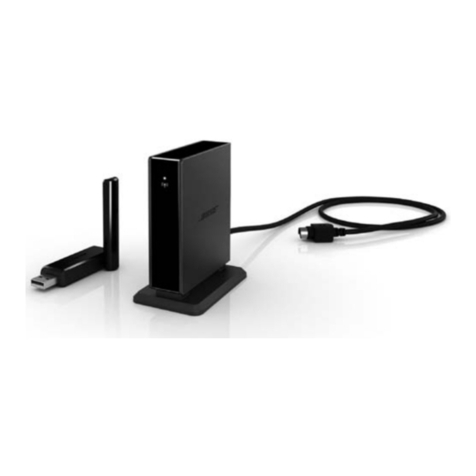
ECS Wi-Bridge User manual

Wi-Bridge User Manual
Ver. 1.0

Wi-Bridge User Manual
INDEX
INDEX
B
Br
ri
ie
ef
f
I
In
nt
tr
ro
od
du
uc
ct
ti
io
on
n
.
..
..
..
..
..
..
..
..
..
..
..
..
..
..
..
..
..
..
..
..
..
..
..
..
..
..
..
..
..
..
..
..
..
..
..
..
..
..
..
..
..
..
..
..
..
..
..
..
..
..
..
..
..
..
..
..
..
..
..
..
..
..
..
..
..
..
..
..
..
..
..
..
..
..
..
..
..
..
..
..
..
..
..
..
..
..
..
..
..
..
..
..
..
..
..
..
..
..
..
..
..
..
..
..
..
..
..
..
..
..
..
..
..
.
1
1
Product SPEC………………………………………………………………………………………………………………………………..2
S
Se
et
tu
up
p
G
Gu
ui
id
de
e
.
..
..
..
..
..
..
..
..
..
..
..
..
..
..
..
..
..
..
..
..
..
..
..
..
..
..
..
..
..
..
..
..
..
..
..
..
..
..
..
..
..
..
..
..
..
..
..
..
..
..
..
..
..
..
..
..
..
..
..
..
..
..
..
..
..
..
..
..
..
..
..
..
..
..
..
..
..
..
..
..
..
..
..
..
..
..
..
..
..
..
..
..
..
..
..
..
..
..
..
..
..
..
..
..
..
..
..
..
..
..
..
..
..
..
..
..
..
..
..
..
..
..
.
3
3
Device Installation.............................................................................................................................3
Client Controller Applications Installation ........................................................................................4
W
Wi
i-
-B
Br
ri
id
dg
ge
e
D
De
ev
vi
ic
ce
e
U
Us
se
er
r
G
Gu
ui
id
de
e
.
..
..
..
..
..
..
..
..
..
..
..
..
..
..
..
..
..
..
..
..
..
..
..
..
..
..
..
..
..
..
..
..
..
..
..
..
..
..
..
..
..
..
..
..
..
..
..
..
..
..
..
..
..
..
..
..
..
..
..
..
..
..
..
..
..
..
..
..
..
..
..
..
..
..
..
..
..
..
..
..
..
..
..
..
..
..
..
..
..
..
..
..
..
..
..
..
..
.
5
5
Wi-Bridge Home Screen....................................................................................................................5
Wi-Bridge Configure on LCD Monitor/TV……………….…………………………………………………………………7
IrDA Remote Controller...................................................................................................................10
Wireless Network Configuration.....................................................................................................11
Device Name Modification..............................................................................................................12
Language Setting.............................................................................................................................12
W
Wi
in
nd
do
ow
ws
s
C
Co
on
nt
tr
ro
ol
l
A
Ap
pp
pl
li
ic
ca
at
ti
io
on
n
(
(F
Fo
or
r
P
PC
C/
/
N
NB
B)
)
.
..
..
..
..
..
..
..
..
..
..
..
..
..
..
..
..
..
..
..
..
..
..
..
..
..
..
..
..
..
..
..
..
..
..
..
..
..
..
..
..
..
..
..
..
..
..
..
..
..
..
..
..
..
..
..
..
..
..
..
..
..
..
..
..
..
..
..
..
..
..
..
..
..
..
.
1
13
3
W
Wi
i-
-B
Br
ri
id
dg
ge
e
A
An
nd
dr
ro
oi
id
d
C
Co
on
nt
tr
ro
ol
l
A
Ap
pp
pl
li
ic
ca
at
ti
io
on
n
(
(F
Fo
or
r
A
An
nd
dr
ro
oi
id
d
O
OS
S)
)
.
..
..
..
..
..
..
..
..
..
..
..
..
..
..
..
..
..
..
..
..
..
..
..
..
..
..
..
..
..
..
..
..
..
..
..
..
..
..
..
..
..
..
..
..
..
..
..
..
..
..
..
..
..
..
.
1
19
9
W
Wi
i-
-B
Br
ri
id
dg
ge
e
i
iO
OS
S
C
Co
on
nt
tr
ro
ol
l
A
Ap
pp
pl
li
ic
ca
at
ti
io
on
n
(
(F
Fo
or
r
i
iO
OS
S)
)
.
..
..
..
..
..
..
..
..
..
..
..
..
..
..
..
..
..
..
..
..
..
..
..
..
..
..
..
..
..
..
..
..
..
..
..
..
..
..
..
..
..
..
..
..
..
..
..
..
..
..
..
..
..
..
..
..
..
..
..
..
..
..
..
..
..
..
..
..
..
..
..
..
..
.
2
24
4
F
Fr
re
eq
qu
ue
en
nt
tl
ly
y
A
As
sk
ke
ed
d
Q
Qu
ue
es
st
ti
io
on
ns
s
.
..
..
..
..
..
..
..
..
..
..
..
..
..
..
..
..
..
..
..
..
..
..
..
..
..
..
..
..
..
..
..
..
..
..
..
..
..
..
..
..
..
..
..
..
..
..
..
..
..
..
..
..
..
..
..
..
..
..
..
..
..
..
..
..
..
..
..
..
..
..
..
..
..
..
..
..
..
..
..
..
..
..
..
..
..
..
..
..
..
..
..
..
..
..
..
..
.
3
30
0

Wi-Bridge User Manual
Brief Introduction
Page
1
B
Br
ri
ie
ef
f
I
In
nt
tr
ro
od
du
uc
ct
ti
io
on
n
Thank you for choosing Wi-Bridge. The Wi-Bridge connects your PC, NB or smart
device such as iPhone, iPad, Android phone and Android Pad to your HDTV or big
screen monitor wirelessly in full HD up to 1080p video resolution to your digital life.
Enjoy the comfortable space with big screen and big sound instead of crowding
around a small screen of PC or cell-phone to enjoy, share and relax the music, photos,
and videos, surf the net in ultimate full HDTV on the couch at home. Besides, you can
show the presentation to the whole conference room wirelessly to save time of plug,
unplug and transfer the cable. With the smart, portable and small design, you can
use remote controller or wireless mouse to control playback smartly and easily and
carry it with you everywhere and saving space.
Wireless Network Connection
AP Mode (Default mode)
The Wi-Bridge device acts as a wireless access point. It allows you connect your windows
computer or smart device to LCD TV directly. This setup constructs a temporary wireless
network for a non-wireless environment.
Note: Please make sure your wifi workable before you connect to the Wi-Bridge
LAN Mode
The Wi-Bridge device allows you to use same wireless network connect your windows
computer or smart device to LCD TV. This setup provides capability for remote operation and
internet connection. However, this setup is vulnerable to any interference in the WiFi signal.
Note: Please connect to AP mode first and switch to Lan mode base on compatible with Windows
Control Application)

Wi-Bridge User Manual
Remote Controller
Page 2
P
Pr
ro
od
du
uc
ct
t
S
SP
PE
EC
C
Model Name
Wi-Bridge
Type
Wireless Adaptor for your devices
Output Connectors
1 x HDMI v1.3 port
1 x USB v2.0 port for keyboard/ mouse/ pen drive
Video Support
Full HD 1080P Resolution
Storage
NAND Flash: 256MB
Memory
DDRII: 256MB
WIFI SPEC & Range
WIFI 802.11 b/g/n; 10M ~ 30M
(The transmission speed may vary according to the environment)
PC/NB Compatibility
Windows 7, Windows XP
Smart Device
Compatibility
IOS: Supports iOS 4.0 or later, Android: Supports Android 2.2 or later
Supported
Languages
English, Simplified Chinese, Traditional Chinese
System Requirement
OS
Windows 7 32/ 64 bit (Recommended), Windows XP 32 bit with
SP2/SP3
CPU
Dual Core 2.0 GHz or better (Excluding Atom processor);
2nd Generation Intel® Core™ Processors ( Intel® 6 Series - Sandy
Bridge platform) is recommended
Memory
1 GB RAM is recommended
HDD
50 MB, 100 MB for running the program
Monitor / TV
1080P Resolution (1920 x 1080 is recommended)
WiFi
802.11n
Accessories
Power Adapter x 1 (Input AC 100 ~ 240V, Output power 5V/2A)
HDMI cable x 1
Remote Controller x 1
Installation CD x 1 - Include Manual, Driver
Product Dimensions
& Weight
77mm x 103mm x 27mm; 0.5 Kg
Wireless Network
Connection Mode
Wireless AP of Multi-media Service (AP Mode)
Wireless LAN of Multi-media Service (LAN Mode)
Mode Support
Support Streaming Mode
Support Mirror Mode - Text & Video Mode

Wi-Bridge User Manual
Remote Controller
Page 3
S
Se
et
tu
up
p
G
Gu
ui
id
de
e
Wi-Bridge Setup Guide includes two parts:
1. Device Installation
2. Application Installation.
Device Installation
Step 1. Connect the HDMI output on the Wi-Bridge device to the LCD TV.
Step 2. Plug in the Wi-Bridge device power adapter to the outlet.
Step 3. Press the Power button on the Wi-Bridge device to turn it on.
Wi-Bridge will be powered on. The Boot Screen & Home Screen as below will be
shown on the LCD TV screen when the system is ready.
Boot Screen
Home Screen –AP Mode

Wi-Bridge User Manual
Remote Controller
Page 4
The default setting will be “AP mode”when use Wi-Bridge for the first time. If you
want to make the Wi-Bridge device connect to the wireless network, you can use the
Remote Controller to configure the wireless network or use wireless mouse on
Wi-Bridge to set the configure on LCD TV directly. For more detailed information,
please refer to the “Wireless Network Configuration” (page 11) section.
You are able to connect to the device with the Notebook, PC, smart phone or tablet
after you install the application. For more detailed information, please refer to the
“Windows Control Application”(page 12), “Android Control Application”(page 19)
or “iOS Control Application”sections (page23)
Applications Installation
PC/ NB Application installation under windows system
Step 1. Double click setup application from Wi-Bridge CD.
Step 2. Click the [I Agree] button for license agreement to continue
Step 3. Click the [NEXT] button or the [INSTALL] button to complete the installation.
Additional components will be installed automatically.
Android Application Installation under Android system (Tablet or Smart phone)
Step 1. Access the Android Market and search “Wi-Bridge”application.
Step 2. Select the “Wi-Bridge”application and install it
iOS Control Application Installation under iOS system (Tablet or Smart phone)
Step 1. Access the Apple AppStore and search “Wi-Bridge”application.
Step 2. Select the “Wi-Bridge”application and install it.

Wi-Bridge User Manual
Remote Controller
Page 5
W
Wi
i-
-B
Br
ri
id
dg
ge
e
D
De
ev
vi
ic
ce
e
U
Us
se
er
r
G
Gu
ui
id
de
e
Wi-Bridge Home Screen
After the Wi-Bridge Device has started, the Home Screen will be displayed on your TV.
It shows the current network connection mode and the client device connection
status.
If Wi-Bridge runs in LAN mode and is waiting for the client device to connect, the
Home Screen will be shown as below.
If Wi-Bridge runs in LAN mode and a PC client device is connected, the Home Screen
will be shown as below.
Note: Please connect to AP mode first and switch to Lan mode base on compatible with Windows
Control Application)

Wi-Bridge User Manual
Remote Controller
Page 6
If Wi-Bridge runs in AP mode and is waiting for client device to connect, the Home
Screen will be shown as below.

Wi-Bridge User Manual
Remote Controller
Page 7
Wi-Bridge Configure on LCD Monitor/ TV
You can do some setting the “Configure & Setting Icon”on the Monitor/ TV directly
from wireless mouse for controlling. Because the default mode is “AP mode”, you
can set it on the Monitor/ TV easily. The screen will be shown as below.

Wi-Bridge User Manual
Remote Controller
Page 8
Connect Setting
You can switch the mode from “Connect Setting”.
Please select your wifi hotspot under AP mode and switch it to Lan mode.
If the wireless network is protected with a password, the password Input screen will
be shown. The wireless network information will be shown on the Home Screen;
otherwise, the original connection will be kept and shown on the Home Screen.
Please wait with patient after you selected the wifi hotspot.
Note1: The device name should be in the English alphabets and/or underscores. And its length must
be less than 12 characters long.
Note2: You can select the wifi hotspot under your device connected to Wi-Bridge.
Note3: Please wait with patient when you change to Lan mode or AP mode cause it need some time
to scan the environment.

Wi-Bridge User Manual
Remote Controller
Page 9
System Setting
The Wi-Bridge Device had been set to a default name when it was manufactured.
User can rename the device using the Remote Controller without other control
applications.
Wi-Bridge provides four languages for selecting –English, Simplified Chinese,
Japanese and Traditional Chinese.

Wi-Bridge User Manual
Remote Controller
Page 10
Remote Controller
No.
Button Description
1
Power
2
OK
3
Navigation
(Up, Down, Left, Right)
4
Reserved
5
Return
6
Menu

Wi-Bridge User Manual
Wi-Bridge Windows Control Application
Page 11
Wireless Network Configuration
To configure the wireless network for the Wi-Bridge device, you can follow the steps
listed below:
Step 1. At first, plug in the Wi-Bridge device power adapter to the outlet and turn
on the device. If the device is working, skip this step.
Step 2. When the Home Screen is displayed, press the [Menu] button on the
Remote Controller to show “Application Menu”.
Step 3. Select the “WiFi Setting” item and press the [OK] button on the Remote
Controller to show the available wireless network list.
Step 4. Use the [Up] or [Down] button on the Remote Controller to move the
selection bar.
Step 5. Select the wireless network that you want to connect and press the [OK]
button. If the wireless network is protected with a password, the Password
Input screen will be shown. Otherwise, please go to Step 7.
Step 6. Use navigation buttons to move the selection cursor and press the [OK]
button to input the selected character. After password input is complete, use
the navigation button to locate the [Enter] key and press the [OK] button to
submit the password.
Step 7. The Wi-Bridge device will try to connect to the specified wireless network. If
it is successful, the wireless network information will be shown on the Home
Screen; otherwise, the original connection will be kept and shown on the
Home Screen.
Note: Please wait with patient when you change to Lan mode or AP mode cause it need some time to
scan the environment.

Wi-Bridge User Manual
Wi-Bridge Windows Control Application
Page 12
Device Name Modification
The Wi-Bridge Device had been set to a default name when it was manufactured.
User can rename the device using the Remote Controller without other control
applications.
Step 1. When the Home Screen is displayed, press the [Menu] button on the
Remote Controller to show the “Application Menu”.
Step 2. Select the “System Setting” item and press the [OK] button on the Remote
Controller.
Step 3. Select the “Rename Device”item and press the [OK] button on the Remote
Controller.
Step 4. Use the navigation buttons to move the selection cursor and press the [OK]
button to input the selected character. After name input is complete, use
the navigation button to locate the “Enter” key and press the [OK] button to
submit the name.
Step 5. The Wi-Bridge device will return to Home Screen and the new name will be
shown.
Note: The device name should be in the English alphabets and/or underscores. And its length must be
less than 12 characters long.
Language Setting
The Wi-Bridge Device support English, Simplified Chinese, Traditional Chinese, and
Japanese currently. You can change the system language by using the Remote
Controller.
Step 1. When the Home Screen is displayed, press the [Menu] button on the
Remote Controller to show the “Application Menu”.
Step 2. Select the “System Setting” item and press the [OK] button on the Remote
Controller.
Step 3. Select the “Language”item and press the [OK] button on the Remote
Controller.
Step 4. Use the navigation buttons to move the selection bar to select the target
language item and press the [OK] button to submit.
Step 5. Wait for the system to restart with the selected language.

Wi-Bridge User Manual
Wi-Bridge Windows Control Application
Page 13
W
Wi
in
nd
do
ow
ws
s
C
Co
on
nt
tr
ro
ol
l
A
Ap
pp
pl
li
ic
ca
at
ti
io
on
n
(
(F
Fo
or
r
P
PC
C/
/
N
NB
B)
)
The Wi-Bridge requirements:
The following list describes the recommended system requirements for Wi-Bridge
Windows Control Application installation. Actual system requirements will vary,
depending on system configuration and on the programs that you installed.
Item
System Requirement
OS
Windows 7 32/ 64 bit (Recommended);
Windows XP 32 bit with SP2/SP3
CPU
Dual Core 2.0 GHz or better (Excluding Atom processor);
2nd Generation Intel® Core™ Processors
( Intel® 6 Series - Sandy Bridge platform) is recommended
Memory
1 GB RAM is recommended
HDD
50 MB, 100 MB for running the program
Monitor / TV
1080P Resolution (1920 x 1080 is recommended)
WiFi
802.11n
Run Application
You can double click the “Wi-Bridge Window Control” shortcut icon that is on the
desktop to run the application manually.
If the Windows firewall or other third party firewall applications alert that the
Wi-Bridge Windows Control application requires network access, you should click the
[YES] button to allow the application to connect to the network.

Wi-Bridge User Manual
Wi-Bridge Windows Control Application
Page 14
Set sharing folder
For first time users, the “Local Shared Folder Settings”window will be shown
automatically.
In the “Local Shared Folder Settings”window, you can add or remove the folder that
contains media files you want to play remotely.
Alternatively, you can also set the sharing folder by clicking the [sharing folder
management] button ( ) while the Wi-Bridge Windows Control application is
running.

Wi-Bridge User Manual
Wi-Bridge Windows Control Application
Page 15
Connect Devices to Wi-Bridge
The device list shows all Wi-Bridge devices that the Windows Control application
found. These devices include all devices connected to the same wireless network as
your Windows computer.
Note: The Wi-Bridge wireless network able to connect one device at one time
Click the [Network Switcher] button ( ) to change the wireless network.
Note: If it can’t work, please try to click the wifi list under your computer to link
( )
Click the [Refresh List] button ( ) to refresh the device list.
You can click the device icon ( ) to connect it. The Play window will be displayed
after the device is connected to the Wi-Bridge device.

Wi-Bridge User Manual
Wi-Bridge Windows Control Application
Page 16
Configure the Wi-Bridge Device Wireless Network Connection
In the “Play”Window, open the “Setting”window by clicking the [Setting] button
().
Add your preferred wireless network to the “preferred network list”and switch the
Wi-Bridge device from AP mode to LAN mode.
Note1: You have to set up the Wifi hotspot before you switch to Lan mode under AP mode
Note2: Please wait with patient when you change to Lan mode or AP mode cause it need
some time to scan the environment.
In the “Wireless”tab page, click the [Add] button to show the wireless network list.
Select your preferred network and click the [Connect] button.
If the network is connected successfully, the Wi-Bridge Windows Control application
will disconnect from the device automatically and the Wi-Bridge device will connect
to the preferred network automatically.

Wi-Bridge User Manual
Wi-Bridge Windows Control Application
Page 17
Play Media Files on the Wi-Bridge Device
In the “Play”Window, you can play a media item on the Wi-Bridge device by double
clicking it.
Click the playback control buttons ( ) to control the media item
playback.
Click the loop mode buttons ( ) to switch the loop mode.
Click the rotate buttons ( ) to rotate the photo.
Switch media storage by clicking the item listed in the media server list.
If the USB storage device is inserted into the Wi-Bridge device, these devices will
be listed in the list too.
Media Servers that meet the DLNA standard could also be found in this list. You
can access the content provided by these servers.
Click the category tab buttons ( ) to change the media
category (Movie/Music/Photo).

Wi-Bridge User Manual
Wi-Bridge Windows Control Application
Page 18
Mirror Content on the Wi-Bridge Device
In the “Play”window, you can click the [Mirror] button ( ) to show all the
contents in your Windows computer on the Wi-Bridge device.
There are 2 mirror types: Main Type and Extend Type. If Main Type is selected, the
main screen content will be outputted to the Wi-Bridge device; if Extend Type is
selected, an extend screen will be enabled on the Windows PC and its content will be
outputted to the Wi-Bridge device.
Click the [Main Type] mirror button ( ) to enter the Mirror function and enable
the Main Type. Click this button again to exit the Mirror function.
Click the [Extend Type] mirror button ( ) to enter the Mirror function and enable
the Extend Type. Click this button again to exit the Mirror function.
Click on the [Text Mode] button ( ) to get better performance.
Click on the [Video mode] button ( ) to get better video content playback.
Disconnect from the Wi-Bridge device
In the “Play”window, you can disconnect the Wi-Bridge device by clicking the
[Disconnect] button ( ).
Information & Upgrade
You can click the [Help] button ( ) to visit the ECS website for more details
include SEPC, feature introduce, driver download for upgrade etc.
http://www.ecs.com.tw
Table of contents
Other ECS Adapter manuals
