manuals.online logo
Brands
  1. Home
  2. •
  3. Brands
  4. •
  5. Edelbrock
  6. •
  7. Automobile Part
  8. •
  9. Edelbrock 3722 User manual

Edelbrock 3722 User manual

®
Performer-Plus 5.0L
Hydraulic Roller Lifter Camshaft only
CATALOG #3722
MODEL: 5.0 Litre Ford V8, 1985 & later
INSTRUCTIONS
• PLEASE study these instructions carefully before installing your new camshaft. If you have any questions or problems, do not hesitate to call our
Technical Hotline at: 1-800-416-8628.
• CAMSHAFT: Edelbrock Performer-Plus camshafts are ground specifically for use with the corresponding Performer manifold on engines operat-
ing between idle and 5500 rpm. The Performer 5.0 EFI manifold #3821 and Performer-Plus hydraulic roller lifter camshaft #3722 are designed to
work as a team to give you better driveability and street performance. They are dyno-matched and street-proven. For best results, use the
Edelbrock manifold/camshaft package with the Throttle Body/EGR Plate and headers we recommend. The Performer-Plus hydraulic roller lifter
camshafts are designed for use with stock or Edelbrock Performer aluminum cylinder heads. Edelbrock Performer-Plus cam #3722 is street legal
in all 50 states, E.O. #D-215-14.
NOTE: Maximum performance is achieved only when the Edelbrock Performer 5.0 EFI Power Package components are used with the following
equipment:
• Performer 5.0 EFI manifold/camshaft/timing set/valve springs
• Edelbrock/BBK 70mm Throttle Body #3825 and EGR Plate #3828
• Tubular Exhaust System #6845 or #7945 (1986-93 Mustangs only)
• Edelbrock RPM Series Cat-back Exhaust System #5645 (1987-93 Mustang GT) or #5646 (1986 Mustang GT and 1986-93
Mustang LX)
• IMPORTANT: This instruction sheet provides general installation guidelines which can affect your warranty. Read it carefully. It is not our intent
to cover each detail of installation here; a step-by-step procedure manual would be far too lengthy. We want to caution you that installing a
camshaft is a complicated procedure that requires a good general knowledge of automotive engines. If you are not confident that you can com-
plete the camshaft installation successfully, we suggest you consider having it installed by an experienced mechanic.
CAUTION: Improper installation will result in LOW MILEAGE, POOR PERFORMANCE, COSTLY REINSTALLATION, and ENGINE DAMAGE.
TO AVOID THESE PROBLEMS YOU MUST DO THE FOLLOWING:
Carefully study and understand all instructions.
Examine the camshaft for possible shipping damage (if damaged contact your dealer immediately).
• TOOLS AND EQUIPMENT
❏Use the following checklist for items needed.
❏box and open-end wrenches
❏socket set
❏distributor wrench
❏pliers (channel locks & hose clamp)
❏screw drivers (regular and phillips)
❏torque wrench
❏hammer
❏gasket scraper or putty knife
❏timing light
❏vacuum gauge
❏rags
❏water bucket
❏harmonic balancer puller
• HARDWARE & PARTS TO BUY
❏gaskets- Fel-Pro Printoseal, OEM or equivalent
❏pipe plugs, if needed
❏Edelbrock Gasgacinch, #9300
❏RTV silicone gasket sealer
❏chalk
❏paper and pencil
❏radiator coolant
❏teflon tape
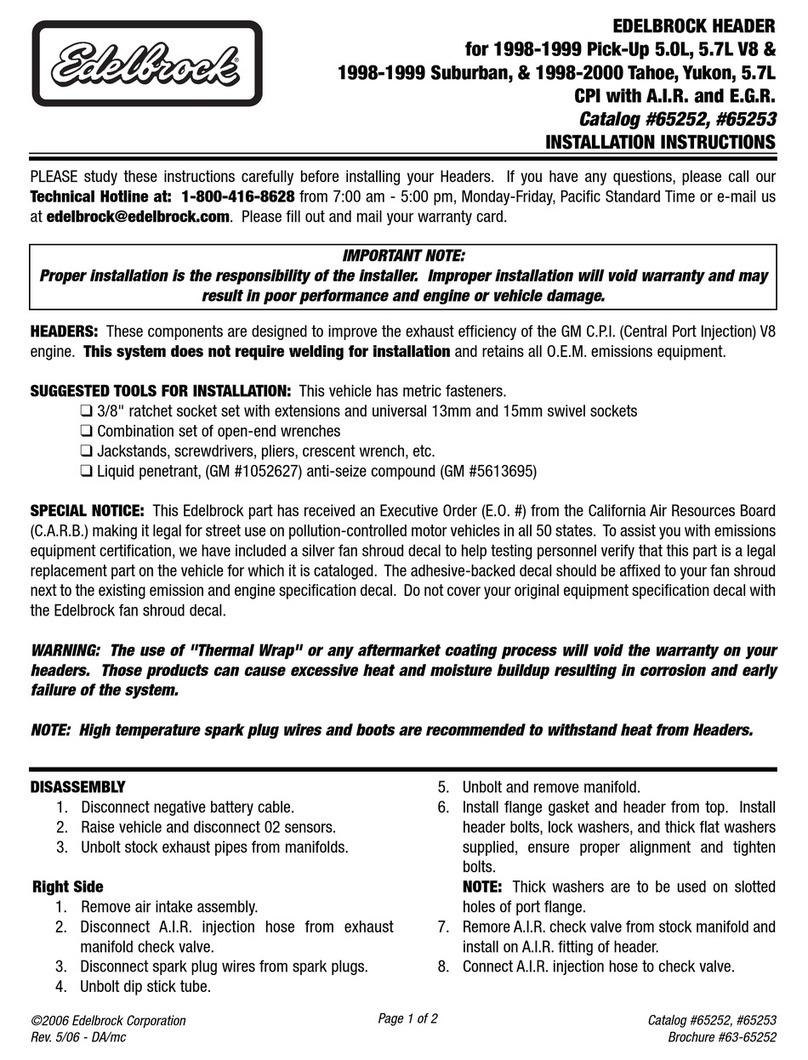
❏Edelbrock Street Legal Performer-Link True Rolling Timing Chain and
Gear Set #7814 or #7811 (for off-road applications)
❏Edelbrock Sure Seat Valve Springs, #5822 or #5922 (for rotators)
❏Intake gasket Fel-Pro #1250
❏Manifold bolt kit #8524
PREPARATION CHECKLIST
page 1
©2008 Edelbrock Corp. Brochure #63-3722
Rev. 9/08 - AJ/mc
INSTRUCTIONS FOR ENGINE PARTS REMOVAL
• BEFORE CAMSHAFT INSTALLATION
• For ease of installation, keep all parts in some sort of order.
WARNING: Do not remove radiator cap or radiator hose if engine is
hot.
1. Disconnect negative battery cable and drain cooling system.
2. Disconnect necessary electrical connections, control cables, link-
ages, vacuum hoses, ventilation hoses, and coolant hoses at throttle
body and manifold. Do not disconnect fuel lines unless
absolutely necessary. Special tooling and procedures are
required to re-install fuel lines. See "Fuel Line Removal and
Installation" Figure 3, page 4.
3. Remove distributor cap and spark plug wires as an assembly. Place
reference mark on distributor for rotor alignment during reassembly.
Remove retaining bolt and distributor.
4. Remove cover plates, retaining bolts, upper intake manifold and gas-
ket. Remove accessory brackets attached to lower manifold. Remove
heater tube assembly from lower manifold. Remove retaining bolts,
lower manifold, gaskets, and seals.
5. Remove fuel pump.
6. Remove rocker arms and pushrods.
7. Remove old valve lifters.
8. Remove crankshaft pulley and, using a suitable puller, crankshaft
dampener.
9. Loosen oil pan and remove front cover.
NOTE: The front cover oil seal should be replaced before the front
cover is re-installed.
10. Rotate engine until timing marks are aligned as shown in Figure 2.
11. Remove cam sprocket bolts. Slide sprocket and timing chain forward
to remove.
12. Remove camshaft. Using appropriate gear puller, remove crank
sprocket.
• VALVE SPRINGS
CAUTION: WARNINGS ABOUT YOUR WARRANTY
In order for this Performer-Plus cam to be covered under ANY WAR-
RANTY you MUST use the correct Edelbrock Sure Seat Valve Springs
or equivalent. Failure to install new Edelbrock valve springs or equiv-
alent with your new Performer-Plus cam could cause the cam lobes
to wear excessively and could cause additional engine damage.
1. This camshaft is designed to function with Edelbrock Sure Seat valve
springs #5822 or #5922 (for rotators). Do not use dual valve springs
with this camshaft.
• LIFTERS
1. The original hydraulic roller lifters should be used with this
camshaft. Inspect each lifter for unusual wear and replace as need-
ed with new original equipment Ford or SVO lifters.
2. Check to be sure that all lifters fit freely in the lifter bores.
• INSTALLATION INSTRUCTIONS
1. Coat cam lobes and rollers of each lifter with MoS2 lube (supplied)
to prevent cam lobe and lifter wear from occurring during initial
start-up.
2. Install new camshaft with new sprockets, timing chain and lifters.
CAUTION: Use Edelbrock Street Legal Performer-Plus True Rolling
Timing Chain and Gear Set #7814. Do not use late model timing
chain & gear sets that are designed in a retarded position and are
not recommended for this camshaft installation. Edelbrock Street
Legal Timing Sets feature a single keyway for accurate timing selec-
tion. Use locking compound material on the bolt threads holding tim-
ing gear to cam. Torque to 35 ft./lbs. or factory recommendations.
Install camshaft with timing marks lined up as recommended by fac-
tory specifications. See Figure 2.
When using Performer-Plus Timing Chain Sets (#7814 or #7811)
with Edelbrock cam and lifter kits, straight up timing alignment is
achieved. If any other timing gear set is used, it is necessary to
check cam position for correct timing alignment. This requires
indexing the camshaft with a degree wheel to verify timing align-
ment. O.E.M. or non-Edelbrock timing gear sets are not recommend-
ed for use with Edelbrock camshafts.
• INSTALLING PUSHRODS AND ROCKER ARMS
After the cam is installed and timed correctly (see Figure 2), it will be
necessary to check each pushrod for correct lifter pre-load. Before
installation, be sure to coat friction surfaces of pushrods, rocker
arms and pivots with a suitable lubricant such as motor oil or
assembly lube.
• VALVE ADJUSTMENT
1. Turn the engine over until the No. 1 cylinder is at Top Dead Center
(TDC) on the compression stroke (both lifters will be at the bottom of
their travel in the lifter bores). Install both intake and exhaust
pushrods, rocker arms, rocker arm pivot, and rocker arm bolts.
Carefully tighten bolts while feeling pushrods for vertical clearance.
As soon as all vertical clearance is gone from pushrods, count num-
ber of turns until bolts bottom out. There should be 1/2 to 1 full turn
of lifter pre-load. If vertical clearance exists after bolts bottom out,
longer-than-stock pushrods are required. They are available from
Ford dealers or other pushrod suppliers. If excessive lifter pre-load
exists, use shims under rocker arm pivots to achieve 1/2 to 1 turn
pre-load.
2. The above procedure assures correct lifter pre-load. Repeat this pro-
cedure for each of the other seven cylinders by rotating the engine
90° and following the firing order (1-3-7-2-6-5-4-8).
3. Re-install front cover, fuel pump, water pump, and oil pan using new
gaskets.
4. Install intake manifold using new intake gasket set and torque mani-
fold bolts to 25 ft./lbs.
5. Install crankshaft dampener and torque to 70-90 ft./lbs.
• INSTALLING DISTRIBUTOR AND TIMING ENGINE
NOTE: Before installing your distributor, check the gear drive on the
distributor and oil pump for any signs of wear. If worn, be sure to
replace with new or you may wear out your camshaft prematurely.
This is especially true when rebuilding your engine and a high per-
formance oil system is used, which generates a heavier load on the
camshaft gear system. Edelbrock camshafts are designed to use
OEM-type gears only.
1. Turn the engine over in the direction of rotation until the No. 1 intake
valve closes and continue until the pointer on the front cover is
approximately 5 degrees BTDC.
2. Re-install the distributor with the rotor pointing towards No. 1 termi-
nal in the cap, and with the vacuum advance canister in its original
position.
3. Lightly tighten the hold-down clamp so that the distributor can still
be turned to determine final setting using a timing light with the
engine running.
page 2
©2008 Edelbrock Corp. Brochure #63-3722
Rev. 9/08 - AJ/mc
4. Replace valve covers, carburetor linkage and remaining vacuum and
electrical connections.
5. Re-install air conditioner, if so equipped.
6. Refill radiator with coolant and re-connect battery.
7. Double check all connections, fuel lines, etc. before starting engine.
Figure 2-
Timing Chain Sprocket Alignment
• CAMSHAFT/LIFTER RUN-IN
CAUTION: Change the engine oil and filter before start-up.
1. No break-in is required with roller lifters.
IMPORTANT INSTRUCTIONS AFFECTING YOUR WARRANTY
• CAM LOBE WEAR- Cam lobe wear is almost non-existent unless
mismatched parts are used or installation of the cam and lifters is
done improperly. Most cam damage is caused by the timing gear
coming loose due to improper torque on bolt. Bolts holding gear to
camshaft should be torqued carefully and a locking compound
applied to threads of bolts.
• CAM GEARS AND CAMSHAFT END PLAY- If cam gear becomes
loose, the cam will slide back in the block, causing the lifters to hit
the lobes next to them and also the cam bearing journals. If the
engine is run after this happens, the bottom of the lifters and the
sides of the lobes will become chipped.
When installing a camshaft, it is always important to check for prop-
er operating clearances, especially when high performance compo-
nents are used. Things to look for that can cause failure and dam-
aged parts are as follows:
1. Improper valve-to-piston clearance (this should be no less than
0.080”).
2. Rocker arm stud slot clearance (both ends; valve closed and open).
3. Proper spring settings (see dimensions with spring instruction sheet;
correct dimensions mean maximum performance and longer engine
life).
• IGNITION TIMING
Ignition timing for this package may vary with each application. Best
results were obtained using stock Ford timing setting specified for
your year and model vehicle (10° BTDC initial). NOTE: The best com-
bination for any particular vehicle or application must be determined
by trial and error using the above information as a guideline.
• HEADERS
For best performance, headers are recommended. Edelbrock Tubular
Exhaust System #6845 or #7945 is a street legal replacement part
for 1986-93 Mustangs with the 5.0L V8. RPM Series Cat-back
Exhaust systems are also available featuring mandrel-bent tubing
and free-flowing RPM Series stainless steel mufflers. Use Edelbrock
RPM Series Cat-back Exhaust System #5645 (1987-93 Mustang GT)
or #5646 (1986 Mustang GT and 1986-93 Mustang LX).
• WARNING
In order for this Performer-Plus cam to be covered under ANY WAR-
RANTY you MUST use the correct Edelbrock Sure Seat Valve Springs
or original equipment replacements. The end flap or label from your
Sure Seat Valve Spring box must be sent in with your camshaft war-
ranty card.
Failure to install new Edelbrock Sure Seat Valve Springs with your
new Performer-Plus cam could cause the cam lobes to wear exces-
sively and could cause additional engine damage. IF YOU HAVE ANY
QUESTIONS ABOUT THIS APPLICATION, PLEASE CONTACT OUR
TECHNICAL DEPARTMENT IMMEDIATELY.
Timing
Marks
Figure 1—5.0 Litre Ford
Firing Order 1-3-7-2-6-5-4-8
Turn Distributor Clockwise to Advance Timing
page 3
• SPECIAL NOTICE: Edelbrock Performer-Plus camshaft kit #3722 has
received E.O. #D-215-14 making it legal for street use on pollution-
controlled motor vehicles in all 50 states. To assist you with emis-
sions equipment certification, we have included a fan shroud decal to
help testing personnel verify that the camshaft is a legal replacement
part for 5.0L Ford vehicles. The adhesive-backed decal should be
affixed to your fan shroud next to the existing emission and engine
specification decal. Do not cover your original equipment specifica-
tion decal with the Edelbrock Performer-Plus camshaft decal.
©2008 Edelbrock Corp. Brochure #63-3722
Rev. 9/08 - AJ/mc
page 4
CAUTION: Fuel system is under pressure. Pressure must be
released before servicing fuel system components.
1. Remove fuel cap to release fuel tank pressure. Using EFI pressure
gauge (T80L-9974-B), release fuel pressure from fuel pressure
relief on fuel rail.
2. Before disconnecting fuel lines, disconnect negative battery cable.
To disconnect fuel lines, remove retaining clip from outside of fuel
line coupling.
3. Use Spring Lock Coupling Remover (D87L-9280-A) for 3/8" line or
(9D87L-9280-B) for 1/2" line. Install spring lock coupling remover
on fuel line coupling so it enters cage opening. See Figure 3.
4. Push spring lock coupling remover into cage opening to release
female fitting from garter spring. Pull couplings apart. Remove
spring lock coupling remover.
Figure 3
Disconnecting Fuel Lines
• FUEL LINE REMOVAL AND INSTALLATION (Optional; Do Not remove fuel lines unless necessary)
5. To install fuel lines, install new O-rings on fuel lines. Use only
specified fuel resistant brown O-rings. Before installing, lightly coat
O-rings with clean engine oil. Clean fittings and replace garter
spring (if necessary).
6. Fit female fitting to male fitting and push until garter spring snaps
over flared end of female fitting. Ensure lines are locked together
and garter spring is over female fitting flared end.
7. Install retaining clip. Ensure horseshoe portion of clip is over cou-
pling. DO NOT install retaining clip over rubber fuel line.
NOTE: Black retaining clip should be installed on fuel supply line
and Gray clip on fuel return line.
©2008 Edelbrock Corp. Brochure #63-3722
Rev. 9/08 - AJ/mc
• CAMSHAFT: Performer-Plus 5.0L
• CATALOG #3722
• ENGINE: Ford 5.0L V8, 1985 & later
• RPM RANGE: idle-6000
• CAUTION: Use only recommended stock or Edelbrock Sure
Seat Valve Springs #5822 or #5922 (for rotators).
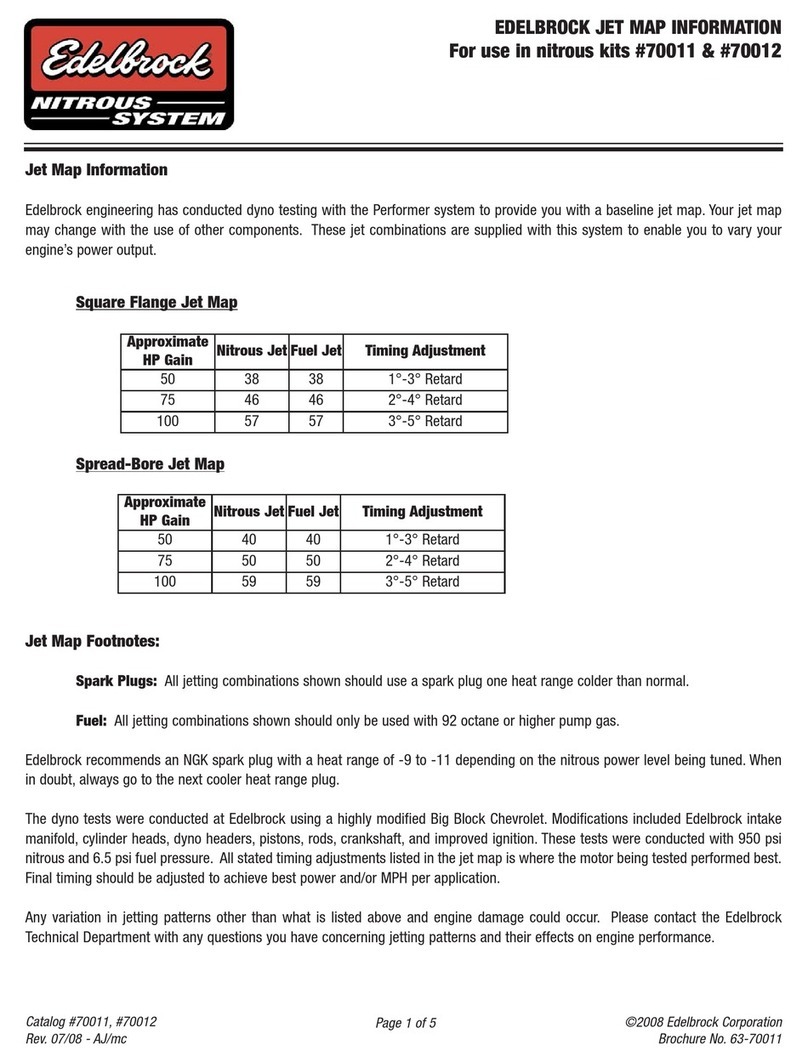
Duration at .004" Lift: Intake 282° Exhaust 282°
Duration at .050" Lift: Intake 220° Exhaust 220°
Lift at cam: Intake .311" Exhaust .311"
Lift at valve: (w/1.6:1 ratio) Intake .498" Exhaust .498"
Timing at .050 Lift:
Open Close
Intake 0° BTDC 40° ABDC
Exhaust 40° BBDC 0° ATDC
• CENTERLINES
Lobe Separation angle: 110°
Intake Centerline: 110°
• CAUTION: Use Edelbrock Street Legal Performer-Link Timing
Chain and Gear Set #7814. Do not use late model timing chain
and gear sets that are designed for emission-controlled
engines. These timing sets are machined in a retarded position
and are not recommended for this camshaft installation.
Edelbrock Street Legal Timing Sets feature one keyway for
accurate timing selection.
®

Other Edelbrock Automobile Part manuals

Edelbrock 16211-MBN-640 Owner's manual

Edelbrock

Edelbrock 16211-MBN-640 Owner's manual

Edelbrock Victor Series 6570 User manual

Edelbrock

Edelbrock Victor Series 6570 User manual

Edelbrock Performer IAS User manual

Edelbrock

Edelbrock Performer IAS User manual

Edelbrock 3821 User manual

Edelbrock

Edelbrock 3821 User manual

Edelbrock 60469 User manual

Edelbrock

Edelbrock 60469 User manual

Edelbrock 71003 User manual

Edelbrock

Edelbrock 71003 User manual

Edelbrock 1901 User manual

Edelbrock

Edelbrock 1901 User manual

Edelbrock 1799 User manual

Edelbrock

Edelbrock 1799 User manual

Edelbrock 5791 User manual

Edelbrock

Edelbrock 5791 User manual

Edelbrock 5247 User manual

Edelbrock

Edelbrock 5247 User manual

Edelbrock Ford Mustang 17931 User manual

Edelbrock

Edelbrock Ford Mustang 17931 User manual

Edelbrock 65272 User manual

Edelbrock

Edelbrock 65272 User manual

Edelbrock 66252 User manual

Edelbrock

Edelbrock 66252 User manual

Edelbrock 68832 (Ceramic-Coated) User manual

Edelbrock

Edelbrock 68832 (Ceramic-Coated) User manual

Edelbrock 6009 User manual

Edelbrock

Edelbrock 6009 User manual

Edelbrock Russell 694540 User manual

Edelbrock

Edelbrock Russell 694540 User manual

Edelbrock 262-400 User manual

Edelbrock

Edelbrock 262-400 User manual

Edelbrock Performer 70060 Technical manual

Edelbrock

Edelbrock Performer 70060 Technical manual

Edelbrock 5644 (Aluminized) User manual

Edelbrock

Edelbrock 5644 (Aluminized) User manual

Edelbrock 63-65903 User manual

Edelbrock

Edelbrock 63-65903 User manual

Edelbrock 2161 User manual

Edelbrock

Edelbrock 2161 User manual

Edelbrock Chevrolet 5783 User manual

Edelbrock

Edelbrock Chevrolet 5783 User manual

Edelbrock 67452 User manual

Edelbrock

Edelbrock 67452 User manual

Edelbrock 94 User manual

Edelbrock

Edelbrock 94 User manual

Popular Automobile Part manuals by other brands

Brink 5426 Fitting instructions

Brink

Brink 5426 Fitting instructions

Murphy MLA20 installation instructions

Murphy

Murphy MLA20 installation instructions

Atwood MPD 87850 Installation and operation manual

Atwood

Atwood MPD 87850 Installation and operation manual

Jeep PBUJ7486 instructions

Jeep

Jeep PBUJ7486 instructions

Ridewell Suspensions RAR-200 Installation and service manual

Ridewell Suspensions

Ridewell Suspensions RAR-200 Installation and service manual

Holley NOS 05177NOS owner's manual

Holley

Holley NOS 05177NOS owner's manual

Mitsubishi F4A4 Workshop manual

Mitsubishi

Mitsubishi F4A4 Workshop manual

Bosch ESHCK installation manual

Bosch

Bosch ESHCK installation manual

BBK 1841 installation instructions

BBK

BBK 1841 installation instructions

Murphy Lube Level Maintainer LM2000 Specifications

Murphy

Murphy Lube Level Maintainer LM2000 Specifications

Vintage Air 571064 manual

Vintage Air

Vintage Air 571064 manual

Ryobi AC04150T user manual

Ryobi

Ryobi AC04150T user manual

ICON 51200 instructions

ICON

ICON 51200 instructions

ICON 51201 installation instructions

ICON

ICON 51201 installation instructions

SAF-HOLLAND B9 Maintenance Instruction

SAF-HOLLAND

SAF-HOLLAND B9 Maintenance Instruction

Parker VO40 technical information

Parker

Parker VO40 technical information

Dodge 8W-43 Wiring diagram

Dodge

Dodge 8W-43 Wiring diagram

Westin 27-1705 instructions

Westin

Westin 27-1705 instructions

manuals.online logo
manuals.online logoBrands
  • About & Mission
  • Contact us
  • Privacy Policy
  • Terms and Conditions

Copyright 2025 Manuals.Online. All Rights Reserved.