Ridewell Suspensions RAR-200 Manual

RAR-200-Trailer-ISM-RevA-06-07-18 Page 1 ENG
Installation and Service Manual
RAR-200
Air Ride Trailer Suspension
Suspension Identication..................................... 2
Suspension System/Axle Serial Tag
Installation ............................................................. 3
Prior to Installation
Axle Integration
Axle Weld Standards
Suspension Mounting
Troubleshooting - HCV Installation
Maintenance .......................................................... 8
Recommended Service Intervals
Parts Illustration
200- Trailer Suspension
Bushing Replacement Kit
Torque Specications
Bushing Replacement Procedure
Axle Alignment
Warranty............................................................... 12
Part No.: 9710121
Doc: 200-Trailer-
ISM--RevA-06-07-18

ENG Page 2 RAR-200-Trailer-ISM-RevA-06-07-18
Gross Axle WeiGht rAtinG CertifiCAtion is per the finAl stAGe
mAnufACturer or Alterer.
this produCt mAy be Covered under one or more pAtents.
AdditionAl pAtents mAy be pendinG.
for more informAtion on pAtent or suspension/Axle CApACity rAtinG
ContACt rideWell CorporAtion.
www.ridewellcorp.com (800) 641-4122
PART NO:
SERIAL NO:
Figure 1. The Suspension Serial Tag is located on
the left-hand (driver’s side) suspension hanger.
MODEL: PART NO.
SERIAL NO. CAPACITY TON
Introduction
It’s important that the proper suspension model be
chosen for the application in which it is to be used.
The Ridewell model RAR-200 suspension is designed
to accommodate a range of ride heights for each
specic model and can be used on a variety of axle
types for various applications. The suspension can be
purchased with or without an integrated axle.
Refer to the engineering drawing for detailed infor-
mation on the suspension system components and
operating parameters.
Read through the entire Installation and Service
Manual (ISM) before performing any installation or
maintenance procedures.
Identication Tag
Ridewell suspension systems and axles can be identi-
ed by the Part and Serial Number listed on the serial
identication tags.
Suspension Serial Tag
The Suspension Serial Tag provides information on
the suspension model (Figure 1).
The Part Number (200xxxx) refers to the individual
model of the suspension system.
The nine-digit Serial Number (1xxxxxxxx) refers to
the date and order of manufacture of the suspension.
Please refer to both the part number and serial num-
ber when contacting Ridewell for customer service,
replacement parts and warranty information.
Axle Body - Serial Tag
Ridewell-branded axles will have a tag aached to
the axle tube listing the Part Number (165xxxx) and
Serial Number of the axle body (Figure 2).
Notes and Cautions
All work should be performed by a properly trained
technician using the proper/special tools and safe
work procedures.
The ISM uses two types of service notes to provide
important safety guidelines, prevent equipment dam-
age and make sure that the suspension system oper-
ates correctly. The service notes are dened as:
“NOTE”: Provides additional instructions or
procedures to complete tasks and make sure that
the suspension functions properly.
Indicates a hazardous situation or
unsafe practice that, if not avoided, could result
in equipment damage and serious injury.
SUSPENSION IDENTIFICATION
Figure 2. Ridewell axles have a serial identication
tag listing the Part Number (165xxxx) and Serial
Number of the axle body.

RAR-200-Trailer-ISM-RevA-06-07-18 Page 3 ENG
INSTALLATION
Installer Responsibilities
The installer of the suspension has the sole responsi-
bility for proper aachment of the suspension system
to the vehicle chassis.
• The installer is responsible for locating the sus-
pension system on the vehicle to provide the
proper load distribution.
• The installer must verify that vehicle crossmem-
bers are positioned to support the suspension at
the installing location.
• It is the installer’s responsibility to determine that
axle spacing conforms to any applicable federal
and local bridge laws.
• The installer must verify that air reservoir volume
requirements are met after suspension installa-
tion. Consult the vehicle manufacturer or Federal
Motor Vehicle Safety Standards (FMVSS) 121 for
more information.
• The installer must verify there is sucient clear-
ance for proper functioning of the suspension, air
springs, brake chambers, axle and tires.
Prior to Installation
Refer to the engineering drawing to conrm dimen-
sional requirements and the range of ride heights
available.
The suspension is designed to t up onto standard
I-beam trailer frames at beam centers that correspond
to standard axle track widths (Figure 3).
Installation at wider beam centers will reduce sus-
pension clearances. Installation at narrower beam
centers will de-rate the axle beam capacity. NOTE:
For non-standard beam centers, frames, frame cen-
ters, axle track widths and wheel-end equipment, the
installer is responsible for verifying clearances, axle
capacity, proper t-up, and any additional required
support structure.
Installations can vary and procedures should be
adapted for dierent vehicles, as needed.
• The Gross Axle Weight Rating (GAWR) is deter-
mined by the system component with the lowest
load rating. Please consult with tire, wheel, axle
and brake manufacturers before installation to
determine the GAWR.
• If vehicle chassis modications are required, con-
sult with the vehicle manufacturer to ensure that
such changes are permied.
• Welding or altering suspension components
is not permied without the express wrien
permission of Ridewell Suspensions.
Trailer Width Axle Track Width Frame Center Beam Center Air Spring Center
96” 71.5” 38” 35” 31”
102” 77.5” 44” 41” 37”
Figure 3. Standard Trailer Dimensions

ENG Page 4 RAR-200-Trailer-ISM-RevA-06-07-18
Figure 4.
Axle should be centered between beams with
beams and axle perpendicular to each other. Refer
to the engineering drawing for measurements.
Figure 5.
Correct axle tube seating for welding.
Suspension systems are available with and without a factory integrated axle. Customer-supplied axle assem-
blies must be positioned and oriented (rotated) properly before welding the axle to the axle seats.
Axle Integration
Use the top-center mark on the axle, if available, to
identify the center of the axle and orient the axle as-
sembly on the suspension. The axle assembly should
be installed so that the camshafts, when activated,
rotate in the same direction as the wheels.
Failure to follow procedures and design
specications could result in injury, damage to the
axle or suspension and void the warranty.
Weld Preparation
The joint to be welded should be positioned in the
at or horizontal position. All grease, dirt, paint, slag
or other contaminants must be removed from the
weld joint.
The axle and suspension components should be at a
minimum temperature of 60°F (15.5°C). Pre-heat the
weld zone to the axle manufacturer’s recommended
pre-heat temperature, if required.
Weld Procedure
Ridewell recommends supporting the axle and sus-
pension with a weld xture during axle integration.
Contact Ridewell Customer Service for the correct
weld xture for your suspension model.
1. Center the axle assembly on the beam centers
(Figure 4).
2. Check the engineering drawing for the brake
component orientation (rotation) before clamping
into place and making the nal welds.
2.1 Drum brake camshafts are spaced o the tail
of the trailing arm beam. Make sure the brake
chamber brackets are oriented properly and
clamp the axle assembly into place.
2.2 Disc brake assemblies have a right- and
left-hand caliper assembly. Make sure the
callipers are located on the correct side and
rotated to the proper position before clamping
the axle assembly into place.
3. Check the gap between the axle and the axle seats
before welding (Figure 5). Side gaps should be
no greater than 1/8”. The gap at the boom of the
axle seat should be no greater than 1/16”.
4. Weld the axle to the seat according to Ridewell
Weld Process #1 (Page 5).
Axle centered between
beam centers
Pivot centers
are lined up

RAR-200-Trailer-ISM-RevA-06-07-18 Page 5 ENG
SHEET OF
RIDEWELL CORPORATION
PO BOX 4586 SPRINGFIELD, MISSOURI 65808
A-SIZE:
SCALE:
MATERIAL:
PROJECT NO:
APPROVED:
DRAWN BY:
CHECKED:
TITLE:
WEIGHT:
R
REV:
PART NO:
WELD PROCESS #1
RIDEWELL WELD PROCESS #1,
5" DIA. AXLE, 3 PASS WELD
CBC
2/1/2016
MDJ 2/21/2003
CJB 2/21/2003
03103
11
--
NTS
WELD JOINT PREPARATION FIRST PASS SECOND PASS THIRD PASS
3.0°
4.0°
NO WELD
TOP OF AXLE
NO WELD
BOTTOM
OF AXLE
NO WELDING ZONE
SMAW GMAW / FCAW
AXLE
BEAM AXLE SEAT
AXLE
BEAM AXLE SEAT
AXLE
BEAM AXLE SEAT
1/8" MAX
REPRESENTATIVE AXLE SEAT (PROFILE DEPENDENT ON SUSPENSION PRODUCT)
ARC STOP
ARC START
ARC STOP
ARC START
AXLE
BEAM AXLE SEAT
1.0 TYP 1.0 TYP
FIRST PASS FIRST PASS
SECOND PASS SECOND PASS
THIRD PASS THIRD PASS
REV PROJECT DESCRIPTION DATE BY CHK APPD
3/8"
ROOT
PASS
THIRD
PASS
1/2"
1/2"
SECOND
PASS
E 15101
REVISED TEXT. REMOVED LIST OF MODELS.
6/30/15 G.H. MDJ CJB
1- CAUTION: All welds must be kept away from the top and bottom of the axle where maximum stresses occur
(see “NO WELDING ZONE” illustration above). Do not test-weld the arc on any part of the axle tube.
2 - All welders and welding operators should be certified as per the requirements of the American Welding Society (AWS)
or equivalent. All electrodes used should meet the AWS specifications and classifications for welding carbon
and low-alloy steels.
3 - Recommended Welding Methods: Shielded Metal Arc Welding (SMAW), Gas Metal Arc Welding (GMAW) or Flux
Cored Arc Welding (FCAW). The welding method used and the electrode selected must develop a minimum weld
tensile strength of 70,000 psi per AWS specifications. The best fusion and mechanical properties will be obtained by
using the voltage, current, and shielding medium recommended by the electrode manufacturer. If the SMAW method
is used, the stick electrodes must be new, dry, free of contaminants and stored per AWS specifications.
4 - Weld Joint Preparation: The joint to be welded should be positioned in the flat or horizontal position. All grease, dirt, paint,
slag or other contaminants must be removed from the weld joint without gouging the axle tube. CAUTION: Never weld
when the axle is cold. The axle and beam assemblies to be welded should be at a temperature of at least 60°F (15°C).
Pre-heat the weld zone to the axle manufacturer's recommended pre-heat temperature, if required. This will reduce
the chance of an area of brittle material forming adjacent to the weld.
5 - The axle should fit into the beam assembly with a maximum root gap of 1/8-inch between the axle and the beam axle seat
(see “WELD JOINT PREPARATION” illustration above).
6 - NOTE: Clamp the axle to the beam axle seat with a C-clamp prior to welding to make sure that proper contact occurs
(see “CORRECT” illustration below).
7 - Ground the axle to one of the attached axle parts such as the brake chamber brackets, cam brackets or brake
spider. Never ground the axle to a wheel or a hub as the spindle bearing may sustain damage.
8 - Multiple pass welding should be used on the beam/axle connection using the following guidelines: 8.1-Total fillet weld size
should be 1/2-inch. 8.2-Weld pass starts and stops should be performed as illustrated above. 8.3-Never start or stop welds
at the end of the weld joint. 8.4-Each pass must be accomplished in one or two segments. 8.5-Start welds at least 1-inch
from the end and backweld over the start. Backstep fill all craters. 8.6-If process is not GMAW all slag must be removed
between passes.
8.7-Welds must go to within 1/8-inch +/- 1/16-inch of the ends of the axle seat and must not go beyond or around the ends
of the axle seat. 8.8-Post-weld peening is recommended, but not required: Needle peen the entire toe of the second pass,
including around the ends of the axle seat. Hold the needles perpendicular to the axle. A uniform dimpled pattern
will appear when properly peened.
F 16101
ADDED MAXIMUM TO 5, ADDED GMAW NOTE TO 8.6
2/10/2016 G.H. B.B. CJB
UPDATED CORRECT VIEWS
F

ENG Page 6 RAR-200-Trailer-ISM-RevA-06-07-18
Mounting the suspension to the frame
Refer to the engineering drawing for the range of ride
heights available, torque values, spacing and clear-
ance requirements of the suspension.
Recommended locations of customer-furnished ller
plates and supporting crossmembers for the suspen-
sion hangers and air spring mounting plates are
shown on the engineering drawing.
The suspension installer has the nal responsibility
of aaching the suspension to the vehicle frame.
Weld-On Installation Procedure
Welding method must use a minimum weld
tensile strength of 70,000 psi, per AWS specications.
1. Mark the desired location of the hangers and
ller plates on the vehicle frame. Hangers must
be installed parallel to each other for proper axle
alignment.
2. Mark the desired location of the air spring
mounting plates and ller plates on the frame.
3. Install ller plates for the hangers and air spring
mounting plates on the frame. Weld ller plates
to crossmembers with ¼” llet welds down the
length of the crossmember.
4. Weld the hangers to the frame/ller plates with
1/4” llet welds completely around the hangers.
Stop the welds 1/2” from the corners and edges.
4.1 For hangers with wing gussets, the wing
gussets must be welded to a crossmember or
other supporting structure.
4.2 A length of 1 1/2”-diameter pipe can be
placed through the holes in the two hangers
to help with stabilization and alignment.
5. Weld the air spring mounting plates to the frame/
ller plates with 3/16” llet welds.
6. Aach a crossmember or diagonal brace to the
front of the hangers with 1/4” llet welds.
Bolt-On Installation
Before installation, check to make sure that wires,
hoses or other components will not be aected by
drilling into the frame rail.
• Bolts/nuts for aaching the suspension to the
vehicle are supplied by the installer. Grade 8 bolts
and anged lock nuts or lock nuts with hardened
washers are recommended.
• Bolt holes are not provided in the air spring
mounting plates. Clamp mounting plates and
ller plates (if necessary) in place before drilling.
Final Assembly and Inspection
• Verify the welds of the hanger and air spring
mounting plates.
• Check the location for sucient clearances of
suspension components.
• Aach beam and axle assemblies to hangers.
Note: Do not fully torque pivot hardware until
axle alignment is completed.
• Complete assembly and installation of air springs
as shown on the engineering drawing. Torque to
specications (Page 10).
• Install shock absorbers. NOTE: If the suspension
is painted after shocks are installed, make sure
paint overspray does not get under the shock
absorber dust covers.
• Install/connect the height control valve (HCV), if
applicable (Page 7). Check the air system tubing
and ings after installation for leaks.
• Verify the suspension ride height is adjusted
within the range shown on the engineering
drawing and complete axle alignment procedure
(Page 11).
Failure to torque bolts/nuts of suspension
components to specications can result in failure of
the suspension and void the warranty.

RAR-200-Trailer-ISM-RevA-06-07-18 Page 7 ENG
Install the height control valve
The Ridewell Extreme Air® Height Control Kit (HCK) automatically adds and exhausts air from the air sus-
pension to maintain the vehicle ride height as loads increase and decrease. The (HCK) assembly consists of a
lever arm connected to the height control valve (HCV) and a vertical rod arm (vertical linkage) connected to
the suspension/axle (Figure 6).
Refer to the Extreme Air® installation guide for installation procedures. Be sure to check the air system after
installation for leakage. The installer is responsible for making sure that air system requirements com-
ply with the appropriate Federal Motor Vehicle Safety Standards.
Pressure Protection Valve (PPV)
(Required with air brakes)
Air Tank
Height Control Valve (HCV)
Lever Arm &
Vertical Link
Figure 6.
Example of single Height Control Valve (HCV) installation on
vehicle frame with linkage attached to the axle.
Height Control Valve (HCV)
Universal
Mounting
Bracket
Vertical Link
Lever
Arm
Troubleshooting – Height Control Valve Installation
Problem Possible Cause Corrective Action
HCV is
not receiving air/
HCV is not
delivering air
to the air springs.
— Blocked air supply line.
— Air tank is not filling/
reaching set pressure.
— Pressure Protection
Valve (PPV) not working
correctly.
— Pilot port is not
plumbed or is plumbed
incorrectly.
— Verify air lines are pressurized by removing
supply line at HCV. Check for pinched lines.
— Verify air tank pressure with manual/in-line
pressure gauge.
— Check PPV operation by making sure that valve
opens when system reaches the desired pressure
setpoint (usually greater than 70 psi).
— Check HCV configuration – Non-Dump; Pressure-
Dump (Normally Open); Zero-Pressure Dump
(Normally Closed). Reinstall, if necessary.
Air springs ll
but do not exhaust.
— Obstructed air line.
— HCV installed
backwards.
— Supply line installed in
suspension port
— Disconnect linkage and rotate actuating lever
to down position (exhaust). If springs remain
inflated, check for pinched/blocked lines.
— Check installation. Reinstall, if necessary.
— Move air supply line to HCV supply port.
Air system leaks
down in a short
period of time.
— HCV installed
backwards.
— Leak in air system
beyond accepted
standards.
— Disconnect HCV linkage and rotate actuating
lever to the up position (fill). If air springs do
not inflate, reinstall HCV.
— To find leak in the HCV area, pressurize system
and spray soapy water solution onto the valve
and lines. Check for bubbles (leaks):
No leak found – Do not remove valve, check
the rest of the system for leaks.
Check that tubing cuts are straight and smooth.
Re-cut and reassemble if necessary.

ENG Page 8 RAR-200-Trailer-ISM-RevA-06-07-18
MAINTENANCE
A visual inspection of the suspension structure should be performed during each pre-trip/safety inspection.
Ridewell Suspensions recommends the following minimum service intervals for standard duty, on-highway
usage applications. More frequent intervals are recommended for heavier duty applications.
Daily/Pre-Trip Inspections
___ Check tires for proper ination, damage or
excessive wear.
___ Check wheel-ends for obvious signs of lubricant
leakage. Check for missing components.
___ Check
axle assemblies for damage or loose
components.
___ Visually inspect suspension structure for signs
of damage or excessive wear.
___ Check for loose or missing bolts/nuts. Check for
irregular movement in suspension components.
___ Make sure air controls are operating properly.
Drain all moisture from air reservoirs.
First 6,000 miles of use
___ Torque all suspension component bolts/nuts to
specications (pg 10/Engineering drawing).
___ Verify that the suspension is operating at the
installed ride height.
Every 12,000 miles of use
___ Inspect air springs for any damage or excessive
wear. Torque air spring bolts/nuts to specications
(pg 10/Engineering drawing).
___ Check air lines and connections for leaks.
Every 50,000 miles of use
___ Torque all suspension component bolts/nuts to
specications (pg 10/Engineering drawing).
Annually/100,000 miles of use
___ Inspect pivot connection for worn pivot bushing
and wear washers. Replace components, if neces-
sary. Torque suspension component bolts/nuts to
specications (pg 10/Engineering drawing).
___ Check arm beam-to-
axle connection welds.
___ Check lubrication level in wheel ends:
1) Oil-Filled Wheel Ends:
Refill/Replace lubricant as needed (Refer to
TMC RP 631 “100K/Annual Inspection”).
2) Semi-Fluid Grease:
Pull outer bearing and visually inspect lubrica-
tion level. Rell/Replace as needed
(Refer to TMC RP 631 “Level 3 Lubrication Level
Inspection” and TMC RP 618 “Wheel Bearing
Adjustment Procedure”).
___ Check air lines and connections for leaks.
___ Test air control system pressure protection valve
(PPV), if equipped.
___ Check height control valve (HCV) adjustment.
___ Verify that the suspension is operating at the
installed ride height.
Failure to torque the bolts/nuts of suspen-
sion components to specications can result in failure
of the suspension and voiding of the warranty.
Park the unloaded trailer on a level surface. Set the
brakes and chock the tires so vehicle cannot move
during inspection.
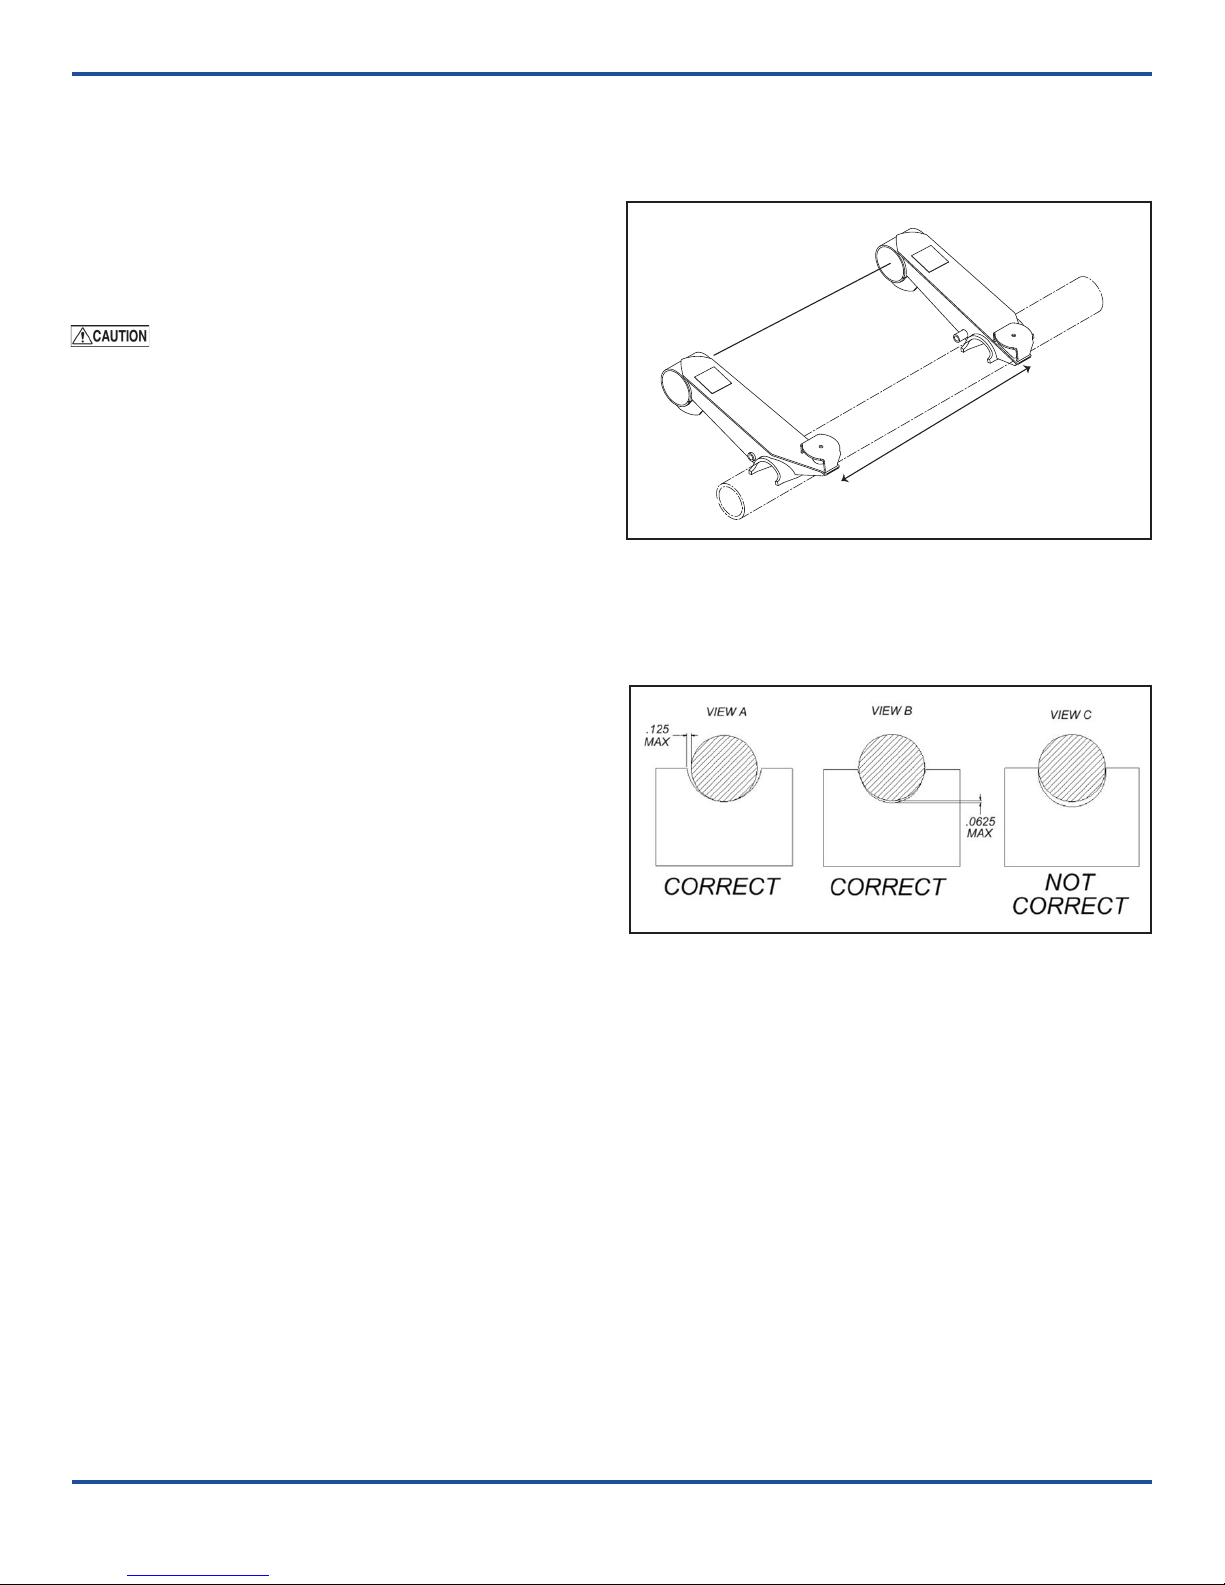
Insert the at end of a pry-bar between one side of
the hanger sidewall and the wear washers. Move the
pry-bar back-and-forth and look for excessive move-
ment of the beam (NOTE: A small amount of beam
Pivot Bushing Inspection Procedure
movement because of the rubber exing is normal).
Inspect the wear washers for excessive wear/damage.
Repeat the pry-bar process and wear washer inspec-
tion on the other side of the hanger. If any large/easy
movement or damaged wear washers is observed,
drop the beams for further inspection. Replace com-
ponents as necessary.
Refer to the following Technology &
Maintenance Council (TMC) publications
for additional maintenance information:
TMC RP 609 Self-Adjusting and Manual Brake
Adjuster Removal, Installation
and Maintenance
TMC RP 618 Wheel Bearing
Adjustment Procedure
TMC RP 619 Air System Inspection Procedure
TMC RP 622 Wheel Seal and Bearing Removal,
Installation, and Maintenance
TMC RP 631 Recommendations for
Wheel End Lubrication
TMC RP 643 Air Ride Suspension
Maintenance Guidelines
TMC RP 728 Trailer Axle Maintenance

RAR-200-Trailer-ISM-RevA-06-07-18 Page 9 ENG
Figure 7.
RAR-200 Trailer Suspension
Refer to the engineering drawing for the individual component part number.
Adjuster
Plate
Hanger
(Left-Hand)
Air
Spring
Shock
Absorber
Pivot Bushing
Assembly
Mounting Plate
(Air Spring)
Trailing Arm Beam Assembly
(Right-Hand)
Axle
Pivot Bolt
(Shear-Type)
Pivot Nut
(Flanged Lock Nut)
Flat Washer
Adjuster Plate Nut/Bolt
Bolt
Washer
Lock Nut
(Bushing Clamp)
Hanger
(Right-Hand)
Lock Nut
(Air Spring)
Upper Bolt/Lock Nut
(Shock Absorber)
Lower Bolt/Lock Nut
(Shock Absorber)
Wear Washer
Cover
(Beam)
Trailing Arm Beam Assembly
(Left-Hand)
Adjuster Plate Nut/Bolt
Pivot Nut
(Flanged Lock Nut)
Lower Bolt/Lock Nut
(Shock Absorber)

ENG Page 10 RAR-200-Trailer-ISM-RevA-06-07-18
Disassemble Suspension
Remove pivot hardware. Rotate arm beams down
and out of hanger. Inspect pivot bolt hole and hanger
surfaces for wear or damage. Repair or replace com-
ponents, if needed.
Bushing Removal
Remove Huck®fasteners from bushing clamp
(Figure 8). Separate bushing clamp and remove pivot
bushing assembly. NOTE: Bushing replacement kit
includes traditional bolts, washers and nuts to re-
place the Huck®fasteners used on bushing clamp.
New Bushing Installation
1. Insert new bushing assembly into bushing clamp.
Install replacement bolts, washers and nuts.
2. Center bushing assembly on bushing clamp.
Torque nuts on clamp to 190 ft-lb. Make sure bush-
ing clamp surfaces are closed “metal-to-metal” and
torque nuts to 280 ft-lb (380 N-m).
Reassemble Suspension
1. Rotate arm beams into hangers. Install new wear
washer on inboard side of the beam.
2. Install pivot hardware – shear-type pivot bolt, at
washer, adjuster plate, adjuster plate nut/bolt and
anged lock nut. NOTE: Do not lubricate pivot bolt/
nut. Tighten anged lock nut until pivot hardware is
snug against hanger. Do not apply nal torque until
axle alignment has been checked (page 11).
3. Use a 1” drive impact wrench with an E-20 Torx®
socket to tighten the pivot bolt until the Torx head is
sheared o..
4. Install shock absorber.
5. Install wheels and tires (if removed). Raise the
vehicle and remove support stands. Lower vehicle to
the ground.
6. Connect height control valve linkage, if necessary,
and adjust ride height.
Park the vehicle on a level surface. Chock wheels to keep vehicle from moving. Raise vehicle to height that
removes load from suspension and support with jack stands. Disconnect the linkage from the height control
valve(s), if necessary, and exhaust all air from the air springs. Failure to properly chock wheels, ex-
haust air system and raise and safely support the vehicle could allow movement resulting in serious injury.
Bushing Replacement Procedure
Figure 8.
Cut collars
and remove
bolts from
bushing
clamp.
RAR-200 Trailer Suspension - Bushing Kit/Torque Specications
Bushing Replacement Kit – 6040039 (25K Ridelite)
Bushing Replacement Kit – 6040072 (25K Tanker Special Ridelite)
Bushing Replacement Kit – 6040056 (30K Ridelite)
Fastener Type Size
foot-pound Newton-meter
Pivot Bolt - (Shear-Type)
Pivot Nut - (Flanged Lock Nut)
Requires E-20 Torx®socket (RW #6100054)
7/8” - 9NC Do not lubricate bolt/nut threads.
Use a 1” drive impact wrench to tighten the
pivot bolt until the
Torx®
head is sheared off.
HHCS/Lock Nut - (Bushing Clamp) 3/4”-10NC 280 ft-lb 380 N-m
Lock Nut - (Shock Absorber) 3/4”-10NC 200-230 ft-lb 271-312 N-m
Nut - (Air Spring) 3/4”-16NF 45-50 ft-lb 61-68 N-m
Lock Nut - (Air Spring) 1/2”-13NC 45-50 ft-lb 61-68 N-m
Bolt/ Lock Nut - (Adjustment Plate) 1/2”-13NC 55-60 ft-lb 75-81 N-m
Refer to the engineering drawing for component torque value. Torque values reflect a lubricated thread condition
(Nuts are pre-lubed). Do not overtorque.
Suspension is shipped with minimal torque applied to fasteners. It is the installer’s responsibility to
apply the proper torque values. All fasteners, except for shear-type pivot bolt, must be re-torqued after the first
6,000 miles of operation. Failure to install and maintain suspension component fasteners at torque specifications
could result in suspension failure and void the warranty.

RAR-200-Trailer-ISM-RevA-06-07-18 Page 11 ENG
Axle Alignment
Alignment should be performed on a level surface with the suspension at the desired ride height.
Align the suspension per TMC or SAE recommended standards. On a multiple-axle vehicle, the forward axle
is moved into the proper alignment, then the remaining axles are positioned so that they are parallel to the
forward axle. A maximum tolerance of 1/8-inch dierence from side-to-side of the forward axle and 1/16-inch
dierence from side-to-side for the aft axles is acceptable (Figure 9).
Check the forward axle alignment by measuring
from the kingpin to both ends of the axle centers.
If the dierence between the “A” measurement
and the “B” measurement is greater than 1/8-inch,
the forward axle needs to be aligned.
If the dierence between the “C” measurement
and the “D” measurement is greater than 1/16-
inch, the aft axle needs adjustment.
C
A
B
D
Speed Set®Alignment
The RAR-200 Trailer Suspension is equipped with the Ridewell Speed Set® alignment feature for simple,
manual alignment of the axle.
Axle alignment procedure
1. Locate the adjuster plate at the pivot connection.
Loosen the pivot nuts and adjuster nuts enough
for beam to move.Check to make sure that align-
ment pointer is at six o’clock position (Figure 10).
2. Insert a 1/2”-shank breaker bar into the square
hole of the adjuster plate. Move the beam forward
or backward until the axle reaches alignment.
NOTE: Check to make sure that the pivot bushing
is not wedged sideways during beam movement.
The adjuster plate and alignment washer on the
two sides of the hanger should move in unison
with the beam.
3. Tighten the pivot nut and so that beam can no lon-
ger move. Re-check alignment measurements and
adjust, if necessary. NOTE: Check to make sure
that adjuster plate and alignment washer are at
against the hanger before nal torque is applied.
4. Use a 1” drive impact wrench with an E-20 Torx®
socket to tighten the pivot bolt until the Torx head
is sheared o.
Failure to properly torque pivot hardware
could result in catastrophic suspension failure and
void the warranty
Figure 9.
Kingpin measurement for axle alignment.
Figure 10.
Alignment pointers should be at six o’clock posi-
tion before attempting alignment. Move beam
back-and-forth using adjuster plate until axle
reaches desired position.
SPEED SETTM ALIGNMENT FEATURE
NOTICE: ALIGNMENT PLATE MUST
BE AT 6 O’CLOCK
POSITION PRIOR TO ALIGNMENT.
AFTER ALIGNMENT, TORQUE
ADJUSTMENT PLATE NUT TO
55-60 FT.LB.
IMPORTANT: ADJUSTMENT
PLATES MUST BE MOVED
EQUALLY ON BOTH SIDES OF
HANGER. TORQUE PIVOT BOLT
NUT TO 450-520 FT.LB.
DO NOT OVER TORQUE!
RIDEWELL CORPORATION SPRINGFIELD,MO USA
#1990006-RevA
6 o’clock
alignment
pointer
Adjustment plates must be
moved equally on both sides of
hanger. Tighten shear-type pivot
bolt with a 1” drive impact wrench
until the Torx® head shears o from
the bolt.
NOTE: Alignment plate must be at
6 o’clock position prior to
alignment. After alignment,
torque adjustment plate nut to
55-60 ft-lb.
NOTES (Do not print):
Size: 3-inches (w) x 2 1/4-inches (h)
P/N: 1990006 Rev: A
rev date (4-25-2016)
STICKER TYPE:
Type 1 (Manufacturing)

ENG Page 12 RAR-200-Trailer-ISM-RevA-06-07-18
WARRANTY
Terms and coverage in this warranty apply only to the United States and Canada.
Ridewell Suspensions warrants the suspension systems manufactured by it to be free of defects in mate-
rial and workmanship. Warranty coverage applies only to suspensions that have been properly installed,
maintained and operated within the rated capacity and recommended application of the suspension. The
responsibility for warranty coverage is limited to the repair/replacement of suspension parts. The liability
for coverage of purchased components is limited to the original warranty coverage extended by the manu-
facturer of the purchased part.
All work under warranty must have prior wrien approval from the Ridewell warranty department. Ride-
well has the sole discretion and authority to approve or deny a claim and authorize the repair or replace-
ment of suspension parts. All parts must be held until the warranty claim is closed.
Parts that need to be returned for warranty evaluation will be issued a Returned Materials Authorization
(RMA). Parts must be returned to Ridewell with the transportation charges pre paid. The transportation
charges will be reimbursed if the warranty claim is approved.
This non-transferable warranty is in lieu of all other expressed or implied warranties or representations,
including any implied warranties of merchantability or tness or any obligations on the part of Ridewell.
Ridewell will not be liable for any business interruptions, loss of profits, personal injury, any costs of
travel delays or for any other special, indirect, incidental or consequential losses, costs or damages.
Contact the Ridewell Warranty Dept. at 417.833.4565 - Ext. 135, for complete warranty information.
This manual suits for next models
1
Table of contents
Other Ridewell Suspensions Automobile Part manuals
Popular Automobile Part manuals by other brands

Edelbrock
Edelbrock 25-9213 installation instructions

Edelbrock
Edelbrock 5680 installation instructions

Ironman4x4
Ironman4x4 ISNORKEL034 installation guide

Jonsered
Jonsered LT2213 Spare parts

Mitsubishi
Mitsubishi F4A4 Workshop manual

Edelbrock
Edelbrock Performer RPM 351-W Ford V8 installation instructions

AEM
AEM 21-704 installation instructions

Skyjacker
Skyjacker TRU25 installation instructions

HURST
HURST COMPETITION PLUS Series installation instructions

Edelbrock
Edelbrock 1713 installation instructions

AUTOTECH
AUTOTECH 10.199.022K installation instructions

Edelbrock
Edelbrock 5061 installation instructions