Eden accessit solo Manual

Lecteur Biométrique sortie RS485 ou WIEGAND
Biometric reader with RS485 or WIEGAND output
NOTICE TECHNIQUE
TECHNICAL INFORMATION

Sommaire / Contents
Technical information SOLO – 12 juin 2008 – V1.0 p.2/20
Sommaire
/ Contents
Remerciements..............................................................................3
Informations et recommandations...........................................4
Caractéristiques techniques......................................................4
Schéma de câblage.......................................................................5
1) Raccordement du lecteur sur une
centrale ACCESS IT en bus RS485.............. 5
2) Raccordement du lecteur
en WIEGAND 26 bits .................................. 6
Première mise sous tension – Configuration usine.............7
Installation de plusieurs lecteurs sur un même site...........8
Gestion des utilisateurs...............................................................9
1) Ajouter un utilisateur en badge plus
empreinte.................................................... 9
2) Ajouter un utilisateur en badge seul.......... 10
3) Ajouter un utilisateur en empreinte
seule.......................................................... 10
4) Suppression dÊun badge ............................ 11
5) Suppression dÊun utilisateur
en empreinte seule.................................... 11
6) Suppression de tous les utilisateurs
(empreintes seules et badges) ................... 11
Acknowledgement ........................................................................12
Information and recommendations.........................................13
Technical characteristics..........................................................13
Wiring diagram .............................................................................14
1) Connecting the reader to an ACCESS
IT control unit via an RS485 bus................ 14
2) Connecting the reader in 26-bits
WIEGAND................................................. 15
First switch-on - Factory settings ..........................................16
Installing several readers on one site ...................................17
Managing users.............................................................................18
1) Adding a „badge plus fingerprint‰
user ........................................................... 18
2) Adding a „badge only‰ user ...................... 19
3) Adding a „fingerprint only‰ user................19
4) Removing a badge..................................... 20
5) Removing a „fingerprint only‰ user............ 20
6) Removing all users
(fingerprints only and badges) ...................20

Remerciements
Technical information SOLO – 12 juin 2008 – V1.0 p.3/20
Remerciements
Cher(ère) Client(e),
Vous venez de faire lÊacquisition dÊun lecteur avec commande
dÊouverture déportée ÿ SOLO Ÿ créé par la société française
ACCESS IT.
Toute lÊéquipe ACCESS IT vous remercie de votre intérêt ainsi
que de votre confiance pour notre solution de sécurité.
Nous espérons quÊelle vous donnera entière satisfaction
dans la sécurisation des locaux de votre entreprise.
Pour toutes remarques complémentaires, vous pouvez
nous contacter via notre site Internet www.access-it.eu
LÊéquipe ACCESS IT.

Informations et recommandations
Technical information SOLO – 12 juin 2008 – V1.0 p.4/20
Informations et recommandations
o Conformément à la directive européenne UTE C00-200 décrivant les directives 89/336CEE et 92/31
CEE, SOLO est conforme aux normes :
•NF EN 50081-1 pour les émissions électromagnétiques et
•NF EN 50082-1 pour la susceptibilité électromagnétique.
o Recommandations de câblage : les câbles utilisés pour le raccordement des lecteurs, réseau et autres
périphériques doivent être installés conformément aux indications décrivant le Niveau 2 (environnement
protégé) de la norme NF EN 61000-4-4.
o Ce produit doit être installé par une entreprise qualifiée. Une installation et une utilisation incorrectes
peuvent entraîner des risques de chocs électriques ou dÊincendie. Avant dÊeffectuer lÊinstallation, lire
la notice technique et respecter les préconisations de montage du produit.
o Après avoir éteint lÊalimentation, tous les condensateurs internes se déchargeront à un niveau sain
après 60 secondes dans des conditions normales. Néanmoins, dans le cas dÊune défaillance, les
charges peuvent être maintenues beaucoup plus longtemps et des précautions adéquates doivent
être prises avant de manipuler le produit.
Caractéristiques techniques
Consommation maximale .................... 300mA @12V
Tension dÊalimentation ........................ 9 – 14VDC
Poids.................................................... 175g
Dimensions du boîtier.......................... 119 x 77 x 40mm
Température de fonctionnement.......... - 20°C à + 50°C
Notre support technique est disponible du lundi
au vendredi de 9h à 12h et de 14h à 18h
(17h le vendredi)
℡0891 70 01 90 (0,225 €/mn)

Schéma de câblage
Technical information SOLO – 12 juin 2008 – V1.0 p.5/20
Schéma de câblage
1) Raccordement du lecteur sur une centrale ACCESS IT en bus RS485
(?) Fiche technique :
4 fils (3 paires conseillées)
1 200 m
± 0,6 mm (SYT conseillé)
Caractéristique : Liaison sensible
Écran : Recommandé
Pour atteindre 1 200 m, vous devez installer de chaque extrémité du réseau une résistance de 220Ω
entre les points A et B (cf. ci-dessus).
Attention : La longueur totale ne doit pas dépasser la distance préconisée.
Attention : Les sorties 12V de la centrale
ne peuvent excéder 0,5A. Si vous souhaitez
raccorder deux SOLO, veillez à reprendre
lÊalimentation directement sur le bornier
ÿ Alimentation Ÿ.
ACCESS IT Unit

Schéma de câblage
Technical information SOLO – 12 juin 2008 – V1.0 p.6/20
2) Raccordement du lecteur en WIEGAND 26 bits
(?) Fiche technique :
5 fils (3 paires recommandées)
150 m
± 0,6 mm (SYT conseillé)
Caractéristique : Liaison sensible
Écran : Recommandé
Il suffit de raccorder les trois fils du lecteur sur le bornier de la centrale comme indiqué ci-contre ainsi
que lÊalimentation.
Attention : Ne câblez pas les fils de liaison centrale-lecteur près dÊautres câbles porteurs de tensions ou
courant élevés notamment les câbles 220V ou plus.
Note : En WIEGAND 26 bits, en badge plus empreinte, le numéro de série du badge MIFARE sera
envoyé sur 24 bits encadré par 2 bits de parité. En empreinte seule, un numéro correspondant à lÊordre
de lÊenrôlement sera envoyé sur 24 bits encadré par 2 bits de parité (exemple, premier utilisateur enrôlé,
numéro 1 envoyé, second utilisateur enrôlé, numéro 2 envoyé, etc.). En cas dÊempreinte non reconnue
ou de badge hors site, le numéro 65535 sera envoyé.
+12V
0V
Data 1
Data 0
LED
ACCESS IT Unit
ou
Centrale Tierce
Attention : Si vous utilisez une alimentation
extérieure pour alimenter SOLO, veillez bien
à raccorder la masse avec celle de la centrale.
Première mise sous tension – Configuration usine
Technical information SOLO – 12 juin 2008 – V1.0 p.7/20
Important :La suite de cette documentation ne concerne que les produits SOLO raccordés en mode
WIEGAND. En RS485, toute la configuration se fait à partir de la centrale.
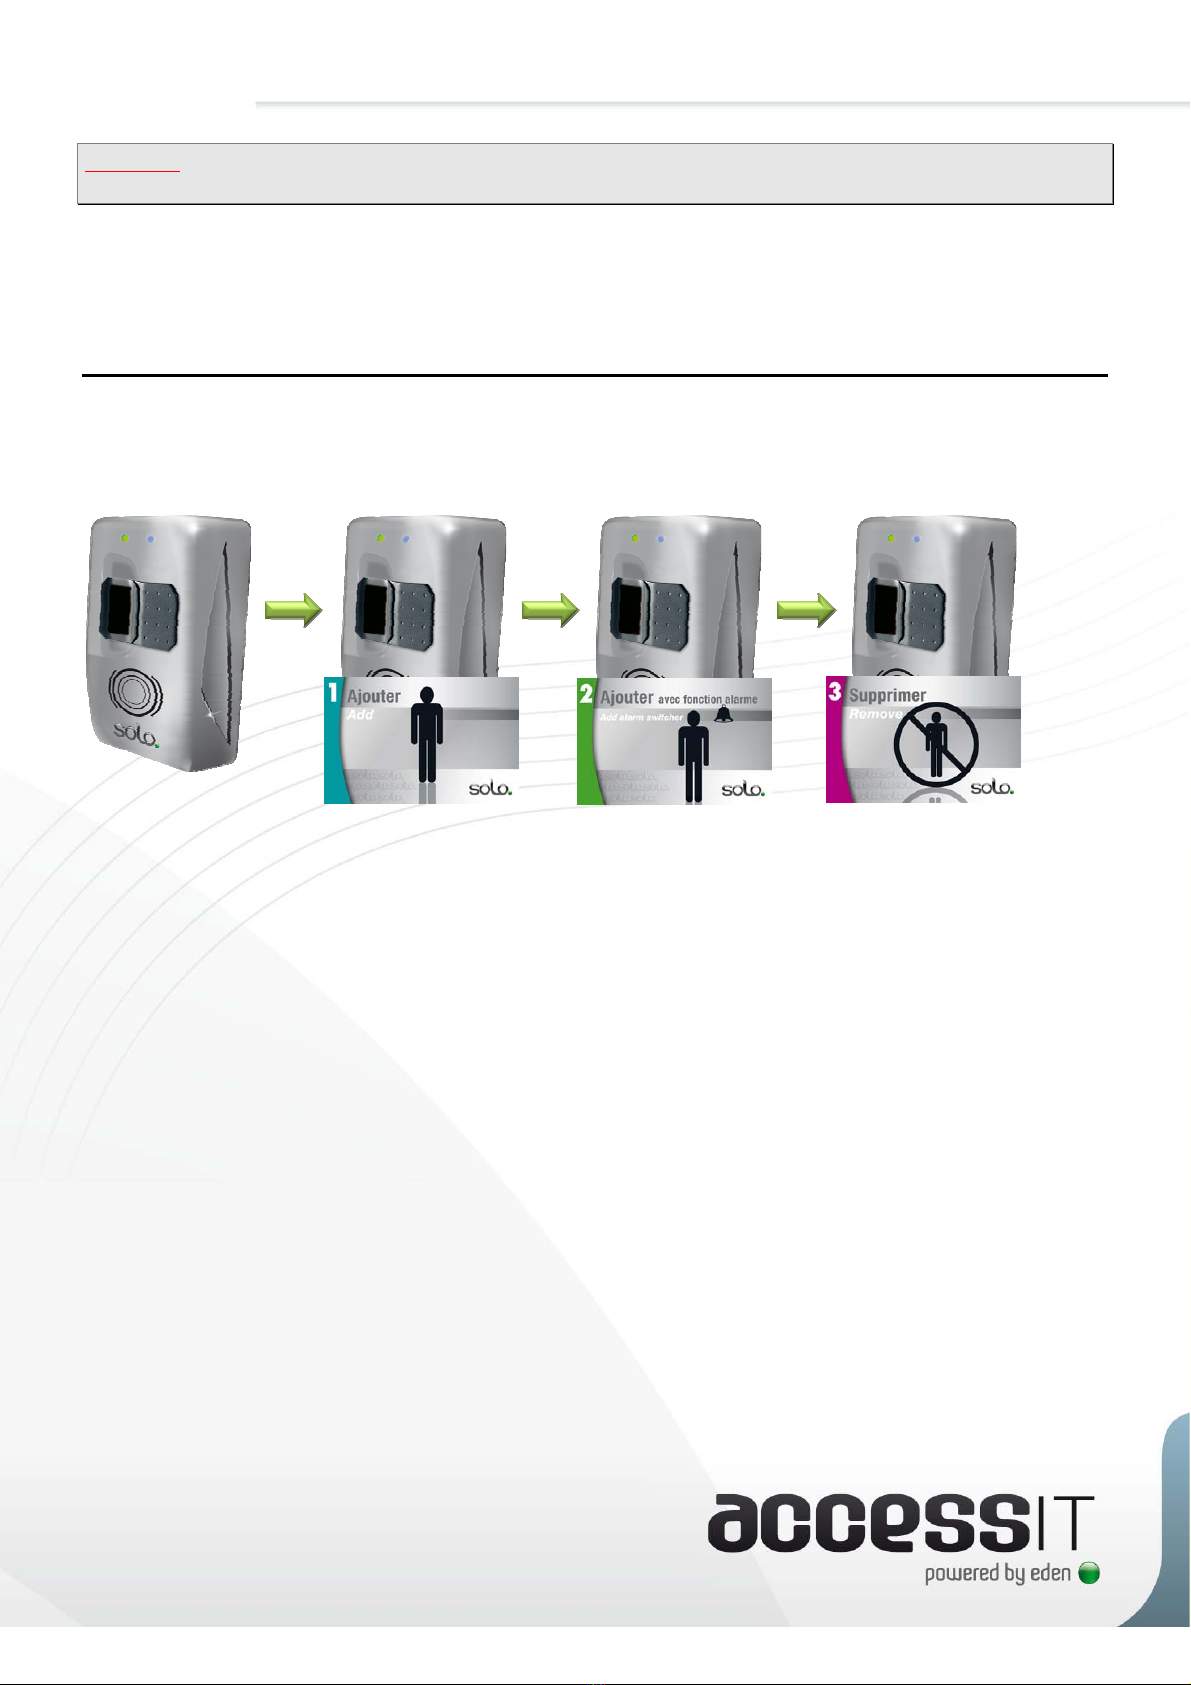
Première mise sous tension – Configuration usine
Lors du premier démarrage du produit, vous devez apprendre les 3 cartes de configuration (
Ajouter
,
Ajouter Alarme
et
Supprimer
) au lecteur afin de le mettre en service. Pour cela, veuillez suivre la
procédure suivante :
Après cette étape, votre produit est en service.
Présentez le badge
Ajouter
Présentez le badge
Ajouter Alarme
Présentez le badge
Supprimer
Installation de plusieurs lecteurs sur un même site
Technical information SOLO – 12 juin 2008 – V1.0 p.8/20
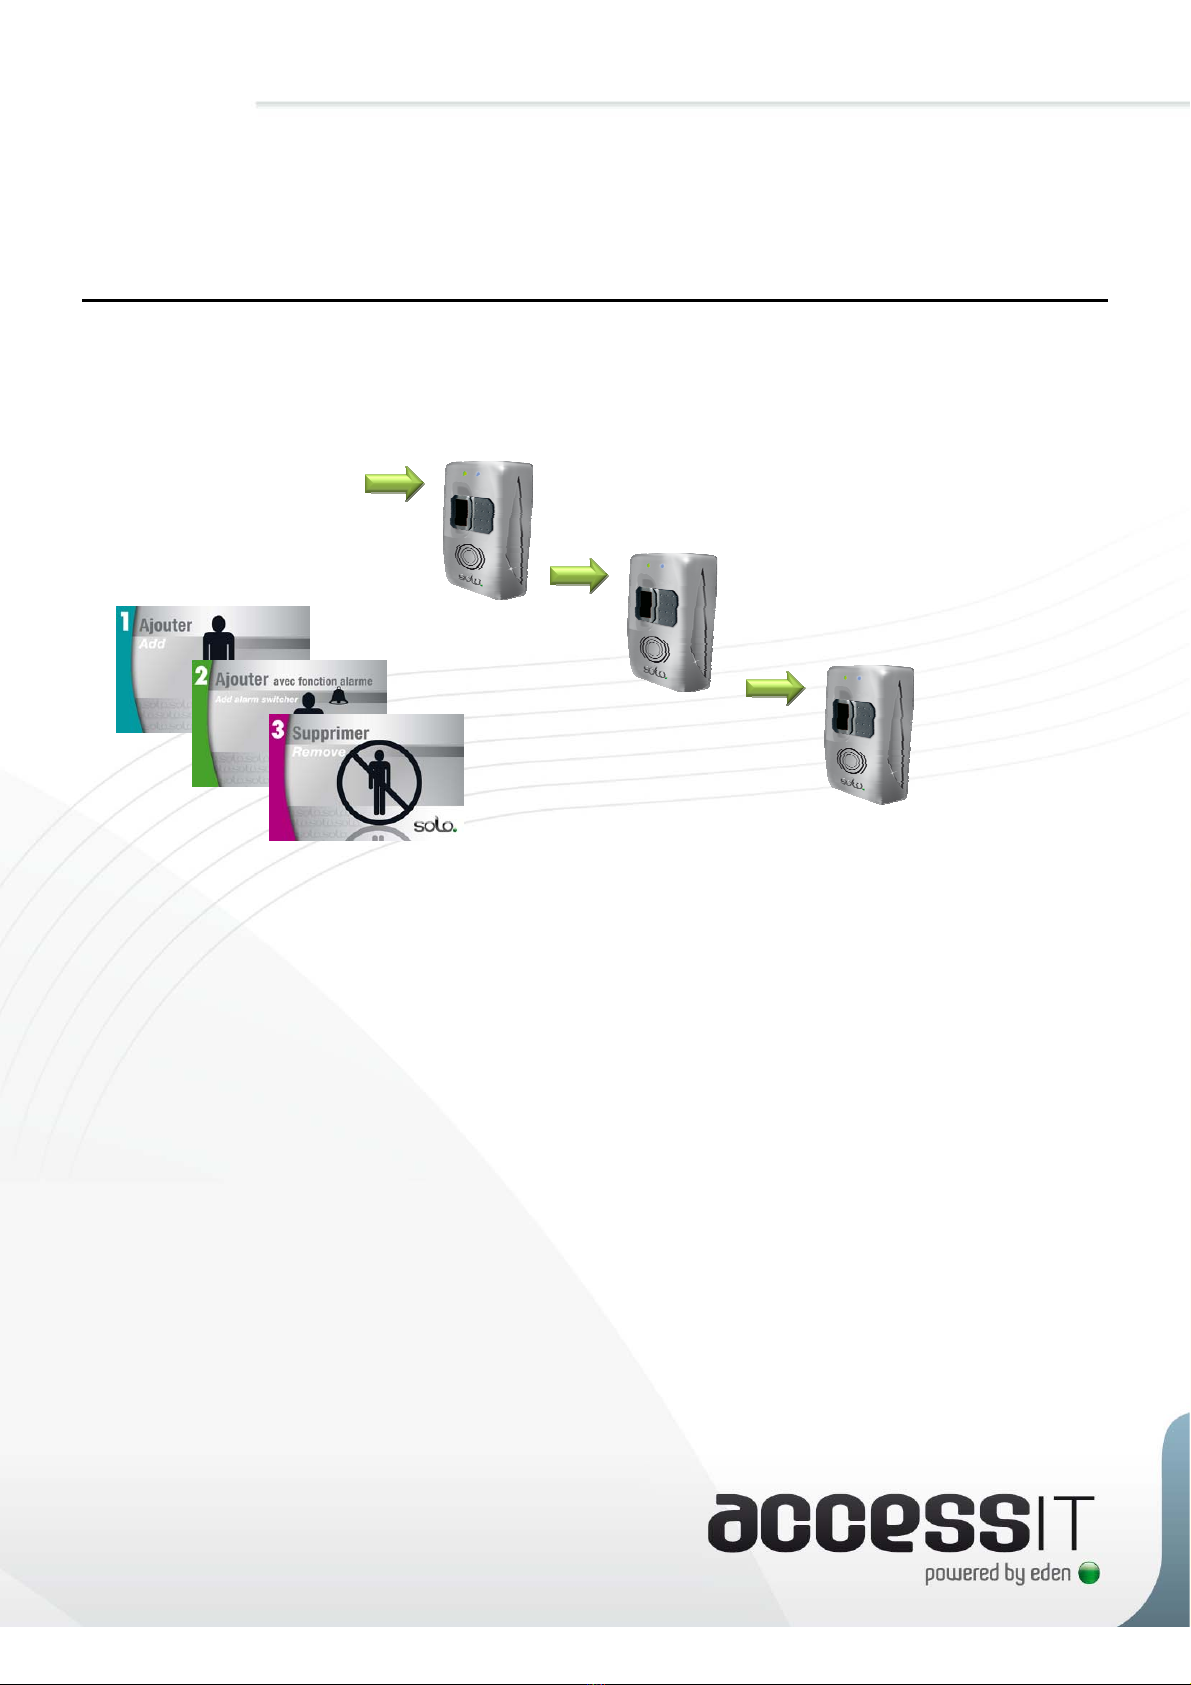
Installation de plusieurs lecteurs sur un même site
Si vous utilisez la fonction badge avec empreinte sur plusieurs lecteurs dÊun même site, afin dÊapprendre
le même code site à tous les lecteurs (donc ne pas refaire lÊajout des badges sur chaque lecteur), vous
ne devez utiliser quÊun seul jeu de badges de configuration pour tous les lecteurs du même site, comme
suit :
⁄
Lecteur n
Lecteur 2
Lecteur 1
Gestion des utilisateurs
Technical information SOLO – 12 juin 2008 – V1.0 p.9/20
Gestion des utilisateurs
Important : Ce produit vous permet de gérer jusque 250 utilisateurs en utilisant leur empreinte seule
(1 ou 2 empreintes par utilisateur). Avant dÊutiliser cette fonction, assurez-vous que vous avez
lÊautorisation dÊutiliser lÊempreinte comme seul moyen dÊidentification en fonction de la législation
en vigueur dans le pays dÊinstallation.
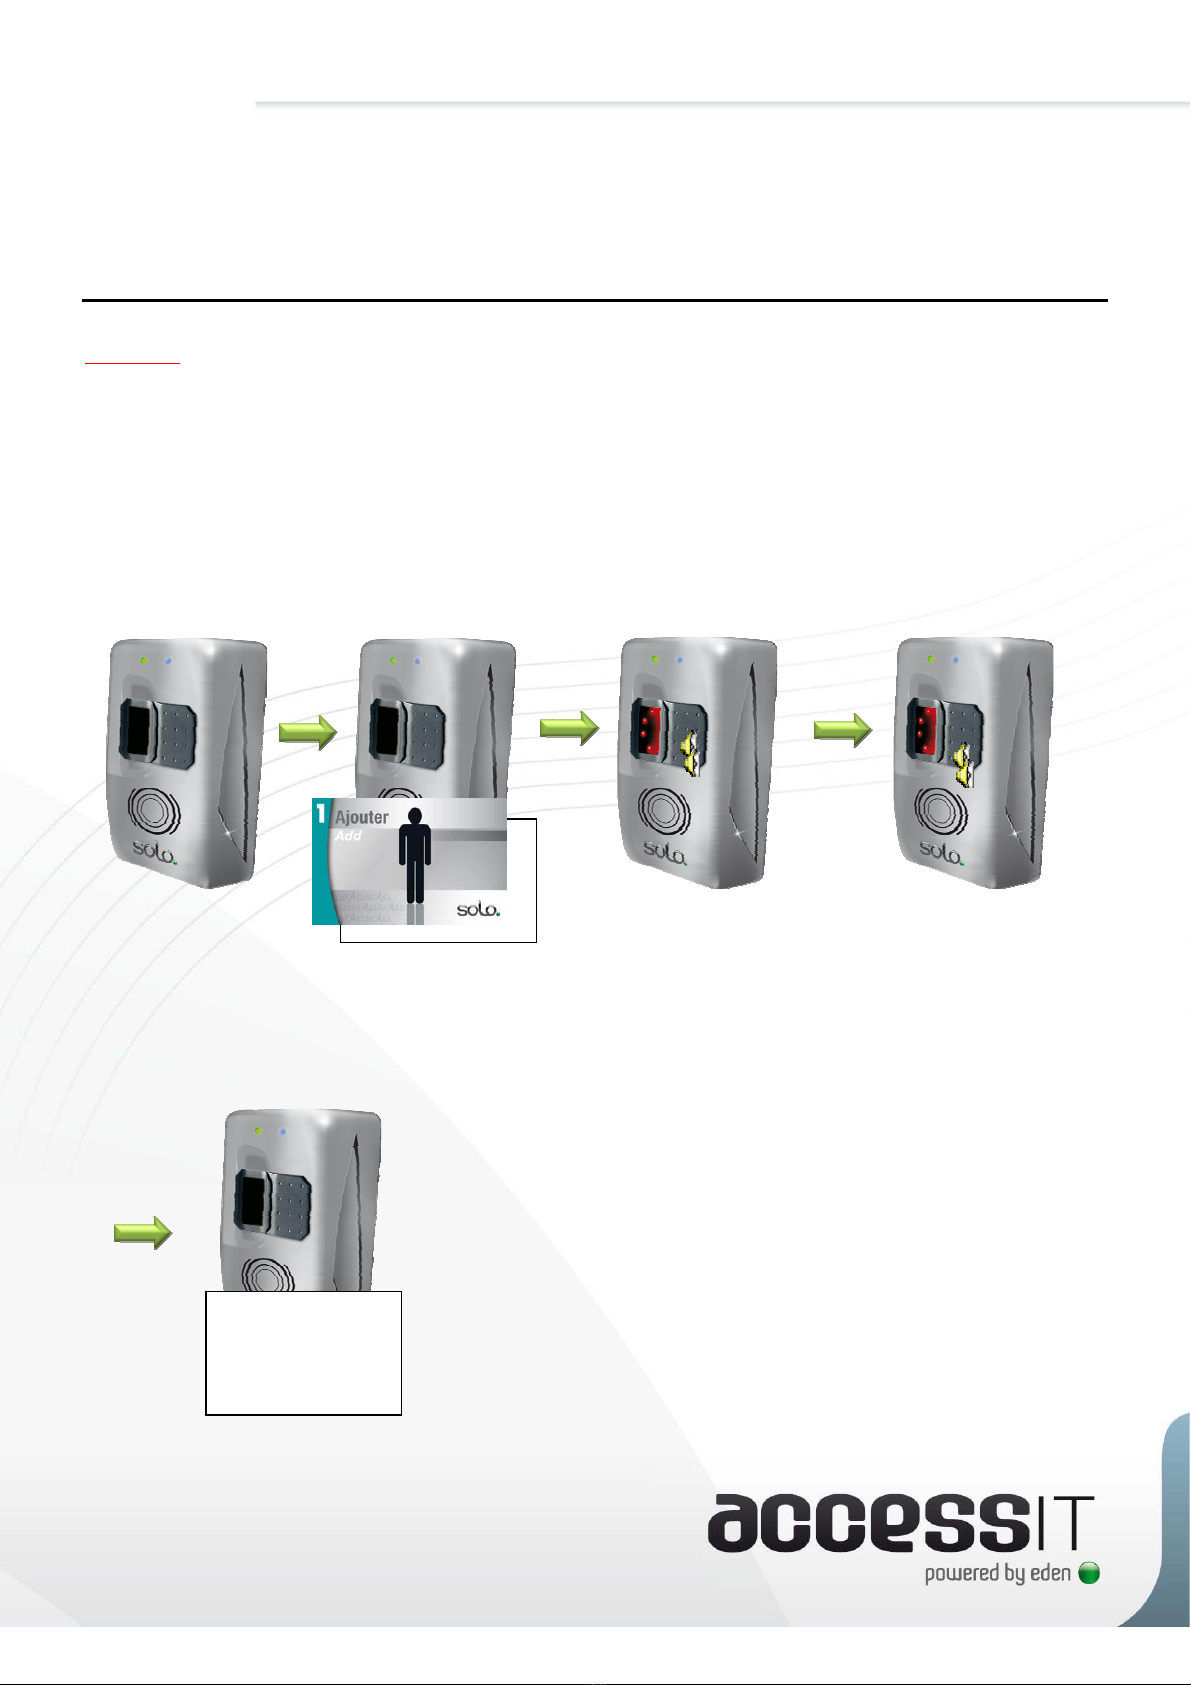
1) Ajouter un utilisateur en badge plus empreinte
Présentez le badge Ajouter
en même temps que le badge
de lÊutilisateur que vous
souhaitez ajouter
Vous avez 10 secondes
pour présenter le premier
doigt de lÊutilisateur
à ajouter 3 fois
Vous avez 10 secondes
pour présenter le second
doigt de lÊutilisateur
à ajouter 3 fois
(si vous ne souhaitez
enrôler quÊun seul doigt,
patientez 10 secondes)
Présentez à nouveau le badge de
lÊutilisateur que vous souhaitez
ajouter et attendez le BIP de
confirmation dÊenrôlement

Gestion des utilisateurs
Technical information SOLO – 12 juin 2008 – V1.0 p.10/20
2) Ajouter un utilisateur en badge seul
3) Ajouter un utilisateur en empreinte seule
Présentez le badge Ajouter
en même temps que le badge
de lÊutilisateur que vous
souhaitez ajouter
Attendez 10 secondes
Présentez à nouveau le badge
de lÊutilisateur que vous
souhaitez ajouter et attendez
le BIP de confirmation
dÊenrôlement
Présentez le badge Ajouter Vous avez 10 secondes pour
présenter le second doigt de
lÊutilisateur à ajouter 3 fois
(si vous ne souhaitez enrôler
quÊun seul doigt, patientez
10 secondes)
Vous avez 10 secondes pour
présenter le premier doigt
de lÊutilisateur à ajouter 3 fois
Table of contents
Languages:


