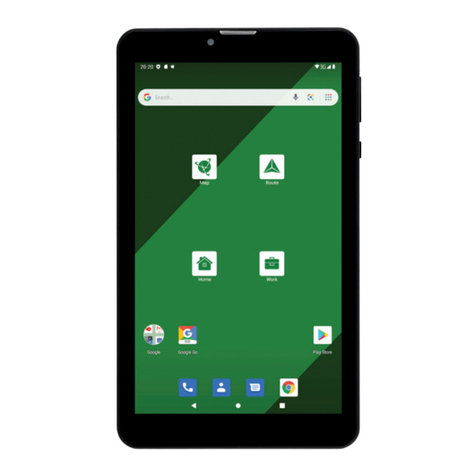
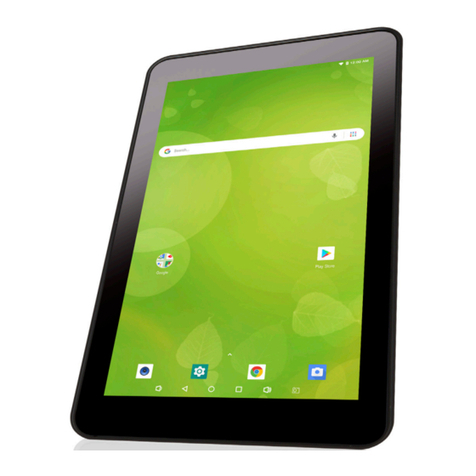
EE Robin User manual

1
User Manual

2 3
13 Maps .................................................................................54
13.1 Get My Location.....................................................................54
13.2 Search for a location..............................................................55
13.3 Star a location .........................................................................55
13.4 Get driving, public transportation or walking directions..
56
13.5 Arrangement of Layers..........................................................57
14 Others...............................................................................59
14.1 Calculator ................................................................................59
14.2 File Manager ............................................................................59
14.3 Sound Recorder .....................................................................59
14.4 Other apps ..............................................................................60
15 Settings ............................................................................61
15.1 Wireless & networks.............................................................61
15.2 Device........................................................................................62
15.3 Personal.....................................................................................64
15.4 System .......................................................................................71
16 Troubleshooting ..............................................................79
This device meets applicable national SAR limits of 2.0
W/kg. SAR values can be found on page 9 of this user
guide. When carrying the device or using it while worn
on your body, either use an approved accessory such
as a holster or otherwise maintain a distance of 0 mm
from the body to ensure compliance with RF exposure
requirements. Note that the product may be transmitting
even if you are not using it.
To prevent possible hearing damage, do not listen at high
volume levels for long periods. Exercise caution when
holding your device near your ear while the loudspeaker
is in use.
The tablet contains magnets which may interfere with
other devices and items (such as credit card, pacemakers,
defibrillators, etc.). Please maintain at least 15 cm of
separation between your tablet and the devices/items
mentioned above.
www.sar-tick.com
Table of Contents
1SETTING UP YOUR DEVICE ..........................................4
1.1 Setting up your device.............................................................6
2 GETTING STARTED WITH KURIO...............................8
3 Kurio Genius Overview...................................................11
4 Kurio profile interface.....................................................15
5 Home screen....................................................................17
6 Text input .........................................................................23
6.1 Using Onscreen Keyboard....................................................23
6.2 Google Keyboard....................................................................23
6.3 Text editing...............................................................................24
7 Contacts............................................................................25
7.1 Understand your contacts....................................................25
7.2 Add a contact ..........................................................................26
7.3 Manage contact groups .........................................................27
7.4 Edit your contacts ..................................................................27
7.5 Import, export, and share contacts....................................27
7.6 Accounts...................................................................................28
8 Email .................................................................................29
8.1 Gmail/Email ..............................................................................29
9 Calendar & time ..............................................................34
9.1 Calendar ..................................................................................34
9.2 Clock ........................................................................................36
10 Getting connected...........................................................37
10.1 Connect to the Internet .......................................................37
10.2 Browser ...................................................................................38
10.3 Connect to Bluetooth devices ...........................................42
10.4 Connect to a computer........................................................43
10.5 Connect to virtual private networks.................................44
11 Play Store .......................................................................45
11.1 Locate the item you want to download and install........45
11.2 Download and install .............................................................47
11.3 Manage your downloads .......................................................47
12 Multimedia apps...............................................................49
12.1 Camera ....................................................................................49
12.2 Photos ......................................................................................51
12.3 YouTube ...................................................................................52

4 5
1 SETTING UP YOUR DEVICE
Congratulations on your purchase of Robin from EE. Please ensure you read
this guide and the included safety / warranty information, to get you set up
quickly and safely.
1 Headphones connector
2 Micro-USB / battery charge
3 Front camera
4 Power key
5 Volume up / down
6 Micro SIM and MicroSD slots
7 Rear camera
Note: please remember to charge your device before powering it on for the
first time. Press and hold the Power key to switch on the tablet, after which
the home screen will be displayed. If the tablet requires charging, a battery
icon will be displayed on the screen.
3
4
5 6
7
1 2

6 7
1.1 Setting up your device
1.1.1 Inserting your Micro SIM
Please note this device uses a Micro SIM - attempting to insert a
Nano size SIM card into your device may cause serious damage to
your tablet. For more help with your EE SIM pack, visit ee.co.uk/
simstart
•Pull out card cover and move clear of the slots
•Take care to insert your Micro SIM in the correct direction to
avoid damage.The orientation is shown in the above diagram and
also marked on the sticker you will find next to the slots on your
tablet
• Optional–ifyouhavepurchasedacompatibleMicroSDcardfor
your tablet, follow the same instructions mentioned above
• Carefullyclosethecardcover,ensuringfirmlyshut
1.1.2 Setup
Charging the battery
To charge your tablet, connect the charger to your tablet and mains
socket.
• When using your tablet for the first time, charge the battery fully.
To reduce power consumption and energy waste, when battery
is fully charged, disconnect your charger from the plug; switch off
Wi-Fi, GPS, Bluetooth or background-running apps when not
in use; reduce the backlight time, etc.
This device can be charged through USB computer connection,
though it will take more time.
1.1.3 Power on your tablet
Hold down the Power key until the tablet powers on, unlock your
tablet (Swipe, Pattern, PIN, and Password) if necessary and confirm.
The Home screen is displayed.
If you do not know your PIN code or if you have forgotten it, contact
your network operator. Do not leave your PIN code with your tablet.
Store this information in a safe place when it is not in use.
1.1.4 Power off your tablet
Hold down the Power key until the popup menu appears. Select
Power off to confirm.

8 9
2 GETTING STARTED WITH
KURIO
The first time you power on the tablet, you should set the following
options:
Language selection: From welcome screen, select your language
to continue. The language can be changed later from the Android
settings.
Insert SIM card: Make sure you insert a SIM card, you can refer
to 1.2 section of this user guide if you don’t know how to insert it.
Wi-Fi connection: Select a wifi hotspot and connect to wifi (not
mandatory but highly recommended).
Date & time settings: If connected to wifi, the date and time will
be set automatically. If not, set the correct date and time.
Name: Enter your first and last name to personalize some apps
later.
Protect your tablet: Touch SET SCREEN LOCK NOW to
set an screen lock for protecting others from using your tablet, you
can change it later from Setting>Lock screen, or from Kurio
Genius>account settings.
Google Services: View the terms of Google services.
Start configuration: A welcome screen to Kurio system appeared,
you can set up your Kurio account in following two steps.
Step1: Enter your email address and read the General condition.
Step 2: Set your security password if you didn’t set it in above
steps.
To protect your parental account, you must set up a password (text,
pin code or visual pattern). Select an option, draw your pattern
or type the text or code your designed, touch continue and then
confirm to continue.
Restore content: This pop-up is displayed only after a factory
reset: it allows you to download and install all the original apps. Skip
this screen if you don’t want to restore the preload.
Create a Kurio child profile
•Create first child profile
You can create your first child’s profile now or choose to create it
later.Touch icon on the home screen to access Kurio Genius.
•Child profile configuration
Enter name, date of birth (important) and select the gender of your
child.Validate.

10 11
3 Kurio Genius Overview
The Kurio Genius parental app is pre-installed on the main screen
of the parental profile. It will give you quick access to the main
settings and features of the Kurio system:
Main menu
From this screen, you can see the current settings for your child’s
profile.You can create a new profile, delete or manage an existing
one and access the parental account settings.You also have access
to all the submenus to set specific parameters of parental control
by pressing their title.
Child profile’s information: You can modify your child profile’s
name, birthday and gender at the top of the screen.
Application management: To allow or block each application
installed on the tablet.
Time control: Allows you to choose the time of day and how long
you would like your child to use the device each day.
Web access: Allows you to set the level of access your child has
on the internet.
Profile settings:Allows you to block USB access and to activate or
disable Google Account for your child’s profile.
.

12 13
Application management
Authorize app auto: Turn off this option if you don’t want to
automatically authorize apps you install on the tablet for the child’s
profile.
Application management menu:
- Here you can select apps from the list to allow or block on your
child’s profile.
- You can move apps to categories (Media, Education, Ebooks, Games
or Other) by pressing their icon at the bottom of the screen after
selecting them.This allows your child to find the apps they want even
easier. If you are setting up more than one child you can import a
previous child’s settings to save time.
Time Control
You can set up different time parameters to control your child’s use
of apps in the time control menu.You may limit the access to apps at
specific times of the day and for a specific duration.
Access to ‘education’ category:
Turn this option on to give access to the apps in the education
category even while the access to the rest is restricted by the time
control.
Time control menu:
Hours of use: Choose the time slot your child can access the apps
by dragging the cursors to define the hours (e.g. 18:00-20:00).
- Play time: Maximum duration of use per day (e.g. 2hrs).
- Session length: Maximum duration of consecutive use.
- Pause length: Minimum break time between each session.
You can do this for the whole week but also set different settings for
specific days using the tabs at the top of the screen.
Web access
Our advanced filtering system allows children to access thousands of
websites safely, by blocking websites that may contain inappropriate
content.
Turn off web access from the Kurio Genius main menu to block all
access to the web.
Turn on the content filtering to use predefined filters of websites
according to the age of your child. (Press the web access title to
access more options.)
Turn on the Web list to use your personalized list of websites. (Press
the web Access title to access more options.)
Web access menu
Content filtering: Use the automatic content filtering list adjusted
to your child’s age by default or touch the switch at the bottom
right of the screen to on to manually disable or activate the filter on
specific categories of your choice.You can press “Set to current age”
at any time to reset the list to default.
Web list: Create and manage your own list of websites by adding
URLs to allow or to block.You can also let Kurio Genius filter

14 15
automatically the added websites according to this profile’s age by
pressing the bulb icon. The green shield shows accessible content,
while the red shield represents forbidden content.
Profile settings
USB access: Turns on the USB port when the device is connected
to a PC or from a USB host, such as an external hard drive.
Google account: Allows your child to set up a Google account and
have access to Google apps (including the Play Store).
Reset child password: If your child added a password to protect
their profile, you can reset it using this option.
4 Kurio profile interface
Avatar: The avatar can be modified from the child’s menu.
Categories: Use the categories to find apps easier.
Favourites: Drag and drop your favourite apps in the favourites tab.
Store: Access the KIDOZ Store directly.
Kurio Genius: Access the Kurio Genius app directly from your child
profile with your parental password.
Switch user: Use this app to switch to another profile quickly.
Updater: Use this app to update, install or uninstall the tablet’s
preloaded apps with your parental password.
Child’s menu: Access the different options of the child profile’s
interface.
Categories
Child's menu
Store
Favourites
Avatar
Child’s menu

16 17
Change my avatar: Press here to select another avatar or to take a
picture as the child profile’s avatar.
Change my theme: Press here to select another theme.
Change my wallpaper: Press here to pick a new wallpaper or picture
from the gallery.
Change my password: Press here to create or modify the child
profile’s password.
Help: Press here to read the help screens of the child profile.
Switch user: Press here to log out from this profile and access
another one.
5 Home screen
You can bring all your favourite icons (apps, shortcuts, and folders) to
your Home screen for quick access.Touch the Home key to switch
to Home screen.
Switch user
Genius icon
Google Search
All Apps
Back
Status Bar
Voice Actions
Home
Recent apps
Name Description
Google
Search
Touch it to access the Google search engine.
Voice Actions Use Voice Actions to watch videos, send emails,
set alarms, get directions, etc.
Switch user Touch to switch user.
All Apps Touch to show all apps list interface.
Genius icon Touch to add your child account (s) and manage
the account(s) through App management,Time
control,Web access and Profile settings.
Back Go back to the previous menu or screen.
Home Return to the home screen.
Recent apps Press to view recent apps.

18 19
The Home screen extends on either side of the screen to allow
more space for adding apps, shortcuts etc. Slide the Home screen
horizontally left and right to get a complete view of the Home screen.
The page indicators above the apps tray indicate which screen you
are viewing.
5.1.1 Status bar
From status bar, you can view both tablet status on the right side and
notification information on the left side. Touch and drag down the
Status bar to open the Quick settings panel or the Notification panel.
Touch and drag up to close it.
Notification panel
When there are notifications, touch and drag down the Status bar to
open the Notification panel to read the detailed information.
Quick settings panel
In the Notifications panel, touch or swipe down the top gray bar to
access the Settings shortcut panel. Touch Settings shortcut options
displayed to enable/disable functions or to access full Settings menu
touch Settings icon at top of panel.
Touchtoclearallevent–
based notifications (other
ongoing notifications will
remain)
Touch to access Settings,
where you can set more items
Touch to access User, where
you can change and add user.
5.1.2 Search bar
The tablet provides a Search function which can be used to locate
information within apps, the tablet, or the web.
Search by text
• Touch Search bar from the Home screen.
• Enter the text/phrase you want to search for.
• Touch on the keyboard if you want to search on the web.
Search by voice
• Touch from Search bar to display a dialog screen.
• Speak the word/phrase you want to search for. A list of search
results will display for you to choose from.

20 21
5.1.3 Lock/Unlock your screen
To protect your tablet and privacy, you can lock the tablet screen by
choosing swipe or creating a pattern, PIN or password.
To create a screen unlock pattern (refer to section "Screen lock"
for detailed settings)
• Drag down the Status bar and open the Quick settings panel then
touch the settings icon to enter Settings, then touch Security
>Screen lock > Pattern.
• Draw your own pattern.
Draw your unlock pattern
Touch to confirm by drawing
pattern again
To create a screen unlock PIN/Password
• Touch Settings > Security >Screen lock > PIN or
Password.
• Set your PIN or password.
To lock tablet screen
Press the Power key once to lock the screen.
To unlock tablet screen
Press the power key once to light up the screen, draw the unlock
pattern you have created or enter the PIN or password to unlock the
screen.
If you have chosen Swipe as the screen lock, touch the Lock icon with
your finger and swipe up to unlock the screen.
5.1.4 Personalise your Home screen
Add
You may long press a folder or app to activate the Move mode, and
drag the item to any Home screen as you prefer.
Reposition
Long press the item to be repositioned to activate the Move mode,
drag the item to the desired position and then release.You can move
items both on the Home screen and the Favourite tray. Hold the icon
on the left or right edge of the screen to drag the item to another
Home screen.

22 23
Remove
Long press the item to be removed to activate the Move mode, drag
the item up to the Remove icon and release after the item turns red.
Create folders
To optimise the organisation of items (shortcuts or apps) on the
Home screen, you can add them to a folder by stacking one item on
top of another.
Wallpaper customisation
Long press the Home screen, then touch WALLPAPERS to
customise wallpaper.
5.1.5 Volume adjustment
Using volume keys
Press Volume keys to adjust the volume.To activate the Silent mode,
press either Volume key, touch NONE in the menu, and select an
option.
Using Settings menu
Drag down the status bar to open the Quick settings panel and
touch the settings icon to enter Settings, then touch Sound &
notification. You can set the media, alarm, and notification volume
to your preference.
6 Text input
6.1 Using Onscreen Keyboard
Touch from the Home screen, select Settings > Language
& input, and touch Android Keyboard. A series of settings are
available for your selection.
6.2 Google Keyboard
Touch to switch
between symbol
and numeric
keyboard.
Touch to enter emoticons.
Touch to confirm inputs.
Touch once to turn on the "Abc" mode and twice to turn on
the "ABC" mode.

24 25
6.3 Text editing
You can edit the text you have entered.
• Long press
or double touch within the text you would like to edit.
• Drag the sliders to select more or less text.
• Upon the selection of some text, the following options appear:
select all , cut , copy , and paste (1).
You can also insert new text.
• Touch a blank area to enter text.Alternatively, touch in the middle
of some text until the cursor appears with a slider. Then drag the
slider to a desired position to enter text.
• If you have cut or copied some text, selecting new text will make
the PASTE icon appear.This allows you to clear the existing text
and paste the previously copied or cut.
(1) The background colour of these icons may vary with apps that involve
text editing.
7 Contacts
The Contacts app enables quick and easy access to the contacts you
want to reach.
You can view and create contacts on your tablet and synchronise
these with your Gmail contacts or other apps.
Touch to add a new
contact.
Touch to view
your favourite
contacts.
Touch to view all
your contacts.
Touch to search in
your contacts.
7.1 Understand your contacts
Touch to display contacts list option menu.
You can select the following options:
Delete Delete a contact that you no longer want.
Contacts to display Choose contacts to display.
Import/export Import or export contacts between the
tablet and microSD card.

26 27
Accounts Manage the synchronisation settings for
different accounts.
Settings Set the modes of displaying contacts.
Memory status Touch to view the memory status.
7.2 Add a contact
Touch the icon in the contact list to create a new contact.
You are required to enter the contact name and other contact
information. By scrolling up and down the screen, you can move from
one field to another easily.
If you want to add more information, touch ADD ANOTHER
FIELD to add a new category.
When you finish adding, touch to save.
To exit without saving, you can touch > Discard changes to return the
previous screen.
Select a picture for
the contact.
Touch to unfold the
other predefined labels
of this category.
Save contact
information.
Add to or remove from Favourites
To add a contact to Favourites, you can touch a contact to view
details, then touch to add the contact to Favourites.
To remove a contact from Favourites, touch on contact details
screen.
7.3 Manage contact groups
A contact group helps you optimise the organisation of your
contacts.You can add, remove and view groups in the Groups
screen.
On the main screen of Contacts, touch GROUPS to view local
groups.To create a new group, touch >Add Group, enter the
group name, select some members, and touch to confirm. If
you have added accounts to your tablet, you can view groups in
accounts.
7.4 Edit your contacts
To edit contact information, select a contact, then touch on top
of the screen,When you finish editing, touch .
Delete a contact
To delete a contact, touch > Delete, select some unwanted
contacts, and touch .
Deleted contacts will be removed from other apps the next
time you synchronise your tablet.
7.5 Import, export, and share contacts
This tablet allows you to import or export contacts between the

28 29
tablet, accounts, and mircoSD card, and to share contacts with others.
To import or export contacts
• On the Contacts screen, touch > Import/export.
• Select a source to copy contacts from.
• Select a target to copy contacts to.
• Select contacts and touch .
7.6 Accounts
Contacts, data or other information can be synchronised from
multiple accounts, depending on the apps installed on your tablet.
To add an account, drag down the status bar to open the Quick
settings panel and touch > Accounts > Add account.
You are required to select the kind of account you are adding, like
Google, Email, etc.
As with other account setups, you need to enter detailed information,
like username, password, etc.
You can remove an account and all associated information from the
tablet. Specifically, open the Settings screen, touch the account you
want to delete, and touch > Remove account.
Turn on/off the auto-sync
On the Accounts screen, touch and mark/unmark the Auto-
sync data checkbox to turn on/off the account auto-sync.When
it is activated, account changes will be automatically synchronised
between the tablet and the web.
Sync manually
On the Accounts screen, touch an account in the list and touch >
Sync now.To stop the sync, touch > Cancel sync.
8 Email
8.1 Gmail/Email
The first time you set up your tablet, you can select to use an existing
Gmail or to create a new Email account.
8.1.1 Gmail
As Google's web-based email service, Gmail is configured when you
first set up your tablet. Gmail on your tablet can be automatically
synchronised with your Gmail account on the web. Unlike other
kinds of email accounts, each message and its replies in Gmail
are grouped in your Inbox as a single conversation; all emails are
organised by labels instead of folders.
To create and send emails
• Touch the icon from Inbox screen.
• Enter recipient(s)’s email address in To field, and if necessary, select
Cc or Bcc to add a copy or a blind copy to the message.
• Enter the subject and the content of the message.
• Touch to add an attachment.
• Finally, touch the icon to send.
• If you do not want to send the mail out right away, you can touch
> Save draft save a copy.To view the draft, touch the icon
, then select Drafts.
If you do not want to send or save the mail, you can touch >
Discard.
To add a signature to emails, touch > Settings, choose an
account, and then touch Signature.

30 31
To receive and read your emails
When a new email arrives, you will be notified by a ringtone or
vibration, and an icon will appear on Status bar.
Touch and drag down the Status bar to display the Notification panel,
touch the new email to view it. Or you can also access the Gmail
Inbox label and touch the new mail to read it.
You can search for an email by sender, receiver, subject, etc.
• Touch the icon from Inbox screen.
• Enter the keyword you want to search for in the searching box
and confirm.
To reply or forward emails
• Reply When viewing an email, touch to reply to
the sender of this mail.
• Reply all Touch and select Reply all to send message
to all people in a mail loop.
• Forward Touch to forward the received mail to
other people.
• To assign a star or remove the star from the
conversation.
Managing Gmail by labels
To conveniently manage conversations and messages, you can
organise them using a label.
When reading a conversation’s messages, you can touch > Change
labels to change the label assigned to the conversation.
To view conversations by labels when viewing your Inbox or another
conversation list, touch the icon , and then touch a label to view
a list of conversations with that label.
To manage labels, touch Settings > an account > Manage labels.
Gmail settings
To manage Gmail settings, touch and select Settings in Inbox
screen.
General settings
• Gmail default
action
Touch to select the Delete or Archive action.
• Conversation
view
Mark the checkbox to group emails in same
conversation together for IMAP and POP3
accounts
• Swipe actions Mark the checkbox to define the swipe
action.
• Sender image Mark the checkbox to show beside name in
conversation list.
• Reply all Mark the checkbox to use as default for
replies to message.
• Auto-fit
messages
Mark the checkbox to zoom in/out the
messages to fit the screen.
• Auto-advance Touch to select which screen to show after
you delete or archive a conversation.
• Confirm before
deleting
Mark the checkbox to confirm before
deleting emails.
• Confirm before
archiving
Mark the checkbox to confirm before
archiving emails.

32 33
• Confirm before
sending
Mark the checkbox to confirm before
sending emails.
Touch an account, the following settings will show:
• Inbox type Touch to set the Inbox as the Default one or
Priority one.
• Inbox categories Touch to mark the checkbox to show/hide in
the Inbox screen.
• Notifications Mark checkbox to activate notification when a
new Gmail arrives
• Inbox sound Touch to select a ringtone for your Gmail
when Notifications is on
• Signature To add a signature text to the end of each
mail you send.
• Vacation
responder
Touch to set automatic reply during your
vacation.
• Sync Gmail Mark the checkbox to sync Gmail.
• Days of mail to
sync
Touch to set the duration for mail sync
• Manage Labels Touch to open the Label screen,where you
can manage syncronisation and notifications
• Download
attachments
Mark the checkbox to auto-download
attachments to recent messages via Wi-Fi.
• Images Show image beside name in conversation list.
8.1.2 Email
Besides your Gmail account, you can also set up external POP3, IMAP,
or EXCHANGE email accounts in your tablet.
To access this function, touch Email from Home screen.
An email wizard will guide you through the steps to set up an email
account.
• Enter the email address and password of the account you want
to set up.
• Touch next. If the account you entered is not provided by your
service provider in the device, you will be prompted to go to the
email account settings screen to enter settings manually. Or you
can touch MANUAL SETUP to directly enter the incoming and
outgoing settings for the email account you are setting up.
• Enter the account name and display name in outgoing emails.
• To add another email account, you can touch > Settings >
Add account.
To create and send emails
• Touch the icon from Inbox screen.
• Enter recipient(s) email address(es) in To field.
• If necessary, expand the Cc and Bcc options to add a copy or a
blind copy to the message.
• Enter the subject and the content of the message.
• Touch to add an attachment.
• Finally, touch to send.
• If you do not want to send the mail right away, you can touch >
Save draft or touch Back key to save a copy.

34 35
9 Calendar & time
9.1 Calendar
Use Calendar to keep track of important meetings, appointments, etc.
9.1.1 Multimode view
You can display the Calendar in Day,Week, Month, or Schedule view.
• Touch the upper left corner of the screen to change your Calendar
view. Touch (1) in the upper right corner to return to Today's
view.
9.1.2 Create new events
You can add new events from any Calendar view.
• To access a new event screen, touch in the lower right corner
of the screen.
• Fill in all required information for this new event. If it is a whole-day
event, you can turn on the All-day switch.
• When you finish editing, touch SAVE.
To quickly create an event from Week view screen, touch an empty
spot and then to create the new event.
Note: You must login your Gmail account first before using this
function.
9.1.3 Delete or edit an event
Touch the event to enter details screen, and touch to edit the
event by modifying the title, location, notification, visibility, etc. On the
event-editing screen, you can touch DELETE to delete the event if
it is no longer required.
(1) The number is consistent with the date.
9.1.4 Event reminder
If a reminder is set for an event, the upcoming event icon (1) will
appear on Status bar as a notification when the reminder time arrives.
Touch and drag down the status bar to open the notification panel,
touch the event name to view Calendar notification list.
Touch Back key to keep the reminder pending on the status bar and
the notification panel.
9.1.5 Calendar settings
On the Calendar main screen, touch at the upper left corner and
then touch Settings to access the following Calendar settings.
General View and change the frequently used
settings regarding the calendar.
Events from Gmail Add events from Gmail and specify the
visibility for the events.
Birthdays Add the birthdays of Google+ circles
and contacts to the calendar, and set
the colour to show.
Holidays Add country and religious holidays
to the calendar, and set the colour
to show.
(1) The number is consistent with the date.

36 37
9.2 Clock
The Clock app includes four subsidiary apps: Alarm, World clock,
Countdown and Timer.
9.2.1 Set an alarm
On the Clock screen, touch to enter the Alarm screen, and touch
to add a new alarm. Set hour and minute on the clock, and touch
OK to continue.The following options will appear:
Label Set a name for the alarm.
Repeat Select days you want alarm to work.
Ringtones Select a ringtone for the alarm by touching .
Delete Delete the current alarm by touching .
9.2.2 Change alarm settings
On the Alarm screen, touch > Settings. You can change settings
for the following options:
Style Select the clock style:Analog or Digital.
Automatic home
clock
Mark the checkbox to activate Automatic
home clock feature.
Home time zone Select a home time zone.
Silence after Set the duration of alarms.
Snooze length Set the time of interruption for an alarm.
Alarm volume Set the alarm volume.
Volume buttons Set Volume up/down key behaviours when
there is an alarm: Snooze, Dismiss or Do
nothing.
Start week on Set the start day of week.
10 Getting connected
10.1 Connect to the Internet
10.1.1Wi-Fi
Using Wi-Fi, you can connect to the Internet when your tablet is
within range of a wireless network.
Turn Wi-Fi on and connect to a wireless network
• On the Quick settings panel, touch > Wi-Fi.
• Touch the Wi-Fi switch to turn on or off Wi-Fi. The detailed
information of detected Wi-Fi networks is displayed in the Wi-Fi
networks section.
• Touch a Wi-Fi network to connect. If the network you selected is
secured, you are required to enter a password or other credentials
(you may contact your network operator for details). When you
finish entering, touch CONNECT.
Activate notification when a new network is detected
When Wi-Fi is on and the network notification is activated, the
Wi-Fi icon will appear on the status bar whenever the tablet
detects an available wireless network within range.
Perform the following steps to activate the notification function:
• On the Quick settings panel, touch > Wi-Fi.
• On the Wi-Fi screen, touch > Advanced and turn on the
Network notification switch.
Add a Wi-Fi network
When Wi-Fi is on, you may add new Wi-Fi networks according to
your preferences.
• On the Quick settings panel, touch > Wi-Fi.

38 39
• On the Wi-Fi screen, touch > Add network.
• Enter the name of the network and any required network
information.
• Touch CONNECT.
When successfully connected, your tablet will be connected
automatically the next time you are within range of this network.
Forget a Wi-Fi network
The following steps prevent automatic connections to networks
which you no longer wish to use.
• Turn on Wi-Fi.
• On the Wi-Fi screen, long press the name of the connected
network.
• Touch Forget network from the menu that appears.
10.2 Browser
Using Browser, you can enjoy surfing the web.
On the Home screen, touch > .
Go to a web page
On the Browser screen, touch the URL box at the top, enter the
address of the web page and confirm.
Touch to stop accessing
Touch to search and go to this address
Set home page
• On the Browser screen, touch > Settings >General >Set
homepage.
• Designate a page or most visited website as your home page.
• If you choose Other, enter the URL of the website you want to set
as your home page, touch OK to confirm.
10.2.1View web pages
When opening a website, you can navigate on web pages by sliding
your finger on the screen in any direction to locate the information
you want to view.
Zoom in/out on a web page
Spread or pinch your fingers on the screen to zoom in or out.
Find text on a web page
• On the Browser screen, touch > Find on page.
• Enter the text or phrase you want to find. Text that matches the
inputs will be highlighted on the screen.
• Touch the up or down arrow to switch to the previous or next
matching items.
• Touch or the Back key to close the search bar.
Further operations for the text on a web page
You can copy, share or search the text from a web page:
• Long press the text to highlight the text.
• Move the two sliders to select the text.
• Touch to select all words in this web screen.
• Touch to copy the selected text.
• Touch or the Back key to deactivate the mode.
Table of contents


