Eglo 96452 User manual
Welcome to use 96452/96454 infrared motion sensor!
The product adopts good sensitivity detector and integrated circuit. It combines automation,
convenience, safety, energy-efficience and practical functions. It utilizes the infrared energy from
humans as control-signal source and it can start the load at once when one enters the detection
field. It can identify day and night automatically. It is easy to install and used widely.
SPECIFICATION:
Power Source: 220-240V/AC Detection Range: 180°
Power Frequency: 50/60Hz Detection Distance: 12m max(<24C°)
Ambient Light: <3-2000LUX (adjustable) Working Temperature: -20~+40C°
Time Delay: Min.10sec±3sec Working Humidity: <93%RH
Max.15min±2min Power Consumption: approx 0.5W
Rated Load: Max.1200W Installation Height: 1.8-2.5m
300W Detection Moving Speed: 0.6-1.5m/s
FUNCTION:
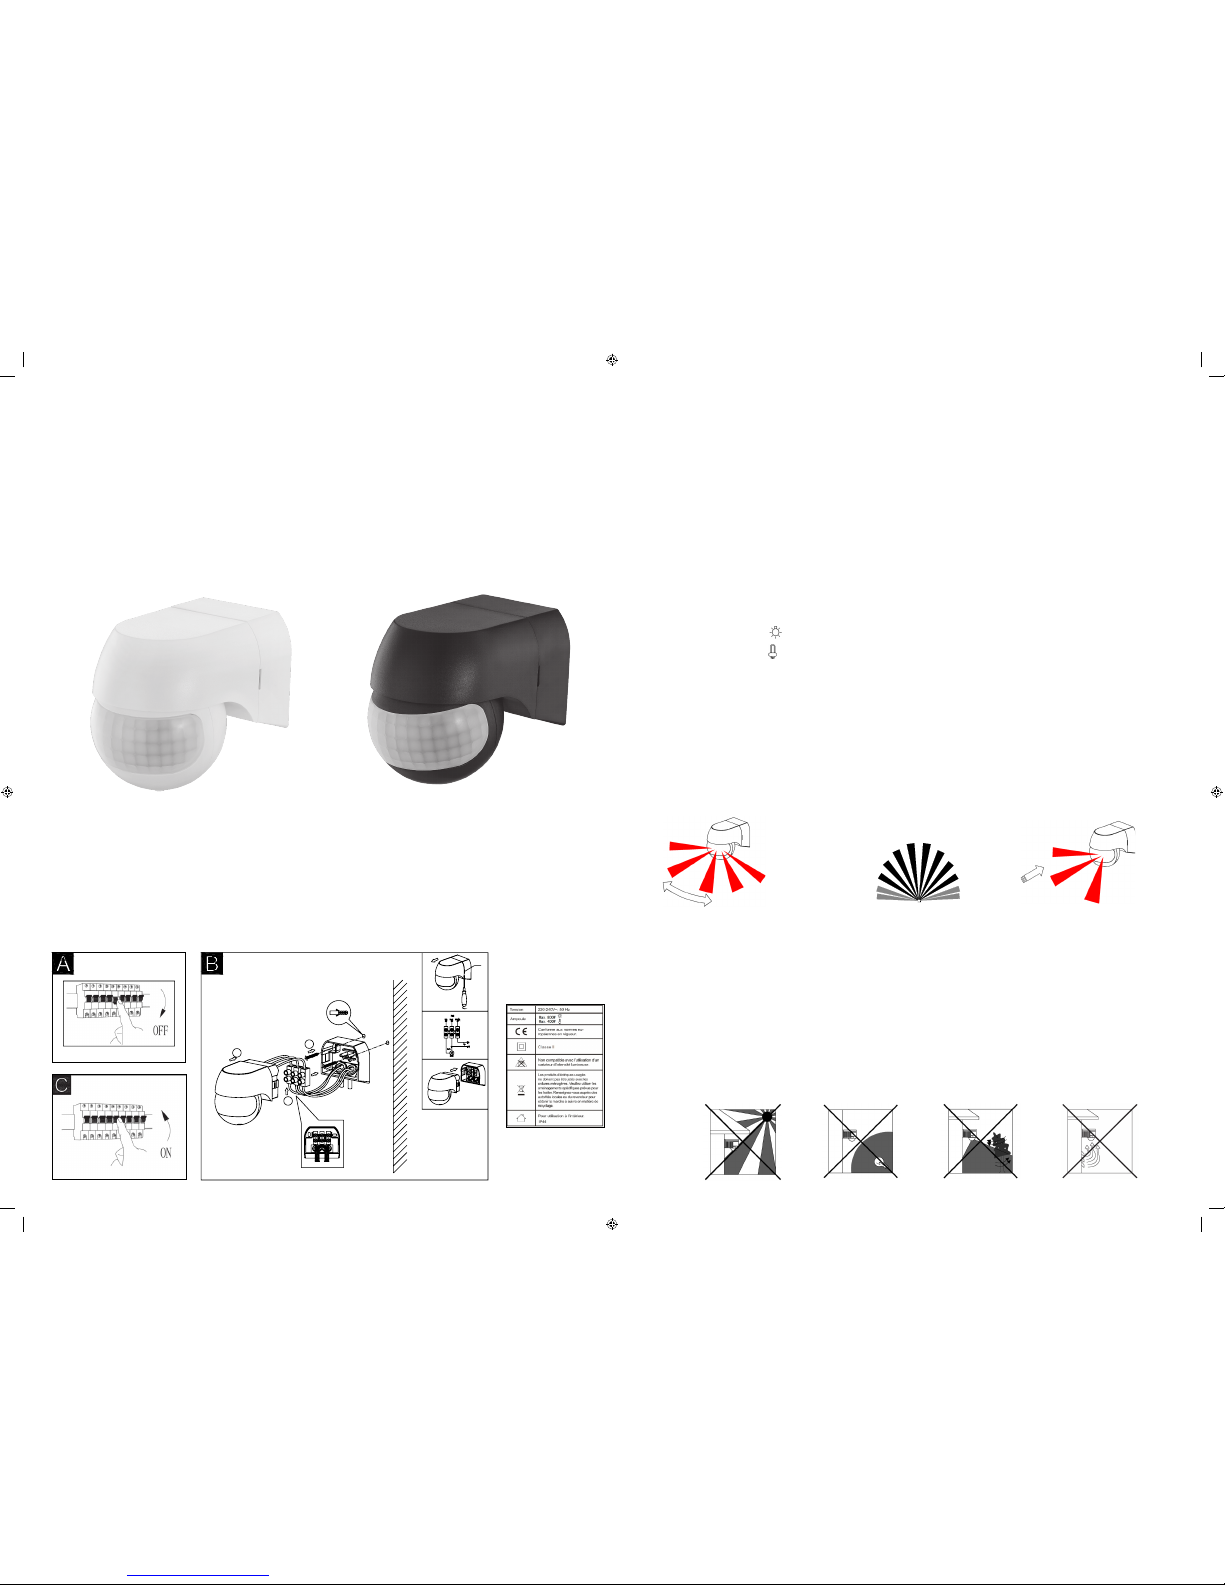
• Can identify day and night: The consumer can adjust working state in different ambient light. It
can work in the daytime and at night when it is adjusted on the “sun” position (max). It can work
in the ambient light less than 3LUX when it is adjusted on the “3” position (min). As for the ad-
justment pattern, please refer to the testing pattern.
• Time-Delay is added continually: When it receives the second induction signals within the first
induction, it will restart to time from that moment.
Good sensitivity Poor sensitivity
INSTALLATION ADVICE:
Since the detector responds to changes in temperature, avoid the following situations:
• Avoid pointing the detector towards objects with highly reflective surfaces, such as mirrors etc.
• Avoid mounting the detector near heat sources, such as heating vents, air conditioning units,
light etc.
• Avoid pointing the detector towards objects that may move in the wind, such as curtains, tall
plants etc.
96452/96454
Infrared Motion Sensor
Instruction Manual
OPEN
1
2
3
96452/96454
L' NL
96452_96454_bda.indd 1 27.12.2016 10:38:49
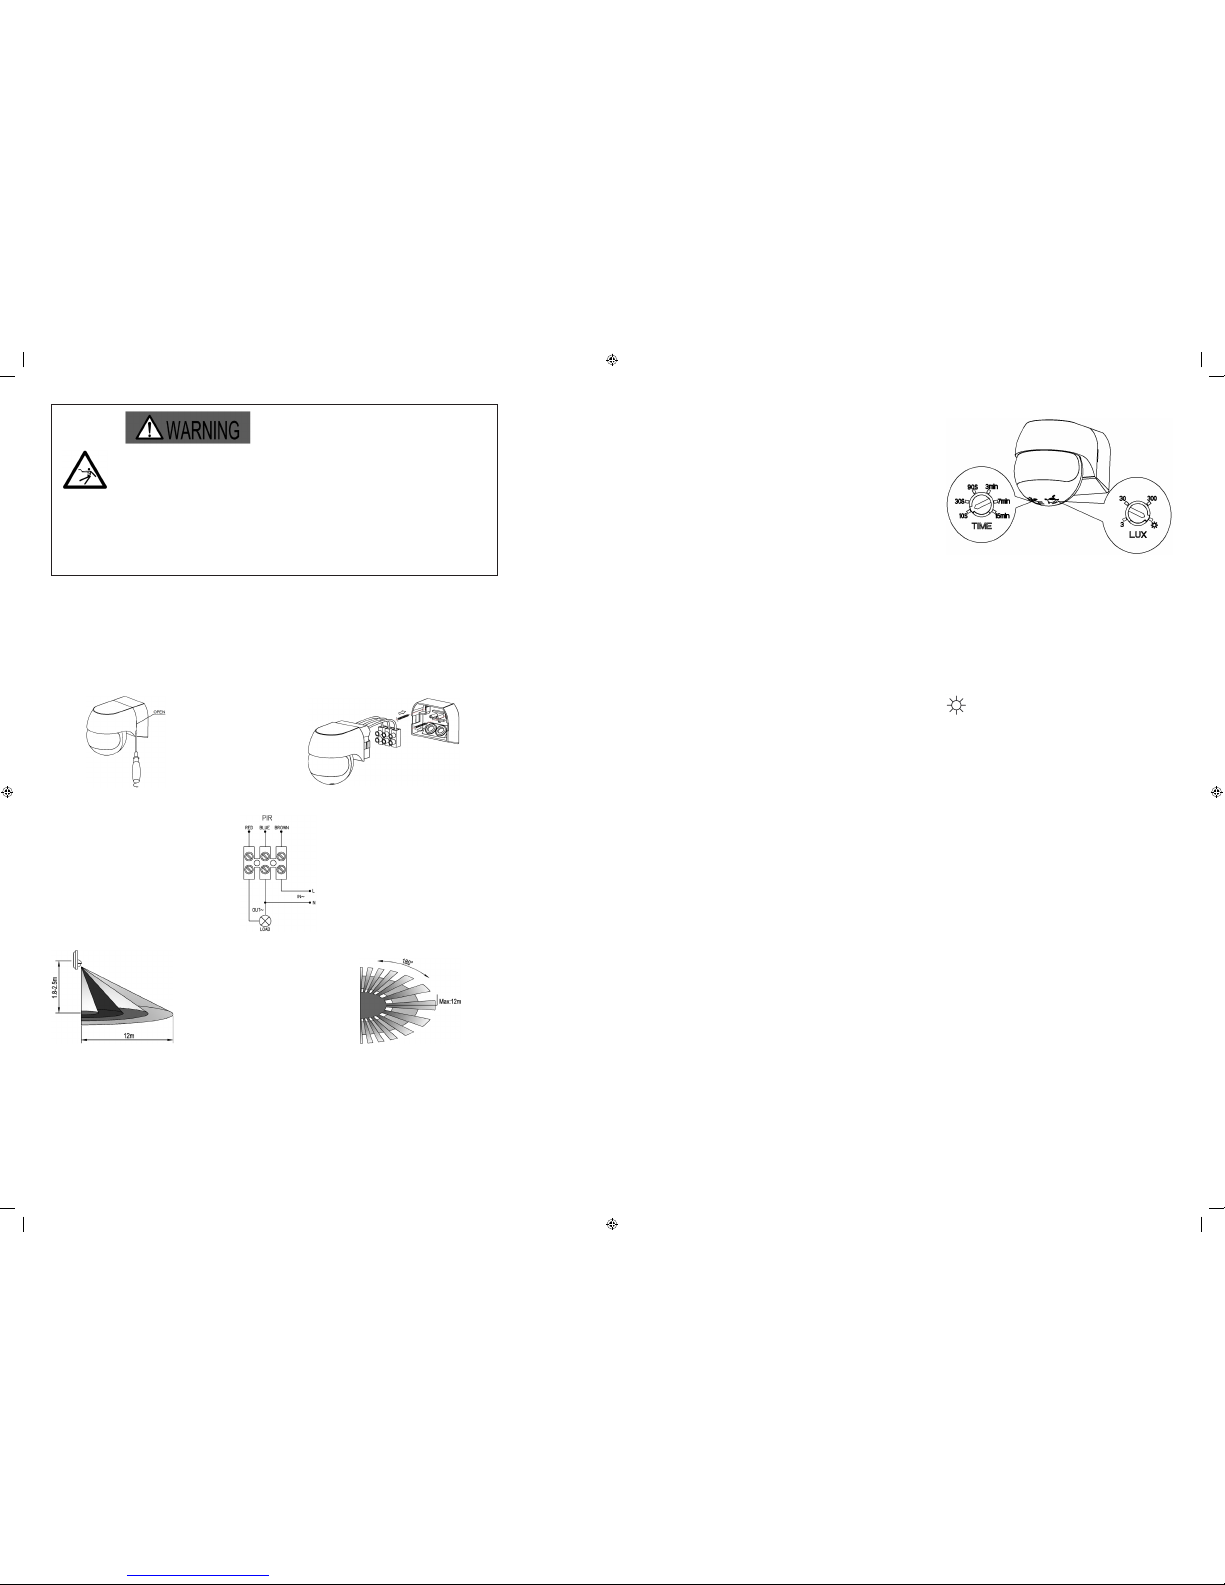
• Loosen the screw in the back and open the bottom (refer to figure 1).
• Find the wire hole with gasket on the downside of the sensor and guide the power wire through
hole. Connect the power wire to connection-wire column according to the connection-wire
diagram.
• Mount the bottom with included screw on the selected position. (refer to figure 2)
• Install the sensor on the bottom, tighten the screw and then test it.
CONNECTION-WIRE DIAGRAM:
(See the right figure)
SENSOR INFORMATION:
Height of installation: 1.8-2.5m Detection Distance: Max.12m
EU - EGLO Leuchten GmbH, Heiligkreuz 22, 6136 Pill, Austria
BA- EGLO Rasvjeta BH D.O.O., Ormanica bb, BIH-76250 Gradacac, Tel.+387 35 86 85 00, Fax +387 35 82 44 41 BG-EGLO Bulgaria EOOD 2B ´Serdika´
Str., 8000 Bourgas, Tel. +359 56 960 401, Fax +35956 530 595
CZ- EGLO Cesko-Moravská Svítidla, SPOL. S.R.O.,Náchodská 2479/63, CZ-193 00 Praha 9 Horní Pocernice,Tel. +420 281 924 163x +420 281 925 205
HU- EGLO LUX KFT.- Sale, FÖ-ÚT 143/A, H-2120 Dunakeszi,Tel. +36 27 341 353,Fax +36 27 341 409
KS-EGLO Kosovo LLC, Lugisht e qytetit pn, 20000 Prizren - Kosovo, Tel: +337 44 2166 87
HR-EGLO Rasvjeta D.O.O., Josipa Loncara 3, HR-10000 Zagreb, Tel. +385 1 37940 62,Fax +385 1 379 41 04
TEST:
• Turn the TIME knob counter-clockwise on the
minimum (10s). Turn the LUX knob clockwise
on the maximum (sun).
• Switch on the power; the sensor and its
connected lamp will have no signal at the
beginning. After Warm-up 30sec, the sensor
will start to work. If the sensor receives the
induction signal, the lamp will turn on.
When there is no another induction signal any more, the load will stop working within
10sec±3sec and the lamp will turn off.
• Turn LUX knob counter-clockwise to the minimum (3). If the ambient light is more than
3LUX, the sensor will not work and the lamp will stop working too. If the ambient light is
less than 3LUX (darkness), the sensor will work. Under no induction signal condition, the
sensor will stop working within 10sec±3sec.
Note: when testing in daylight, please turn LUX knob to (sun) position, otherwise the
sensor will not work!
SOME PROBLEMS AND SOLUTIONS:
• The load does not work:
a. Please check if the connection of power source and load is correct.
b. Please check if the load is good.
c. Please check if the settings of working light correspond to ambient light.
• The sensitivity is poor:
a. Please check if there is any hindrance in front of the detector to affect it to receive the
signals.
b. Please check if the ambient temperature is too high.
c. Please check if the induction signal source is in the detection field.
d. Please check if the installation height corresponds to the height required in the
instruction.
e. Please check if the moving orientation is correct.
• The sensor can not shut off the load automatically:
a. Please check if there is continual signal in the detection field.
b. Please check if the time delay is set to the maximum position.
c. Please check if the power corresponds to the instructions.
RO- EGLO Romania Prodexim SRL, Str. AtomistilorNr. 1D, R-077125 Magurele-Ilvov-Romania, Tel. +40 314 250 897,Fax+314 250 899
RU -ООO ЭГЛО Лайтинг, ул. Промышленная, д. 11, строение 3, офис419, Россия-115516 Москва, Tel. +7495 789 4311, Fax +7495 789 4312
RS-EGLO Rasveta D.O.O Beograd, Stefana Prvovencanog 28, 11000 Beograd, Srbija, Tel. +381 11 3981 366, Fax +381 11 3095 136
TR- EGLO Aydinlatma İthalat İhracat LTD, Eyüp Sultan Mah. Sekmen Cad. No: 18/1,34855 Samandira, Sancaktepe/ İstanbul, Tel. +90 216 311 09-02/-
03/-04, Fax +90 216 311 09-05
UA-EGLO Ukraine LTD, Str. Marko Vovchka 14, UA-04073 Kiev, Tel. +38 44 463 98 41, Fax +38 44 468 84 67
Made in China
Figure 1 Figure 2
Warning. Danger of death through electric shock!
• Must be installed by professional electrician
• Disconnect power source.
• Cover or shied any adjacent live components.
• Ensure device cannot be switched on.
• Check power supply is disconnected.
96452_96454_bda.indd 2 27.12.2016 10:38:50
This manual suits for next models
1


