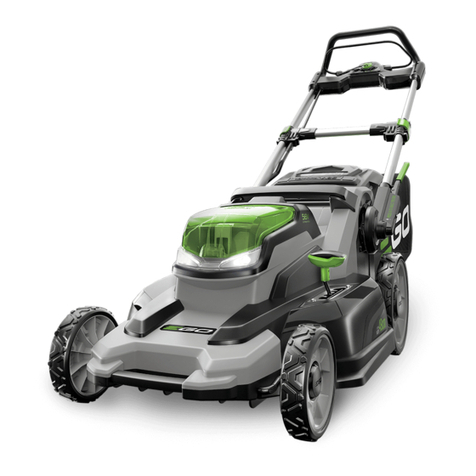
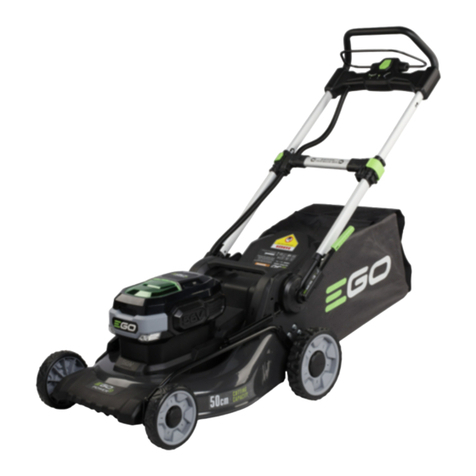
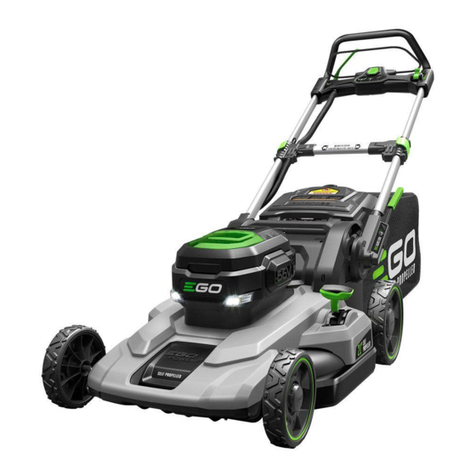
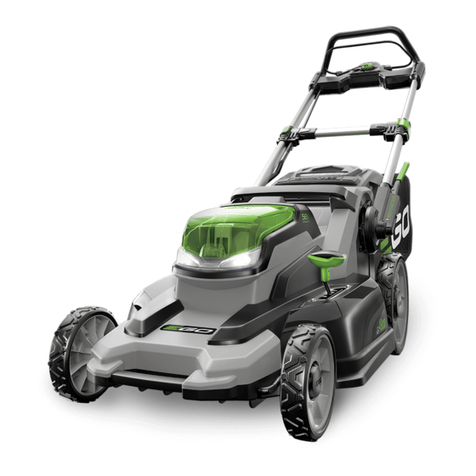
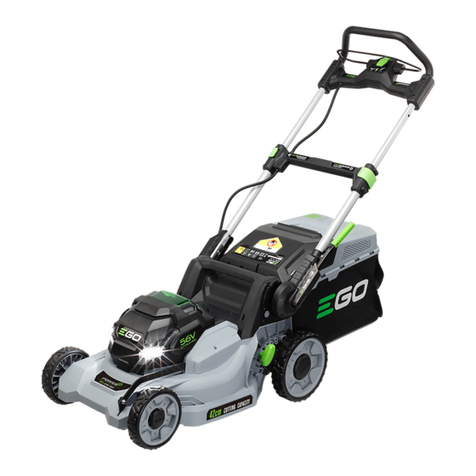
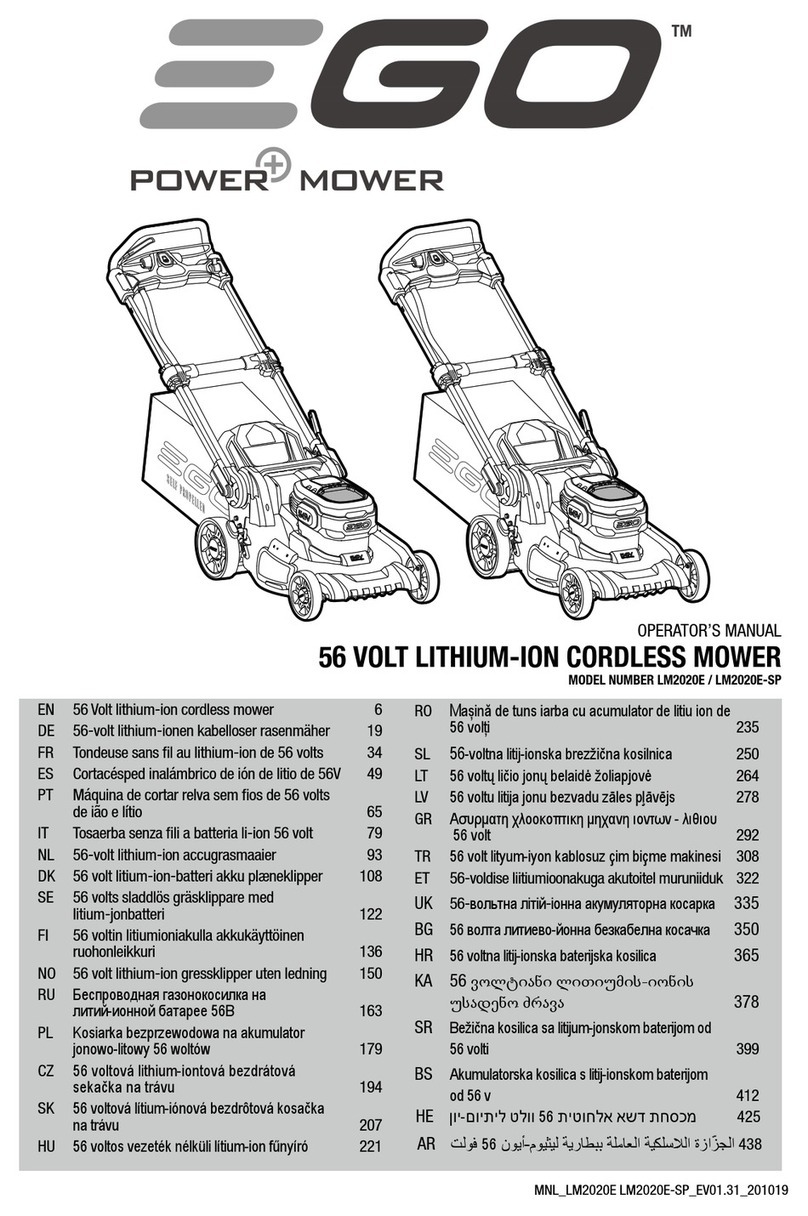
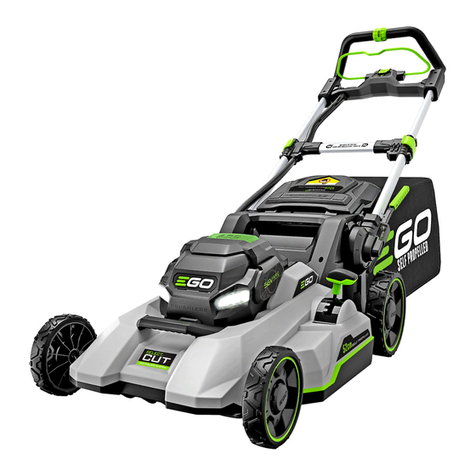
EGO LM2010E User manual

EN 56 Volt lithium-ion cordless mower 6
DE 56-volt lithium-ionen kabelloser rasenmäher 18
FR Tondeuse sans l au lithium-ion de 56 volts 31
ES Cortacésped inalámbrico de ión de litio de 56V 44
PT Máquina de cortar relva sem os de 56 volts
de ião e lítio 58
IT Tosaerba senza li a batteria li-ion 56 volt 70
NL 56-volt lithium-ion accugrasmaaier 82
DK 56 volt litium-ion-batteri akku plæneklipper 95
SE 56 volts sladdlös gräsklippare med
litium-jonbatteri 107
FI 56 voltin litiumioniakulla akkukäyttöinen
ruohonleikkuri 119
NO 56 volt lithium-ion gressklipper uten ledning 131
RU Ȼɟɫɩɪɨɜɨɞɧɚɹɝɚɡɨɧɨɤɨɫɢɥɤɚɧɚ
ɥɢɬɢɣɢɨɧɧɨɣɛɚɬɚɪɟɟ% 143
PL KRVLDUNDEH]SU]HZRGRZDQDDNXPXODWRU
MRQRZROLWRZ\ZROWyZ 156
CZ YROWRYiOLWKLXPLRQWRYiEH]GUiWRYi
VHNDþNDQDWUiYX 167
SK YROWRYiOtWLXPLyQRYiEH]GU{WRYiNRVDþND
QDWUiYX 180
LT YROWǐOLþLRMRQǐEHODLGơåROLDSMRYơ 192
LV YROWXOLWLMDMRQXEH]YDGX]ƗOHVSƺƗYƝMV 204
ET 56-voldise liitiumioonakuga akutoitel muruniiduk 216
OPERATOR’S MANUAL
56 VOLT LITHIUM-ION
CORDLESS MOWER
MODEL NUMBER LM2010E/LM2010E-SP

231
16
17
15
14
12 131110
7
9
6
5
A4
8
B
16
18
C
19
20

F
H
G
I
K
D
21
22
E
23
24
J
J-1
J-3
J-2
J-4
1
2

1
2
L
P
R
Q
S
M1
2
M-1
M-2
M-3
M-4
N
2
1
OO-3
O-2
O-1
1
2

T
W
X Y
THIS SIDE FACING GRASS
UU-1
U-2
U-3
U-4 U-5
THIS SIDE FACING GRASS
V
V-1
V-2
V-3

56 VOLT LITHIUM-ION CORDLESS MOWER — LM2010E/LM2010E-SP6
EN
READ ALL INSTRUCTIONS!
READ & UNDERSTAND
INSTRUCTION MANUAL
Residual risk! People with electronic devices, such
as pacemakers, should consult their physician(s) before
using this product. Operation of electrical equipment
in close proximity to a heart pacemaker could cause
interference or failure of the pacemaker.
WARNING: To ensure safety and reliability, all
repairs and replacements should be performed by a
qualied service technician.
Intended use & Foreseeable misuse: The product
is intended for mowing grass in domestic gardens only.
It must not be used to mow unusually high, dry or wet
grass, e.g. pasture grass; or to shred leaves. The product
is to be used only for its prescribed purpose. Any other
use is deemed to be a case of misuse.
SAFETY SYMBOLS
The purpose of safety symbols is to attract your attention to
possible dangers. The safety symbols and the explanations
with them deserve your careful attention and understand-
ing. The symbol warnings do not, by themselves, eliminate
any danger. The instructions and warnings they give are no
substitutes for proper accident prevention measures.
WARNING: Be sure to read and understand all
safety instructions in this Operator’s Manual, including
all safety alert symbols such as “DANGER,” “WARNING,”
and “CAUTION” before using this tool. Failure to follow all
instructions listed below may result in electric shock, re,
and/or serious personal injury.
SYMBOL MEANING
SAFETY ALERT SYMBOL: Indicates DANGER, WARN-
ING, or CAUTION. May be used in conjunction with other
symbols or pictographs.
WARNING: The operation of any power tools can
result in foreign objects being thrown into your eyes,
which can result in severe eye damage. Before beginning
power tool operation, always wear safety goggles or safety
glasses with side shields and a full face shield when
needed. We recommend a Wide Vision Safety Mask for
use over eyeglasses or standard safety glasses with side
shields.
SAFETY INSTRUCTIONS
This page depicts and describes safety symbols that may
appear on this product. Read, understand, and follow
all instructions on the machine before attempting to
assemble and operate.
Safety Alert Precautions that involve your
safety.
Wear Eye
Protection
Always wear safety goggles
or safety glasses with side
shields and a full face shield
when operating this product.
WARNING:
Read Opera-
tor’s Manual
To reduce the risk of injury,
user must read and under-
stand operator’s manual
before using this product.
Beware of
Sharp Blades.
Blades continue to rotate
after the motor is switched
off – Remove disabling device
before maintenance. Switch
off and remove detachable
battery pack(or disabling
device) before adjusting or
cleaning.
Keep Bystand-
ers Away
Ensure that other people and
pets remain at least 30m
away from the mower when
it is in use.
Class II Con-
struction
Double-insulated Construc-
tion.
IPX4 IP Symbol Protection against ingress of
water degree 4
V Volt Voltage
A Amperes Current
Hz Hertz Frequency (cycles per
second)
W Watt Power
min Minutes Time
Alternating
Current Type of current
Direct Current Type or a characteristic of
current
n0No Load Speed Rotational speed, at no load
... /min Per Minute Revolutions per minute

56 VOLT LITHIUM-ION CORDLESS MOWER — LM2010E/LM2010E-SP 7
EN
SAFETY RULES FOR CORDLESS LAWN
MOWER
DANGER: This machine was built to be operated
according to the rules for safe operation included in
this manual. As with any type of power equipment,
carelessness or error on the part of the operator can
result in serious injury. This machine is capable of injuring
hands and feet and throwing objects. Failure to observe
all safety instructions could result in serious injury or
death.
WARNING: When using cordless lawn mowers,
basic safety precautions should always be followed to
reduce the risk of re, electric shock, and personal injury.
IMPORTANT
READ CAREFULLY BEFORE USE. KEEP FOR FUTURE
REFERENCE.
SAFETY RULES FOR CORDLESS LAWNMOWERS:
CAUTION-DO NOT TOUCH ROTATING BLADE!
TRAINING
čRead the instructions carefully. Be familiar with the
controls and the proper use of the appliance.
čNever allow children or people unfamiliar with these
instructions to use the appliance. Local regulations
may restrict the age of the operator.
čNever mow while people, especially children, or pets
are nearby.
čThe operator or user is responsible for accidents or
hazards occurring to other people or their property.
PREPARATION
čWhile mowing, always wear substantial footwear and
long trousers.
čDo not operate the appliance when barefoot or wearing
open sandals. Avoid wearing clothing that is loose
tting or that has hanging cords or ties.
čThoroughly inspect the area where the appliance is to
be used and remove all stones, sticks, wires, bones,
and other foreign objects.
čBefore using, always visually inspect to see that the
blades, blade bolts and cutter assembly are not worn
or damaged. Replace worn or damaged blades and
bolts in sets to preserve balance. Replace damaged or
unreadable labels.
OPERATION
čMow only in daylight or in good articial light.
čAvoid operating the appliance in wet grass, where
feasible.
čAlways be sure of your footing on slopes.
čWalk, never run.
čFor wheeled rotary mowers, mow across the face of
slopes, never up and down.
čExercise extreme caution when changing direction on
slopes.
čDo not mow excessively steep slopes.
čUse extreme caution when reversing or pulling the
appliance towards you.
čStop the blade(s) if the appliance has to be tilted for
transportation when crossing surfaces other than
grass, and when transporting the appliance to and
from the area to be mowed.
čNever operate the appliance with defective guards
or shields, or without safety devices, for example
deectors and/or grass catchers, in place.
čSwitch on the motor according to instructions and with
feet well away from the blade(s).
čDo not tilt the appliance when switching on the motor,
except if the appliance has to be tilted for starting. In
this case, do not tilt it more than absolutely necessary
and lift only the part which is away from the operator.
Always ensure that both hands are in the operating
position before returning the appliance to the ground.
čDo not start the machine when standing in front of the
discharge opening.
čDo not put hands or feet near or under rotating parts. For
rotary mowers, keep clear of the discharge opening at
all times.
čNever pick up or carry an appliance while the motor
is running.
čSwitch off and remove detachable battery pack (or
disabling device) and make sure that all moving parts
have come to a complete stop before adjusting or
cleaning:
čWhenever you leave the machine;
čBefore clearing a blockage and unclogging chute;
čBefore checking, cleaning or working on the
appliance;
čAfter striking a foreign object. Inspect the appliance
for damage and make repairs as necessary.
čIf the appliance starts to vibrate abnormally (check
immediately):
čInspect for damage;
čReplace or repair any damaged parts;
čCheck for the tighten any loose parts.

56 VOLT LITHIUM-ION CORDLESS MOWER — LM2010E/LM2010E-SP8
EN
MAINTENANCE AND STORAGE
čBe careful during adjustment of the machine to prevent
entrapment of the ngers between moving blades and
xed parts of the appliance.
čKeep all nuts, bolts, and screws tight to be sure the
appliance is in safe working condition.
čCheck the grass catcher frequently for wear or
deterioration.
čReplace worn or damaged parts for safety.
čWhen servicing the blades be aware that, even though the
power source is switched off, the blades can still be moved.
čFor rotary mowers, ensure that only replacement
cutting means of the right type are used.
PERSONAL SAFETY
Tragic accidents can occur if operator is not alert to the
presence of children. Children are often attracted to the
mower and mowing activity. They do not understand the
dangers. Never assume that children will remain where
you last saw them.
čKeep children out of the mowing area and under the
watchful care of a responsible adult other than the
operator.
čBe alert and turn the mower off if a child enters the area.
čUse extreme care when approaching blind corners,
doorways, shrubs, trees, or other objects that may
obscure your vision of a child who may run into the
mower.
čChildren should be supervised to ensure that they are
not playing with the mower.
čAlways turn the mower off when removing the battery
pack from the tool. Stop the blade(s) if the appliance
has to be tilted for transportation when crossing
surfaces other than grass, and when transporting the
appliance to and from the area to be mowed.
OPERATION
GENERAL OPERATION:
čRead this operator’s manual carefully in its entirety before
attempting to assemble this machine. Read, understand,
and follow all instructions on the machine and in the
manuals before operation. Be completely familiar with the
controls and proper use of this machine before operating
it. Keep this manual in a safe place for future and regular
reference and for ordering replacement parts.
čUse the right appliance – Do not use the lawn mower
for any job except that for which it is intended.
čDon’t overreach – Keep proper footing and balance at
all times.
čObjects struck by the lawn mower blade can cause
severe injuries to persons. The lawn should always be
carefully examined and cleared of all objects prior to
each mowing.
čBefore and while moving backwards, look behind and
down for small children and other people.
čThis machine is not a plaything. Therefore, exercise
extreme caution at all times. Your unit has been
designed to perform one job: to mow grass. Do not use
it for any other purpose.
čDon’t force the lawn mower – it will do the job better
and more safely at the rate for which it was designed.
čBefore using, always visually inspect to see that the
blades, blade bolts and cutter assembly are not worn
or damaged. Replace worn or damaged blades and
bolts and any other components at the same time to
preserve balance. Replace damaged or unreadable
labels.
čUse extreme caution when reversing or pulling the
appliance towards you.
čThoroughly inspect the area where the equipment is to
be used. Remove all stones, sticks, wire, toys and other
foreign objects that could be tripped over or picked up
and thrown by the blade. Thrown objects can cause
serious personal injury. Plan your mowing pattern to
avoid discharge of material toward roads, sidewalks,
bystanders and the like. Also, avoid discharging
material against walls or obstructions, which may
cause discharged material to ricochet back toward the
operator.
čTo help avoid blade contact or an injury from thrown
objects, stay in the operator zone behind the handles
and keep children, bystanders, helpers and pets at
least 30m from the mower while it is in operation. Stop
the machine if anyone enters the area.
čAlways wear safety glasses or safety goggles during
operation and while performing an adjustment or repair
to protect your eyes. Thrown objects that ricochet can
cause serious injury to the eyes. Always use a face or
dust mask if the operation is dusty.
čDress properly – Do not wear loose clothing or jewelry.
They can be caught in moving parts. Use of rubber
gloves and footwear is recommended when working
outdoors. Wear sturdy, rough-soled work shoes and
close-tting trousers and shirts. Shirts and trousers
that cover the arms and legs and steel-toed shoes are
recommended. Never operate this machine in bare
feet, sandals, slippery or lightweight (e.g., canvas)
shoes.

56 VOLT LITHIUM-ION CORDLESS MOWER — LM2010E/LM2010E-SP 9
EN
čDo not put hands or feet near rotating parts or under the
cutting deck. Contact with the blade can injure hands
and feet.
čA missing or damaged discharge cover can cause
blade contact or injuries from thrown objects.
čMany injuries occur as a result of the mower being
pulled over the foot during a fall caused by slipping or
tripping. Do not hold onto the mower if you are falling;
release the handle immediately.
čNever pull the mower back toward you while you are
walking. If you must back the mower away from a
wall or obstruction rst look down and behind to avoid
tripping and then following these steps:
čStep back from mower to fully extend your arms.
čBe sure you are well balanced with sure footing.
čPull the mower back slowly, no more than half way
toward you.
čRepeat these steps as needed.
čDo not operate the mower while under the inuence of
alcohol or drugs.
čNever operate the appliance with defective guards
or shields, or without safety devices, for example
deectors and/or grass catchers, in place.
čStay alert – watch what you are doing. Use common
sense. Do not operate the lawn mower when you are
tired.
čT
he motor/blade control handle is a safety device. Never
attempt to bypass its operation. Doing so makes the
safety device inoperative and may result in personal
injury through contact with the rotating blade. The
motor/blade control handle must operate easily in both
directions and automatically return to the disengaged
position when released.
čAvoid dangerous environments – Don’t use lawn
mowers in damp or wet locations.
čDon’t use in rain.
čAlways be sure of your footing. A slip and fall can
cause serious personal injury. If you feel you are losing
your footing, release the motor/blade control handle
immediately and the blade will stop rotating within
three seconds.
čStop the blade when crossing gravel drives, walks or
roads.
čIf the equipment should start to vibrate abnormally,
stop the motor and check immediately for the cause.
Vibration is generally a warning of trouble.
čInspect for damage;
čReplace or repair any user replaceable damaged
parts;
čCheck for and tighten any loose parts.
čNever operate the mower without the proper trailing
shield, discharge cover, grass bag, mulching insert,
side discharge chute, motor/blade control handle or
other safety protective devices in place and working.
Never operate the mower with damaged safety
devices. Failure to do so can result in personal injury.
čIf situations occur that are not covered in this manual,
use care and good judgment. Contact EGO Customer
Service for assistance.
čUse only with the battery packs and chargers listed
below:
BATTERY PACK CHARGER
BA1120E, BA2240E, BA2800,
BA3360, BA4200
CH5500E,
CH2100E
čThe battery pack must be removed from the appliance
before it is scrapped.
čThe battery shall be disposed of safely.
OPERATION ON A SLOPE:
Slopes are a major factor related to slip-and-fall acci-
dents, which can result in severe injury. Always be sure of
your footing on slopes. Operation on slopes requires extra
caution. If you feel uneasy on a slope, do not mow it.
Do:
čMow across the face of slopes; never mow up and down.
Exercise extreme caution when changing direction on
slopes.
čWatch for holes, ruts, rocks, hidden objects, or bumps which
can cause you to slip or trip. Tall grass can hide obstacles.
Do not:
čDo not mow near drop-offs, ditches or embankments;
you could lose your footing or balance.
čDo not mow slopes greater than 15 degrees.
čDo not mow on wet grass. Unstable footing could
cause slipping.

56 VOLT LITHIUM-ION CORDLESS MOWER — LM2010E/LM2010E-SP10
EN
SERVICE
WARNING: Grass bag components, the discharge
cover, side discharge chute, mulching insert and trailing
shield are subject to wear and damage, which could expose
moving parts or allow objects to be thrown and could
increase the risk of injury. For safety protection, frequently
check all components and replace damaged components
immediately with identical replacement parts, listed in this
manual. Contact EGO Customer Service or your closest
EGO service center, and repairs or replacements shall be
performed by a qualied service technician!
čIf the mower’s built-in overload protection switch
frequently trips, contact EGO Customer Service or your
closest EGO service center.
čDo not wash the mower with a hose; avoid getting
water in the motor and electrical connections.
čRemove the key and store the idle lawn mower indoors
when not in use. Allow the motor to cool before storing
it in any enclosure. The lawn mower should be stored
in a dry, high, or locked-up enclosure, out of reach of
children.
čWhen servicing, use only identical replacement parts
listed in this manual. Use of parts that do not meet the
original equipment specications may lead to improper
performance and compromised safety.
čRemove or disconnect the battery pack before servicing,
cleaning, or removing material from the lawn mower.
čFollow instructions for lubricating and changing
accessories.
čKeep handles dry, clean and free from oil and grease.
čTo reduce a re hazard, keep the motor cover free of
grass, leaves and debris build-up.
čCheck the blade and motor mounting bolts at frequent
intervals for proper tightness. Also, visually inspect the
blade for damage (e.g., bending, cracking and wear.).
Replace the blade only with the identical replacement
blade, listed in this manual.
čMaintain your mower with care – keep the mower
blade sharp and clean for the best and safest
performance. Mower blades are sharp and can cut.
Wrap the blade or wear gloves and use extra caution
when servicing it.
čNever remove or tamper with safety devices. Regularly
check their proper operation. Never do anything to
interfere with the intended function of a safety device
or to reduce the protection provided by a safety device.
čAlways stop the motor before making adjustments to a
wheel or a cutting-height adjustment.
čAfter striking a foreign object, stop the motor, remove
the key, and thoroughly inspect the mower for any
damage. Repair the damage before operating the
mower.
čMaintain or replace safety and instruction labels,
as necessary. Contact EGO Customer Service or
your closest EGO service center, and repairs or
replacements shall be performed by a qualied service
technician!
čSAVE THESE INSTRUCTIONS. Refer to them frequently
and use them to instruct others who may use this tool.
If you lend this tool to someone else, also lend these
instructions to them to prevent misuse of the product
and possibly injury.
BATTERY USE AND CARE
čTo preserve natural resources, please recycle or
dispose of batteries properly. This product contains
lithium-ion batteries. Local or national laws prohibit
disposal of lithium-ion batteries in ordinary rubbish.
Consult your local waste authority for information
regarding available recycling and/or disposal options.
čUpon removal of the battery pack for disposal or
recycling, cover the battery pack’s terminals with
heavy-duty adhesive tape. Do not attempt to destroy
or disassemble the battery pack or remove any of its
components. Lithium-Ion batteries, must be recycled
or disposed of properly. Also, never touch the terminals
with metal objects and/or body parts as a short circuit
may result. Keep away from children. Failure to comply
with these warnings could result in re and/or serious
injury.
čUNDER ABUSIVE CONDITIONS, LIQUID MAY BE
EJECTED FROM THE BATTERY; AVOID CONTACT. IF
CONTACT ACCIDENTALLY OCCURS, FLUSH WITH
WATER. IF LIQUID CONTACTS EYES, ADDITIONALLY
SEEK MEDICAL HELP. Liquid ejected from the battery
may cause irritation or burns.
SPECIFICATIONS
Model Number LM2010E
LM2010E-SP
Self Propel System No Yes
Voltage 56 V 56 V
No-Load Speed 3150 /min 3150 /min
Cutting Height 25-95 mm 25-95 mm
Cutting Height Positions 6 6
Deck Size 51 cm 51 cm
Cutting Width 50 cm 50 cm
56 VOLT LITHIUM-ION CORDLESS MOWER — LM2010E/LM2010E-SP 11
EN
Grass Bag Volume 60 L 60 L
Mower Weight
(without battery pack) 25.1 kg 28.1 kg
Blade Model AB2001 AB2001
Measured sound power
level LWA
94 dB(A) 94.32 dB(A)
Sound pressure level at
operator’s ear LPA
K=2.5 dB(A)
82.5 dB(A) 85.6 dB(A)
Guaranteed sound power
level LWA
(according to 2000/14/EC)
96 dB(A) 96 dB(A)
Valuation of
vibration ah
K=1.5 m/s2
Left handle 3.65 m/s21.08 m/s2
Right handle 1.64 m/s20.88 m/s2
Blade brake YES YES
čThe declared vibration total value has been measured
in accordance with a standard test method and may be
used for comparing one tool with another;
čThe declared vibration total value may also be used in
a preliminary assessment of exposure.
NOTICE: The vibration emission during actual use of the
power tool can differ from the declared value in which the
tool is used;In order to protect the operator, user should wear
gloves and ear protectors in the actual conditions of use.
PACKING LIST
PART NAME QUANTITY
Lawn mower 1
Grass bag 1
Grass bag frame 1
Mulching insert 1
Side-discharge chute 1
Safety key 2
Operator’s manual 1
DESCRIPTION
KNOW YOUR MOWER (Fig. A & B & C & D & E)
1. Self-propel Trigger
2. Handle
3. Bail Switch (Switch Lever)
4. Switch Button
5. Grass Bag
6. Quick-adjust Knob
7. Cutting-height Adjustment Lever
8. Rear Wheel
9. Side Discharge Chute
10. Side Discharge Door
11. Mower Deck
12. LED Headlights
13. Front Wheel
14. Battery-pack Cover
15. Rear Handle
16. Rear-discharge Door
17. Self-propel Speed-control Lever
18. Trailing Shield
19. Safety Key Slot
20. Battery-release Button
21. Switch Button for LED Headlights
22. Power Indicator on the Mower
23. Mulching Insert
24. Side Discharge Chute
OPERATION
ASSEMBLING THE GRASS BAG
1) Slide the grass bag onto the frame (Fig. F).
2) Assemble the top clips to the frame (Fig. G). Then
assemble the two side clips. Assemble the bottom
clip lastly.
3)
The completely assembled grass bag is shown in Fig. H.
ADJUSTING THE FOLDABLE HANDLE
WARNING: Do not attempt to start the mower until
the handle has been locked at one of the three preset
operating positions (UPPER OPERATING POSITION, MIDDLE
OPERATING POSITION and LOWER OPERATING POSITION).
Your mower is shipped with the handle in the compact,
LOCKED STORAGE POSITION (Fig. I).
1) Pull out the two quick-adjust knobs and turn 90°
to release the handle from the LOCKED STORAGE
POSITION.
2) Lift the handle. Gently pivot the handle backward
until the handle reaches any one of the three different
positions as shown in Fig. J. Turn the knobs 90° until
you hear and feel the lock pin engage in the right
position.

56 VOLT LITHIUM-ION CORDLESS MOWER — LM2010E/LM2010E-SP12
EN
Fig. J parts description see below:
J-1
J-2 Middle Operating Position
J-3 Lower Operating Position
J-4 Locked Storage Position
NOTICE: The two quick-adjust knobs must be in the
same height during the adjustment so that they can be
engaged into the position at the same time.
ATTACHING/REMOVING THE GRASS BAG/
MULCHING INSERT/SIDE DISCHARGE CHUTE
WARNING: Do not at any time make any adjustment
to the lawn mower without rst stopping the motor, removing
the safety key and waiting for the blade to stop rotating.
NOTICE: Attach any of the attachments to the lawn
mower before mowing.
čTo Attach/Remove the Grass Bag (Fig. K)
Adjust the handle to the suitable operating position.
Lift the rear-discharge door and hook the grass bag
onto the pivot rod. To remove, just lift the grass bag up,
off of the pivot rod. Lastly, release the rear-discharge
door.
NOTICE: Remove the pre-installed mulching insert from
the mower before attaching the grass bag to the mower.
čTo Attach/Remove the Mulching Insert (Fig. L)
Lift the rear-discharge door and insert the mulching
insert into the mower. To remove, just pull it out. Lastly,
release the rear-discharge door.
čTo Attach/Remove the Side Discharge Chute (Fig. M)
Lift the side-discharge door.Align the slot of the discharge
chute with the knob of the discharge door and release the
side-discharge door gently to make it rotate around the
pivot rob until it rests on the discharge chute rmly. To re-
move, lift the side-discharge door, lift the side- discharge
chute up, off the assembly knob of the door.
Fig. M parts description see below:
M-1 Side-discharge Door
M-2 Assembly Knob
M-3 Assembly Slot
M-4 Side-discharge Chute
ADJUSTING THE CUTTING HEIGHT (Fig. N)
WARNING: Keep your feet away from the deck when
adjusting its height. The mower can be set to 6 cutting
heights between 20mm and 90mm. Choose the proper
cutting height according to the type and condition of the
grass.
NOTICE: When moving the tool, make sure the cutting
height is adjusted at the position of 3 or higher. Failure to
do so, could result in the damage of the blade.
ATTACHING/DETACHING THE BATTERY PACK (Fig. O)
CHARGE BEFORE FIRST USE.
WARNING: If any parts are broken or missing, do
not attempt to attach the battery pack to the mower or
operate the mower until the broken or missing parts are
replaced. Failure to do so could result in serious injury.
čTo Attach
Push the battery pack into the battery compartment
until you hear a “click”.
čTo Detach
Depress the battery-release button in the battery
compartment.
Fig. O parts description see below:
O-1 Safety Key Slot
O-2 Safety Key
O-3 Battery-release Button
NOTICE: Make sure that the latch on the mower snaps
into place and that the battery pack is secured to the
mower before starting operation.
STARTING/STOPPING THE MOWER
WARNING: The operation of any lawn mower
can result in foreign objects being thrown into your or
others’ eyes, which can damage eyes severely.Always
wear safety glasses while operating the mower or while
performing any adjustments or repairs on the mower.
WARNING: Ensure that other people and pets
remain at least 30m away from the mower when it is in
use.
WARNING: The blade will continue to rotate for
a few seconds after the mower is turned off. Allow the
motor/blade to stop rotating before starting it again. Do
not rapidly turn the mower off and on.
SAFETY KEY
In order to prevent accidental start-up or unauthorized
use of your cordless mower, a removable safety key has
been incorporated into the design of your mower. The
mower will be completely disabled when the safety key
has been removed from the mower.

56 VOLT LITHIUM-ION CORDLESS MOWER — LM2010E/LM2010E-SP 13
EN
DANGER: Rotating blades can cause serious injury.
To prevent serious injury, remove the safety key when
the mower is unattended, or when adjusting, cleaning,
servicing, transporting, lifting, or storing the mower.
To Start (Fig. Q)
1)
Attach the battery pack to the mower, insert the safety
key into the key slot and close the battery cover (Fig. O).
2)
According to Fig. P, depress the switch button down.
3)
With the switch button depressed, pull the bail switch
upward to the handle and release the switch button.
To Stop (Fig. R)
1) Fully release the bail switch.
2)
The electric brake in the Automatic Braking
Mechanism will stop the blade rotation within 3
seconds of the bail switch release.
VARIABLE-SPEED SELF-PROPEL SYSTEM (only
model LM2010E-SP)
LM2010E-SP mower is equipped with variable-speed
self-propel capability. This system is independent of the
blade On-Off switch; it is not dependent on blade rotation.
To operate the system without blade rotation, pull the
self-propel lever to the handle.
To turn the self propel off, release the self-propel lever.
The system has variable speed. To increase the speed,
move the self-propel speed-control lever forwards. To
decrease the speed, move the self-propel speed-control
lever backwards (Fig. S).
To operate with the blade rotating for cutting:
1. Start the mower.
2. While holding the bail switch against the handle with
left hand, pull the self-propel lever to the handle with
your right hand.
3. Hold both the bail switch and the self-propel lever
simultaneously against the handle with your right
hand and use your left hand to adjust the self-propel
speed-control lever to choose a proper speed.
WARNING: To reduce the risk of injury, never attempt
to override the operation of the switch or self propel system.
Use the self propel for its intended purpose only.
LED HEADLIGHTS (Fig. A-12)
Press the switch button (Fig. D-21) to turn on/off the LED
headlights in the front of the battery compartment.
POWER INDICATOR ON THE MOWER (Fig. D-22)
The mower is equipped with a power indicator to indicate
the charge level of the battery pack and the working
status of the mower. The power indicator will illuminate
when the blade is rotating or when the LED headlights are
turned on.
Power
Indicator
on Mower
Meaning Action
Shining
green
Mower is working
properly; battery
has at least 15%
of its charge
N/A
Shining red Low battery Stop the mower and
charge the battery pack
Flashing red The battery is
nearly depleted
Stop the mower and
charge the battery pack
Shining
orange
The mower or the
battery pack is
overheated
Remove the battery
from the mower, move
them to the shade and
cool them at least 15
minutes
Flashing
orange
The mower is
overloaded
Slow down your pace
or raise up the cut
height to decrease
the load
MOWER OVERLOAD PROTECTION
To prevent overload conditions, do not try to remove too
much grass at one time. Slow down your cutting pace or
raise the cut height.
Your mower has built-in overload circuit protection. When
the mower is overloaded, the motor will stop and the
power indicator on the mower will ash orange. Remove
the battery pack from the mower. Check to see if grass
has collected beneath the deck and clear it if necessary,
then install the battery and restart the mower.
BATTERY HIGH TEMPERATURE PROTECTION
The battery pack will generate heat during operation. The
heat dissipates more slowly in hot weather. If the battery
temperature exceeds 70°C during operation, the protection
circuit will immediately turn off the mower to protect the
battery pack from damage. The power indicator on the
mower will shine orange and the LED on the battery will
ash orange. Release the bail handle, wait until the battery
pack cools down to approximately 67°C , then restart the
mower.
MAINTENANCE

56 VOLT LITHIUM-ION CORDLESS MOWER — LM2010E/LM2010E-SP14
EN
WARNING: To avoid serious personal injury, always
remove the safety key and battery pack from the mower
before cleaning or performing any maintenance.
WARNING: When servicing, use only identical
replacement parts. Use of any other parts may create a
hazard or cause product damage. To ensure safety and
reliability, all repairs should be performed by a qualied
service technician.
CLEANING THE MOWER
WARNING: Always remove the safety key and
battery pack when servicing or transporting the mower.
The underside of mower deck should be cleaned after each
use, as grass clippings, leaves, dirt and other debris will
accumulate. This accumulation is undesirable, as it will
promote rust and corrosion on metal parts and reduce the
cutting efciency of the mower.
Remove any build-up of grass and leaves on or around the
drive shaft (LM2010E-SP) and the motor fan (do not use
water). Wipe the mower clean with a damp cloth.
REMOVING/INSTALLING THE BLADE
WARNING: Always protect your hands by wearing
heavy gloves or wrapping the cutting edges with rags or
other materials when performing any maintenance on the
mower blade.
čTo Remove the Blade (Fig. V)
NOTICE: If the bolt rotates with the motor shaft when
loosening the bolt, turn the fan by hand to align the
through holes in the fan with the holes in the blade,
and place another metal rod into the aligned holes.
čTo Install the Blade
Following the assembly sequence in Fig. U, with the
fan blade towards deck and the printed blade side
towards outside, align the through holes in the fan with
the holes in the blade (Fig. W) and then tighten the
blade as Fig. X shown.
Fig. U & V parts description see below:
U-1 Fan U-5 Bolt
U-2 Inner Flange V-1 Stabilizer 1
U-3 Outer Flange V-2 Stabilizer 2
U-4 Blade V-3 14mm Wrench
NOTICE: The recommended torque for tightening the
blade bolt is 49-59Nm.
STORING THE MOWER
čRemove the battery pack from the mower and store it
in a cool, dry and clean location. Do not store it next to
corrosive materials, such as fertilizer or rock salt.
čLubricate the mower.
čStore the mower in a covered, enclosed space, that is
cool and dry and out of the reach of children.
čDo not cover the lawn mower with a solid plastic
sheet. Plastic coverings trap moisture around the
mower, which causes rust and corrosion.
čThe mower can be stored upright or at (Fig. Y).
WARNING: If the mower begins to tip over from
the upright position, mower damage or personal injury
may result. Always keep the mower stable and out of
the reach of children when it is in the upright position. If
possible, lay it at for storage.

56 VOLT LITHIUM-ION CORDLESS MOWER — LM2010E/LM2010E-SP 15
EN
Protecting the environment
Do not dispose of electrical equipment,
battery charger and batteries/
rechargeable batteries into household
waste!
According to the European law 2012/19/
EU, electrical and electronic equipment
that is no longer usable,and according to
the European law 2006/66/EC, defective
or used battery packs/batteries, must be
collected separately.
If electrical appliances are disposed of in
landlls or dumps, hazardous substances
can leak into the groundwater and get into
the food chain, damaging your health and
well-being.
EC DECLARATION OF CONFORMITY
We, CHERVON EUROPE LTD.
47 CASTLE STREET, READING, RG1 7SR, UNITED KINGDOM
Declare that the product 56V lithium-ion cordless
mower LM2010E/LM2010E-SP complies with the
essential health and safety requirements of the following
Directives:
2006/42/EC, 2004/108/EC, 2011/65/EU, 2000/14/EC
Standards and technical specications referred to:
EN 60335-1, EN 60335-2-77, EN 62233, EN 55014-1,
EN 55014-2
LM2010E LM2010E-SP
Measured Sound
Power Level: 94 dB(A) 94.32 dB(A)
Guaranteed Sound
Power Level: 96 dB(A) 96 dB(A)
Peter Melrose Dong Jianxun
Vice President of Chervon Europe Quality Manager of Chervon
* (Authorized representative for CHERVON and responsible for technical documentation)
01/01/2016

56 VOLT LITHIUM-ION CORDLESS MOWER — LM2010E/LM2010E-SP16
EN
TROUBLESHOOTING
WARNING: Always remove the safety key and battery pack when servicing or transporting the mower. Always
protect your hands by wearing heavy gloves or wrapping the cutting edges with rags or other materials when
performing any maintenance on the mower blade.
PROBLEM CAUSE SOLUTION
The mower fails
to start
čThe battery pack is depleted. čCharge the battery pack.
čThe battery pack is not mounted in place in
the battery compartment. čAttach the battery pack to the
mower; press it until you hear a
click
čThe battery or mower circuitry is too hot.
(The power indicator on the mower will
illuminate in orange for 10 seconds)
čAllow the battery pack or mower
to cool until the temperature drops
below 67°C.
čThe side rails are not extended to their
maximum length and the clamps are not
locked in position.
čFully extend the handle and lock
both clamps.
čThe handle is not set at one of the three
operating positions. čAdjust the handle to one of the three
operating positions.
čThe mower deck is clogged with grass and
debris.
čClean the mower deck and make
certain that the blade has freedom
of movement.
The mower cuts
unevenly
čThe blade is dull. čSharpen or replace the blade.
čThe cutting height is not set properly. čRaise the deck to a higher cutting
height setting.
čThe blade is assembled incorrectly. čReassemble the blade, following the
section “INSTALLING THE BLADE” in
this manual.
The mower stops
while mowing
čThe battery pack is depleted. čCharge the battery pack.
čMower is in overload condition. čRaise the cutting height or slow down
the mowing.
čMower deck is clogged with grass and
debris. čUnclog the mower deck. Raise
the cutting height, or cut a narrow
swath.
čThe battery or mower circuitry is too hot. (The
power indicator on the mower will illuminate
orange for 10 seconds.)
čAllow the battery pack or mower
to cool until the temperature drops
below 67°C.
čThe side rail is retracted a little by the
pushing force applying on the handle. čUnlock the clamps. Fully extend the
side rails and lock the clamps again.

56 VOLT LITHIUM-ION CORDLESS MOWER — LM2010E/LM2010E-SP 17
EN
PROBLEM CAUSE SOLUTION
The mower does not
mulch properly
čWet grass clippings are sticking to the
underside of the deck.
čWait until the grass dries before
mowing.
čThe mower is set to cut too much grass at
once. čRaise the deck to a higher cutting
height setting.
There is excessive
vibration
čThe cutting blade is loose. čTighten the blade bolt.
čThe cutting blade is unbalanced. čBalance the blade following the
instructions.
čThe cutting blade is bent. čReplace the blade.
čThe motor shaft is bent. čContact the service center.
The handle locking
clamps cannot be
closed in position.
čThe side rails are not fully extended. čFully extend the side rails, then lock
the clamps.
WARRANTY
EGO WARRANTY POLICY
Please visit the website egopowerplus.com for full terms and conditions of the EGO Warranty policy.

18 56-VOLT LITHIUM-IONEN KABELLOSER RASENMÄHER — LM2010E/LM2010E-SP
DE
LESEN SIE ALLE ANWEISUNGEN!
LESEN UND BEACHTEN SIE DIE BEDI-
ENUNGSANLEITUNG
Restrisiko! Menschen mit elektronischen
Geräten, wie z.B. Herzschrittmachern, sollten ihren Arzt
konsultieren, bevor sie dieses Gerät verwenden. Die
Bedienung von Elektrogeräten in unmittelbarer Nähe zu
Herzschrittmachern kann zu Interferenzen und Störungen
des Schrittmachers führen.
WARNUNG: Um die Sicherheit und Zuverlässigkeit
zu gewährleisten, sollten alle Reparaturen und
der Austausch von Teilen nur von qualizierten
Servicetechnikern durchgeführt werden.
Bestimmungsgemäße Verwendung & Zweckent-
fremdung: Das Gerät ist nur für das Mähen von Gras in
Privatgärten vorgesehen. Es darf nicht zum Mähen von
ungewöhnlich hohem, trockenem oder feuchtem Gras wie
beispielsweise Weidegras oder zum Zerkleinern von Blät-
tern eingesetzt werden. Das Gerät darf nur für den dafür
vorgesehenen Zweck eingesetzt werden. Jeder andere
Geräteeinsatz gilt als Zweckentfremdung.
WARNSYMBOLE
Der Zweck von Warnsymbolen besteht darin, Ihre Auf-
merksamkeit auf mögliche Gefahren zu lenken. Die Warn-
symbole und deren Erklärungen verdienen Ihre vollste
Aufmerksamkeit und Beachtung. Durch die Warnsymbole
allein sind die Gefahren noch nicht ausgeschaltet. Die
Anweisungen und Warnhinweise stellen keinen Ersatz für
angemessene Unfallverhütungsmaßnahmen dar.
WARNUNG: Vor der Benutzung des Geräts
sollten alle Sicherheitsanweisungen in dieser
Bedienungsanleitung gelesen und bekannt sein. Das
gilt auch für sämtliche Warnhinweise, die mit den
Vermerken „GEFAHR“, „WARNUNG“ und „VORSICHT“
gekennzeichnet sind. Die Nichtbeachtung sämtlicher
Anweisungen kann zu Stromschlägen, Feuer und/oder
schweren Verletzungen führen.
SICHERHEITSHINWEISE
Auf dieser Seite werden die Warnsymbole vorgestellt und
beschrieben, die sich unter Umständen an dem Gerät
benden. Vor dem Zusammenbau und der Inbetriebnahme
müssen sämtliche Anweisungen am Gerät gelesen und
genau befolgt werden.
Sicherheitswarnung Vorsichtsmaßnahmen zu
Ihrer Sicherheit
Augenschutz tragen
Tragen Sie immer eine
Schutzbrille, möglichst
mit Seitenschutz, und ein-
en Gesichtsschutz, wenn
Sie das Gerät bedienen.
WARNUNG:
Bedienungsanleitung
lesen
Um das Verletzungsrisiko
zu verringern, muss der
Benutzer die Bedi-
enungsanleitung vor der
Benutzung des Gerätes
gelesen und verstanden
haben.
Vorsicht - scharfe
Messer
Die Messer rotieren
nach dem Ausschalten
des Motors weiter. Vor
Wartungsarbeiten muss
die Deaktivierungsvor-
richtung entfernt werden.
Schalten Sie das Gerät
aus und nehmen Sie den
abnehmbaren Akku (oder
die Deaktivierungsvor-
richtung) ab, bevor Sie
Einstellungen vornehmen
oder das Gerät reinigen.
Unbefugte Personen
fernhalten
Stellen Sie sicher, dass
andere Personen und
Haustiere mindestens
30m vom Rasenmäher
entfernt sind, wenn er in
Betrieb ist.
Schutzklasse II Doppelt isolierte Kon-
struktion
IPX4 IP-Symbol Grad-4-Schutz gegen das
Eindringen von Wasser
V Volt Spannung
A Ampere Strom
Hz Hertz Frequenz
W Watt Leistung
min Minuten Zeit
Wechselstrom Stromzufuhr
Gleichstrom Art oder Eigenschaft der
Stromzufuhr
n0Leerlaufdrehzahl Drehzahl im Leerlauf
... /min pro Minute Umdrehungen pro Minute

1956-VOLT LITHIUM-IONEN KABELLOSER RASENMÄHER — LM2010E/LM2010E-SP
DE
SICHERHEITSREGELN FÜR DEN
AKKU-RASENMÄHER
VORSICHT: Dieses Gerät wurde dazu konstruiert,
um so bedient zu werden, wie es in den Regeln für
einen sicheren Betrieb in dieser Bedienungsanleitung
beschrieben wird. Wie bei jedem anderen Elektrogerätetyp
kann Fahrlässigkeit oder ein Fehler vonseiten des
Benutzers zu schweren Verletzungen führen. Dieses
Gerät kann Hände und Füße verletzen und Gegenstände
umherschleudern. Wenn nicht alle Sicherheitshinweise
beachtet werden, können schwere oder tödliche
Verletzungen verursacht werden.
WARNUNG: Beim Gebrauch von Akku-Rasenmähern
sollten stets grundlegende Sicherheitsvorkehrungen
beachtet werden, um Verletzungs-, Brand- und
Stromschlaggefahren einzudämmen.
WICHTIG!
VOR DER BENUTZUNG SORGFÄLTIG LESEN. ZUM
SPÄTEREN NACHSCHLAGEN AUFBEWAHREN.
SICHERHEITSREGELN FÜR AKKU-RASENMÄHER:
VORSICHT - ROTIERENDE MESSER NICHT BERÜHREN!
SCHULUNG
čLesen Sie die Anweisungen aufmerksam. Machen
Sie sich mit den Bedienelementen und der richtigen
Handhabung des Gerätes vertraut.
čAllen Personen, denen die vorliegenden Anweisungen
nicht bekannt sind, muss die Nutzung des Geräts
untersagt werden. Für das Mindestalter des Benutzers
gelten möglicherweise örtliche Vorschriften.
čSetzen Sie den Mäher nicht in Betrieb, solange sich
noch Personen, insbesondere Kinder oder Haustiere in
der Nähe aufhalten.
čFür Unfälle, Personen- oder Sachschäden Dritter ist der
Bediener oder Nutzer des Geräts verantwortlich.
VORBEREITUNG
čTragen Sie beim Mähen immer festes Schuhwerk und
lange Hosen.
čSetzen Sie das Gerät nicht Betrieb, wenn Sie barfuß
sind oder offene Sandalen tragen. Lockere sitzende
Kleidung oder Kleidungsstücke mit herabhängenden
Kordeln oder Bändern sind zu vermeiden.
čUntersuchen Sie gründlich den Bereich, indem Sie
das Gerät einsetzen möchten, und entfernen Sie
alle Steine, Stöcke, Drähte, Knochen und andere
Fremdkörper.
čFühren Sie vor der Benutzung immer eine
Sichtprüfung durch, um sicherzustellen, ob die
Messer, Messerschrauben und Schneidvorrichtung
nicht abgenutzt oder beschädigt sind. Tauschen Sie
abgenutzte oder beschädigte Messer und Schrauben
immer komplett im Satz aus, um die Auswuchtung
beizubehalten. Wechseln Sie beschädigte oder
unleserliche Etiketten aus.
BEDIENUNG
čMähen Sie nur bei Tageslicht oder unter gutem
künstlichen Licht.
čBenutzen Sie das Gerät nicht bei nassem Gras, sofern
dies möglich ist.
čAchten Sie an Hängen immer auf einen festen Stand.
čNur gehen, niemals rennen.
čMähen Sie bei einem Sichelmäher mit Rädern immer
quer zum Hang und niemals auf- und abwärts.
čSeien Sie besonders vorsichtig, wenn Sie an Hängen
die Richtung ändern.
čMähen Sie keine extrem steilen Hänge.
čSeien Sie besonders vorsichtig, wenn Sie rückwärts
mähen oder das Gerät zu sich heran ziehen.
čHalten Sie das (die) Messer an, wenn das Gerät zum
Transport bei der Überquerung von anderen Flächen
als Rasen gekippt werden muss und wenn Sie das
Gerät von und zum Bereich, der gemäht werden soll,
transportieren.
čVerwenden Sie das Gerät niemals mit defekten
Abdeckungen und Schutzvorrichtungen oder ohne
Sicherheitsvorrichtungen, wie z.B. ohne Ablenkbleche
und/oder Grasfangvorrichtung.
čSchalten Sie den Motor gemäß Anweisungen ein und
halten Sie Ihre Füße von dem (den) Messer(n) fern.
čKippen Sie das Gerät beim Einschalten des Motors
nicht; es sei denn, das Gerät muss zum Starten gekippt
werden. In diesem Fall kippen Sie es nur so weit, wie
es unbedingt erforderlich ist, und heben Sie nur die
vom Benutzer abgewandte Seite hoch. Stellen Sie stets
sicher, dass beide Hände in Bedienposition sind, bevor
Sie das Gerät zurück auf den Boden stellen.
čSchalten Sie das Gerät nicht ein, wenn Sie vor der
Auswurföffnung stehen.
čReichen Sie mit den Händen oder Füßen nicht in die
Nähe oder unter die rotierenden Teile. Halten Sie sich
bei Sichelmähern immer von der Auswurföffnung fern.
čTragen oder heben Sie das Gerät niemals an, während
der Motor läuft.

20 56-VOLT LITHIUM-IONEN KABELLOSER RASENMÄHER — LM2010E/LM2010E-SP
DE
čSchalten Sie das Gerät aus und nehmen Sie den Akku
(bzw. die Deaktvierungsvorrichtung) ab und stellen
Sie sicher, dass alle beweglichen Teile komplett
zum Stillstand gekommen sind, bevor Sie das Gerät
einstellen oder reinigen:
čBeim Zurücklassen des Geräts
čVor dem Beseitigen von Blockaden und dem
Freimachen des Auswurfs;
čVor dem Prüfen, Reinigen oder Arbeiten am Gerät
čNach einem Zusammenstoß mit einem Fremdkörper
Untersuchen Sie das Gerät auf Beschädigungen und
führen Sie die notwendigen Reparaturen aus.
čWenn das Gerät ungewöhnlich stark zu vibrieren
beginnt (sofort überprüfen)
čAuf Schäden prüfen
čBeschädigte Teile ersetzen oder reparieren
čGelockerte Teile wieder festziehen
WARTUNG UND LAGERUNG
čSeien Sie vorsichtig, wenn Sie Einstellungen an dem
Gerät vornehmen. Es besteht die Gefahr, dass Sie sich
die Finger zwischen den beweglichen Messern und
den festen Teilen des Gerätes einklemmen.
čAchten Sie darauf, dass alle Schrauben, Muttern
und Bolzen fest angezogen sind. Nur kann für eine
entsprechende Gerätesicherheit gesorgt werden.
čÜberprüfen Sie die Grasfangvorrichtung regelmäßig auf
Verschleiß oder Abnutzung.
čWechseln Sie abgenutzte oder beschädigte Teile aus
Sicherheitsgründen aus.
čDenken Sie bei der Wartung der Messer daran, dass
sich diese immer noch bewegen, auch wenn die
Energiequelle ausgeschaltet wurde.
čStellen Sie bei Sichelrasenmähern sicher, dass nur
Ersatz-Schneidvorrichtungen vom korrekten Typ
verwendet werden.
PERSONENSICHERHEIT
Tragische Unfälle können sich ereignen, wenn der Benu-
tzer nicht auf die Gegenwart von Kindern achtet. Kinder
fühlen sich von Rasenmähern und von den Mäharbeiten
häug angezogen. Sie sind sich der Gefahren nicht
bewusst. Gehen Sie niemals davon aus, dass Kinder dort
bleiben, wo Sie sie zuletzt gesehen haben.
čHalten Sie Kinder vom Mähbereich fern. Sie sollten von
einem anderen verantwortlichen Erwachsenen als dem
Benutzer beaufsichtigt werden.
čSeien Sie wachsam und schalten Sie den Rasenmäher
aus, wenn sich ein Kind dem Bereich nähert.
čLassen Sie besondere Vorsicht walten, wenn Sie sich
unübersichtlichen Ecken, Eingängen, Büschen, Bäumen
oder anderen Objekten nähern, die Ihnen die Sicht auf
ein Kind versperren könnten. Es besteht Gefahr, dass
das Kind in den Rasenmäher läuft.
čKinder sollten beaufsichtigt werden, um
sicherzustellen, dass sie nicht mit dem Rasenmäher
spielen.
čSchalten Sie den Rasenmäher immer aus, wenn Sie
den Akku aus dem Gerät entfernen. Halten Sie das
(die) Messer an, wenn das Gerät zum Transport bei der
Überquerung von anderen Flächen als Rasen gekippt
werden muss und wenn Sie das Gerät von und zum
Mähbereich transportieren.
BEDIENUNG
ALLGEMEINE BEDIENUNG:
čLesen Sie die Bedienungsanleitung vor der Montage
des Geräts sorgfältig und vollständig durch. Vor der
Inbetriebnahme müssen sämtliche Anweisungen am
Gerät und in der Bedienungsanleitung gelesen und genau
befolgt werden. Machen Sie sich umfassend mit den
Bedienelementen und dem sachgemäßen Gebrauch
dieses Gerätes vertraut, bevor Sie es benutzen.
Bewahren Sie diese Bedienungsanleitung an einem
sicheren Ort für späteres und regelmäßiges Nachlesen
und die Bestellung von Ersatzteilen auf.
čVerwenden Sie das richtige Gerät – Verwenden Sie den
Rasenmäher zu keinem anderen Zweck als den, für den
er vorgesehen ist.
čNicht zu weit nach vorn strecken – achten Sie stets auf
einen festen Stand und halten Sie das Gleichgewicht.
čGegenstände, die vom Messer des Rasenmähers getroffen
werden, können schwere Verletzungen hervorrufen. Der
Rasen sollte vor jedem Mähen stets sorgfältig untersucht
und von allen Fremdgegenständen befreit werden.
čVor und beim Zurücksetzen immer nach hinten und nach
unten schauen, ob sich dort kleine Kinder und andere
Personen aufhalten.
čDieses Gerät ist kein Spielzeug. Seien Sie deshalb immer
extrem vorsichtig. Das Gerät ist ausschließlich für das
Mähen von Gras vorgesehen. Verwenden Sie es zu keinem
anderen Zweck.
čÜben Sie keinen Druck auf den Rasenmäher aus - er
lässt sich für die Arbeiten besser und sicherer in dem
jeweils vorgesehenen Tempo einsetzen.
čFühren Sie vor der Benutzung immer eine
Sichtprüfung durch, um sicherzustellen, ob die
Messer, Messerschrauben und Schneidvorrichtung
nicht abgenutzt oder beschädigt sind. Tauschen Sie
abgenutzte oder beschädigte Messer und Schrauben
immer komplett im Satz aus, um die Auswuchtung
beizubehalten. Wechseln Sie beschädigte oder
unleserliche Etiketten aus.
Other manuals for LM2010E
1
This manual suits for next models
1
Table of contents
Languages:
Other EGO Lawn Mower manuals

EGO
EGO LM2000-S User manual

EGO
EGO LM2000E Power+ Mower User manual

EGO
EGO POWER+ LM2130E-SP User manual

EGO
EGO Power+ LM1900E-SP User manual

EGO
EGO Power+ LM2021E-SP User manual

EGO
EGO LM2120E User manual

EGO
EGO POWER Z6ZTR User manual

EGO
EGO LM2000E Power+ Mower User manual

EGO
EGO LM1700E-SP User manual

EGO
EGO Power+ User manual

EGO
EGO LM2000E Power+ Mower User manual

EGO
EGO LM2100SP User manual

EGO
EGO LM2100E User manual

EGO
EGO POWER+ ZT5200E-L User manual

EGO
EGO LM2010E User manual

EGO
EGO POWER+ LM2110 User manual

EGO
EGO LM2000 User manual

EGO
EGO LM2020E User manual

EGO
EGO POWER Plus ZT5200L User manual

EGO
EGO Power+ ZT4200L User manual