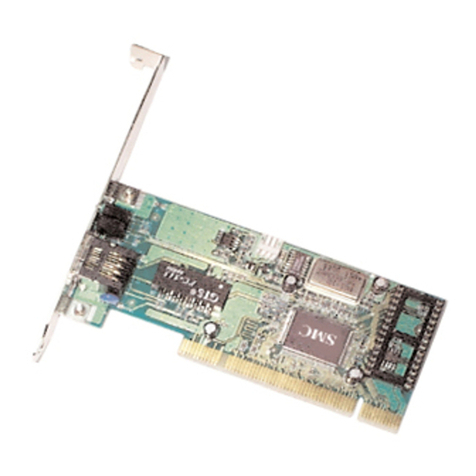
Eicon Networks Eiconcard S50 User manual

www.eicon.com
Eiconcard S5x Family
for ISA-Compatible Bus

www.eicon.com
Fourth Edition (July 2001) 203-078-04
Eicon, Eiconcard, and the Eicon logo are either trademarks or registered
trademarks of Eicon Networks Corporation.
Changes are periodically made to the information herein; these changes will be
incorporated into new editions of the publication. Eicon Networks may make
improvements and/or changes in the products and/or programs described in
this publication at any time.
Copyright © 1996-2001 Eicon Networks Corporation. All rights reserved,
including those to reproduce this publication or parts thereof in any form without
permission in writing from Eicon Networks Corporation.

www.eicon.com
Table of Contents
Introduction ................................................................... 5
Installing the Eiconcard S5x.......................................... 6
Making an ISDN Connection......................................... 9
Connecting to an Eicon Networks NT1....................................... 9
Connecting to a Third Party NT1 ................................................ 9
Termination ............................................................................... 11
Making an HSI Connection ......................................... 13
Interface Specifications ............................................... 14
Cable Construction Information ................................................ 15
The V.24 Interface..................................................................... 16
The V.35 Interface..................................................................... 18
The X.21 Interface .................................................................... 20
Null-Modem Cables .................................................................. 22
Appendix ..................................................................... 25
Setting the I/O Address ............................................................ 25
Selecting an Interface ............................................................... 27
Software Configuration ............................................................. 28
LED Functionality ..................................................................... 29
Technical Specifications.............................................. 31
International Regulatory Information ........................... 33

www.eicon.com

Introduction 5
Introduction
The S5x family of Eiconcards are ISA cards that offer X.25
connectivity through one or two (depending on the the Eiconcard
model) high-speed ports (supporting V.24, V.35, or X.21 interfaces)
at speeds of up to 512 Kbps, and/or through an ISDN BRI port
(Eiconcard S51) at speeds of up to 128 kbps (over the “D” channel
or the “B” channels).
Note The Eiconcard S5x also supports protocols such as SDLC,
PPP, and Frame Relay.
All Eiconcards have been tested and found to comply with
the Electromagnetic compatibility, Safety and Network
connection regulations within the European Union, North
America, and other major territories. Read the regulatory
information on page 29 before installing and using your
adapter.
Hardware Features
The Eiconcard S5x features the following:
The High-Speed Interface (HSI) ports, support full duplex
communications over a V.24, V.35, or X.21 interface at speeds of up
to 512 Kbps per port (depending on the type of interface selected).
The ISDN BRI port supports transfer rates of up to 128 kbps (over
the “D” channel or the “B” channels).
Power Consumption
Warning: Check that power supply will not be overloaded. Maximum
power consumption of the board is stated above. The user should
check that the total power drawn by the host computer, the
Eiconcard S5x, and any other peripherals, does not exceed the
capability of the host power supply unit.
Eiconcard CPU/Memory # of HSI Ports #of ISDN BRI Ports
Eiconcard S50 20 MHz Motorola 68302 /
2 MB RAM
1N/A
Eiconcard S51 20 MHz Motorola 68302 /
2 MB RAM
11
Eiconcard S52 20 MHz Motorola 68302 /
2 MB RAM
2N/A

6 Installing the Eiconcard S5x
Installing the Eiconcard S5x
Follow the steps below to install the Eiconcard S5x. If you want the
Eiconcard S5x to be available to multiple users on a LAN, install it
in the PC that will function as a gateway for the LAN.
1 Prepare the PC
Turn off the PC and disconnect its power cable. Remove the cover
of the PC according to the instructions that came with it.
2 Prepare the Eiconcard
Prepare the Eiconcard S5x by selecting its I/O address and
communications interface.
a) Set the I/O address. The default I/O address is 380h. You only
need to change this setting if another card already installed in
the PC uses an I/O address in the range 380h to 387h. To
change the I/O address, follow the instructions in “Setting the
I/O Address”on page 22, then continue with Step 1(b) below.
b) Select the interface. The default setting enables the V.24 and
V.35 interfaces; to use these interfaces, continue with Step 2
below. To enable the X.21 interface instead, follow the
instructions in “Selecting an Interface”on page 24, then
continue with Step 3.
3 Install the Eiconcard S5x
a) Drain static electricity from your body by touching the metal
chassis (the unpainted metal at the back of your PC).
b) Locate a slot in your PC that has the same bus type as your
adapter.
If your PC has both ISA and PCI slots, the ISA slots are longer,
as shown.
Figure 1. Locating a PCI slot
PCI slots
metal plates
ISA slots

Installing the Eiconcard S5x 7
c) If there is a metal plate at the end of the slot, remove it and keep
the screw.
d) Firmly insert the adapter into the selected slot.
To avoid damaging your hardware, insert the adapter
only into a slot with the same bus type as the adapter.
Inserting the adapter into any other type of slot can
damage your adapter, your PC, or both.
Figure 2. Inserting the Eiconcard S5x.
e) Fasten the adapter with the screw (to ensure that the adapter
is properly secured and grounded to the PC’s chassis).
f) Replace the cover of your PC as described in your PC’s
manual.
g) Reconnect the power cable.
Note Although the Eiconcard S5x can be installed in any available
ISA expansion slot (unless the PC’s documentation specifies
otherwise), it is recommended that you install the card in a 16-bit
slot to take advantage of the higher IRQs and memory-address
locations available only through 16-bit slots.
4 Set the interrupt request level and memory segment address
These parameters are set using the Eicon Networks networking
software that you purchased with the Eiconcard S5x. Consult the
documentation included with the networking software for
instructions on how to configure the Eiconcard.
To determine the correct interrupt request level and memory
segment address values to use, follow the instructions in “Software
Configuration”on page 25, then continue with Step 5.
screw
ISA slot
ISA
Eiconcard

8 Installing the Eiconcard S5x
5 Test the Eiconcard S5x
The application software purchased with the Eiconcard S5x
contains a test program to verify the card’s integrity. Consult the
documentation supplied with this software for details.
6 Connect to the outside world
You are now ready to connect the Eiconcard S5x to the outside
world.
•To set up ISDN connections, consult “Making an ISDN Connec-
tion”on page 9.
•To set up an HSI connection, consult “Making an HSI Connec-
tion”on page 13.

Making an ISDN Connection 9
Making an ISDN Connection
Note Only the Eiconcard S51 supports ISDN connections.
After you have installed your Eiconcard S51, connect your ISDN
line.
•If you plan to use an Eicon Networks NT1, see “Connecting to
an Eicon Networks NT1,”below.
•If you plan to use a third party NT1 or if you are installing the
Eiconcard S51 outside of North America, see “Making an HSI
Connection”on page 13.
Connecting to an Eicon Networks NT1
To connect to an Eicon Networks NT1, plug one end of the Interface
Cable for ISDN NT1 into the DIN-4 port on the Eiconcard S51; plug
the other end into the DIN-4 port on the NT1. Figure 3 shows how
to make these connections.
Figure 3. Connecting to the Eicon Networks NT1
HSI connector
Interface Cable for ISDN NT1
Eicon Networks NT1
DIN-4 port
DIN-4 port

10 Connecting to a Third Party NT1
Connecting to a Third Party NT1
To connect to a third party NT1, you must use the ISDN S/T Cable.
This cable includes interface circuitry which is not normally provided
by the third party NT1 (but which is provided by Eicon’s NT1).
Plug the ISDN S/T Cable into the DIN-4 port on the card as
illustrated in Figure 4.
•In North America and Australia, you may need to insert the
RJ-45 plug into the terminating resistor, and then insert the
terminating resistor into the S/T connector. The next section,
“Termination,”explains when to use the terminating resistor.
•In the rest of the world, insert the RJ-45 plug directly into the S/T
connector. Do not install the terminating resistor.
Plug the other end of the RJ-45 cable into the S/T port on your NT1.
Figure 4 shows how the ISDN S/T Cable, the terminating resistor
(when required), and the RJ-45 plug connect together.
Figure 4. Connecting the ISDN S/T Cable
The interface cable contains fully passive components and does not
affect the energy consumption or other specifications of the
Eiconcard. This passive interface is required to ensure regulatory
compliance and guarantee proper functionality.
ISDN S/T Cable
Terminating resistor
(if required)
RJ-45 plug
DIN-4 port

Termination 11
Termination
This section applies to S/T interface users in Australia and North
America, and provides instructions to help set up termination
scenarios. Termination requirements vary according to: the number
of devices connected to the NT1; and the distance between the
devices and the NT1.
For users who require termination, the Eiconcard S51 S/T has been
shipped with a separate terminating resistor. For information on how
to install the terminating resistor, see “Installing a Terminating
Resistor”on page 12.
How do I determine the termination value?
Single ISDN Device
If the NT1 is connected to a single ISDN device (e.g.
Eiconcard S51), follow the instructions below.
75 meters or more
If the connection spans 75 meters (250 feet) or more, connect the
100 ohm terminating resistor included with the ISDN cable. Set the
NT1 to provide 100 ohms of resistance. Consult the manual
provided with the external NT1 for more detailed instructions.
Note Some NT1s do not support connections over 75 meters (250
feet). Check your user documentation to determine the distance
supported.
75 meters or less
If the connection spans less than 75 meters (250 feet), set the NT1
to 50 ohms of resistance, and do not connect the terminating
resistor. Consult the manual provided with the external NT1 for more
detailed instructions.

12 Termination
Multiple ISDN Devices
If the NT1 is connected to more than one ISDN device, follow the
procedures below.
75 meters or more
If the connection spans 75 meters (250 feet) or more, both end
devices on the ISDN bus must be set to 100 ohm termination. If the
Eiconcard is one of the end devices, connect the 100 ohm
terminating resistor included with the ISDN cable. Consult the
manuals provided with the other ISDN devices and NT1 for more
details.
Note Some NT1s do not support connections over 75 meters (250
feet). Check your user documentation to determine the distance
supported
75 meters or less
If the connection spans less than 75 meters (250 feet), set the NT1
to 50 ohms of resistance, and do not connect the terminating
resistor. Set the other ISDN devices to no termination. Consult the
manuals provided with the NT1 and other ISDN devices for more
detailed instructions.
Installing a Terminating Resistor
The terminating resistor is installed by inserting the RJ-45 end of
the ISDN cable into the terminating resistor, and then inserting the
terminating resistor into the ISDN S/T cable (see, “Connecting the
ISDN S/T Cable”on page 10.

Making an HSI Connection 13
Making an HSI Connection
The Eiconcard S5x can connect as a DTE to devices such as Data
Service Units (DSUs) which support one of the following interfaces:
V.24, V.35, or X.21. It can also connect directly to a host computer,
or back-to-back to another Eiconcard. Each HSI port is configured
independently
Table 1 lists the most common connections supported by the HSI
port, and specifies the part number of the required Eicon Networks
cable. For information on making your own cables, see “Interface
Specifications”on page 14.
Table 1. Standard Interface Cables
When you make connections through a null-modem cable—for
example, to a DTE or to the HSI port on another Eiconcard—one
card must be set to internal clocking, and the other to external
clocking.
Consult the documentation which came with your networking
software for more information about port configuration.
Interface Eiconcard S5x
Connection Cables Required Part #
V.24 to V.24 DCE (method
1)
HSI V.24 DCE Cable 300-026
to V.24 DCE (method
2)
HSI/V.24 Converter, plus
Standard V.24 cable
300-046*
300-007
* Included with the Eiconcard
to V.24 DTE
or non-HSI Eiconcard
HSI V.24 DCE Cable, plus
HSI Null-Modem Conversion Cable
300-026,
300-033
to HSI Eiconcard HSI V.24/V.35 Null-Modem Cable 300-031
V.35 to V.35 DCE HSI V.35 DCE Cable
HSI V.35 DCE Modem Cable
(France)
300-024
300-086
to V.35 DTE HSI V.35 DCE Cable, plus
HSI Null-Modem Conversion Cable
300-024,
300-033
to HSI Eiconcard HSI V.24/V.35 Null-Modem Cable 300-031
to AS/400 port HSI V.35 Null-Modem Cable for
AS/400
300-047
X.21 to X.21 DCE HSI X.21 DCE Cable 300-025
to X.21 DTE HSI X.21 DCE Cable, plus
HSI Null-Modem Conversion Cable
300-025,
300-033
to HSI Eiconcard HSI X.21 Null-Modem Cable 300-032

14 Interface Specifications
Interface Specifications
The standards compliant with the interfaces supported on the HSI
port are listed in Table 2. The rest of this section describes the
allocation of pins used to implement the electrical and signalling
requirements of each interface.
Table 2. Interface Compatibility
Interface Standard Compatibility
V.24 CCITT V.24 Signalling
CCITT V.28 Electrical
CCITT X.21bis Electrical and signalling
RS-232-C Electrical and signalling
ISO 2110 Connector type for the DCE side of a
V.24 HSI Modem Cable
V.35 CCITT V.28 Some signals for electrical
CCITT V.35 Some signals for electrical and signalling
ISO 2593 Connector type for the DCE side of a
V.35 HSI Modem Cable
X.21 CCITT X.21 Signalling
CCITT V.11 Electrical
CCITT X.27 Electrical
RS-422-A Electrical
ISO 4903 Connector type for the DCE side of an
X.21 HSI Modem Cable

Cable Construction Information 15
Cable Construction Information
If you plan to construct your own HSI cables, be sure to observe the
guidelines given below.
Wire Gauge, Grounding, and Pairing
•Use 26 or 24 AWG wire. Contacts should be 30 microinch gold
flash.
•The cable must be grounded both by a drain wire connected to
pin 1 on both sides (pin A on the type M connector) and by the
braid. Both the drain wire and the braid must be connected to
the connector case and shell at each end of the cable. The braid
must be connected through its full circumference.
•Unused wires must be connected to the cable shield at one end.
•Use an anti-EMI shield.
•Important. Wires identified by a rectangle under the heading
“Twisted pair”must be installed as a twisted pair. If you do not
install twisted pairs correctly, the cable will not work.
Type of Connectors
The HSI port accepts a 26-pin, 3-row male connector. The types of
connectors used on the interface-specific end of the cable are as
follows:
Table 3. Connector Types
Cable Type Connectors
V.24 modem DB25, HSI
V.35 modem Type M, HSI
X.21 modem DB15, HSI
V.24/V.35 null-modem HSI, HSI
X.21 null-modem HSI, HSI
V.35-AS/400 null-
modem
Type M, HSI
Null-modem conversion HSI, HSI

16 The V.24 Interface
The V.24 Interface
A pin-out diagram for the V.24
DCE interface is shown in
Figure 5. The signal definitions
and names are listed in Table 4.
Figure 5. V.24 Interface
110 19
PGND
RXD
RTS
RI
DCD
SGND
TXD
TCLK
CTS
DSR
DTR
DTECLK
TEST
RLB
TI
RCLK
Table 4. V.24 DCE Interface Signals
Pin # Signal Name Direction CCITT #
1 PGND Protective Ground Common 101
2 TXD Transmit Data Output 103
3 RXD Receive Data Input 104
4 RTS Request to Send Output 105
5 CTS Clear to Send Input 106
6 DSR Data Set Ready Input 107
7 SGND Signal Ground Common 102
8 DCD Data Carrier Detect Input 109
15 TCLK Transmit Clock (DCE) Input 114
17 RCLK Receive Clock Input 115
18 TEST Local Loopback Activation Output 141
20 DTR Data Terminal Ready Output 108
21 RLB Remote Loopback Output 140
22 RI Ring Indicator Input 125
24 DTECLK Transmit Clock (DTE) Output 113
25 TI Test Indicator Input 142

The V.35 Interface 17
Table 5. V.35 Interface Signals
Pin # Signal Name Direction CCITT #
1 PGND Protective Ground Common 101
4 RTS Request to Send Output 105
5 CTS Clear to Send Input 106
6 DSR Data Set Ready Input 107
7 SGND Signal Ground Common 102
8 DCD Data Carrier Detect Input 109
9 RCLK+ Receive Clock from Modem Input 115A
10 RCLK- Receive Clock from Modem Input 115B
11 RXD+ Receive Data Input 104A
12 RXD- Receive Data Input 104B
13 CLK- Transmit Clock to Modem Output 113B
14 TCLK+ Transmit Clock from Modem Input 114A
16 CLK+ Transmit Clock to Modem Output 113A
18 TEST Local Loopback Activation Output 141
19 TXD+ Transmit Data Output 103A
20 DTR Data Terminal Ready Output 108
21 RLB Remote Loopback Output 140
22 RI Ring Indicator Input 125
23 TCLK- Transmit Clock from Modem Output 114B
25 TI Test Indicator Input 142
26 TXD- Transmit Data Output 103B
The V.35 Interface
A pin-out diagram for the V.35
interface is shown in Figure 6.
The signal definitions and names
are listed in Table 5.
Figure 6. V.35 Interface
PGND
RXD+
RTS
RI
DCD
SGND
TXD+
CTS
DSR
DTR
CLK+
TEST
RLB
TI
RCLK+
TXD-
RXD-
CLK-
RCLK-
TCLK+
TCLK-
110 19

18 The X.21 Interface
The X.21 Interface
A pin-out diagram for the X.21
interface is shown in Figure 7.
The signal definitions and names
are listed in Table 6.
Figure 7. X.21 Interface
PGND
T(A)
C(A)
R(A)
I(A)
S(A)
B(A)
SGND
T(B)
C(B)
R(B)
I(B)
S(B)
B(B)
110 19
Table 6. X.21 Interface Signals
Pin # Signal Name Direction CCITT #
1 PGND Protective Ground Common 101
7 SGND Signal Ground Common 102
9 S(A) Signal Element Timing (+) Input 115A
10 S(B) Signal Element Timing (-) Input 115B
11 R(A) Receive Data (+) Input 104A
12 R(B) Receive Data (-) Input 104B
13 I(B) Indication (-) Input 109B
14 B(A) Byte Timing (+) Input 114A
16 I(A) Indication (+) Input 109A
19 T(A) Transmit Data (+) Output 103A
20 C(B) Control Signal (-) Output 105B
23 B(B) Byte Timing (-) Input 114B
24 C(A) Control Signal (+) Output 105A
26 T(B) Transmit Data (-) Output 103B

Null-Modem Cables 19
Null-Modem Cables
The wiring diagrams below shows the connections required to
construct a back-to-back HSI—HSI cable, and V.35 - AS/400 cable.
For additional information required to construct your own cables,
see “Cable Construction Information”on page 15.
Figure 8. HSI V.24/V.35 Null-Modem Cable (300-031)
11
23
14
9
8
6
5
4
3
2
HSI HSI
26
19
13
16
5
4
7
20
8
3
TWISTED PAIRS
(MANDATORY)
DRAIN WIRE
BRAID
1
1
16
24
14
9
23
10
15
2
17
15
6
12
11
7
10
12
19
17
24
20
26
13

20 Null-Modem Cables
Figure 9. HSI X.21 Null-Modem Cable (300-032)
Figure 10. HSI V.35 Null-Modem Cable for AS/400 (300-047)
24
20
26
19
16
13
12
11
7
HSI HSI
16
13
12
11
24
20
26
19
7
BRAID
1
TWI STED P AIRS
(MANDATORY)
DRAIN WIRE
1
10
9
8
7
6
5
4
HSI Type M
Y
V
AA
X
S
P
W
U
D
C
B
H
F
TWISTED PAIRS
(MANDATORY)
DRAIN WIRE
BRAID
1A
E
T
R
23
14
16
13
12
11
20
26
19
This manual suits for next models
2
Table of contents
Other Eicon Networks Network Card manuals
Popular Network Card manuals by other brands

Brainboxes
Brainboxes UC-268 Specification sheet

MikroTik
MikroTik RouterBOARD 711UA-2HnD Quick setup guide and warranty information
ATTO Technology
ATTO Technology FastFrame NQ41 Installation and operation manual
Cisco
Cisco WUSB54GSC Quick installation guide
König Electronic
König Electronic CMP-WNPCI41 manual
Thales
Thales Cinterion MV31-W sub6 USB user guide
