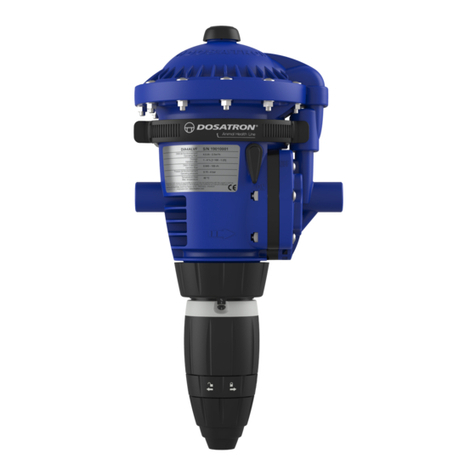
Eighteeth VacStation User manual

0197
Extraoral Dental Vacuum System
USER MANUAL


Content
Page 3 / 25
Content
1. Scope of VacStation...........................................................................................4
2. Symbols.............................................................................................................5
3. Introduction........................................................................................................6
3.1 Scope of application..................................................................................6
3.2 Safety instructions.....................................................................................6
4. Installing VacStation...........................................................................................8
5. User Interface.................................................................................................. 11
6. Operating instructions......................................................................................12
6.1 Air volume setting....................................................................................12
6.2 Connect volume controller for air volume adjustment..............................12
6.3 Power off.................................................................................................13
7. Maintenance....................................................................................................14
7.1 Cleaning and disinfection........................................................................14
7.1.1 Forward ........................................................................................14
7.1.2 General recommendations............................................................15
7.2 Filter replacement...................................................................................16
7.2.1 The frequency of filter replacement...............................................16
7.2.2 How to replace filters.....................................................................16
8. Trouble shooting ..............................................................................................17
9. Technical Data .................................................................................................18
10. EMC Tables ...................................................................................................19
11. Statement.......................................................................................................24

1 Scope of VacStation
Page 4 / 25
1. Scope of VacStation
1. Vacuum Station
2. Directional Duct
3. Suction Nozzle
4. Volume Controller
5. Power cord

2 Symbols
Page 5 / 25
2. Symbols
WARNING
If the instructions are not followed properly, operation may
lead to hazards for the product or the user/patient.
NOTE
Additional information, explanation of operation and
performance.
Serial number
Catalogue number
Date of manufacture
LOT
Lot of manufacture
Protective earth(ground)
Type B applied part
Fuse
WEEE directive marking
Keep dry
55 C
20 C
Temperature limitation
80%
20%
Humidity limitation
106kPa
70kPa
Atmospheric pressure limitation
Manufacturer’s LOGO
CE mariking
EC REP
Authorized Representative in the European Community
Consult instructions for use
!
Refer to manual

3 Introduction
Page 6 / 25
3. Introduction
3.1 Scope of application
VacStation is used to reduce drill aerosols, abrasion powder, and mercury
vapour during dental procedures before they spread.
This device must only be used in hospital environments, clinics or dental offices
by qualified dental personnel.
3.2 Safety instructions
1. Please read this manual before use.
2. The VacStation must be placed upright when being used. Laying on the side or
upside down is prohibited, because these will cause damage to the machine or
shorten its service life. her the rubber frame is flat,
otherwise air leakage will occur and the suction power will be reduced.
and then fix the buckle button, otherwise the buckle button will be damaged.
so be careful when moving it.
faces the filter, and the sparse side faces the air inlet.
WARNING
1. The device is only used for reducing drill aerosols, abrasion powder, and mercury
vapour during dental procedures before they spread, it cannot be applied to prevent
the spread of virus.
2. The device must not be placed in humid surroundings or anywhere where it can
come into contact with any type of liquids.
3. Do not expose the device to direct or indirect heat sources. The device must be
operated and stored in a safe environment.
4. The device requires special precautions with regard to electromagnetic
compatibility (EMC) and must be installed and operated in strict compliance with the
EMC information. In particular, do not use the device in the vicinity of fluorescent
lamps, radio transmitters, remote controls and do not use this systemnear the active

3 Introduction
Page 7 / 25
HF Surgical Equipment in the hospital. Portable RF communications equipment
(including peripherals such as antenna cables and external antennas) should be
used no closer than 30cm (12 inches) to any part of the VacStation, includingcables
specified by the manufacturer. Otherwise, degradation of the performance of this
equipment could result. Do not operate or store at high temperatures. Comply with
the specified operating and storage conditions.
5. If irregularities occur in the device during treatment, switch it off. contact the
agency.
6. Never open or repair the device yourself, otherwise, void the warranty.

4 Installing VacStation
Page 8 / 25
4. Installing VacStation
Step
Diagrammatic Sketch
Description
1
Remove the top cover:
Open four buckles (marked by blue
arrows) and remove the top cover.
2.
Take out main filter assembly:
Take out the sealing strip and filter
elements in sequence. Then take out the
main filter assembly enclosed by the
dotted line.
3
Remove the foam:
Take out the foam installed at the bottom
of the main filter element. The foam can be
discarded according to the local law and
regulations

4 Installing VacStation
Page 9 / 25
4
Install the main engine box:
Install the parts in order and fix four
buckles.
5
Installation of suction nozzle: Screw the
nut, fix suction nozzle to the directional
duct.
6
Installation of directional duct:
Plug the directional duct to the top cover.
NOTE
Directional duct should be installed
vertically and in place on top cover,
otherwise the suction ability will be
degraded.

4 Installing VacStation
Page 10 / 25
7
Connecting power cord:
Install one end of power cord into main
engine housing, and the other end into a
power outlet.
NOTE
Only the original power cord could be
used.
8
Connecting volume controller:
Plug one end of the connecting wire into
the volume controller and the other end of
the connecting wire into the interface on
main engine housing as shown in the
picture.

5 User Interface
Page 11 / 25
5. User Interface
1 Screen display
2 Volume down
3 Volume up
4 Power switch
Turn Power On
Press power switch 4 to “ ”
Volume up
Shot press volume up key 3 to change air
volume from 1 to 10.
Volume down
Shot press volume down key 2 to change
air volume from 10 to 1.
Turn Power On
Press power switch 4 to “ ”.
5.Volume setting knob
6.Volume controller power
switch
Turn on the cotroller
Press volume controller power switch 6 to
side “ON”.
Volume setting
Rotate volume setting knob clockwise to
change air volume from 1 to 10,
anticlockwise from 10 to1.
Turn off the controller
Press volume controller power switch 6 to
side “OFF”.
6

6 Operating instructions
Page 12 / 25
6. Operating instructions
WARNING
Do not block the air inlet artificially to avoid damage to the motor.After the filter
is blocked, please replace the filter immediately to avoid damage to the motor.
NOTE
Before first use, be sure to remove the foam placed under the main filter. When
using the buckle button, be sure to press the top cover part firmly, and then fix the
buckle button, otherwise the buckle button will be damaged. Fix the directional air
duct, adjust the direction of the directional air duct according to different occasions,
connect the power supply, turn on the power switch (without inserting an external
keyboard to adjust the air volume), the value displayed at this time is the air volume
gear at the last shutdown. When starting up, the display shows two-digit value,
indicating the air volume range: 01-10, if there is no operation within 3 minutes
(including the key box and the machine ▲or ▼key), the cumulative flow value is
displayed, and the flow value is a three-digit value (flow The value is that when the
fan rotates 5.76 million revolutions, the cumulative value is 001, which is
accumulated in multiples of 5.76 million revolutions.)
6.1 Air volume setting
A total of 01 ~ 10 ten-speed air volume can be set. Click the ▲ or ▼ key to
set the air volume. When 01 is displayed, the air volume is the smallest; when 10
is displayed, the air volume is the largest.
6.2 Connect volume controller for air volume adjustment
When the volume controller for air volume regulation is connected, the ▲or
▼key on the machine fails, and the air volume can only be adjusted by the knob
on the controller. When the air volume is large, the suction capacity of the machine
is strong. It is recommended to work under the condition of large air volume.

6 Operating instructions
Page 13 / 25
6.3 Power off
Turn off the power key on the external keyboard, and the window will display
"off" before turning off.
WARNING
Do not use the device continually for more than 1 hour each time. Make sure no
water accumulated on the suction nozzle.
Do not shut down the device as soon as dental procedures finish, keep the
device working for another 15-30 minutes, make sure no water or vapour exist in
directional duct and suction nozzle.

7 Maintenance
Page 14 / 25
7. Maintenance
7.1 Cleaning and disinfection
7.1.1 Forward
For hygiene and sanitary safety purpose, the components (suction nozzle) must
be cleaned and disinfected before each usage to prevent any contamination. This
concerns the first use as well use the subsequent uses. The components (directional
duct, top cover and main engine housing) should be cleaned and disinfected
regularly according to the usage. Comply with your national guidelines, standards
and requirements for cleaning, disinfection and sterilization.
Reprocessing procedures have only limited implications to this dental
instrument. The limitation of the numbers of reprocessing procedures is therefore
determined by the function / wear of the device. From the processing side there is
no maximum number of allowable reprocessing. The device should no longer be
reused in case of signs of material degradation. In case of damage, the device
The components in the figure are:
1: Main engine housing
2: Main filter assembly
3: Secondary filter assembly
4: Primary filter cotton
5: Rubber pad
6: Top cover
7: Directional duct
8: Suction nozzle

7 Maintenance
Page 15 / 25
should be reprocessed before sending back to the manufacturer for repair.
7.1.2 General recommendations
The user is responsible for the sterility of the product for the first cycle and each
further usage as well as for the usage of damaged or dirty instruments, where
applicable after sterility.
For your own safety, please wear personal protective equipment (gloves, safety
glasses, etc.).
Use only a disinfecting solution which is approved for its efficacy (VAH/DGHM-
listing, CE marking, and FDA approval) and in accordance with the DFU of the
disinfecting solution manufacturer.
The water quality has to be convenient to the local regulations especially for the
last rinsing step or with a washer-disinfector.
Do not use bleach or chloride disinfectant materials.
Disinfection components
Suction nozzle
Directional duct
Main engine box
Power cord
Volume controller
Wipe all the surfaces with a cloth lightly moistened with Ethanol for Disinfection (Ethanol
70 to 80 vol%) at least 2min, repeat for 5 times.
NOTE
Do not use anything except Ethanol for Disinfection (Ethanol 70 to 80 vol%).
Do not use too much ethanol as it’s going into machine and damage the components
inside.

7 Maintenance
Page 16 / 25
7.2 Filter replacement
7.2.1 The frequency of filter replacement
Components
Frequency
Primary filter cotton
1Month
Secondary filter assembly
1~3 Month
Main filter assembly
6~12 Month
NOTE
When the LED window displays "□" circularly, the filter must be replaced.
7.2.2 How to replace filters
Release the four buckle buttons on the edge of the upper cover of the machine,
and pick up the top cover part, primary filter cotton, secondary filter assembly and
main filter successively. Replace the main filter wieh a new one. Make sure the new
main filter is placed correctly and the fan outlet connected to the bottom of the filter
is conductive.
NOTE
When replacing filter, turn off the power switch first.

8 Trouble shooting
Page 17 / 25
8. Trouble shooting
When a problem or malfunction occurs, please check the machine with the table
below before contacting the dealer to quickly eliminate common problems or
malfunctions. If the problem or malfunction is not solved, please contact the dealer.
Problem or
malfunction
Reasons
Solutions
The window flashes
"OFF" and clockwise
"□" alternately,
alarms, the fan
stops working.
The air inlet is
completely
blocked
Turn off the power, check whether the
direction air duct and suction nozzle
are blocked by foreign matters, and if
so, clean them up. Ifthe problem is not
solved, open the upper cover and
check whether there is foreign matter
blocking the air inlet inside the
machine, and if so, clean them up.
After these steps, restart the machine
and observe after one minute whether
it still alarms, if so, replace the filter
LED window
displays "ERR",
alarms, the fan and
motor stop working.
The fan or line
control part is
abnormal
Turn off the power and restart the
machine tocheck whether it is working
properly, and if not, check the fan.

9 Technical Data
Page 18 / 25
9. Technical Data
Manufacturer
Changzhou Sifary Medical Technology Co.,Ltd
Model
VacStation
Dimensions
65cm x 45 cm x 60 cm±1 cm(Package)
Duct
Φ75mm×1500 mm
Weight
21kg±10%
Input
220V AC ±10% for European Standard/110V AC ±
10% for American Standard
Power
250W Max
Filter efficiency
(0.3um)
99.97%
Static pressure
3000Pa
Blowing rate
14m/s
Volume(Filter included)
3.7m3/min
Electrical safety class
ClassⅠ
Applied part
B
Operating conditions
Use: in enclosed spaces
Ambient temperature: 5°C ~ 40 °C
Relative humidity: <80%
Operating altitude < 3000m above sea level
Transport and storage
conditions
Ambient temperature: -20 °C ~ +55 °C
Relative humidity: 20% ~ 80 %
Atmospheric pressure: 70kPa~106kPa

10 EMC Tables
Page 19 / 25
10. EMC Tables
Guidance and manufacturer’s declaration – electromagnetic emissions
The VacStation is intended for use in the electromagnetic environment specified below.
The customer or the user of the VacStation should assure that it is used in such an
environment.
Emissions test
Compliance
Electromagnetic environment -
guidance
RF emissions CISPR 11
Group 1
The VacStation uses RF energy only for
its internal function. Therefore, its RF
emissions are very low and are not likely
to cause any interference in nearby
electronic equipment.
RF emissions CISPR 11
Class B
The VacStation is suitable for use in all
establishments, including domestic
establishments and those directly
connected to the public low-voltage
power supply network that supplies
buildings used for domestic purposes.
Harmonic emissions
IEC61000-3-2
Class A
Voltage fluctuations/flicker
emissions
IEC 61000-3-3
Complies
Guidance and manufacturer’s declaration –electromagnetic immunity
The VacStation is intended for use in the electromagnetic environment specified below.
The customer or the user of the VacStation should assure that it is used in such an
environment.
Immunity test
IEC 60601
test level
Compliance
level
Electromagnetic
environment -
guidance

10 EMC Tables
Page 20 / 25
Electrostatic discharge
(ESD) IEC 61000-4-2
+/- 8 kV
contact
+/- 2 kV, +/- 4
kV, +/- 8 kV,
+/- 15 kV air
+/- 8 kV
contact
+/- 2 kV, +/- 4
kV, +/- 8 kV,
+/- 15 kV air
Floors should be wood,
concrete or ceramic tile.
If floors are covered with
synthetic material, the
relative humidity should
be at least 30 %.
Electrical fast
transients/bursts
IEC 61000-4-4
±2kV
100kHz
repetition
frequency
±2kV
100kHz
repetition
frequency
Mains power quality
should be that of a
typical commercial or
hospital environment.
Surge
IEC 61000-4-5
Line to line:
±0.5kV, ±1kV
Line to earth:
±0.5kV, ±1kV,
±2kV
Line to line:
±0.5kV, ±1kV
Line to earth:
±0.5kV, ±1kV,
±2kV
Mains power quality
should be that of a
typical commercial or
hospital environment.
Voltage dips
IEC 61000-4-11
Voltage interruptions
IEC 61000-4-11
0% UT; 0.5
cycle
at 0°, 45°, 90°,
135°, 180°,
225°, 270°,
and 315°
0% UT; 1
cycle and 70%
UT; 25/30
cycles
sine phase at
0°
0% UT;
250/300 cycle
0% UT; 0.5
cycle
at 0°, 45°,
90°, 135°,
180°, 225°,
270°, and
315°
0% UT; 1
cycle and
70% UT;
25/30 cycles
sine phase at
0°
0% UT;
250/300 cycle
Mains power quality
should be that of a
typical commercial or
hospital environment. If
the user of devices
require continued
operation during power
mains interruptions, it is
recommended that
devices be powered
form an uninterruptible
power supply or a
battery
Other manuals for VacStation
1
Table of contents
Popular Medical Equipment manuals by other brands
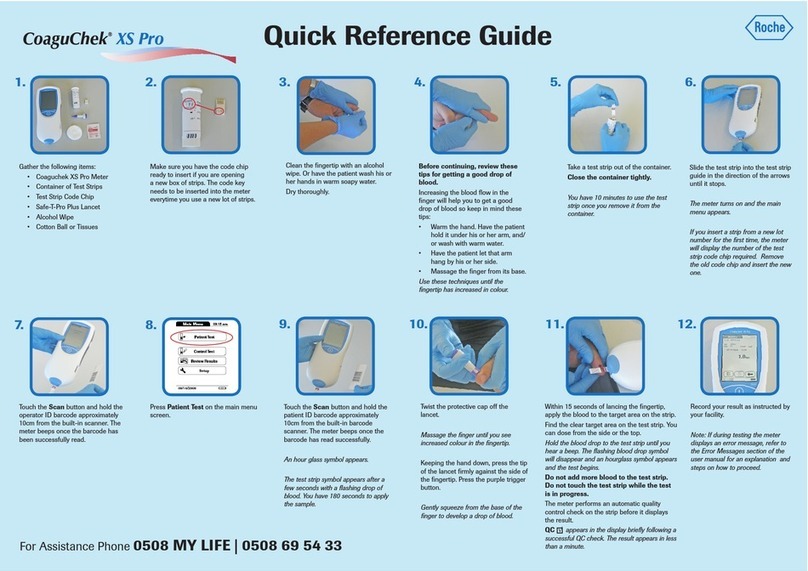
Coaguchek
Coaguchek XS Pro Quick reference guide
Sun Nuclear
Sun Nuclear MapCHECK 3 user guide
Nidek Medical
Nidek Medical ARK-700 Series Operation manual

Drive DeVilbiss Healthcare
Drive DeVilbiss Healthcare Apollo II Cushion Instructions for use
Graham Field
Graham Field GENDRON 3648 Series user manual
Siemens
Siemens acuson Sequoia Service training manual
