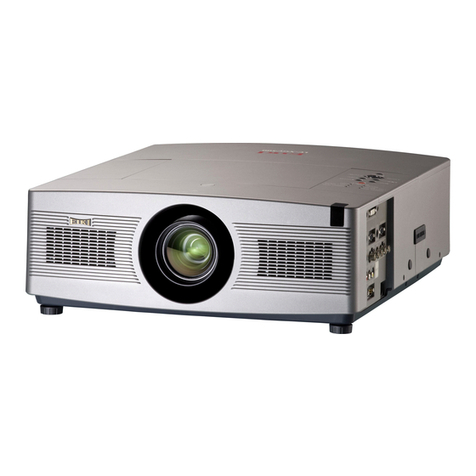
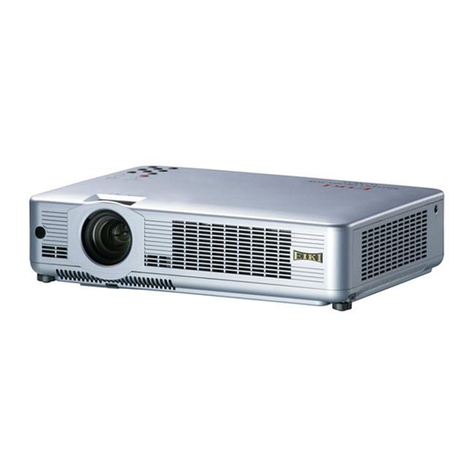
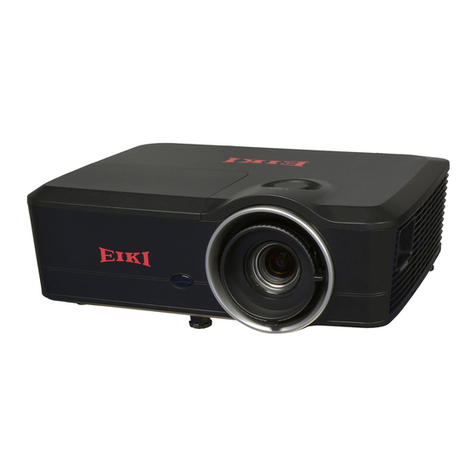
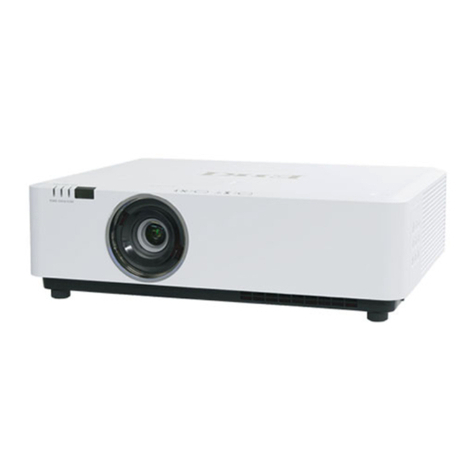
Eiki EK-130U User manual

Note:
- The manual is subject to change without prior notice. V1.0
Owner's manual
Multimedia Projector
EK-130U
EK-131W / K
EK-132X
EK-125UK
EK-125WK

2
Note:
- The screen menu and pictures in the manual may slightly differ from the real product.
- The manual is subject to change without prior notice.
Features and Design
This Projector is designed with the most advanced technology for portability, durability, and ease
of use. This projector utilizes built-in multimedia features, a palette of 10.7 million colors, and
matrix liquid crystal display (LCD) technology.
Simple Computer System Setting
The projector has the Multi-scan system to
conform to almost all computer output signals
quickly. Up to WUXGA resolution can be
accepted.
Useful Functions for Presentations
The digital zoom function allows you to
focus on the crucial information during a
presentation.
Lamp Control
Brightness of the projection lamp can be
selected.
Logo Function
The Logo function allows you to customize the
screen logo.
Multilanguage Menu Display
The on screen menu of the projector is
available in 26 languages: English, German,
French, Italian, Spanish, Polish, Swedish,
Dutch, Portuguese, Japanese, Simplified
Chinese, Traditional Chinese, Korean,
Russian,Arabic, Turkey, Finland, Norway,
Denmark, Indonesia, Hungary, Czech
Republic, Kazakhstan, Vietnamese, Thai,
Farsi.
Helpful Maintenance Functions
Filter maintenance functions provide for better
and proper maintenance of the projector.
Security Function
The Security function helps you to ensure
security of the projector. With the Key lock
function, you can lock the operation on the
top control or remote control. PIN code lock
function prevents unauthorized use of the
projector.
LAN Network Function
This projector is loaded with the wired LAN
function. You can operate and manage the
projector via network.( Page 59-66.)
Auto Setup Function
This function enables input source search, auto
pc adjust and auto keystone by simple pressing
the AUTO button on the remote control.
Colorboard Function
At the time of simple projection on the colored
wall, you can get the close color image to the
color image projected on a white screen by
selecting the similar color to the wall color from
the preset four colors.
Power Management
The Power management function reduces
power consumption and maintains the lamp
life.
Closed Caption
This is a printed version of the program sound
or other information displayed on the screen.
You can turn on the feature and switch the
channels.

3
Contents
Features and Design......................................2
Contents.........................................................3
Safety Operation Guideline ............................4
Safety instructions ......................................4
Air circulation............................................11
Place your projector correctly...................12
Moving the projector.................................13
Compliance...................................................14
Accessories..................................................15
Part names and functions.............................16
Front .........................................................16
Rear..........................................................16
Bottom ......................................................16
Terminals..................................................17
Top control and Indicators........................18
Remote control .........................................19
Install remote control batteries..................20
Operating range........................................20
Adjustable foot..........................................20
Installation ....................................................21
Positioning the projector...........................21
Connecting to computer
(Digital and analog RGB)..........................22
Connecting to video equipment
(Video, S-Video) .......................................23
Connecting to audio equipment................24
Connecting to USB device
(USB-A, USB-B) .......................................25
Connecting the AC power cord.................27
Basic operation.............................................27
Power on your projector............................27
Power off your projector............................28
Adjust zoom and focus.............................29
Auto setup function...................................29
Keystone adjustment................................30
Volume......................................................31
Remote control operation .........................32
Input select ...............................................34
How to operate the screen menu .............35
Menu bar...................................................36
Display..........................................................37
Auto PC adj...............................................37
Fine sync ..................................................37
H Position .................................................37
V Position..................................................37
H.Size.......................................................37
Aspect.......................................................38
Project Way ..............................................38
Menu Position...........................................39
Background Display..................................39
System......................................................40
Color adjust ..................................................41
Image Mode..............................................41
Color adjust (Computer) ...........................42
Color adjust (Video)..................................43
Setting ..........................................................44
Direct power on.........................................44
Standby mode...........................................44
ECO..........................................................44
Normal......................................................44
Network.....................................................44
High land...................................................45
Light source mode....................................45
Cooling fast...............................................45
Closed Caption.........................................46
Key lock....................................................46
Iris.............................................................47
Sound .......................................................47
HDMI setup...............................................48
Expand .........................................................49
Language..................................................49
Auto setup.................................................49
Keystone...................................................50
Logo..........................................................52
Security.....................................................53
Power management..................................54
Filter counter.............................................54
Test Pattern..............................................55
Network.....................................................55
Factory default..........................................56
Lamp Counter Reset.................................56
Memory viewer.............................................57
Set Slide ...................................................57
Slide transition effect ................................57
Sort Order.................................................57
Rotate.......................................................57
Best Fit......................................................57
Repeat......................................................57
Apply.........................................................57
Information....................................................58
Network Control Instructions ........................59
LAN control...............................................59
Using useful functions ..................................67
Memory Viewer function...........................67
USB Display function................................69
Maintenance and cleaning............................71
WARNING indicator..................................71
Cleaning the lter......................................72
Filter counter reset....................................72
Order Replacement Filter .........................72
Clean the projection lens..........................73
Clean the cabinet......................................73
Appendix.......................................................74
Troubleshooting........................................74
Menu Tree ................................................76
Indicator and projector state.....................80
Compatible computer specications.........81
Technical Specications ...........................82
Congurations of terminals.......................83
Content of hazardous substances
and elements............................................84
Dimensions...............................................84
PIN code memorandum............................85
4
Safety Operation Guideline
Safety instructions
This document and the projector employ certain symbols to illustrate how to use the projector
safely. They are described below: Please get yourself familiar with them before going through this
document.
Caution
Prudence
Ignoring messages indicated by this symbol may lead to personal
injuries or deaths due to human errors.
Ignorer un message indiqué par ce symbole peut entraîner des
blessures ou décès dus à des erreurs humaines.
Note
Note
Ignoring messages indicated by this symbol may lead to personal
injuries or property damage.
Ignorer un message indiqué par ce symbole peut entraîner des
blessures ou des dommages à la propriété.
High voltage inside with risks of electric shock.
Haute tension à l'intérieur avec les risques de choc électrique.
RG2. DO NOT stare into the beam.
RG2. Ne regarde pas dans la poutre.
Please read this manual carefully before installing and operating the
projector.
The projector comes with a lot of convenient features and functions. You may make the
most of these features and keep the projector in good working conditions by using it correctly. Invalid operation
of the projector may not only shorten its life cycle but also may lead to product failure, re, or other incidents.
In case of any operation abnormality, refer to this manual to check the operation and connections and try
solutions given in the “Troubleshooting” section at end of this manual.
If the problem persists, call the dealer or our service center.
The projector’s light source is a consumable and will get dimmer after long-term use. It’s normal for an
older light source to be dimmer than a newer one. Please power on and off the projector by strictly following
steps given in “Power on the projector” and “Power off the projector” section of this manual. Execute regular
maintenance and cleaning according to instructions set forth in “Maintaining and cleaning the projector”
section of this manual. Fail to do so may shorten life cycle of the projector and its light sources sharply or even
damage the projector and its light sources.
Veuillez lire ce guide attentivement avant de l'installation et de
l'exploitation de votre projecteur.
Votre projecteur a beaucoup de caractéristiques et de fonctions pratiques.Tu peux faire ça. La plupart de ces
fonctions et gardez votre projecteur en bon état de fonctionnement.Un mauvais fonctionnement du projecteur
peut non seulement raccourcir sa durée de vie, mais aussi entraîner une défaillance du produit, un incendie ou
d'autres accidents.
En cas d'anomalie de fonctionnement, consultez ce manuel pour vérier votre fonctionnement et vos
connexions et essayez la solution indiquée dans la section Dépannage à la n du manuel.
Si le problème persiste, appelez votre revendeur ou notre centre de service.
La lampe du projecteur est consommable et s'assombrit après une utilisation prolongée. Il est normal que
l'ancienne lumière soit plus foncée que la nouvelle.Suivez strictement les procédures d'allumage et d'arrêt du
projecteur dans les sections allumage et arrêt du projecteur du présent manuel.Effectuer un entretien et un
nettoyage périodiques conformément aux instructions de la section entretien et nettoyage du projecteur du
présent manuel.Non. La durée de vie du projecteur et de ses luminaires peut être considérablement réduite,
voire bientôt endommagée.

5
Safety Operation Guideline
Caution / Prudence
Danger of electric shock DO
NOT open this.
Risque de choc électrique n'ou-
vre pas.
Note: DO NOT remove the casing (or back cover) as this
may result in electric shock. Users shall not execute any
maintenance work on components within the projec-
tor except replacing LED light sources. Call qualied
maintenance personnel in case of any maintenance
requirements.
Note: ne pas retirer le cuvelage (ou couverture), cela
pourrait entraîner des chocs électriques.les utilisateurs
ne doivent pas exécuter de travaux d'entretien sur
des composants au sein de votre projecteur.appel du
personnel d'entretien qualié en cas de besoins de
maintenance.
High voltage inside with risks of
electric shock.
Haute tension à l'intérieur avec les
risques de choc électrique.
Operation and maintenance tips
about these components.
Fonctionnement et entretien des
conseils sur ces éléments.

6
Caution
Safety precautions:
●GROUND the projector.
●Lens of the projector projects strong light. DO NOT look at the light beam directly. You may
get the eyesight hurt. This is especially the case with children.
●Unplug the AC power plug if the projector will not be used for long time.
●DO NOT overload the socket of power cord as it may lead to re or electric shock. DO
NOT subject the power cord to any object. DO NOT place the projector in locations
where its power cord may become damaged by treading by passersby.
●Disconnect the power plug before cleaning the projector. DO NOT apply liquid or sprays
to the projector. DO NOT wipe the projector with wet cloth.
●Please follow warnings and instructions given in labels attached to the projector. Unplug the
projector when the projector is exposed to thunderstorm weather, is unmanned, or
not in use for long periods to prevent damage caused by lightning and power surges.
●DO NOT use accessories without recommendation by the manufacturer as it may result in
potential risks.
Prudence
Les précautions de sécurité:
● Motif de votre projecteur.
● Lens de votre projecteur projets la lumière forte.ne regarde pas le rayon de lumière.vous
pouvez obtenir votre vue blessée.c'est notamment le cas avec les enfants.
● Débranchez l'ac power plug si votre projecteur ne sera pas utilisé depuis longtemps.
● Ne surchargez pas la prise de risque qui peuvent conduire à un incendie ou un choc élec-
trique. Ne pas soumettre le cordon d'alimentation d'un objet.ne pas placer votre projecteur
dans les endroits où le cordon d'alimentation peuvent être endommagés par empruntée
par les passants.
● Débrancher le pouvoir brancher avant de nettoyer votre projecteur.ne s'applique pas de
liquide ou de pulvérisateurs à votre projecteur.ne pas essuyer votre projecteur avec chiffon
mouillé.
● Veuillez suivre les instructions données dans les mises en garde et les étiquettes liées à
votre projecteur.débranchez votre projecteur quand le projecteur est exposé à des condi-
tions météorologiques orageuses, ou pas utilisés pendant de longues périodes à prévenir
les dommages causés par la foudre et les surtensions.
● Ne pas utiliser d'accessoires sans recommandation par le fabricant, car elle peut entraîner
des risques potentiels.
Safety Operation Guideline

7
Caution
Precautions on air outlet:
● Keep adequate clearance around the projector for its ventilation and cooling. See gure below for the least
clearance requirements. The least clearance is a MUST when the projector is placed within a cabinet or
other closed environment.
Sides and bottom Rear
●DO NOT cover the air outlet of the projector. Poor ventilation not only shorten life cycle of the projector but
also may lead to risks.
●Slots and openings at rear and bottom of the projector are designed for ventilation. Keep the projector from
overheated to ensure its steady operation.
●DO NOT cover the air outlet with cloth or other objects. DO NOT place the projector on the surface of bed,
sofa, carpets, or similar object as this may block the air outlets at its bottom.
●DO NOT place the projector in closed environment, e.g. a bookcase, unless it is well ventilated.
●Keep any matter from falling in the projector through the air outlets as they may touch high voltage parts
and lead to re or electric shock by short circuits. DO NOT splash liquid to the projector.
Attention à la sécurité
Avis de sortie d'air:
● Laisser sufsamment d'espace autour du projecteur pour permettre la ventilation et le refroidissement.Les
exigences minimales en matière de dégagement sont indiquées dans la gure ci - dessous.Un dégage-
ment minimal est nécessaire lorsque votre projecteur est placé dans une armoire ou un autre environne-
ment fermé.
Sides and bottom Rear
●Ne couvrez pas la sortie d'air du projecteur.Une mauvaise ventilation peut non seulement raccourcir la
durée de vie du projecteur, mais aussi être dangereuse.
●Les fentes et les ouvertures à l'arrière et au bas du projecteur sont conçues pour la ventilation. Ne laissez
pas le projecteur surchauffer pour assurer un fonctionnement stable.
●Ne couvrez pas la sortie d'air d'un chiffon ou d'un autre objet.Ne placez pas le projecteur sur la surface d'un
lit, d'un canapé, d'un tapis ou d'un objet similaire, car cela peut bloquer la sortie d'air au bas du projecteur.
●Ne pas placer le projecteur dans un environnement fermé, comme une bibliothèque, à moins qu'il n'y ait
une bonne ventilation.
●Ne laissez aucune matière tomber dans le projecteur par la sortie d'air, car elle peut entrer en contact avec
des composants haute tension et provoquer un incendie ou un choc électrique par court - circuit.Ne pas
éclabousser de liquide sur le projecteur.
Greater than 500 mm Greater than 1000 mm Greater than 1000 mm
Safety Operation Guideline

8
Caution
Precautions on location of the projector:
●Place the projector in a proper location or it may result in re.
●DO NOT expose the projector in rain or high humidity environments or it may result in re or
electric shock. DO NOT place the projector near water or splashing water. DO NOT place
any water container, e.g. ower vase, atop the projector.
●DO NOT place the projector in environments of soot, moisture or smoke, e.g. the kitchen,
or it may lead to product failure or accidents. The projector may be damaged by contact
with oil or chemicals.
●DO NOT place the projector near exhaust pipe or air conditioning equipment.
●DO NOT place the projector near radiator or heating pipes.
●DO NOT place the projector atop unstable truck, rack, or table. It may fall of the surface
and lead to personal injuries and property damages. Please use cart or rack recommended
by the manufacturer or included with the product. Please follow steps given in installation
guideline included with the wall and ceiling mount racks for installation. Use installation
components approved by the manufacturer.
●Be careful when moving the projector with cart. Abrupt stops, pushing too hard and rugged
surfaces may topple the projector and the cart together.
Prudence
Précautions sur l'emplacement de votre projecteur:
●Placez votre projecteur dans un endroit ou il peut provoquer un incendie.
●Ne pas exposer votre projecteur dans la pluie ou l'humidité élevée et peut entraîner un
incendie ou un choc électrique.fais pas ton projecteur près de l'eau ou les éclaboussures
d'eau.ne pas placer un récipient d'eau, par exemple, vase, sur votre projecteur.
●Ne pas placer votre projecteur dans des environnements de suie, d'humidité ou de fumer,
par exemple, votre cuisine, ou il peut conduire à l'échec du produit ou des accidents. Votre
projecteur peuvent être endommagés par contact avec du pétrole ou de produits chimiques.
●Ne pas placer votre projecteur près du tuyau d'échappement ou de climatisation.
●Ne pas placer votre projecteur près du radiateur ou conduites de chauffage.
●Ne pas placer votre projecteur sur instable camion, rack, ou un tableau.il peut tomber de
la surface et entraîner de blessures et de dommages matériels.veuillez utiliser la voiturette
ou rack recommandé par le fabricant ou inclus avec votre produit.veuillez suivre les étapes
indiquées dans l'installation de directive inclus avec le mur et supports au plafond pour
l'installation.utilisation des composants approuvés par le fabricant.
●Soyez prudent quand bouger votre projecteur avec chariot.des arrêts brusques, trop fort et
robuste des surfaces peuvent renverser votre projecteur et le chariot.
Safety Operation Guideline

9
FOR EU USERS
The symbol mark and recycling systems described below apply to EU countries and
do not apply to countries in other areas of the world.
The product is designed and manufactured with high quality materials and
components which can be recycled and/or reused.
The symbol mark means that electrical and electronic equipment, batteries and accu-
mulators, at their end-of-life, should be disposed of separately from the household waste.
Note:
If a chemical symbol is printed beneath the symbol mark, this chemical symbol means
that the battery or accumulator contains a heavy metal at a certain concentration.
This will be indicated as follows: Hg: mercury, Cd: cadmium, Pb: lead In the European
Union there are separate collection systems for used electrical and electronic equipment,
batteries and accumulators.
Please, dispose of them correctly at the local community waste collection/recycling centre.
Please help us to conserve the environment we live in!
Pour les utilisateurs de l'ue
Le symbole de marque et de systèmes de recyclage décrites ci - dessous s'appliquent aux
pays de l'ue et ne applicable aux pays dans d'autres régions du monde.
Votre produit est conçu et fabriqué avec des matériaux et des composants de haute qualité
qui peuvent être recyclées ou réutilisées.
Le symbole marque signie que les équipements électriques et électroniques, les piles et
accumulateurs, à la n de leur vie utile, doit être éliminé séparément de vos déchets domes-
tiques.
Note:
Si un symbole chimique est imprimé sous le symbole marque, ce symbole chimique: que la batterie ou ac-
cumulateur contient un métal lourd à une certaine concentration.
Ce sera indiqué comme suit: hg: mercure, cadmium, plomb pb cd: en europe: les systèmes de collecte
séparée de l'union sont utilisés des équipements électriques et électroniques, les piles et accumulateurs.
S'il vous plaît, de les éliminer correctement à votre communauté locale, collecte des déchets / centre de re-
cyclage.
Veuillez nous aider à conserver l'environnement dans lequel nous vivons.
Caution
Contains mercury
For more information on safe handling procrdures, the measure to be taken in case of acci-
dental breakage and safe disposal options visit: ec.gc.ca/mercure-mercury/
Dispose of or recycle in accordance with applicable laws.
Prudence
Contient du mercure
pour de plus amples renseignements sur la sécurité des procédures de manipulation, les me-
sures à prendre en cas de bris accidentel et l'élimination en toute sécurité des options visite:
ec.gc.ca/mercure-mercury/
Éliminer ou recycler en conformité avec les lois applicables.
Safety Operation Guideline

10
Note:
Precautions on using the projector:
●DO NOT project the same image for long time as residual images may be left in the panel. This is a prop-
erty of LCD panel.
●Use power as indicated in tags attached to the projector. If you have doubts over available power type,
consult the dealer or local power company rst.
●DO NOT open or remove the casing for maintenance as this may lead to electric shock or other damages.
Call qualied maintenance personnel in case of any maintenance requirements.
– In case of the following, unplug the power cord and call qualied maintenance personnel for service
immediately:
a. Damaged or broken power cord or plug
b. Liquid splashed in the projector
c. The projector exposed to rain or water
d. If the projector fails to work as expected by following operation instructions, adjust it according to giv-
en instructions. Other invalid operations may damage the projector, which requires the technician to
spend more time before returning it back to normal.
e. The projector falls off to ground or its casing is damaged.
f. In case of any abnormal change in the projector during its use, then maintenance services would be
required.
●In case components replacement is required, make sure the replacements have been approved by the
manufacturer and features the same with the one being replaced. Use of unauthorized parts may lead to
re, electric shock or personal injury.
●After the completion of maintenance or repair work, get the maintenance personnel to run routine safety
check to ensure the projector’s safety operation status.
Note:
Precautions on using your projector:
●Ne pas la même image pour longtemps que les images peuvent être laissés dans le groupe.c'est une
propriété de panneau lcd.
●Recours à la force comme indiqué dans les étiquettes jointes à votre projecteur.si vous avez des doutes
sur l'énergie disponible, consultez votre courtier ou la compagnie d'électricité.
●N'ouvrez pas ou enlever l'enveloppe pour le maintien comme cela peut conduire à un choc électrique ou
d'autres dommages.appel du personnel d'entretien qualié en cas de besoins de maintenance.
- Dans le cas de la – débrancher le cordon d'alimentation, et du personnel d'entretien qualié de service
immédiatement:
a. Endommagé ou brisé le cordon d'alimentation ou le bouchon
b. Liquide éclaboussé dans votre projecteur
c. Votre projecteur exposé à la pluie ou à l'eau
d. Si votre projecteur ne parvient pas à travailler comme prévu par l'opération suivante des instructions, à
ajuster selon les instructions.d'autres opérations peuvent endommager votre nullité projecteur qui exige
le technicien pour passer plus de temps avant de la retourner à la normale.
e. Le projecteur tombe à la surface ou son enveloppe est endommagé.
f. En cas de changements anormaux dans votre projecteur pendant son utilisation, entretien serait néces-
saire.
●Dans le cas des composants remplaçant est nécessaire, assurez - vous que les remplacements ont été
approuvés par le fabricant et les caractéristiques même avec celui d'être remplacé.l'utilisation de pièces
non autorisée peut conduire au feu, choc électrique ou un dommage corporel.
●Après l'achèvement de travaux de réparation ou d'entretien, l'entretien de routine du contrôle de sécurité
pour assurer la sécurité de votre projecteur.
Safety Operation Guideline

11
Information for users in the European Union
This is a device to project images onto a screen, etc., and is not itended for use as indoor lighting
in a domestic environment. Directive 2009/125/EC.
Informations pour les utilisateurs dans l'union européenne
C'est un dispositif pour projeter des images sur un écran, etc., et n'est pas destiné à l'éclairage
intérieur dans un environnement national. La directive 2009/125/ce.
Safety Operation Guideline
NOTE FOR CUSTOMERS IN THE US
Hg LAMP(S) INSIDE THIS PRODUCT CONTAIN MERCURYAND MUST BE RECYCLED OR
DISPOSED OF ACCORDING TO LOCAL STATE OR FEDERAL LAWS.
NOTE POUR DES CLIENTS AUX ÉTATS - UNIS
LAMPE Hg (S) À L'INTÉRIEUR DE CE PRODUIT CONTIENT DU MERCURE ET DOIVENT
ÊTRE RECYCLÉS OU ÉLIMINÉS SELON LA LOI.
Air circulation
Openings in the casing are designed for ventilation and overheating prevention. DO NOT block or
cover these openings to keep the projector in normal operation and from overheating.
Note:
Heat exhaust at the air outlet. Keep the following in mind when using or installing the projector:
– DO NOT place ammable materials or sprayers near the projector.
– Keep the air outlet one meter away from other objects.
– DO NOT touch the area close to the air outlet especially the metal components, e.g. screws.
This area and parts will get very hot once the projector starts operating.
– DO NOT place any object atop the projector. They may not only be damaged but also lead to
re after being overheated.
Cooling fans are designed for cooling the projector. Fan speed is auto adjusted subject to
internal temperature of the projector.
Note:
La chaleur d'échappement en sortie d'air de garder à l'esprit les points suivants lors de
l'utilisation ou de l'installation de votre projecteur:
– Ne mettent pas les matières inammables ou de pulvérisateurs près de votre projecteur.
– Garde la sortie d'air à un mètre de distance des autres objets.
– Ne touche pas la zone proche de la sortie d'air surtout les composantes métalliques, p.ex. de
vis.ce domaine et parties sera très chaud une fois votre projecteur sera opérationnel.
– Ne place aucun objet sur votre projecteur. Ils ne peuvent pas être endommagé mais aussi
conduire à feu après avoir été chauffé.
Les ventilateurs de refroidissement sont conçus pour refroidir votre projecteur.la vitesse du
ventilateur est auto ajustées de la température interne de votre projecteur.
Air Exhaust Vent
Intake Filter

12
Place your projector correctly
Use your projector at specied location in corect way. Invalid projector location may shorten life-cy-
cle of lamps or even lead to severe incidents or re.
Note:
Avoid installing your peojector as illustrated below:
Éviter d'installer votre projecteur tel qu'illustré ci - dessous:
Do not roll the projector over 10ofrom side to side.
Ne penchez votre projecteur plus de 10 degrés.
Do not point the projector up to project an image.
Ne pas mettre le projecteur sur une projection verticale.
Do not point the projector down to project an image.
Ne pas mettre le projecteur à l'envers pour faire une projection.
Do not put the projector on either side to project an image.
Ne pas mettre le projecteur sur la projection horizontale.
(
Do not pitch the projector more than 10obackward and forward.
Ne penchez votre projecteur plus de 10 degrés.
Safety Operation Guideline
Note:
Precautions on ceiling mount racket installation:
●Get qualied technician to install the ceiling mount racket.
●Warranty of the projector does not cover hazards and damage caused by using ceiling
mount rackets provided by unauthorized dealers.
●Remove the ceiling mount racket when it is not in use.
●Apply torque driver instead of power driver or impact driver in the projector.
Note:
Installation de précautions sur plafond mont raquette:
●Technicien qualié pour installer le plafond mont raquette.
●La garantie de votre projecteur ne couvre pas les dangers et les dommages causés par
l'utilisation non autorisée de raquettes fournies par les vendeurs au plafond.
●Supprimer le plafond mont raquette quand il n'est pas utilisé.
●Au lieu de pouvoir appliquer le couple de serrage chauffeur chauffeur chauffeur ou d'impact
dans votre projecteur.

13
Safety Operation Guideline
Moving the projector
When moving the projector close its adjustment legs as they may damage the lens and casing.
Keep the projector in suitable box when it is not to be used for a long time.
Note:
Precautions on moving or shipping the projector:
●DO NOT drop or impact the projector as it may get damaged or failed in operation.
●Please employ proper container for movement.
●Prohibit express or other shipping service provider personnel from shipping the projector
with improper boxes. The projector may become damaged. Please consult the dealers for
shipping the projector by express or other shipping service providers.
●Place the projector in box only after it has been fully cooled down.
Note:
Le projecteur ou d'expédier vos précautions:
●Ne lâchez pas ou qu'il peut avoir sur votre projecteur endommagés ou omis dans l'opéra-
tion.
●Veuillez employer contenant convenable pour le mouvement.
●Interdire l'express ou autre fournisseur de services de transport maritime transport person-
nel votre projecteur sans les boîtes.votre projecteur peuvent être endommagés.veuillez
consulter vos dealers pour expédier votre projecteur par exprès ou d'autres fournisseurs
de services d'expédition.
●Placez votre projecteur dans la case seulement après qu'il ait complètement refroidi.
Precautions on dealing with the projector:
DO NOT lift or move the projector by holding the lens
or projecting decoration ring as it may damage the lens
and the projector.
Be careful when handling the projector. DO NOT drop it,
subject it to external forces, or place objects atop it.
Note:
Projection lens are nanual ones. Precautions on using
your projector.
Lentille de projection sont manuels. Des précautions
en utilisant votre projecteur:
●DO NOT touch the lens when it is working as
your ngers may get hurt.
●Ne touchez pas la lentille lorsqu'il travaille
comme vos doigts peuvent se blesser.
●DO NOT let children touch the lens.Please
employ proper container for movement.
●Ne pas laisser les enfants touchent la lentille.
DO NOT hold the lens or area around it.

14
Compliance
THE SOCKET-OUTLET SHOULD BE INSTALLED NEAR THE EQUIPMENT AND EASILY ACCESSIBLE.
FCC Caution
Note: This equipment has been tested and found to comply with the limits for a Class B digital device,
pursuant to Part 15 of the FCC Rules. These limits are designed to provide reasonable protection against
harmful interference in a residential installation. This equipment generates, uses, and can radiate radio
frequency energy, and if not installed and used in accordance with the instructions, may cause harmful
interference to radio communications. However, there is no guarantee that interference will not occur in a
particular installation. If this equipment does cause harmful interference to radio or television reception,
which can be determined by turning the equipment off and on, the user is encouraged to try to correct the
interference by one or more of the following measures:
– Reorient or relocate the receiving antenna.
– Increase the separation between the equipment and receiver.
– Connect the equipment into an outlet on a circuit different from that to which the receiver is connected.
– Consult the dealer or an experienced radio/TV technician for help.
Use of shielded cable is required to comply with class B limits in Subpart B of Part 15 of FCC Rules.
Do not make any changes or modifications to the equipment unless otherwise specified in the
instructions. If such changes or modications should be made, you could be required to stop operation of
the equipment.
Model Number : EK-130U series
Trade Name : EIKI
Responsible party : EIKI International, Inc.
Address : 22552 Avenida Empresa Rancho Santa Margarita, CA 92688 U.S.A.
Telephone No. : 1-800-242-3454 (949-742-6800)
The AC Power Cord supplied with this projector meets the requirement for use in the country you purchased it.
AC Power Cord for the United States and Canada:
AC Power Cord used in the United States and Canada is listed by the Underwriters Laboratories (UL) and cer-
tied by the Canadian Standard Association (CSA).
AC Power Cord has a grounding-type AC line plug. This is a safety feature to be sure that the plug will t
into the power outlet. Do not try to defeat this safety feature. Should you be unable to insert the plug into the
outlet, contact your electrician.
AC Power Cord Requirement
AC Power Cord for the United Kingdom:
This cord is already tted with a moulded plug incorporating a fuse, the value of which is indicated on the pin
face of the plug. Should the fuse need to be replaced, anASTA approved BS 1362 fuse must be used of the
same rating, marked thus
ASA
. If the fuse cover is detachable, never use the plug with the cover omitted. If a
replacement fuse cover is required, ensure it is of the same colour as that visible on the pin face of the plug
(i.e. red or orange). Fuse covers are available from the Parts Department indicated in your User Instructions.
If the plug supplied is not suitable for your socket outlet, it should be cut off and destroyed.
The end of the exible cord should be suitably prepared and the correct plug tted.
WARNING : A PLUG WITH BARED FLEXIBLE CORD IS HAZARDOUS IF ENGAGED IN A LIVE SOCKET
OUTLET.
The Wires in this mains lead are coloured in accordance with the following code:
Green-and-yellow ....... . Earth
Blue................. Neutral
Brown ............... Live
As the colours of the wires in the mains lead of this apparatus may not correspond with the coloured markings
identifying the terminals in your plug proceed as follows:
The wire which is coloured green-and-yellow must be connected to the terminal in the plug which is marked
by the letter E or by the safety earth symbol or coloured green or green-and-yellow.
The wire which is coloured blue must be connected to the terminal which is marked with the letter N or co-
loured black.
The wire which is coloured brown must be connected to the terminal which is marked with the letter L or co-
loured red.
WARNING: THIS APPARATUS MUST BE EARTHED.
THE SOCKET-OUTLET SHOULD BE INSTALLED NEAR THE EQUIPMENTAND EASILY ACCESSIBLE.

15
Accessories
Quick Start Guide AC Power Cord Remote Control
VGA VIDEO HDMI
MENU
INPUT
FREEZE
MUTE
BLANK
LAMP
PATTERNKEYSTONE
TIMER
INFO.SCREEN
IMAGE
AUTO
+ +
- -
D.ZOOM VOLUME
Safety Information VGA Cable

16
Part names and functions
Front
Rear
Bottom
①Focus ring
②Zoom ring
③Top control panel and indicator
④Filter
⑤ Remote control receiver (front)
⑥ Projector Lens
⑦Speaker
⑧Anti-thief bar
⑨ AC cord connector
⑩ Kensington Security Slot
⑪ Remote control receiver(rear)
⑫ Adjustable foot
⑬ Echaust vent
⑨
①
②
④
⑤
③
⑥
⑦ ⑧ ⑩ ⑪
⑫
NOTE
NOTE
Hot air is exhausted from the exhaust
vent. Do not put heat-sensitive
objects near this side.
You need keep at least a distance
of 3"(1m) awat, or it may cause it
burning or damage.
● Kensington Security Slot is for a
Kensington lock used to deter theft of
the projector.
● Kensington is a registered trademark
of ACCO Brands Corporation.
⑬

17
Part names and functions
Terminals
①②③ ④ ⑤⑥
⑦⑫
⑪
⑩⑨
⑧
①MONO(R/L)
For a mono audio signal (a single audio
jack), connect it to MONO(R/L) jack.
② AUDIO OUT
Connect external audio amplier to this jack.
③ VGA IN
Connect a computer output to this terminal.
④HDMI 1 / HDMI 2
This is the terminal to input the HDMI 1 / HDMI
2 signals
⑤ USB-B
This terminal is used to connect the
projector to the computer with a USB cable
when you want to use the "USB Display"
function.(Refer to Page 69-70).
⑥ USB-A
When using the "Memory Viewer" function,
insert the USB memory directly to this
terminal.(Refer to Page 67-68)
⑦ VIDEO IN
This is the terminal to input video signals.
⑧ AUDIO IN
This is the terminal to input computer audio
signals.
⑨ VGA OUT
Output the analog signal form ②to other
monitor.
⑩RS-232C
When using RS232 to control the projector,
please connect the serial control line to this
terminal.
⑪ Remote Control receiver(BACK)
Operation the projector by remote control.
⑫LAN
- This is the LAN terminal to connect to the
network.
- Connect the projector to the computer via
RJ45 cable when you use the "Network"
Display function.

18
Part names and functions
Top control panel and Indicators
①
⑤
⑦
⑥
②
③
④
① WARNING indicator(Refer to Page 80)
- It flashes red when the internal projector
temperature is beyond the operating
temperature range.
②POWER indicator(Refer to Page 80)
- It lights red when the projector is in stand-by mode.
- It lights green during normal operations.
- It ashes green during the Power management mode.
- It ashes red during fans cooling.
- It turns steady green-yellow while the power is abnormal.
③ ▲▼◄►/UP/DOWN/VOL+/VOL-
- Select an item or adjust the value in the
screen menu.
- Select the image display area in D.zoom + mode.
- Increase or decrease volume.
④MENU
Open or close the screen menu.
⑤ POWER
Turn on/off the projector.
⑥ OK
- Enter menu operation.
- Execute the selected item.
⑦ INPUT
Select an input source.

19
Remote control
Part names and functions
①POWER
Turn on or turn off the projector.
②INPUT
Open or close the input source menu.
③VGA
Select "Computer 1" as input source.
④VIDEO
Select "Video" as input source.
⑤HDMI
Select “HDMI” as input source.
⑥AUTO
Enter auto setup adjust mode.
⑦ MENU
Open or close the screen menu.
⑧ button
- Select item or adjust the value in
screen menu.
- Select the image display area in
digital zoom + mode.
⑨OK
Enter the menu or select an item in
the menu.
⑩KEYSTONE
Correct the keystone distortion.
⑪ IMAGE
Select the image mode.
⑫FREEZE
Freeze the projected image.
⑬PATTERN
Set the internal test image.
⑭SCREEN
Select the screen size.
⑮ LAMP
Select the lamp mode.
⑯MUTE
Turn off the volume.
⑰ INFO.
Display the projector information.
⑱ D.ZOOM + / -
Digital zoom in / zoom out the image.
⑲VOLUME + / -
Increase / decrease the volume.
⑳ BLANK
Temporarily close the image on the
screen.
㉑TIMER
Enable the timer function.
PATTERN button on the remote controller is invalid when you choose USB display,
Memory viewer and Network as input signal.
!
⑥⑦
⑩
⑤
⑬
⑭
⑮
⑱
⑲
⑯
⑰
⑳
㉑
⑧
⑪
④
⑫
⑨
VGA VIDEO HDMI
MENU
INPUT
FREEZE
MUTE
BLANK
LAMP
PATTERNKEYSTONE
TIMER
INFO.SCREEN
IMAGE
AUTO
+ +
- -
D.ZOOM VOLUME
①②
③

20
30°
30° 5m
Install remote control batteries
Operating range
① Open the battery
cover. ②Install new batteries. ③Put the cover
back.
Two AAA batteries
For correct polarity
(+ and –), be sure
battery terminals are in
contact with pins in the
compartment.
Point the remote control toward the remote
control receivers on the projector (front and
back) when pressing any button.
The maximum operating range for the remote
control is about 5 meters and 30 degrees.
Part names and functions
To ensure safe operation, please observe the following precautions:
● Use two (2) AAA or LR3 type alkaline batteries.
● Always replace batteries in sets.
● Do not use a new battery with a used battery.
● Avoid contact with water or liquid matter.
● Do not expose the remote control to moisture or heat.
● Do not drop the remote control.
● If the battery has leaked in the remote control, carefully wipe the case clean and
install new batteries.
● Risk of explosion if two batteries are replaced by an incorrect type.
● Dispose of used batteries according to the instructions on the battery or local
regulations or guides.
30°
30°
5m
The projector can be adjusted up to 40 mm (10
degree) with the adjustable foot.
Rotate the adjustable foot to lift the projector to
a certain height. During lifting, rotate the foot
clockwise.
To lower or retract the adjustable foot, rotate
the foot counterclockwise.
Keystone distortion of projected images can
be corrected by auto settings, remote control
operation or menu operation.
Adjustable foot
Adjustable foot
!
This manual suits for next models
5
Table of contents
Other Eiki Projector manuals

Eiki
Eiki DLP EIP-4200 User manual

Eiki
Eiki LC-W3 Setup guide

Eiki
Eiki Brilliant LC-XNP4000 User manual

Eiki
Eiki LC-180AR User manual

Eiki
Eiki LC-XS31 User manual

Eiki
Eiki LC-WNB3000N User manual

Eiki
Eiki EK-815U User manual

Eiki
Eiki LC-X5 Setup guide

Eiki
Eiki LC-200 Setup guide

Eiki
Eiki LC-X1100 Installation and operating instructions