6. Snoezelen® Stimulations
Visual
7. Best Use
Use in a darkened environment. Use with props to enhance your favourite themes e.g.
brushes to sweep away leaves and so on.
8. Compatible ROMPA® Products
Not applicable
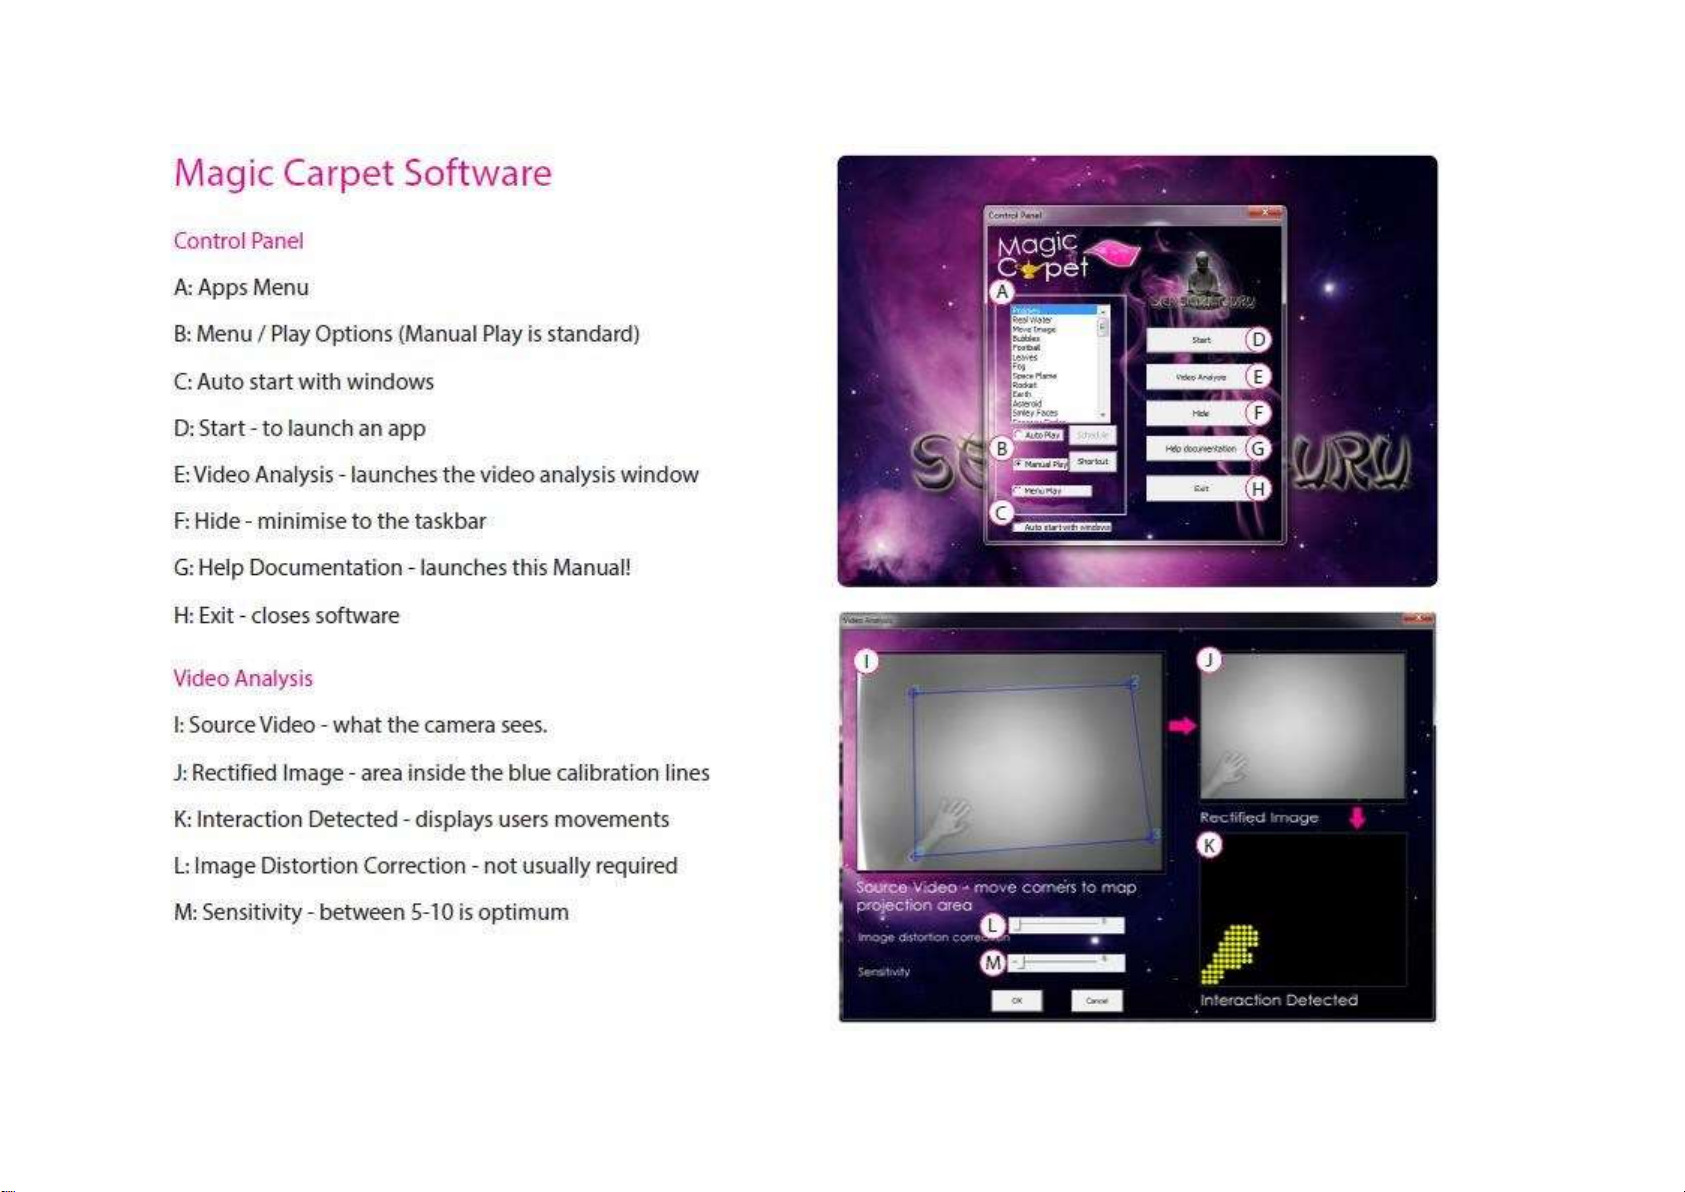
9. Starting Up
There are no short cuts to setting this system up carefully and thoroughly.
10. Detailed Description
Seeing really is believing … and truly delighting! Taking interactivity to a new level!
A virtual wonderland! Making otherwise impossible experiences a reality …
Brush virtual leaves aside with a sweep of your foot …. step through water to create ripples
and see fish move out of your way … set off fireworks with one step!
An incredible multimedia visual display system that projects amazing interactive special
effects and activities directly onto an ‘interactive floor’. Users control dynamic interactive
displays with simple gestures and body movement on the vinyl floor mat. Movement is
rewarded with engaging experiences and captivating images.
Cutting-edge immersive technology to enable clients, regardless of ability, to control and
interact independently with a moving image and explore their own creativity and
imagination.
With nothing to actually touch, this system is safe, requires no cleaning and is perfect for
places where infection control is an issue. As a non-contact resource, once installed, it is also
perfect for those with challenging behaviours.
Multiple easy-to-customise templates are included, with further effects available to build
your own ‘library’. The ROMPA® Interactive Projection can be permanently installed by
ROMPA® in your Snoezelen® room.