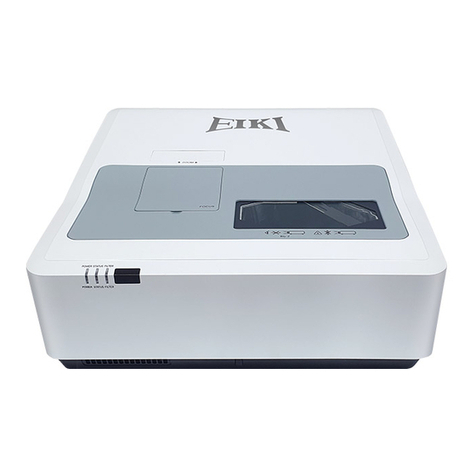
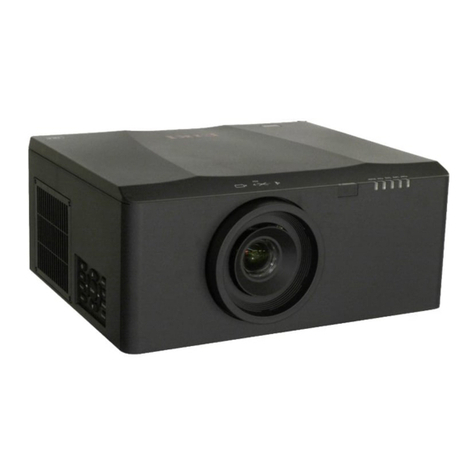
Eiki EK-815U User manual

SERVICE MANUAL
Copyright November 2017 All Rights Reserved
EK-815U
Date Revise Version Description
2017.11.06 V1.0 Initial Issue
(C) 2017 EIKI Industrial Inc,

i
EK-815U
Preface
This manual is applied to EK-815U projection system.The manual gives you a brief
description of basic technical information to help in service and maintain the product.
Your customers will appreciate the quick response time when you immediately identify
problems that occur with our products.We expect your customers will appreciate the
service that you offer them.
This manual is for technicians and people who have an electronic background.Please send
the product back to the distributor for repairing and do not attempt to do anything that is
complex or not mentioned in the troubleshooting.
Note: The information found in this manual is subject to change without prior notice.Any
subsequent changes made to the data herein will be incorporated in future edition.
EK-815U Service Manual
Copyright November 2017
All Rights Reserved
Manual Version 1.0

ii
EK-815U
Table of Content
Chapter 1 Introduction
Highlight 1-1
Compatible Mode 1-3
Chapter 2 Disassembly Process
Equipment Needed & Product Overview 2-1
Disassemble Projector Lens 2-2
Disassemble Top Cover 2-3
Disassemble Main Board Module 2-5
Disassemble Front Cover 2-10
Disassemble Left Cover 2-11
Disassemble IO Cover 2-12
Disassemble Engine Module 2-14
Disassemble LVPS 2-19
Disassemble Bottom Cover Module 2-22
Chapter 3 Troubleshooting
LED Lighting Message 3-1
Main Procedure 3-2
No Power Troubleshooting 3-3
Verify power functionality 3-4
Verify image performance 3-5
Verify IR remote keypad operation 3-9
Verify the network connection 3-10

iii
EK-815U
Chapter 4 Test & Inspection
Test Equipment Needed 4-1
Service Mode 4-1
Factory Reset 4-3
Adjustment 4-4
Calibration 4-8
Chapter 5 Firmware Upgrade
Scalar/MCU/Formatter/LAN FW upgrade 5-1
Recovery Mode 5-7
Rewrite SN 5-11
Appendix A
Exploded Image I
Appendix B Error Log I

1-1EK-815U
1-1 Highlight
Chapter 1
Introduction
No Item
Description
EK-815U
1Dimensions (W x H x D) 484 x 181 x 509 mm (without lens, w/o elevators)
2 Weight (kg)
22.9 kg Net Weight (w/o lens)
23.9 kg Net Weight (with A06 lens)
27.4 kg Gross Weight with package (w/o lens)
3 Power Supply
770W (110V)
AC 100 - 240 V (50Hz / 60Hz)
Stand-by Mode: <0.5W
4 Keystone Correction Horizontal: +/- 20 degrees
Vertical:+/- 20 degrees
5 Brightness Normal Mode: 8000 lm
ECO Mode: 4000 lm
6
Throw Ratio
AH-A25010 (A16)
AH-A22010A (A15)
AH-A22020 (A01)
AH-A22050 (A06)
AH-A21010 (A03)
AH-A23010 (A13)
0.36
0.75 ~ 0.95
0.95 ~ 1.22
1.22 ~ 1.53
1.52 ~ 2.92
2.90 ~ 5.50
7 Lens Shift Horizontal: +/- 15%,Vertical: +/-50%
8 Uniformity Typical 90%,Minimum85%(JBMA)
9 Laser Diode Power 35W@3A (Normal Mode)
10 Laser Diode Life Normal mode:20,000 hours ,ECO mode:35000 hours
11 DMD Chip 0.67”WUXGA DMD, Type A, DC3
12 I/O Terminal
1 x HDMI (version1.4) (with locking screw)
1 x DVI-D (only support digital signal)
1 x VGA IN(D-Sub 15pin) (Computer In)
1 x HDBaseT
1 x HDMI Out (version1.4) (with locking screw)
1 x VGA Out
1 x 3D SYNC Out

1-2
EK-815U
No Item
Description
EK-810U
13 Control Terminal
1 x RS232 (D-sub 9 pin) (PC Control)
1 x Wired in (3.5mm phone jack) (Remote In)
1 x USB type A (for WiFi dongle purpose)
1 x Mini USB (for LAN FW upgrade only) (Service)
1 x RJ45 (LAN)
14 Native Resolution 1920 x 1200
15 Filter Wheel 4 Segment—RYGB; Filter Diameter: 67 mm
FW Speed: 7200 rpm (x2) / 10800 rpm (x3)
16 Operating Temperature
0~2500 ft: 5~40 ℃
2500~5000 ft: 5~35 ℃
5000~10000 ft: 5~30 ℃

1-3
EK-815U
1-2 Compatible Mode
—
64
—
DLP Projector — Owner’s Manual
Timing Mode Table
S
IGNAL
T
YPE
R
ESOLUTION
F
RAME
RATE
(H
Z
)QD881 VGA HDMI
DVI HDB
ASE
T 3G-SDI
PC
[ 60 DMT0660 VVVV—
[ 72 DMT0672 VVVV—
[ 75 DMT0675 VVVV—
[ '07 VVVV—
[ 66.6 APP0667 — VVV—
720x400 70 IBM0770H VVVV—
[ 60 '07 VVVV—
[ 72 '07 VVVV—
[ 75 '07 VVVV—
[ '07 VVVV—
[ 120 &95 VVVV—
[ 75 $ VVVV—
[ 50 &97+ —VVV—
[ 60 &97+ —VVV—
[ 75 &97+ —VVV—
[ &97+ —VVV—
[ 60 DMT1060 VVVV—
[ 75 DMT1075 VVVV—
[ '07 VVVV—
[ 120 CVR1012 VVVV—
1152x720 50 CVT1150D — VVV—
1152x720 60 CVT1160D — VVV—
1152x720 75 CVT1175D — VVV—
1152x720 &97' —VVV—
[ 60 CVT1160 VVVV—
[ 70 DMT1170 VVVV—
[ 75 DMT1175 VVVV—
[ '07 VVVV—
[ 75 APP1175 — VVV—
[ 50 CVT1250H — VVV—
[ 60 CVT1260H VVVV—
[ 75 CVT1275H VVVV—
[ &97+ VVVV—
[ 120 VVVV—
[ 60 CVT1260E VVVV—
[ 75 CVT1275E VVVV—
[ &97( VVVV—
[ 50 CVT1250_ VVVV—
[ 60 DMT1260D VVVV—
[ 75 CVT1275_ VVVV—

1-4
EK-815U
—
65
—
DLP Projector — Owner’s Manual
SIGNAL
TYPE RESOLUTION FRAME
RATE (HZ)QD881 VGA HDMI
DVI HDB
ASE
T 3G-SDI
PC
[ &97B VVVV—
[ 50 CVT1250 — VVV—
[ 60 CVT1260 VVVV—
[ 75 CVT1275 VVVV—
[ &97 VVVV—
[ 50 CVT1250G — VVV—
[ 60 DMT1260G VVVV—
[ 75 DMT1275G VVVV—
[ '07* VVVV—
[ 50 CVT1350H — VVV—
[ 60 DMT1360H — VVV—
[ 75 CVT1375H — VVV—
[ &97+ —VVV—
[ 60 DMR1360H VVVV—
1400x1050 50 CVT1450 — VVV—
1400x1050 60 CVT1460 — VVV—
1400x1050 75 CVT1475 VVVV—
[ 60 CVT1460D VVVV—
[ 75 CVT1475D — VVV—
[ 60 DMR1660H — VVV—
1600x1200 60 DMT1660 VVVV—
[ 60 CVT1660D VVVV—
; 50 &97+ —VVV—
; 60 &95+ VVVV—
;5% 60 &95' VVVV—
;5% 50 &97' VVVV—
NTSC NTSC (M,
4.43) 60 —————
PAL
PAL (B,G,H,I) 50 — — — — —
PAL (N) 50 — — — — —
PAL (M) 60 — — — — —
SECAM SECAM (M) 50 — — — — —
SDTV L 60 VVVV—
576i 50 VVVV—
EDTV S 60 VVVV—
576p 50 VVVV—

1-5
EK-815U
—
66
—
DLP Projector — Owner’s Manual
S
IGNAL
T
YPE
R
ESOLUTION
F
RAME
RATE
(H
Z
)QD881 VGA HDMI
DVI HDB
ASE
T 3G-SDI
HDTV
L 25 VVVV—
L VVVV—
L 30 VVVV—
720p 50 VVVV—
720p VVVV—
720p 60 VVVV—
S 23 VVVV—
S 24 VVVV—
S 25 VVVV—
S VVVV—
S 30 VVVV—
S 50 VVVV—
S VVVV—
S 60 VVVV—
Mandatory
3D
Frame Packing
S 24 — V—V—
Frame Packing
720p 50 — V—V—
Frame Packing
720p 60 — V—V—
Side by Side
L 50 — V—V—
Side by Side
L 60 — V—V—
Top and
Bottom 720p 50 — V—V—
Top and
Bottom 720p 60 — V—V—
Top and
%RWWRPS 24 — V—V—
Frame
sequential
3D
[ 120 — V—V—
[ 120 — V—V—
[ 120 — V—V—
SD-SDI
L<FE&U
10bit — ———— V
576i YcbCr422
10bit 50 — — — — — V

1-6
EK-815U
Note: If the Computer Compatibility supportive signal is different from User’s Manual,
please refer to User’s Manual.
—
67
—
DLP Projector — Owner’s Manual
S
IGNAL
T
YPE
R
ESOLUTION
F
RAME
RATE
(H
Z
)QD881 VGA HDMI
DVI HDB
ASE
T 3G-SDI
HD-SDI
720p
YcbCr422
10bit
50 — — — — — V
— ———— V
60 — — — — — V
L
YcbCr422
10bit
50 — — — — — V
— ———— V
60 — — — — — V
S
YcbCr422
10bit
— ———— V
24 — — — — — V
25 — — — — — V
— ———— V
30 — — — — — V
V)
YcbCr422
10bit
25 — — — — — V
— ———— V
30 — — — — — V
3GA-SDI
S
YcbCr422
10bit
50 — — — — — V
— ———— V
60 — — — — — V
3GB-SDI
S
YcbCr422
10bit
With 352M
Payload ID"
50 — — — — — V
— ———— V
60 — — — — — V
V
: Frequency supported
— : Frequency not supported

EK-815U 2-1
Chapter 2
Disassembly Process
2-1 Equipment Needed & Product Overview
1. Screw Bit (+) :105
2. Screw Bit (+) :107
3. Screw Bit (-) :107
4. Hex Sleeves 5 mm
5. Tweezers
6. Knife
7. Projector
* Before you start:
- This process is protective level II. Operators should wear electrostatic chains.
- When disassemble Engine module , please notice that it require specic environmental
conditions (clean room).

EK-815U 2-2
2-2 Disassemble Projector
Lens
1. Remove the lens cover (as blue arrow).
Projector lens
2. Rotate the lens carefully (as red arrow),
then remove it out carefully.
Note: - Please hold lens module in the
right way.
- Be careful not to dirty the glass
of the lens module.
- Be careful not to touch the motor
of the lens module
Lens cover
Wrong Right

EK-815U 2-3
2-3 Disassemble Top Cover
1. Loosen 4 black screws (as red circle).
2. Loosen 8 screws (as green circle).
3.Take the top cover module out.
4. Remove the sponge which is around the
Led lens.
5. Remove 2 M3*5 screws to disassemble
the Led lens.
Led lens
Led sponge

EK-815U 2-4
6. Remove 2 M3*5 screws to disassemble
the IR .
7. Remove the 2 sponges from the top
IR lens

EK-815U 2-5
2-4 Disassemble Main Board
Module
1. Take out the top IR board from the hook.
2. Loosen 18 screws to disassemble top
shielding (as green circle).
3. Loosen 2 screws to disassemble LED
board (as red circle).
LED board
IR board

EK-815U 2-6
4. Loosen 3 screws and 10 hex screws (as
red circle).
5.Loosen 9 screws to disassemble main
board (as green circle).
6.Loosen 3 screws to disassemble IO
board (as red circle).

EK-815U 2-7
IO board
Main board
Item
Male Connector
on Connector
Board
The key feature Figure
J5 KEYPAD CONN White connector (30 pin)
J35/J34 FAN10/FAN4 Composed of black,blue,gray,red wires
white connector (4pin)
J33/J32 FAN9/FAN8 Composed of black, green, gray, and red
wires, white connector (4 pin)
J23 P/W FPC FPC

EK-815U 2-8
Item Male Connector
on Connector Board The key feature Figure
J38 FAN6 Composed of black, green, gray, and
red wires, a white connector (4 pin)
J25 F/W SENSOR Composed of white, black, and red
wires, a red connector (3 pin)
J22 F/W FPC FPC
J44/J47 H SENSOR L/ V
SENSOR B
Composed of two white wires, a white
connector (2 pin)
J14 LIGHT SENSOR 2
Composed of white, yellow, pink,
brown, black, and red wires, a white
connector (6 pin)
J48 LD DRIVER Composed of a white connector, and a
black wire tube (20 pin)
J46 V SENSOR T Composed of two blue wires, a white
connector, a black wire tube (2 pin)
J43 H SENSOR R Composed of two red wires, a white
connector, a black wire tube (2 pin)
J45/J42 V POWER/ H
POWER
Composed of yellow, white, red, and
blue wires, a white connector (4 pin)

EK-815U 2-9
Item Male Connector
on Connector Board The key feature Figure
J39 ZOOM/FOCUS Composed of white, yellow, pink,
brown, black, and red wires (six pin)
J8 FRONT IR Composed of red, black, and white
wires, a green connector (3 pin)
J9 LIGHT SENSOR Composed of black, yellow, and red
wires, a white connector (6 pin)
J1 LVPS Composed of a white connector, and a
black wire tube (22 pin)
J24 P/W SENSOR Composed of white, black, and red
wires, a red connector (3 pin)
J36/J37
J31/J30
J29
FAN7/FAN5/FAN3/
FAN2
FAN1
Composed of black, blue, gray, and
brown wires, a white connector (4 pin)
7.Loosen 6 screws to disassemble bottom
shielding (as green circle).

EK-815U 2-10
2-5 Disassemble Front
Cover
1.Loosen 9 screws to disassemble front
cover (as red circle).
2.Loosen 6 screws to disassemble bracket
(as green circle).
Table of contents
Other Eiki Projector manuals

Eiki
Eiki LC-XB30 User manual

Eiki
Eiki LC-XL200 User manual

Eiki
Eiki LC-NB3EU User manual

Eiki
Eiki LC-X990 Setup guide

Eiki
Eiki LC-X986 Installation and operating instructions
Eiki
Eiki EIP-3500 User manual

Eiki
Eiki Projector User manual

Eiki
Eiki LC-XA20 User manual

Eiki
Eiki EK-308U User manual

Eiki
Eiki Brilliant LC-SB15 User manual

Eiki
Eiki LC-XDP3500 User manual

Eiki
Eiki LC NB2UW LC-NB2UW LC-NB2UW User manual

Eiki
Eiki LC-XIP2600 Parts list manual

Eiki
Eiki LC-XB31 User manual

Eiki
Eiki LC-NB1 User manual

Eiki
Eiki EIP-X5500 User manual

Eiki
Eiki LC-SB20 User manual

Eiki
Eiki LC-XBS500 User manual

Eiki
Eiki Brilliant LC-XNP4000 User manual

Eiki
Eiki LC-150 Setup guide