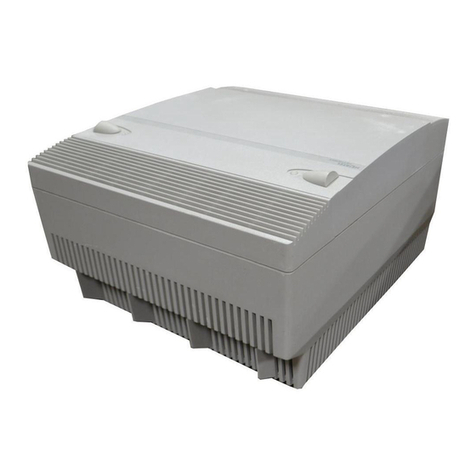
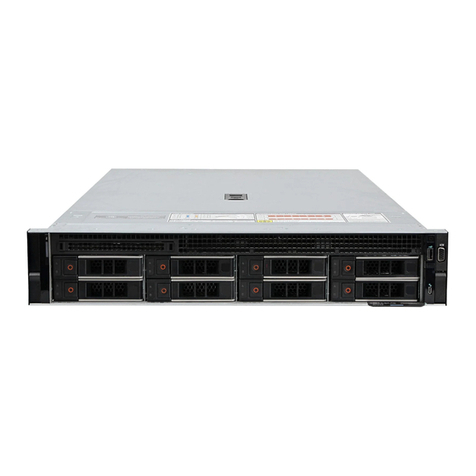
EiRA TC1350 User manual

User Manual TC1350
www.eiratek.com
TC1350
TURN 1 PC INTO 2…..10…….EVEN 100
BIS Approved: Self Declaration - Conforming to IS 13252 (Part 1): 2010,
R- 41057215

User Manual TC1350
www.eiratek.com
All rights reserved © EiRA TEK
Without the company's written permission, no unit or individual
can copy picking, copying some or all the content of this
document, and cannot be disseminated in any form.

User Manual TC1350
www.eiratek.com
Directory
1 Introduction to Terminal.................................................................................4
2 TC1350 Host interface and specifications .......................................................5
2.1 TC1350 Host interface ...........................................................................5
2.2 List of specifications ..............................................................................6
3 Connection mode ............................................................................................7
4 Instructions for use.........................................................................................8
4.1 Boot .......................................................................................................8
4.2 Initializing network ...............................................................................9
4.3 Automatic connection .......................................................................... 10
4.4 Configuration Centre ........................................................................... 11
4.5 Connection settings ............................................................................. 13
4.6 New Microsoft RDP connection............................................................ 15
4.7 New RDS connection............................................................................ 18
4.8 Display settings ................................................................................... 19
4.9 Network settings ................................................................................. 21
4.10 Network Diagnostics.......................................................................... 23
4.11 System ............................................................................................... 24
5 Frequently asked questions .......................................................................... 30
5.1 How to fix monitor black screen problem............................................ 30
5.2 Microsoft RDP remote connection failure may cause .......................... 30
5.3 How to fix Google Chrome browser sound issues................................ 31

User Manual TC1350
www.eiratek.com
1 Introduction to Terminal
EiRA TC1350 thin client is a small cloud terminal equipment.
It uses a high-performance ARM Cortex A53 quad-core
2.0GHz processor and runs the shared technology
independently developed by Linux operating system. Main
features are:
●High performance, full HD (1920*1080) resolution
●Appearance of small, space saving
●Energy saving, low power consumption
●Fan-less design, 24-hour zero noise
●Reliable and safe operation, maintenance-free in the late
●Multiple optimised desktop protocols (RDP, and Critix, and
Vmware)
●Smooth HD video playback experience
●Redirect supports HD video files player
●Support system software online upgrade
●Support USB redirection
4 /33

User Manual TC1350
www.eiratek.com
2 TC1350 Host interface and specifications
2.1 TC1350 Host interface
Fig 2-1 TC1350 PORTS
Fig 2-1 TC1350 Monitor After hanging
5 /33

User Manual TC1350
www.eiratek.com
2.2 List of specifications
System configuration information:
System parameters
Specific information
CPU
ARM Cortex A53 ( 2.0GHz, 4Cores )
Memory
DDR3 : 1GB
Local storage
NAND Flash: 4GB
Ethernet (wired)
10/100/1000M Adaptive RJ45 Interface
Wireless network
Audio input
MIC Input diameter 3.5mm
Audio output
Audio output diameter 3.5mm
USB Interface
5x USB2.0
VGA
The highest 1920 x 1080, 60 Hz ; Colour depth: 32 bpp
Power supply
External power adapter: Input: AC, 100~240V , 50~ 60Hz
Output: DC - 5V, 2000mA
Power input parameters
DC 5V, 2000mA
Power switch
Touch switch
Overall dimension
145 x 92 x25 mm
Power consumption
< 7.5W
Cooling
Adaptive cooling, fanless
Noise
0 DB
Working temperature
-20~50 Degrees Celsius
Operating humidity
10 % To 80 %
Casing material
Plastic / Aluminium alloy (optional)
Rack
Supported monitor plug-in
6 /33

User Manual TC1350
www.eiratek.com
3 Connection mode
Fig 3-1 Connecting TC1350 cloud to a remote desktop server
Note: Please use the correct qualified BIS power
adapter (sold separately by EiRA), power adapter that does
not match, may lead to irreparable equipment failure.
7 /33

User Manual TC1350
www.eiratek.com
4 Instructions for use
Figure 3-1 shown in the dashed box connected
TC1350, monitors, keyboards, mice, cables and power
supply.
4.1 Boot
Host power up, enter the boot screen, the centre of the
screen shows EiRA Logo then enter 4.2 section which
describes "initializing network".
Fig 4-1 boot screen
Note: After the end of the boot screen, if the monitor
shows black screen, refer to 6.1 section & restore factory
setting.
8 /33

User Manual TC1350
www.eiratek.com
4.2 Initializing network
System load, hosts entered as in Figure 4-2 shows the
network initialization stage, the network initialization phase
detection network is available, the IP address configuration is
normal, if the network initialization is successful, hosts into
the 5.3 section describes automatic connection state.
Fig 4-2 network initialization
Note: If the network fails to initialize, main access 4.4
section describes service interfaces, network initialization
failure may be caused by:
1) network connectivity, you need to check whether the
host you plug the network cable and the switch are working
properly;
2) If it is dynamic get IP address, get IP failure will cause
network initialization fails, check your DHCP server is working
correctly;
9 /33

User Manual TC1350
www.eiratek.com
4.3 Automatic connection
If automatic connection is not configured, the host will
automatically skip the connection phase, into 4.4 section
describes configuration centre.
If automatic connection is configured, the host after
successfully initialize the network, it will enter the figure 4-3a
shown in the remote desktop connection automatically
countdown. The countdown period, users can cancel the
automatic connection. After the end of the countdown, enter
the figure 4-3B shown in the remote desktop connection
automatically.
Fig 4-3a countdown to automatically connect
Fig 4-3b automatic connection
If automatic connection fails, the system entered the
figure 4-3C shown in the automatic link with State, Countdown
to 15 seconds after the restart automatic desktop
10 /33

User Manual TC1350
www.eiratek.com
connection, if the connection is lost again in 4-3C shown
in the automatic link with the countdown.
Fig 4-3C Auto Connecting Retry
Note: Automatic connection phase, automatic connection
cancelled by the user or automatically reconnect, the system
will enter 4.4 configuration Centre referred to in section.
4.4 Configuration centre
Figure 4-4A shows, before entering the centre, prompted
for an administrator password.
Fig 4-4A enter the administrator password
Note: This machine has no default password,
when you click OK you will be directly entered as in Figure 4-
4B is shown in the Center. (For Setting the administrator
password, please refer to 4.11d)
11 /33

User Manual TC1350
www.eiratek.com
Fig 4-4B Control Center
Fig 4-4B shows, the Center is divided into three functional
areas:
◆Main menu: Center the menu list.
◆Set the window: setting the host parameters area.
◆Status bar: Displays current status information of the
host.
Main menu configuration the main functions of the Centre
are listed, click on the menu icon to enter the appropriate
settings window, main menu items include:
◆Connection settings: Remote Desktop for
Administration session.
◆Display settings: set the resolution and interface
language.
12 /33

User Manual TC1350
www.eiratek.com
◆Network settings: Configure the network IP address,
subnet mask, gateway, DNS, and so on.
◆Network Diagnostics: provides network connectivity
PING diagnostic operations.
◆System: provides system-level operation interface and
display information about the system.
4.5 Connection settings
Enter the configuration Center main interface, the default
display < connection settings > interface, or click on the center
of the main menu "connection settings" and enter the figure 4-
5a shows the < connection settings > interface, red inside the
dashed line is the list of remote desktop connection.
13 /33

User Manual TC1350
www.eiratek.com
Fig 4-5a Connection settings interface
■ Connection type
TC1350 Cloud support two Remote Desktop Protocol:
◆Deskpool Connection: Deskpool virtual desktop
management system entry, defaults to using the Microsoft
RDP Remote Desktop Protocol.
◆Microsoft RDP Connection: MS RDP server connections,
use Microsoft RDP Remote Desktop Protocol.
■Connection list
Each additional connection configuration, a record is
saved in the connection list, connection list displays fields
include:
◆Connection name: increased connection - enter
the globally unique name for the connection.
14 /33

User Manual TC1350
www.eiratek.com
◆Connection type: Microsoft RDP, and Microsoft RDS
◆Server address: the connection to the remote server address.
◆Automatic connection: is set to auto connect, a host can set up
an automatic connection.
◆Action: "connection", "Edit", "delete" three action
buttons.
4.6 New Microsoft RDP connection
Click "added Microsoft RDP connection", can see as
Figure 4-7A by shows dialogue box, entered "connection
name", and "server address", and if hook selected "remember
account information", can entered login remote desktop of
"user name", and "password" and "domain name", click
"added", can increased MS RDP desktop session connection.
15 /33

User Manual TC1350
www.eiratek.com
Fig 4-6A added Microsoft RDP connection
Set Microsoft RDP connection option as in Figure 4-7B
shows, including personalized options and user desktop
remotely, you need programs that run automatically.
Fig 4-6B sets the Microsoft RDP options
16 /33

User Manual TC1350
www.eiratek.com
Note: RemoteFX Option only and Hyper-V virtualization
platform used in conjunction with Windows virtual desktops
must be Windows 7 SP1 or later, or "start RemoteFX" option is
invalid. When RemoteFX option is valid, the colour depth option
is not available, RemoteFX defaults to 32 -bit colour depth.
Set Microsoft RDP connection experience as in Figure 4-
7c shows, including select RDP connections colour depth and
screen experience. System default settings are given.
Fig 4-6c sets the Microsoft RDP experience
17 /33

User Manual TC1350
www.eiratek.com
4.7 New RDS connection
Tap the "add RDS connection", you can see in Figure 4-8
is shown in the dialog box:
Fig 4-7 added RDS connection
Enter the "connection name" and the "server address”,
click "add", you can add the RDS desktop sessions. If you tick
the "remember account", users can enter an RDS desktop
user "user name" 、"password" and "domain" in the remote
connection RDS server and automate user login.
18 /33

User Manual TC1350
www.eiratek.com
4.8 Display settings
Click on the center of the main menu "display
settings" and enter the figure 4-8A shows the < display
settings > interface.
Fig 4-8A display settings
■ Set the resolution
In the "resolution" in the list, select the appropriate
display resolution, and then click the "Save" button.
System the following prompt dialog box pops up.
Fig 4-8B modifying resolution prompt dialog box
19 /33

User Manual TC1350
www.eiratek.com
Click on the figure 4-8B "OK" button, the system will
restart. After the restart is complete, appears as in Figure 4-
9C shows the prompt dialog box. Countdown 15 second
expiration click "confirm" button. If you do not click the
"confirm", and the system restarted when the countdown
completes the system and revert to the previous resolution.
Fig 4-8C modifying resolution prompt dialog box
Note: When the user sets the host resolution, if you have
set up the monitor does not support the resolution, may result
in a black screen, not to do anything at this time, the system
will reboot after timeout waiting for confirmation, restored to
its original resolution setting.
■ Setting the language
In the language list, select the language you want
"Chinese Simplified" or "English" and click "Save", the
system will reappear in the new language interface.
20 /33
Table of contents
