Elby Designs MonoWave(X) User manual

MonoWave(X) User Manual
ELBY Designs - Laurie Biddulph
9 Follan Close, Kariong, NSW 2250, Australia
1 of 26
MonoWave(X) Manual
User Guide
February 12th 2019
Firmware V5.4
Please note that this manual is still undergoing development and that additions to this manual will be posted on my website.
(extensively borrowed from the manual by Till Kopper)

MonoWave(X) User Manual
ELBY Designs - Laurie Biddulph
9 Follan Close, Kariong, NSW 2250, Australia
2 of 26
Description
Imagine a monophonic, MIDI controllable, 19" rack mountable PPG blue wavetable synth
minus the wavetable scanning, plus a user selectable De-Rez, with a classic Moogª filter
ladder and real analogue knobs……
The MonoWave has balls and a special "umpfh" that give it, its unique sound.
Features
The MonoWave(X) features two digital oscillators with 256 different waveshapes
selectable individually. There is also a unique de-res function that lowers the digital
waveshapes' sample resolution, to give a sound very much like the famous German PPG
wave synthesizers from the eighties. The signal of these oscillators and their suboctave
signals are mixed together and then fed in to the pure analog part of the synth: a 24db low-
pass filter a la Moog synthesizer, and a VCA. Both of them controlled by their own ADSR
envelopes.
The MonoWave(X) has no patch memory. It can be played by incoming MIDI signals from
software, sequencers or MIDI keyboards.
The MonoWave(X) comprises 2 boards:-
1) Main Board. This provides all the functionality of the MonoWave(X). The board
measures 269mm x 145mm and all connections to panel components are via 3 x
40-way IDC ribbon-cable connectors.
2) Panel Board. This houses all of the panel components for the MonoWave(X) and
greatly simplifies construction of the unit with connection to the Main Board being
via 3 x 40-way IDC ribbon-cable connectors. This board measures 392mm x 76mm
and is intended to be mounted behind a 2U x 84HP front panel.

MonoWave(X) User Manual
ELBY Designs - Laurie Biddulph
9 Follan Close, Kariong, NSW 2250, Australia
3 of 26
Enhancements in the MonoWave(X) over the original MonoWave include:-
1) Reduction of interconnecting cables to 3 x 40-way IDC ribbon cables
2) Upgrading of the AT90S8515 to an ATMEGA16
3) Upgrading of the AT90S1200 to ATtiny2313
4) Expansion of LCD from 1x16 to a 2x16 line display
Development of a front panel support PCB to substantially improve the construction
process
Specifications
Power
Input: 15VDC @ 400mA
Audio out
Headphone socket: best if used with 32 ohms impedance
Monophonic 6.3 mm (1/4") socket
ROM waves
8-bit depth
256 samples per cycle
DE-REZ reduces cycle to 64 samples
ADSR timing range
Attack: 7mS to 6 Seconds
Decay: 7mS to greater than 20 Seconds
Release: 7mS to greater than 20 Seconds
Dynamic range
About 90dB
MIDI Note Range
C#-2 to C6
MIDI Note Offs
Recognises real Note Offs as well as velocity Note Offs
Size
2U 19” rack unit
Display
2 x 16 backlit LCD
All specifications are subject to change without notice.

MonoWave(X) User Manual
ELBY Designs - Laurie Biddulph
9 Follan Close, Kariong, NSW 2250, Australia
4 of 26
MonoWave(X) User Guide
Setting up the instrument
Connect the [MIDI IN]socket to the
MIDI OUT of your MIDI controller
such as a keyboard or computer
Connect the [AUDIO OUT]socket to
the line input of your mixer or amp.
Make sure the gain/level/volume
control is set low
Connect the [POWER] socket to a
suitable power source*
Turn [ON] the MonoWave(X) which
should now show an information
screen indicating that the MonoWave(X) is powered on.
Press the [F1+]and the [F4-]button together to select the MIDI channel display.
Select the MIDI channel you wish the MonoWave(X) to receive on by pressing the
[F1+] and [F1-] buttons
Press [F4-] to exit back to the main system
Now set up a patch like that shown below
Press a key on your keyboard and hold it.
Slowly increase the gain of your mixer or amp until the level is OK for your
equipment.
You should hear the first sounds from your MonoWave(X) now.
Alternate rear panel layout
External power supply should be a well regulated 15VDC supply terminated with a
2.5mm DC plug (tip = positive).

MonoWave(X) User Manual
ELBY Designs - Laurie Biddulph
9 Follan Close, Kariong, NSW 2250, Australia
5 of 26
The Analogue Section
The MonoWave(X) has the following analogue sections:
Tune and Detune
Oscillator #1
Oscillator #2
Analogue 24dB Moog Ladder Filter with envelope, velocity and note tracking
control
ADSR Filter Envelope
ADSR Amplifier Envelope with velocity on volume control
Main Volume
MonoWave(X) Block Diagram
The TUNE and Detune Section
A TUNE knob to tune the MonoWave(X) to other instruments.
The MonoWave(X) has digital oscillators which will not drift out of tune.
A DETUNE knob to detune the second oscillator in relation to the first.
Centre is no Detune. Clockwise will increase the pitch of the second oscillator. Counter-
clockwise will decrease its pitch. The `amount’ of Detune available is determined by the
TUNE setting which can be either FINE (+/-99 cents) or SEMI (+/-8 semitone)
The Oscillator (OZ1 & OZ2) section
The 5-step octave switch selects octave transpose. This is handy if your keyboard does
not have the full range or just for quick live changes. The 1 O’clock position is the
normal 16’footage.

MonoWave(X) User Manual
ELBY Designs - Laurie Biddulph
9 Follan Close, Kariong, NSW 2250, Australia
6 of 26
The HI-REZ button is integrated in to the OZ knob and, when OFF, will lower the
sample frequency of the digital oscillator by a factor of 4 (256 samples per waveshape
will drop to 64 samples) to get a more sexy low-fi sound. Many old digital synthesizers
got their special harsh sound due to this.
This is a digital controller, but it's positioned near the analogue section of the oscillators
for the ease of use. An LED near the OZ knob will show you when the HI-REZ is active.
You might have to raise the filter cut-off to hear the effect of HI-REZ.
The OZ knob allows you to adjust the oscillator's volume. It also incorporates the HI-
REZ switch as discussed above.
The SUB knob allows you to fade in the sub oscillator - a square wave one octave
below the main pitch of the oscillator. By using this wave shape together with the
oscillator's normal wave shape, you get a very fat sound.
The Oscillators may be modulated by the LFO (refer to “LFO” in the "The Digital
Section")

MonoWave(X) User Manual
ELBY Designs - Laurie Biddulph
9 Follan Close, Kariong, NSW 2250, Australia
7 of 26
The FILTER Section
CUT-OFF = Lowpass filter cut off point.
Q = Emphasis = Resonance
ENVELOPE adds the envelope modulation amount to the cut off frequency.
NOTE adds a voltage according to the note number send to the MIDI input. The full
counter clockwise position means no key tracking; Fully clockwise gives 200 % tracking.
That is, playing an octave above the previous note will raise the cut-off frequency by 2
octaves.
VELOCITY opens the filter according the velocity of played notes. The more you turn
this knob clockwise, the greater effect velocity has on the cut-off (until the filter is fully
open anyway). Thus, playing with full force will raise the cut-off and make the sound
brighter. Playing softly will only alter the sound by a small amount (almost in-audible).
This can be very expressive.
The Filter may be modulated by the LFO (refer to “LFO” in "The Digital Section")
The Filter and Amplifier Envelope Sections
The MonoWave(X) has two analogue ADSR-style envelope generators. They are
optimised for short but very precisely controlled timescales.
ATTACK time can be adjusted between 6mS and 820mS,
DECAY time can be adjusted between 16mS and 6000mS,
RELEASE time can be adjusted between 16mS and 6000mS.
Note: There is a special hold mode
Let the ATTACK phase finish
Set DECAY below 2.
Turn SUSTAIN above 9
And RELEASE above 2.
All these conditions must be met at the same time.
The last note played will ring endlessly. If you experience a hanging note, check if you
have set the ADSR to `hold mode’by accident.
The Amplifier Envelope has an additional VELOCITY control that allows you to change
the level of velocity modulation - useful for dynamic control.
If set to zero (full counter clockwise), velocity will have no effect on loudness. At maximum
(fully clockwise) the velocity value will have maximum velocity effect. That is, near to no
volume at all if played very softly and maximum volume if played real hard. The maximum
volume you may gain will always be the same. This way you don't overdrive or destroy
your audio equipment.


MonoWave(X) User Manual
ELBY Designs - Laurie Biddulph
9 Follan Close, Kariong, NSW 2250, Australia
9 of 26
The Digital Section
The MonoWave(X) has the following digital parameter pages:
The Information page (only at power on)
the Wave Form page (this is the default)
the LFO page
the MIDI Channel selection page
the Tune/Detune page
the Retrigger Options page
the Arpeggiator Speed and Mode selection page
the Velocity page
the Test Mode page
The various pages are selected by pressing [F4-] in combination with one of the other [F..]
keys as listed below:-
[F1+] and [F4-] = MIDI Channel page
[F2+] and [F4-] = Tune and Detune page
[F3+] and [F4-] = Velocity page
[F4+] and [F4-] = Re-Trigger page
[F1-] and [F4-] = ARP page
[F2-] and [F4-] = LFO page
[F3-] and [F4-] = Test Mode page
In most cases, pressing [F4-] will exit the selected page and return you to the main display
page. In some cases, pressing [F4-] will take you to a further ‘option’ within the menu. In
all cases, not pressing any key for a few seconds will allow the system to automatically exit
the selected page and return to the main display page.
All parameters are stored in EEPROM and are automatically retrieved each time the
MonoWave(X) is powered on. On exiting from any of these menu pages the system will
display a message indicating that the data has been saved.
Where a number is to be displayed on the screen it may be in either hexadecimal or
decimal depending upon the screen being displayed. In the following documentation any
number that is displayed on the screen in hexadecimal format will be represented in the
text with a preceding 0x. So, for example, when discussing the Wave Banks and Wave
Forms for the two oscillators we use the form 0x12 (decimal 18) whereas in the Test Mode
screen the MIDI Note number is displayed in decimal format such as 12 (0xC).

MonoWave(X) User Manual
ELBY Designs - Laurie Biddulph
9 Follan Close, Kariong, NSW 2250, Australia
10 of 26
The Information page
This page, which is only shown when the MonoWave(X) is powered on, provides
information on the program version.
It consists of 2 screens:-
1. The first screen provides information on the original author of the program and the
last revision upon which the current MonoWave(X) was based.
2. The second screen shows the current software revision for the MonoWave(X).
Information screen #1
Information screen #2
MonoWave(X) User Manual
ELBY Designs - Laurie Biddulph
9 Follan Close, Kariong, NSW 2250, Australia
11 of 26
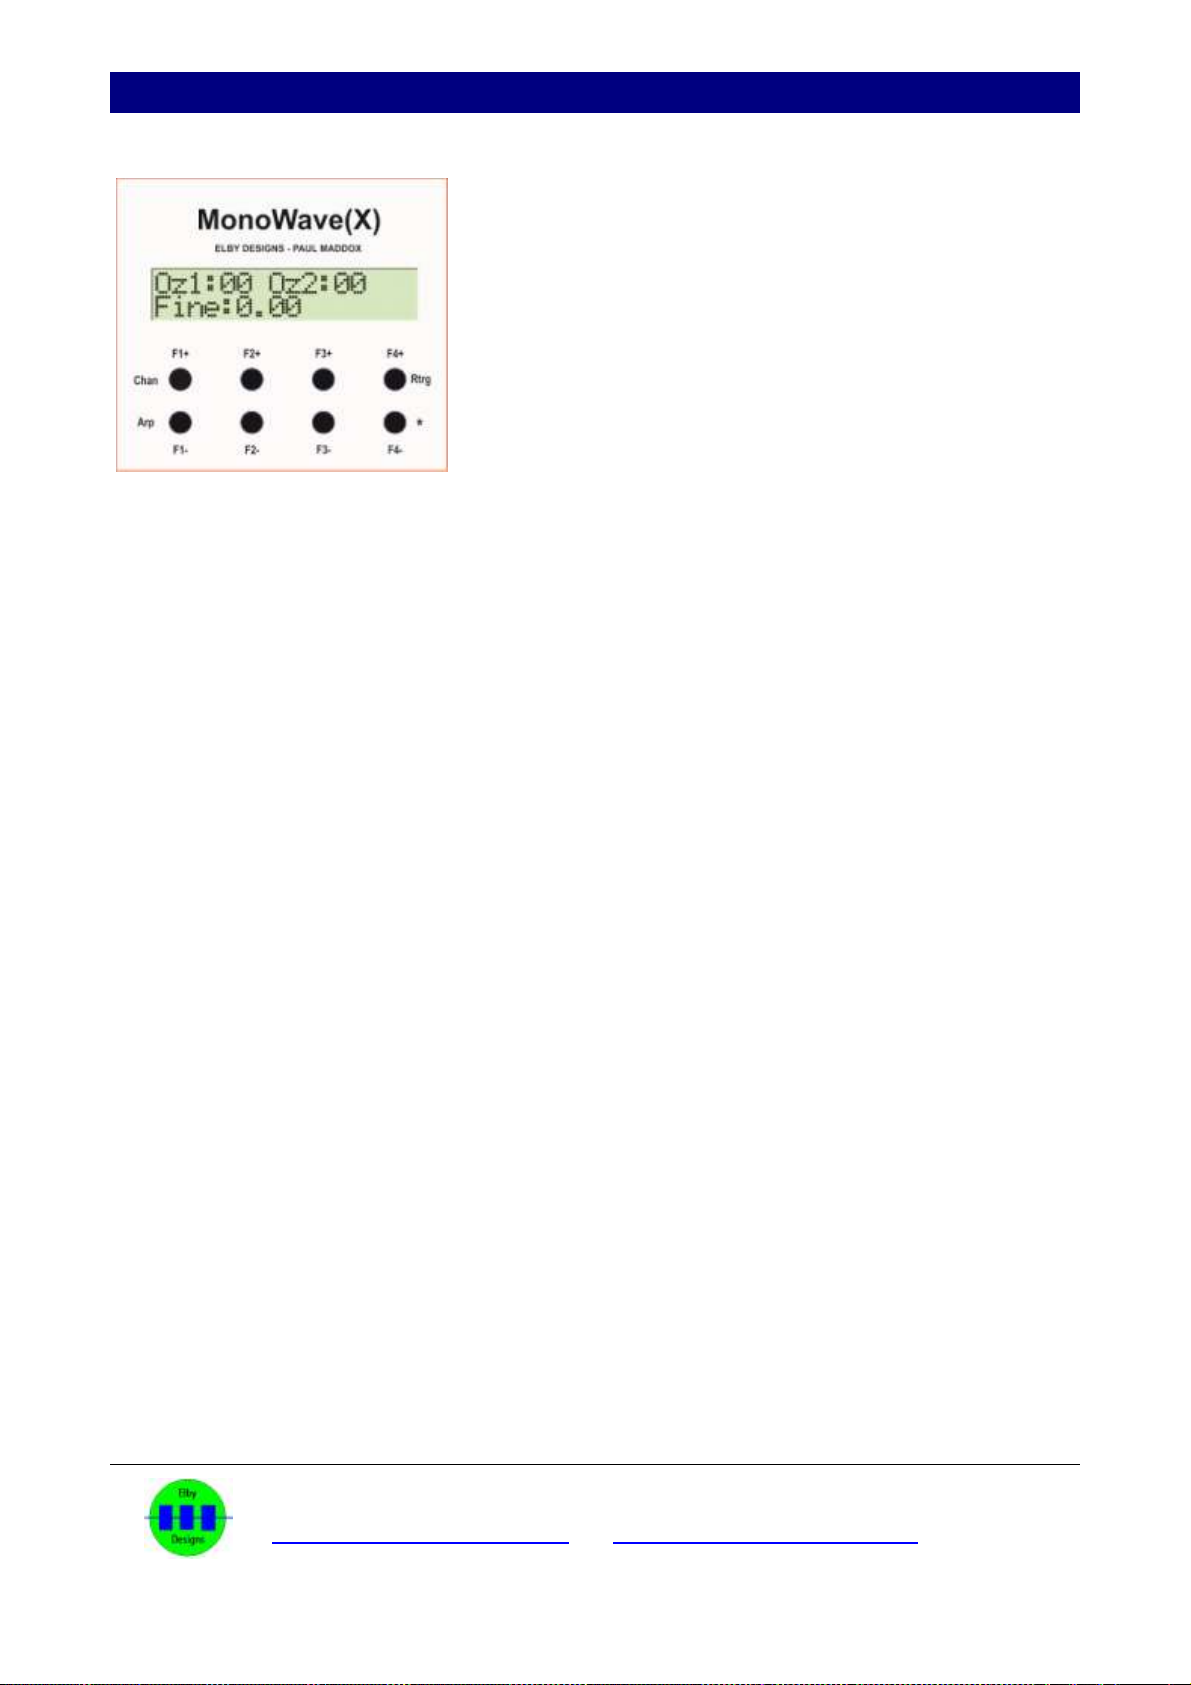
The Wave Shapes Menu (main display)
The Wave Shapes display is the main page. It is always
shown when the MonoWave(X) is in normal play mode.
The MonoWave(X) features 256 different waveshapes
which are divided in to 16 Wave Banks each of which
contains 16 variants or Wave Shapes –see appendix.
These Wave Shapes can be selected independently for
OZ1 and OZ2 as described below:-
[F1+] and [F1-] - increment/decrement the OZ1 Wave Bank
[F2+] and [F2-] - increment/decrement the OZ1 Wave Shape
[F3+] and [F3-] - increment/decrement the OZ2 Wave Bank
[F4+] and [F4-] - increment/decrement the OZ2 Wave Shape
The 16 Wave Banks provide the following classification of waveforms:-
0x00 = sawtooth
0x01 = reversed sawtooth
0x02 = sine
0x03 = square
0x04 = triangle
0x05 = pulse, 25%
0x06 = saw, rising and rounded
0x07 = cross over point distorted sawtooth
0x08 = cross over point distorted sine
0x09 = 1.+2. harmonic
0x0A = 1.+3. harmonic
0x0B = 1.+4. harmonic
0x0C = 1.+5. harmonic
0x0D = 1.+6. harmonic
0x0E = 1.+7. harmonic
0x0F = noisy/distorted sawtooth
Wave Shapes 0x00 to 0x0F (Wave Bank 0x0) were designed by Paul Maddox
Wave Shapes 0x10 to 0x7F (Wave Bank 0x1 to 0x7) are from the PPG wave synths (!)
Wave Shapes 0x80 to 0xEF (Wave Bank 0x8 to 0xE) are classic digital waveforms.
Wave Shapes 0xF0 to 0xFF (Wave Bank 0xF) are from the PPG wave synths (!)
The display shows the active Wave Shapes for both oscillators and the Detune setting for
oscillator #2 and whether it is set for FINE or SEMI-tone tuning.
(!) PPG wave forms are used with the permission of Waldorf Music

MonoWave(X) User Manual
ELBY Designs - Laurie Biddulph
9 Follan Close, Kariong, NSW 2250, Australia
12 of 26
The MIDI Channel Menu
This page lets the user select which MIDI Channel the MonoWave(X) will respond to. The
factory default is MIDI Channel 1 (i.e MIDI Address = 0x0).
The [F1+] button will raise the channel number while the [F1-] button will lower it.
Pressing [F4-] will exit this page and take you back to the main display page.
MonoWave(X) User Manual
ELBY Designs - Laurie Biddulph
9 Follan Close, Kariong, NSW 2250, Australia
13 of 26
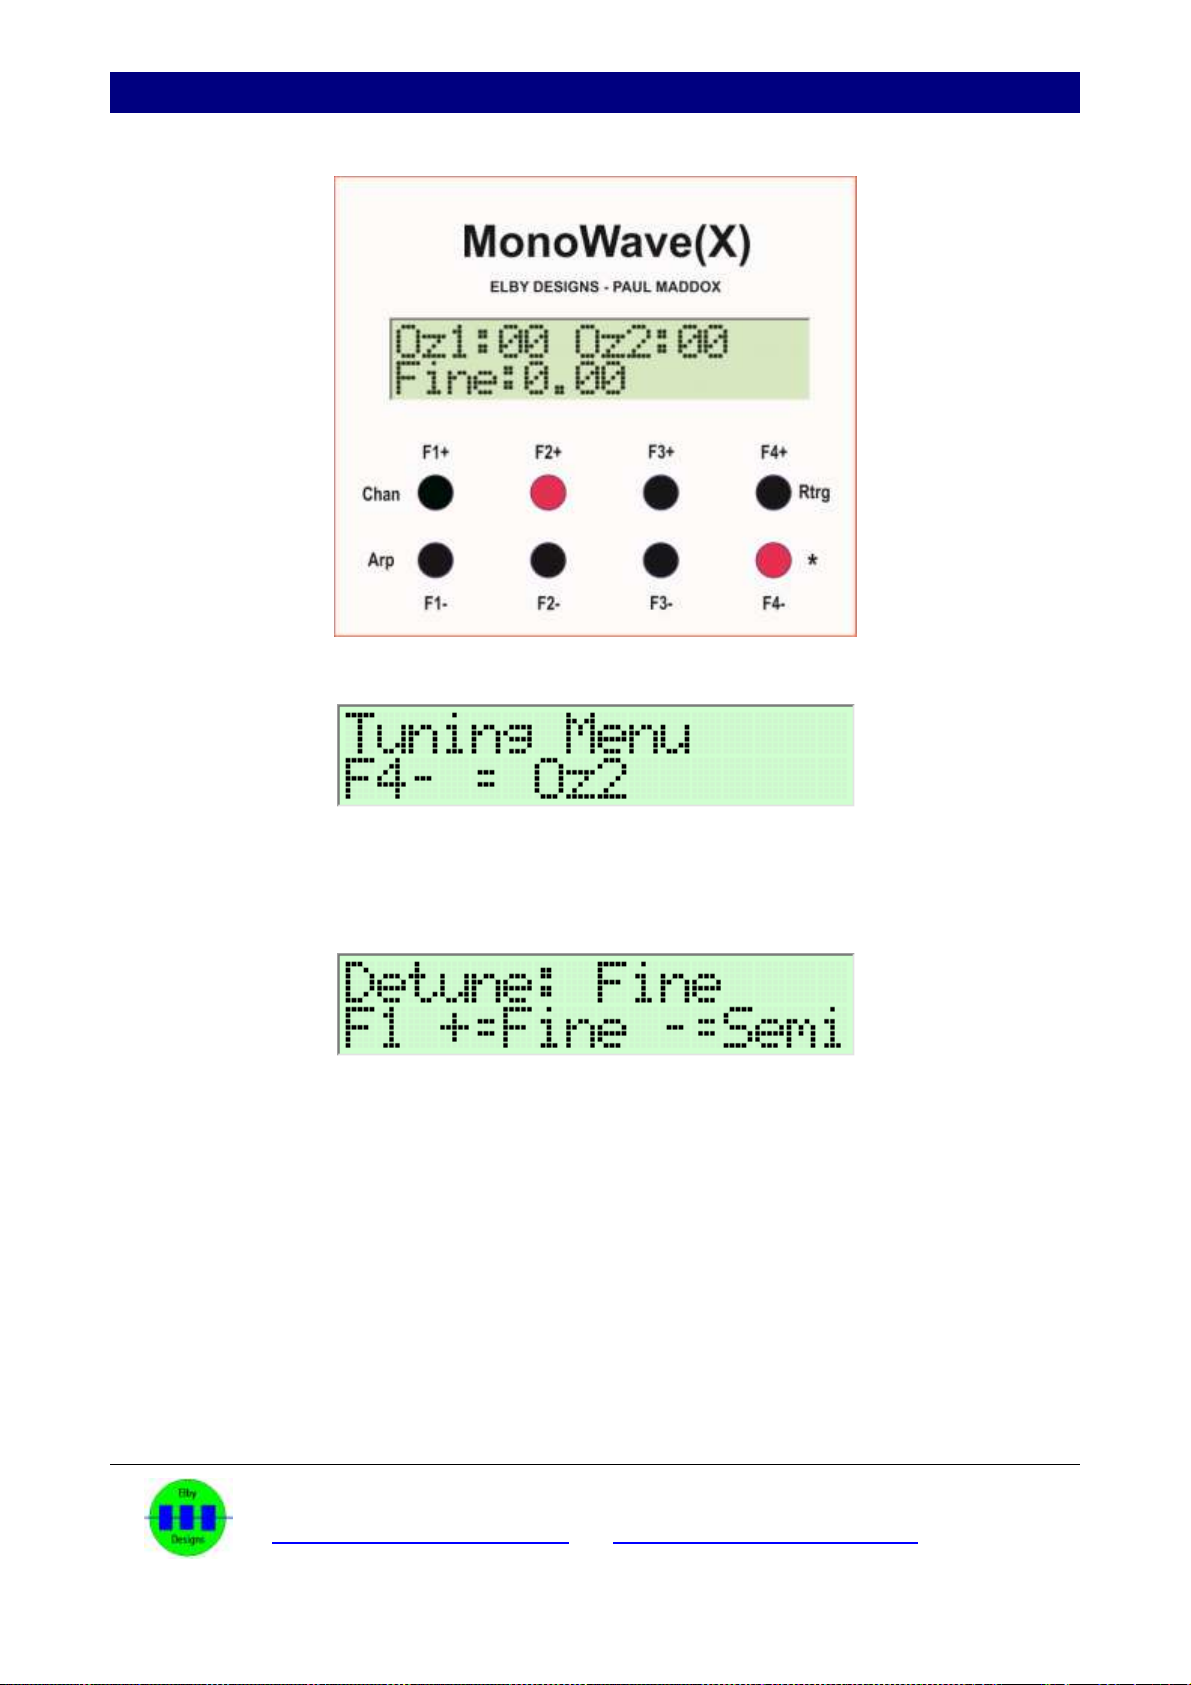
The Tune and Detune Menu
This page lets you store a tuning offset which will be recalled the next time you power up.
Turn down the Oz2 output level and then adjust TUNE until the MonoWave(X) is in tune
with your external equipment. Press [F4-] to save this `tune offset’ and to proceed to the
OZ2 TUNE settings.
Turn down the Oz1 output level and turn up the Oz2 output level. Adjust the TUNE control
until the MonoWave(X) is in tune with your external equipment. Press [F4-] to save this
`tune offset’ and to proceed to the DETUNE settings.
You can also determine the resolution of the DETUNE control:-
When you select FINE, the Detune control will have a narrow range of approximately+/-99
cents. This is ideal for slow beating detuned effects. When you select SEMI, the Detune
control will allow you to transpose the second oscillator by +/-8 semitones.
Press [F4-] to exit and return to the main display page.
MonoWave(X) User Manual
ELBY Designs - Laurie Biddulph
9 Follan Close, Kariong, NSW 2250, Australia
14 of 26
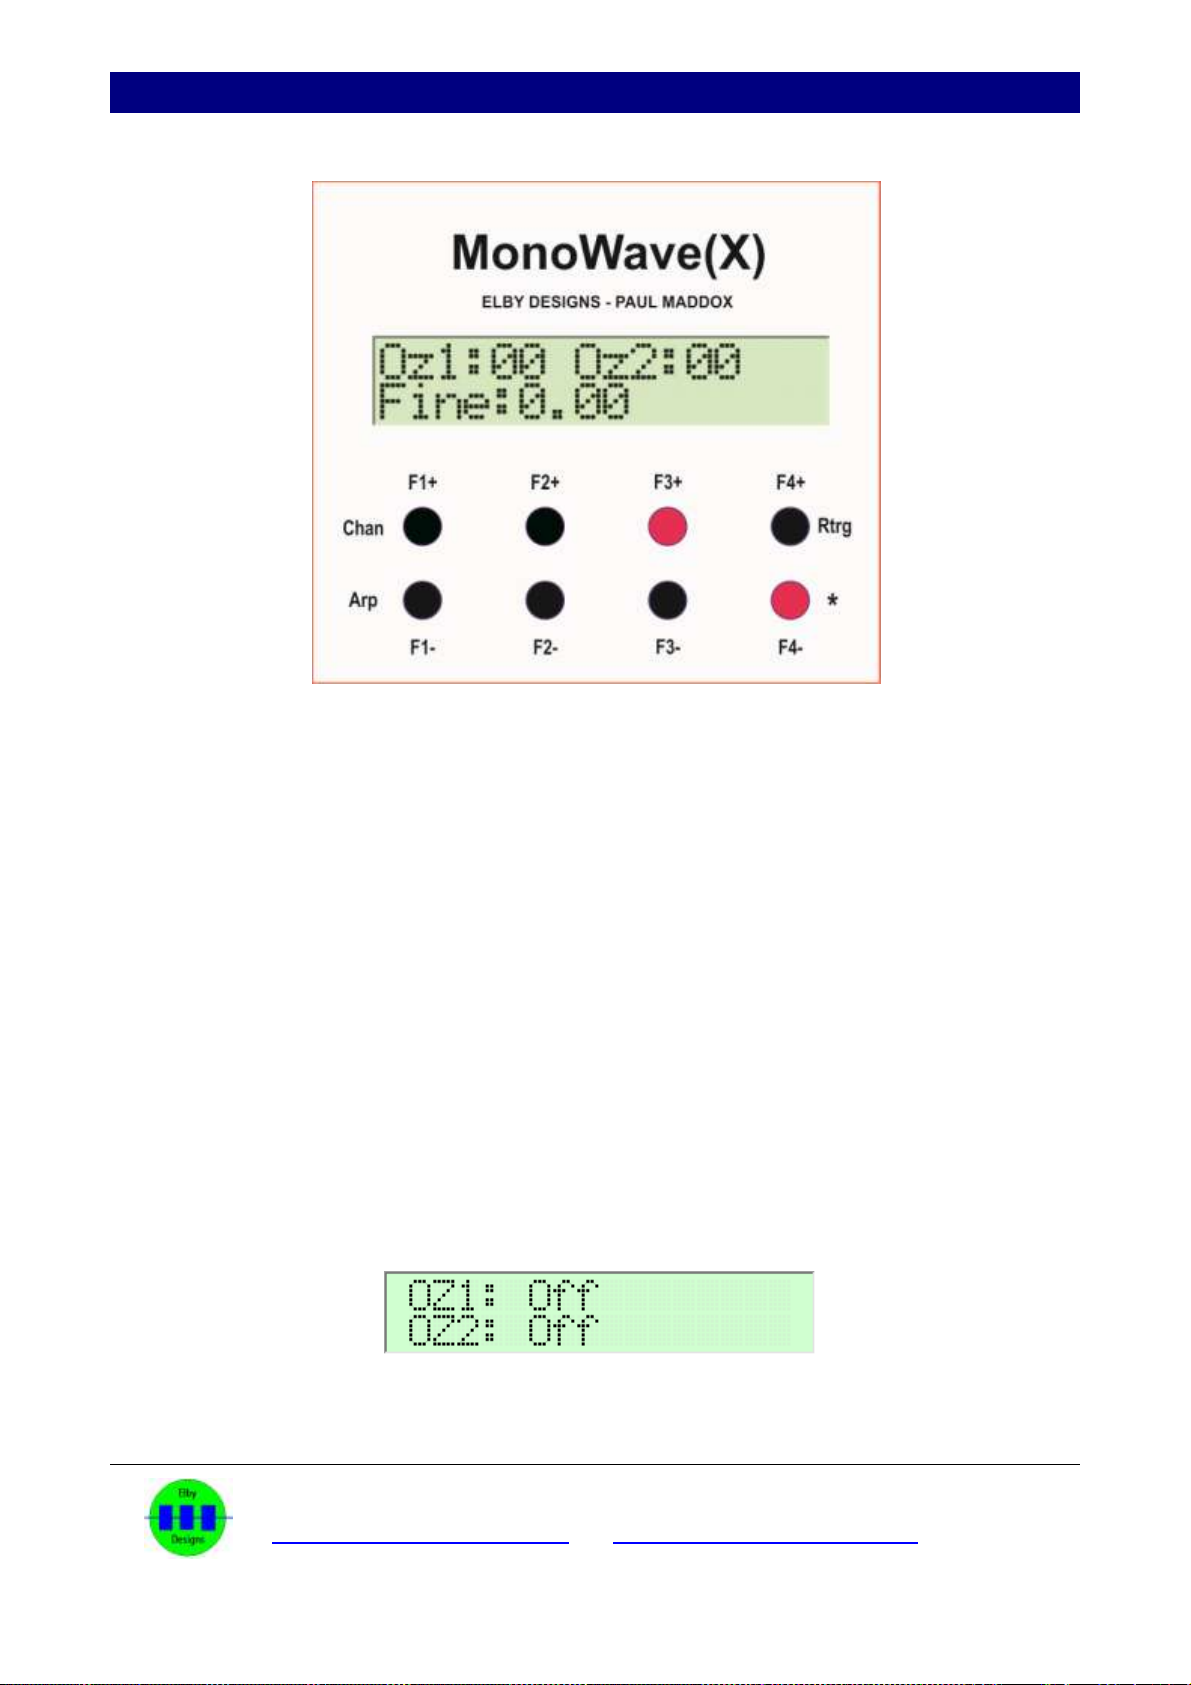
The Velocity Menu
This page lets the user select if the Velocity value will be used to adjust the wave shape of
the oscillators. The Velocity Wave Mode setting can be set individually for each oscillator
to:-
Off –The Velocity Wave is disabled
Wave –The Velocity Wave value will be used to adjust the selected Wave Shapes
Bank –The Velocity Wave value will be used to adjust the selected Wave Bank
All - The Velocity Wave value will be used to adjust the selected Wave Bank and
Wave Form
The settings can be made as follows:-
[F1+] will step through the Velocity Wave Mode options for oscillator #1
[F1-] will step through the Velocity Wave Mode options for oscillator #2
[F2+/-] will increment/decrement the Velocity Wave Depth for oscillator #1
[F3+/-] will increment/decrement the Velocity Wave Depth for oscillator #2
[F4-] will exit the Velocity Menu
After a few seconds of inactivity the program will automatically exit back to the main
display page.
Velocity Wave Mode for both oscillators disabled


MonoWave(X) User Manual
ELBY Designs - Laurie Biddulph
9 Follan Close, Kariong, NSW 2250, Australia
16 of 26
The Re-Trigger Menu
You can change the way the MonoWave(X) triggers.
If you set Re-Trigger to "Yes" [F1+] then the MonoWave(X) will retrigger on all
incoming new notes - whether the last note is still pressed or not.
If you set Re-Trigger to "No" [F1-] then the MonoWave(X) will not retrigger on an
incoming new note if the last note is still pressed. This allows legato playing.
Press [F4-], or wait a few seconds, to exit this page and return to the main display page.
MonoWave(X) User Manual
ELBY Designs - Laurie Biddulph
9 Follan Close, Kariong, NSW 2250, Australia
17 of 26
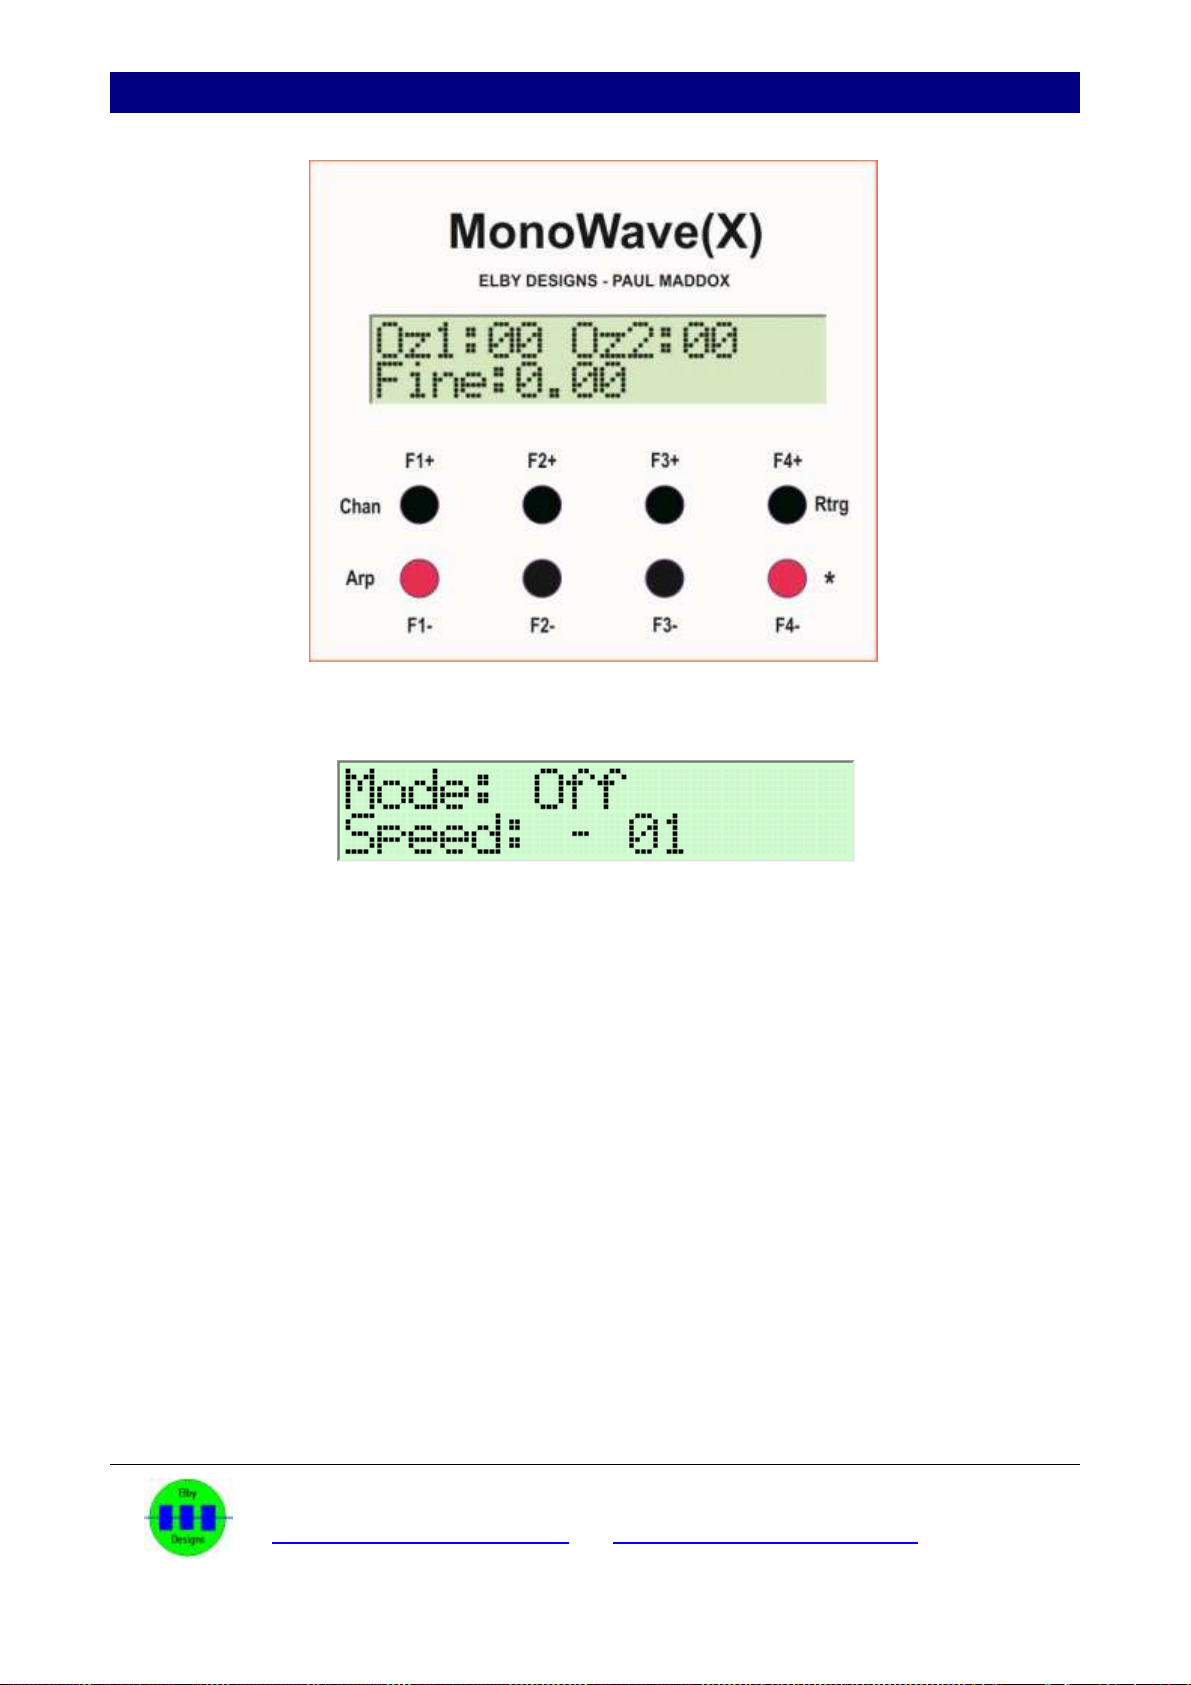
The ARP Menu
The display will show something like:
Speed:
The speed may be controlled by sending modwheel data to the MonoWave(X) while its
running. When the MonoWave(X) is set to be synced to MIDI clock, the modwheel can't
control the speed anymore. You may enter and memorise the tempo setting by setting the
tempo by values, not by using the modwheel.
The unsynced tempo ranges from 0x10 to 0xFF. You can select the tempo by using the 4
left most buttons. The left button changes the first digit, the right one the last digit.
And there are additional synced to MIDI values you may enter here:
M01, M02, M03, M04, M06, M08, M12, M16, M24, M36, M48, M96:
The "M" stands for synced to MIDI".
The number is the fraction of a whole note each note of the ARP is played. M04 means a
quarter note per whole note, ie 4 notes to the bar (4/4 time).

MonoWave(X) User Manual
ELBY Designs - Laurie Biddulph
9 Follan Close, Kariong, NSW 2250, Australia
18 of 26
There are 6 different ARP modes to choose from:-
Normal: The notes are played in the order you pressed them, Legato playing style.
Normal s: Same as above, but in a more staccato playing style.
NNN-OOO: The notes are played in the order you pressed them. And the whole sequence
is then repeated after being transposed up an octave, Legato playing style.
NNN-OOO s: Same as above, but in a more staccato playing style.
NO-NO-NO: The notes are played in the order you pressed them. And each note is then
repeated after being transposed up an octave, Legato playing style.
NO-NO-NO s: Same as above, but in a more staccato playing style.
The ARP starts playing when you press a key (in non-MIDI sync mode).
The ARP LED lights with the beat of the ARP notes to help you. This feature isn't
available, if the MonoWave(X) is set to sync to MIDI clock. In the case of MIDI sync (speed
settings "Mxx") it will start playing if you're upto 1/16th after the beat, otherwise it will wait
until the next beat is due before starting. This ensures your sequence is always in time
with MIDI clock.
Sending the sustain pedal MIDI CC will cause the MonoWave(X) to hold the played ARP
notes even after releasing all keys. Without this controller being sent, the ARP will be silent
after you release the last pressed key.
And the sustain will make the MonoWave(X) react as if you are still holding the keys you
pressed to make the ARP pattern. That is, if you press a few notes and press and hold the
sustain pedal before lifting all fingers, you can enter more notes into the 64 notes long
ARP memory of the MonoWave(X).

MonoWave(X) User Manual
ELBY Designs - Laurie Biddulph
9 Follan Close, Kariong, NSW 2250, Australia
19 of 26
The LFO Menu
This page lets you assign a triangle wave LFO output as a modulation source. The routing
destinations can be any combination of these 3 paths:-
1. Oscillator #1
2. Oscillator #2
3. Filter Cut-off
[F1+] and [F1-] set the “LFO Sync on Key Trigger” option. When set to “Yes” ( [F1+]) the
LFO will start a new wave cycle when ever a key is depressed. When set to “No” ([F1-])
the LFO will generate a free running LFO waveform.
The LFO may be routed to oscillator #1 and/or #2 and/or the filter as described below:-
[F2+] and [F2-] will enable [1] or disable [.] routing to oscillator #1
[F3+] and [F3-] will enable [2] or disable [.] routing to oscillator #2
[F4+] and [F4-] will enable [F] or disable [.] routing to the filter
A ModWheel (the one on your chosen keyboard controller) can be used to adjust the
modulation depth to the oscillators.
The maximum modulation depth of the filter can be set by the Key-Tracking knob [Note].
This way you are able to have heavy filter modulation and tiny oscillator modulation
combined and controlled by the same ModWheel.
The setting will be automatically saved after a few seconds of not pressing any buttons.

MonoWave(X) User Manual
ELBY Designs - Laurie Biddulph
9 Follan Close, Kariong, NSW 2250, Australia
20 of 26
The maximum LFO depth can be controlled via Midi Controller #12. 8 settings are
available. If no Midi Controller #12 event is ever send then it will stay on the default value
of "1" (maximum pitch modulation ± 100 cent).
The LFO Speed is set up in the ARP menu while the ARP is switched off (refer to the ARP
paragraph below). Midi Controller #48 can also be used to change the LFO speed
however this setting will not be stored in the MonoWave(X).
The LED marked ARP/LFO will flash according to the speed of the ARP/LFO. It will glow
when the LFO wave cycle is in the positive phase of its cycle.
The ARP and the LFO modes may not be used at the same time.
Other manuals for MonoWave(X)
1
Table of contents
Other Elby Designs Synthesizer manuals

Elby Designs
Elby Designs ASM-2 Instructions for use

Elby Designs
Elby Designs Pixie Attache EDP WASP User manual

Elby Designs
Elby Designs EURO SERGE ASM301 Instructions for use

Elby Designs
Elby Designs IF101 2Q/4Q Instructions for use

Elby Designs
Elby Designs EURO STAGE ES30 Instructions for use

Elby Designs
Elby Designs EURO-SERGE User manual
 User manual")
Elby Designs
Elby Designs MonoWave(X) User manual

Elby Designs
Elby Designs CGS738 Instructions for use

Elby Designs
Elby Designs ASM321 Instructions for use


