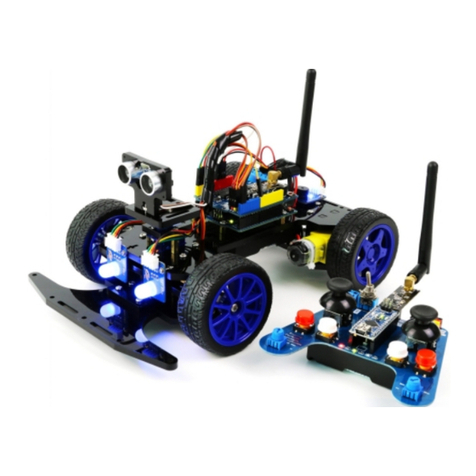
Elecfreaks Arduino Starter Kit User manual

ArduinoStarterKit(AbsoluteBeginner)
FromWiki
Contents
1Introduction
2GettingStartedwithArduino
2.1Part1.ArduinoStartblink
2.2Part2.ButtoncontrolLED
2.3Part3.Vibrationsensorcontrolpassivebuzzer
2.4Part4.PIRsensorcontrolmotorfan
2.5Part5.LDRsensorcontrolmotorfan
2.6Part6.Soilmoisturesensorcontrolrelay
2.7Part7.Encodersensorcontrolservo
2.8Part8.DisplayTemperatureandHumidity
2.9Part9.DisplayNumberOfIRremote
3Download
4Howtobuy
5Licensing
6ExternalLinks
Introduction
TheArduinoStarterKitprovidedbyElecFreaksisagreatmaterialtogetusersintolearningstepbystep
conveniently.Forthiskit,thereisnoneedforsoldering,plugthenuse,theconstructionoftheworking
circuitcanbedonewithinoneminute.Ithas9coursesintotal,contentincludesLED,infraredsensor,
servo,andIRremotecontrol.
ThekitusestheFreaduinoUNO,whichistheimprovedversionoftheofficialUNOand100%
compatiblewithArduino.Itprovideseasytousebricksensorinterface,3.3vor5vIOswitch,power
supplywithDCDCcircuitwhichsupportMAX2Aetc.
GettingStartedwithArduino
DownloadIDEfrom:ArduinoDownload(http://www.arduino.cc/en/Main/Software)
DownloadCodeandLibraries:ArduinoStarterKitDemoCode(http://elecfreaks.com/estore/download/starterkit/starterkit.zip)

Part1.ArduinoStartblink
/*
PART1ARDUINOSTARTBlink
TurnsonLEDforonesecond,thenoffforonesecond,repeatedly.
Getthecodefrom:ArduinoIDE‐>File‐>Example‐>Basics‐>Blink
Pin13hasanLEDconnectedonmostArduinoboards.
*/
intled=13;
//thesetuproutinerunsoncewhenyoupressreset:
voidsetup(){
//initializethedigitalpinasanoutput.
pinMode(led,OUTPUT);
}
//thelooproutinerunsoverandoveragainforever:
voidloop(){
digitalWrite(led,HIGH);//turntheLEDon(HIGHisthevoltagelevel)
delay(1000);//waitforasecond
digitalWrite(led,LOW);//turntheLEDoffbymakingthevoltageLOW
delay(1000);//waitforasecond
}
Part2.ButtoncontrolLED
/*
PART2BUTTONCONTROLLED

Pressthebutton,ledON,pressagainledOFF
*/
intled=5;//TheD5pin,drivingLED
intbutton=A0;//TheA0,readthebutton,Hereusedaanalogpinasdigitalpin.
voidsetup(){
pinMode(led,OUTPUT); //initializetheLEDpinasanoutput.
pinMode(button,INPUT_PULLUP);//initializetheBUTTONpinasaninput.
}
voidloop(){
if(digitalRead(button)==LOW){
delay(200); //waitfor200microsecond,Avoidpressingthebuttonandreadmanytimesinthisveryshorttime
digitalWrite(led,HIGH);//turntheLEDon(HIGHisthevoltagelevel)
while(1){
if(digitalRead(button)==LOW){
delay(200);
digitalWrite(led,LOW);//turntheLEDoff(LOWisthevoltagelevel)
break;//Endofthewhileloop,Backtothemainloop
}}
}}
Part3.Vibrationsensorcontrolpassivebuzzer
/*
PART3VibrationsensorsCONTROLPassivebuzzer
Knockonthetable,thebuzzerwillring
*/
intvibration=A0;//TheA0pin,readVibrationsensors
intbuzzer=6;//TheD6pin,drivingthePassivebuzzer,thepinmustPWMpin(35691011onUNO)
voidsetup(){
pinMode(vibration,INPUT_PULLUP);//initializethevibrationpinasaninput.
pinMode(buzzer,OUTPUT);//initializethebuzzerpinasanoutput.
}
voidloop(){
if(digitalRead(vibration)==HIGH){
analogWrite(buzzer,200);//driverPassivebuzzermustPWM,soanalogWrite,200isPWMvalue,max1024
delay(1000);//waitfor1000microsecond
analogWrite(buzzer,0);//turnoffthebuzzer
}
}

Part4.PIRsensorcontrolmotorfan
/*
PART4PIRSensorCONTROLMotorfan
Ifsomeonepassingfromthefront,thefanwillturn
*/
intpir=A0;//TheA0pin,readPIR
intmotor=6;//The6pin,drivingthemotor
voidsetup(){
pinMode(pir,INPUT);//initializethePIRpinasaninput.
pinMode(motor,OUTPUT);//initializethemotorpinasanoutput.
}
voidloop(){
if(digitalRead(pir)==HIGH){
digitalWrite(motor,HIGH);
delay(5000);//waitfor5000microsecond
digitalWrite(motor,LOW);//turnoffthemotor
}
}
Part5.LDRsensorcontrolmotorfan
/*
PART5PhotodiodesensorCONTROLMotorFan
Accordingtotheintensityoflightmotorspeedcontrol
*/

intphotodiode=A0;//TheA0pin,readPhotodiode
intmotor=6;//The6pin,drivingthemotor
voidsetup(){
pinMode(photodiode,INPUT);//initializethephotodiodepinasaninput.
pinMode(motor,OUTPUT);//initializethemotorpinasanoutput.
}
voidloop(){
intspeed=analogRead(photodiode)/2;//becausethereadmaxvalueis512
analogWrite(motor,speed);//Accordingtotheintensityoflightmotorspeedcontrol
}
Part6.Soilmoisturesensorcontrolrelay
/*
PART6SoilmoistureSensorCONTROLRelay
Accordingtotheintensityoflightmotorspeedcontrol
*/
intsoil=A0;//TheA0pin,readSoilmoisture
intrelay=6;//The6pin,drivingtheRelay
voidsetup(){
pinMode(soil,INPUT);//initializethesoilpinasaninput.
pinMode(relay,OUTPUT);//initializetherelaypinasanoutput.
}
voidloop(){
intvalue=analogRead(soil);
if(value>200){//setthedefaultvalue,youcansetitthenmoreorlesstodosomething
digitalWrite(relay,HIGH);//turnontherelay
}
elsedigitalWrite(relay,LOW);//turnofftherelay
}

Part7.Encodersensorcontrolservo
/*
PART7EncodeSensorCONTROLServos
Turntherotaryencodercontrolservos
*/
#include<Servo.h>
intencodeB=A0;//TheA0pin,readencodeB
intservos=6;//The6pin,drivingtheservos
Servoservo;//Getaservocontroller
intangle=90;//settheservoangle
voidsetup(){
pinMode(encodeB,INPUT);//initializetheencodeBpinasaninput.
servo.attach(servos);
attachInterrupt(0,start,FALLING);//setencodeAinterrupt,thisboardinterrupt0ispin2
}
voidloop(){}
voidstart(){
if(digitalRead(encodeB)==HIGH){
angle‐=30;
}elseangle+=30;
if(angle>=180)angle=180;
elseif(angle<=0)angle=0;
servo.write(angle);}
Part8.DisplayTemperatureandHumidity
/*Part8USEDHT11TemperatureandhumiditysensorandSegment
*displayTemperatureandhumidity*/
#include"DHT11.h"//loadTemperatureandhumiditysensorlibrary
#include"TM1637.h"//loadSegmentdisplaylibrary

#defineCLK4//pinsdefinitionsclkforTM1637
#defineDIO5//pinsdefinitionsdioforTM1637
TM1637tm1637(CLK,DIO);//getSegmentdisplaycontroler
DHT11dht11(A0);//DHT11A0
voidsetup(){
tm1637.init();
tm1637.set(BRIGHT_TYPICAL);}
voidloop(){
dht11.start();
tm1637.display(3,12);//TemperatureUnit
tm1637.display(2,(dht11.DHT11data)[2]%10);
tm1637.display(1,(dht11.DHT11data)[2]%100/10);
delay(1000);
tm1637.clearDisplay();
tm1637.display(3,(dht11.DHT11data)[0]%10);//humidity
tm1637.display(2,(dht11.DHT11data)[0]%100/10);
delay(1000);
}
Part9.DisplayNumberOfIRremote
N
ote:IfyouusedIRremote.hon1.6.5,whichneedchangeRECV_PIN=A0.That'swhywedonotrecommend.
/*Part9USEIRreceiveandIRremoteDisplayedonthesegmentcode*/
#include<IRremote.h>//loadIRremotelibrary
#include"TM1637.h"//loadSegmentdisplaylibrary
#defineCLK4//pinsdefinitionsclkforTM1637
#defineDIO5//pinsdefinitionsdioforTM1637
TM1637tm1637(CLK,DIO);//getSegmentdisplaycontroler
IRrecvir(A0);//aninstanceoftheIRreceiverobject,A0isIRreceivepin;
decode_resultsresult;//containerforreceivedIRcodes
longcodes[10]=//thisarrayisusedtostoreinfraredcodes
{0xFD708F,0xFD08F7,0xFD8877,0xFD48B7,0xFD28D7,0xFDA857,//012345
0xFD6897,0xFD18E7,0xFD9867,0xFD58A7};//6789
voidsetup(){
tm1637.init();
tm1637.set(BRIGHT_TYPICAL);
ir.enableIRIn();}
voidloop(){
if(ir.decode(&result)){
inti=‐1;
while(!(i>9||result.value==codes[++i]));
ir.resume();//resumereceiver
if(i<10){
tm1637.clearDisplay();
tm1637.display(3,i);//IRremotevalue
}}}
This manual suits for next models
1
Table of contents
Other Elecfreaks Robotics manuals
Popular Robotics manuals by other brands

SunFounder
SunFounder PiDog manual
ABB
ABB IRB 1200-5/0.9 product manual
Universal Robots
Universal Robots CB3 Kinematic Calibration Manual

AREXX Engineering & JM3 Engineering
AREXX Engineering & JM3 Engineering SKY WALKER SW-007 manual
QB Robotics
QB Robotics SoftClaw manual
Rethink Robotics
Rethink Robotics Sawyer Original instructions

