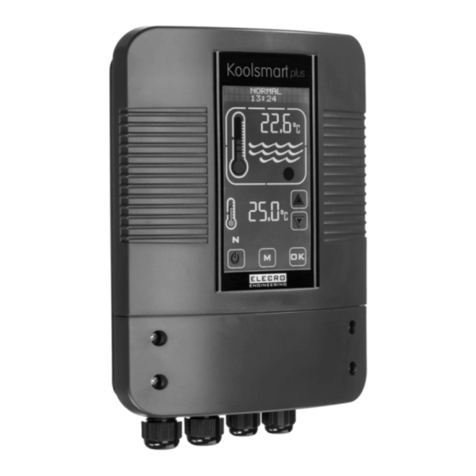
Elecro Engineering Heatsmart PLUS Installation instructions

Heatsmart PLUS
Touchscreen Heating Controller
Installation & Operating Manual

2
Contents
IMPORTANT NOTES ..................................................................................................................3
1. PRODUCT OVERVIEW ........................................................................................................3
2. GENERAL INSTALLATION INSTRUCTION ........................................................................4
2.1 Mounting instructions..........................................................................................................4
2.2 Electrical connection...........................................................................................................5
3. WIRING DIAGRAM...............................................................................................................6
4. DIGITAL TOUCHSCREEN CONTROLLER OVERVIEW .....................................................7
5. OPERATING INSTRUCTION................................................................................................7
6. INSTALLATION MODE........................................................................................................9
6.1 Language Setup.................................................................................................................9
6.2 UNITS Setup ....................................................................................................................10
6.3 CLOCK Setup...................................................................................................................11
6.4 TIMER Setup....................................................................................................................11
6.5 Probe Calibration Setup ...................................................................................................12
6.6 MODBUS Setup ...............................................................................................................13
6.7 FACTORY Setup..............................................................................................................14
7. OPERATING MODES.........................................................................................................14
7.1 Standby Operating Mode..................................................................................................14
7.2 Normal Operating Mode...................................................................................................15
7.3 Timer Mode ......................................................................................................................15
7.4 Priority of Heating Mode...................................................................................................16
7.5 Priority of Heating and Timer Mode..................................................................................17
8. TROUBLE SHOOTING.......................................................................................................17
9. DISPOSAL OF ELECTRICAL/ELECTRONIC EQUIPMENT..............................................18
10. WARRANTY .......................................................................................................................18

3
IMPORTANT NOTES
Thank you for purchasing the Heatsmart Plus Touchscreen Heating Controller manufactured to the highest
standards in England.
To ensure years of trouble-free service, please read and follow these instructions for proper installation,
maintenance, and use. Incorrect installation will affect your warranty.
The appliance is not to be used by children or by people with reduced physical, sensory, or mental
capabilities, or lack of experience and knowledge, unless they have been given supervision or instruction.
Please retain this manual for future reference.
1. PRODUCT OVERVIEW
Fig 1.

4
2. GENERAL INSTALLATION INSTRUCTION
Screw mount the Heatsmart Plus to a suitable wall in a dry weatherproof location out of direct sunlight,
ensuring that it is sited no more than 1 metre from the flow sensor and temperature sensor parts on your
Elecro heat exchanger.
Fig 2.
The rear face of the Heatsmart Plus has an upperkeyhole screw hook, located at the rear of the enclosure,
and 2 lower screw holes which are accessed after removing the 4 screws retaining the lower access cover
at the front.
2.1 Mounting instructions
The Elecro G2 and SST Heat Exchangers have common ports at both sides of the heat exchanger to
accommodate the NTC Temperature Sensor or the Flow Sensor.
It is important to ensure that the NTC Temperature Sensor is positioned on the water entry side of the heat
exchanger - see below.

5
Fig 3.
2.2 Electrical connection
The Heatsmart Plus must be installed in accordance with the Country / regional requirements and
regulations. In any event the work must be carried out by a qualified electrician who willprovide a certificate
of conformity upon completion of the work.
Undo the lower cover screws and remove the electrical access cover.
All electrical connections should be made into the relevant terminal block position, according to the labelled
positions.
Connection Explanation:
•Terminal 1 = Incoming Live 220 to 240V
•Terminal 2 = Incoming Neutral
•Terminal 3 and 4 = Primary Circuit Pump Output (Connect the Booster Pump)
•Terminals 5 and 6 = Priority of Heating filtration pump override signal out
•Terminals 7 and 8 = Heat Out –Volt free switched output to control heatingappliance (2-Amp MAX
if the load is greater than 2-Amp an auxiliary contactor must be used)
•Terminals 9 = Earth
•Terminals 10 and 11 = Flow Switch
•Terminals 12 and 13 = NTC Temperature sensing probe
•Terminals 14, 15 and 16 = RS485 MODBUS Data Link
See wiring diagram on page 7.

6
3. WIRING DIAGRAM

7
4. DIGITAL TOUCHSCREEN CONTROLLER OVERVIEW
The Touchscreen digital controller has been pre-programmed with all the necessary parameters to ensure
reliable service & operation. Below is an overview indicating the controller button keys and graphical
symbols.
5. OPERATING INSTRUCTION
On initial power up of the controller the digital display will be illuminated.
The heating device will only be switched ‘On’ when the following criteria are met i.e.:
•Water circulating pump is ‘On’ delivering in excess of 4,000 litres per hour (4m³/h)
•The required temperature is set to a higher value than the actual water temperature

8
The digital display will show ‘NORMAL’ and the
graphical red coloured thermometer will be
‘Animated’ whenever the heating device is
switched ‘ON’.
The actual pool water temperature is shown in the upper area of the display. The required temperature is
shown in the lower area of the display. The required water temperature can be adjusted by touching the
‘UP / DOWN’ touch button keys until the required temperature is displayed, adjustments are in 0.1°C
increments.
Priority of Heating is a function that ensures your pool water is constantly maintained at your required
temperature. When Priority of Heating is activated the Symbol will be displayed on the screen.
The controller will then monitor the pool water temperature and start both the pool circulation pump and
heating process when necessary.
Time Switching Delay
To prevent overheating of the switch components within the heating device caused by frequent on/ off
switching (cycling) the controller has been pre-programmed with a time delay function.
When time switching delay is activated the message display will show ‘HEATER DELAY’ for 2 minutes.
Differential
When the pool water has reached the required temperature the heating device will switch off and
will not switch back on until the water temperature has fallen 0.6°C below the required
temperature.
Operating Modes
There are five operating modes:
Normal
Timer
Priority
Installation
Standby

9
The required Modes are selected by touching the
‘M’ button key, each touch causes the mode to
change to the next mode. The display will indicate
which mode is currently selected together with the
clock time.
(Example illustrated ‘INSTALLATION’ mode)
6. INSTALLATION MODE
When entering Installation mode, the heating device and pump will immediately be turned off (if they are
on) and will not be permitted to be turned on while the controller remains in any of the setup menus. On
exiting the ‘Installation’ mode the controller will revert to the ‘Normal’ mode and follow the same procedure
as if first entering that mode, the display will reflect this.
•LANGUAGE (English, French, German, Spanish and Russian)
•UNITS (temperature units; centigrade or Fahrenheit)
•CLOCK (set current time)
•TIMER (four-time settings for switching the heating device ‘On’ and ‘Off’)
•PROBE CAL (Temperature calibration adjustment)
•MODBUS (Set Baud rate, address and parity for BMS connection)
•FACTORY (Access restricted)
•EXIT
6.1 Language Setup
Enter the ‘INSTALLATION’ mode by touching the ‘M’ button key repeatedly until ‘INSTALLATION’
appears at the top of the display then touch the ‘O.K’ button key.
Touch the ‘UP’ / ‘DOWN’ button keys until the desired language is displayed then touch the ‘O.K’ button
key to select

10
6.2 UNITS Setup
After selecting ‘O.K’. For the language setup the display will then revert back to show
‘LANGUAGE’ touch the ‘UP’ / ‘DOWN’ button keys again to display the next option which is
‘UNITS’ touch the ‘O.K’ button key to select, the display will show ‘UNITS’ and ‘CENTIGRADE’
touch the ‘UP’ / ‘DOWN’ button keys to change to ‘FAHRENHEIT’ if required, touch the ‘O.K’
button key to select and save, the display will then revert back to ‘UNITS’.

11
6.3 CLOCK Setup
Touch the ‘UP’ / ‘DOWN’ button keys to display the next option which is ‘CLOCK’ touch the ‘O.K’ button
key to select, the display will show ‘SET TIME’ and the current clock time, touch the ‘UP’ / ‘DOWN’ button
keys to change the clock time, touch the ‘O.K’ button key when the time is correct to save.
Note: The time can only be set in the 24-hour format.
6.4 TIMER Setup
After selecting ‘O.K’ for the ‘CLOCK’ setup the display will then revert back to show ‘CLOCK’, touch the
‘UP’ / ‘DOWN’ button keys until ‘TIMER’ is displayed, touch the ‘O.K’button key to select, ‘TIMER 1’ will
be displayed, touch the ‘O.K’button key to select and ‘SET TIMER 1 ON’ will be displayed, touch the ‘UP’
/ ‘DOWN’ button keys to set the required time, touch the ‘O.K’button key to save the setting, ‘SET TIMER
1 OFF’ will be displayed, touch the ‘UP’ / ‘DOWN’ button keys to set the required time, touch the ‘O.K’
button key to save the required time, the display will then show
‘TIMER 2’ repeat the same procedure for all four ‘ON’ / ‘OFF’ timer settings, select ‘EXIT’.If any Timers
are not required set the ‘ON / OFF’ times the same.

12
The timer mode allows you to set up 4 on and off time periods when you would like heating to
take place. These can be set to take advantage of off-peak energy tariffs, or to ensure your pool
is at the required temperature during specific time periods.
The controller allows you to override the timeclock at any point by activating the Priority of Heating
Mode explained on page 16.
Note: The time clock will only control the heating time periods and not the filtration pump cycles.
6.5 Probe Calibration Setup
After selecting ‘EXIT’ for the timer setup the display will then show ‘PROBE CAL’ touch the ‘O.K’
button key to select, touch the ‘UP’ / ‘DOWN’ button keys to increase or decrease the temperature
calibration adjustment, touch the ‘O.K’ button key to select, the display will then revert back to
show ‘PROBE CAL’.
Probe calibration is usually not required. However, should you need to make an adjustment take a
temperature reading from the pool water with an accurate thermometer then adjust as required.
Actual Water Temp
Heatsmart Plus Reading
Adjustment Required
28
30
-2.0
28
26
2.0

13
6.6 MODBUS Setup
Refer to your BMS Management System manual for the required settings. SET BAUD touch the
‘O.K’ button key to select, ‘MODBUS SET BAUD’ will be displayed, touch the ‘O.K’ button key
to select and ‘SET BAUD 19200 Baud’ will be displayed, touch the ‘UP’ / ‘DOWN’ button keys
for the other option ‘SET BAUD 9600 Baud’ touch the ‘O.K’button key to select the required,
Baud rate.
Set Address
Touch the ‘UP’ button and ‘MODBUS SET ADDRESS’ will be displayed, touch the ‘UP’ / ‘DOWN’ button
keys to setthe required address, touch the ‘O.K’ button key, the display will revert back to show ‘MODBUS
SET ADDRESS’.
Set Parity
Touch the ‘O.K’ button key to select ‘MODBUS SET PARITY’ and ‘PARITY ODD’ will be displayed touch
the ‘UP’ / ‘DOWN’ button keys to change ‘PARITY ODD’ to ‘PARITY EVEN’ or ‘PARITY NONE’ touch
the ‘O.K’ button key to select the required setting, the display will now revert back to show ‘MODBUS
SET PARITY’ touch the ‘UP’ button key and ‘MODBUS EXIT’ will be displayed, touch the ‘O.K’ button
key to select ‘EXIT’ and the display will show ‘MODBUS’.Touch the ‘UP’ button key and the display will
show ‘FACTORY’ touch again and ‘EXIT’ will be displayed, touch ‘O.K’ and the controller will exit the
‘INSTALLATION’ mode and revert to ‘NORMAL’ mode.

14
Once configured the MODBUS connection will enable the controller to be switched ‘on’ and ‘off’ (into and
out of standby mode) remotely via an external BMS device.
6.7 FACTORY Setup
This category has restricted access.
7. OPERATING MODES
7.1 Standby Operating Mode
When in Standby mode the controller will display the text ‘STANDBY’, Clock time and the Standby button
key (as below).
When in this mode the internal clock continues to run but there is no other functionality apart from the
Standby button key.

15
7.2 Normal Operating Mode
Under normal conditions when the controller is connected and ‘On’ and flow has been detected by the flow
switch the controller display will be as shown below indicating the following information:
1. ‘Normal’ and ‘Time’
2. Actual water temperature
3. Required temperature
4. If the Flow switch does not detect sufficient flow the message ‘NO FLOW’ will be shown on
the Display.
7.3 Timer Mode
To activate the Timer mode, touch the ‘M’ button key until the ‘TIMER’ symbol is displayed (see
below)

16
In this mode the controller will only heat during a timed-on period and when receiving sufficient flow.
If no or insufficient flow is being received no heating will take place. When in a timed off period no heating
will take place.
7.4 Priority of Heating Mode
To activate the ‘Priority of Heating’ mode touch the ‘MODE’ button key until the ‘PRIORITY’ symbol is
displayed, the message ‘FLOW STABILISING’ will be displayed, after two minutes the display will change
to show ‘SAMPLING’ and after a further two minutes the display will change back to ‘PRIORITY’.
Once the ‘Priority of Heating’ feature has been enabled the controller will take a water temperature
sample every hour and the message ‘SAMPLING’ will be displayed.
If the pool water temperature is below the required temperature, the controller will send a signal to the
heating device to come on until the required temperature is reached. When the required temperature is
reached the controller will switch the heating appliance off, followed by the filtration pump. ‘Pump Delay’
will be displayed for one hour, then a new water temperature sample will be taken, if the sampled water is
at or above the required temperature no heating will take place and the controller will switch the circulation
pump off (pump delay will be displayed), then one hour later take a new temperature sample.
The sequence will continue to repeat until ‘Priority of Heating’ is switched off.

17
7.5 Priority of Heating and Timer Mode
To activate the ‘Priority’ and ‘Timer’ modes together touch the ‘M’ button key until both symbols and
are displayed.
In this mode the controller will heat whenever it is receiving flow during a timed-on period.
8. TROUBLE SHOOTING
Heating Device will not switch on
In most cases this will be the result of one of the following not being met:
Possible Cause 1. The required temperature has been reached.
To confirm the controller is requesting the heating device to switch on check that
the required temperature is at least 0.6⁰C greater than the current water temperature
and that the red thermometer in the display is ‘animated’ showing the thermometer
increasing.
Possible Cause 2. Insufficient Flow.
The display will show ‘NO FLOW’ if the flow switch has detected that the flow
volume is below 4,000-litres per hour (4m³/h).
Check that the flow volume is greater than 4,000-litres per hour and that the flow
switch is in the correct orientation to sense flow (i.e. check that the arrow moulded
into the flow switch body is facing in the same direction as the flow travelling through
the T-Piece).
Possible Cause 3. The controller is in a timed off period.
Check if the controller has the ‘TIMER’ symbol displayed –if it does check your
clock and time period settings (explained in the set-up section).
Possible Cause 4. The heat output has not been correctly connected to the control circuit of your
heating device.
Check the wiring diagram for verification on how the controller should be connected
to the heating device and seek the expertise of a qualified electrician if in any doubt.

18
Possible Cause 5. The controller is in time delay mode.
If the display is showing ‘HEATER DELAY’ the controller is in time delay mode.
This is activated if the controller is requesting the heating device to switch on more
than once in a 2-minute period –this can be caused by a fluctuating flow rate (just
above and then just below the 4,000-litre per hour requirement) or fluctuations in
water temperature.
To rectify check the plumbing for any restrictions to flow and increase the flow
volume. Also check the positioning of the temperature sensor, it should be
positioned on the entry port of the heat exchanger.
9. DISPOSAL OF ELECTRICAL/ELECTRONIC EQUIPMENT
DO NOT dispose of this product as an unsorted municipal waste.
This symbol on the product or on the packaging indicates that this product should not be treated
as household waste. Instead it should be handed over to the applicable collection point for the
recycling of electrical and electronic equipment.
By ensuring this product is disposed of correctly you will help prevent
potential negative consequences for the environment and human health,
which could otherwise be caused by inappropriate waste handling of this
product. The recycling of materials will help to conserve natural
resources.
For more information please contact your local Civic Office, household
waste disposal service or the retailer where the product was purchased.
10.WARRANTY
This product is guaranteed from the date of purchase against faulty workmanship and
materials for:
–two years within Europe
–one year outside Europe
•The manufacturer will replace or repair, at its discretion, any faulty units or components
returned to the Company for inspection.
•Proof of purchase may be required.
•The manufacturer will not be liable in cases of incorrect installation of the product,
inappropriate use or neglect.
•Any damages occurred due to shipping must be reported within 48 hours of receipt of the
product. Any claims after this time will be considered as misuse or abuse of the product
and will not be covered by the warranty.
•The guarantee does not include serviceable parts, i.e. lamps, quartz sleeves and O-rings,
etc.

19
Notes:
……………………………………………………………………………………………….
……………………………………………………………………………………………….
……………………………………………………………………………………………….
……………………………………………………………………………………………….
……………………………………………………………………………………………….
……………………………………………………………………………………………….
……………………………………………………………………………………………….
……………………………………………………………………………………………….
……………………………………………………………………………………………….
……………………………………………………………………………………………….
……………………………………………………………………………………………….
……………………………………………………………………………………………….
……………………………………………………………………………………………….
……………………………………………………………………………………………….
……………………………………………………………………………………………….
……………………………………………………………………………………………….
……………………………………………………………………………………………….
……………………………………………………………………………………………….
……………………………………………………………………………………………….
……………………………………………………………………………………………….
……………………………………………………………………………………………….
……………………………………………………………………………………………….
……………………………………………………………………………………………….

20
Elecro Engineering Ltd
RepairsDepartment
Unit 11 Gunnels Wood Park
Gunnels Wood Road
Stevenage
Hertfordshire
SG1 2BH
United Kingdom
___________________________________________________________________________
Customer Information: (ATTACH TO THE PRODUCT)
Company Name:
……………………………………………………………………………….
Contact Name:
……………………………………………………………………………….
Daytime Telephone
Number:
……………………………………………………………………………….
Email Address:
………………………………………………………………………………..
Return Address:
………………………………………………………………………………..
………………………………………………………………………………..
………………………………………………………………………………..
Post/Zip Code:
………………………………………………………………………………..
Country:
……………………………………………………………………………….
Suspect Fault / Description of problem:
Table of contents
Other Elecro Engineering Controllers manuals
Popular Controllers manuals by other brands

Arroyo Instruments
Arroyo Instruments ComboPak 685 Series user manual

Keith McMillen Instruments
Keith McMillen Instruments QuNeo Reference manual

Hardy
Hardy HI 2151 Series Operation and installation manual

ITEM
ITEM C 1-Series product manual

Marathon Electric
Marathon Electric DVR 2000E Installation, operation and maintenance manual

iWorX
iWorX LCI2 installation guide