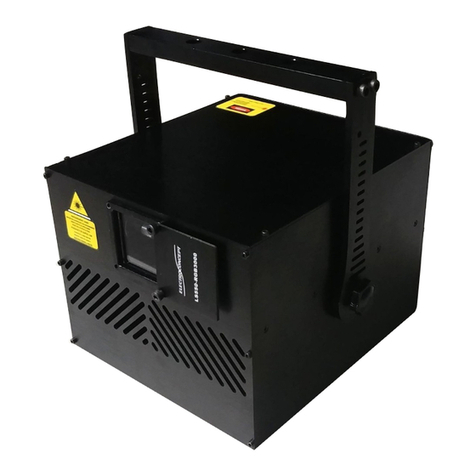
Electroconcept LS450-RGB1000 User manual

LS450-RGB1000
LASER PROJECTOR
INSTRUCTION MANUAL
Thank you for purchasing this Electroconcept laser product.
Please read this manual carefully before operating the laser projector and keep the notice in
safe place for future readings.
Legal notice:
Electroconcept SARL reserves the right to make modifications to its products. This manual
has been made ith due care but Electroconcept on’t take any responsability for any errors,
omissions neither resulting damages due to improper operating of this projector. This laser
projector is for professional indoor use. Please check to be in accordance ith applicable
la s in your country before each laser sho , in particular safety regulations for laser CLASS
IV product.
Content
1.Warranty
2.Technical Datas
3.General safety instructions and warning notices
4.Installation notice :
5. peration

1.Warranty:
Electroconcept products are guaranteed 2 years (electronic , lasers sources, galvas).
Are excluded from arranty : Damages through inappropriate use , inappropriate storage
(humidity and/or thermal conditions,...) and lack of maintenance ( seized fan and motors, ...)
This product is not intended for continuous use, in order to extend the lifetime of laser sources
please make a 10 minutes break per hour of continuous operation (BLACKOUT OR
ELECTRICAL STOP)
2.Technical Datas :
Po er supply:AC230V ±10% 50Hz~60Hz
Po er consumption:max 40W
Laser po er specification : RGB1000mW ( ~300mW Red ,~150mW Green, ~600mW
Blue)
Wave length: 638nm(Red)/520nm (Green)/450nm(Blue)
Laser Class : CLASS 4
DMX Channel:14
Control signal:DMX-512 signal
Scanner :25K and 30K at 8°
Operation Mode :Stand-alone, DMX-512 , Sound to Music, ILDA,master and slave
Environment : Indoor use only
3.General safety instructions and warning notices
This laser is a CLASS IV laser product .
This product has to be operated by trained laser operator.
Avoid eye or skin exposure to direct or scattered radiation.
Never look directly into a laser beam or directly into laser aperture hen the laser projector is on.
Al ays stay focused during lasers operating in order to stop the laser projector if anything goes
rong.
The user/o ner is fully responsible for any damages caused by the laser projector, use it in
accordance ith applicable la s in your country especially safety regulations la s and any
certification bodies.
4.Installation notice :
Before any use check that the product do not suffer during transport.
While installing the device, do not plug the po er supply cord.
Do not use the laser projector outside, indoor use only.
Do not s itch on the laser projector as soon as installed, ait for the laser projector to be at the
same temperature of the room to avoid condensation/moisture/mist to damage the product.
2

When rigging use safety cords able to resist ten times the eight of the laser projector.
Rig the laser projector at least 50 cm a ay from any all or flammable objects.
Do not cover the laser projector and place it a ay from heat sources like spotlights to ensure a
good air flo around the product.
At least laser beams should not hit anything under 3 meters from the floor level. Be attentive to
reflective surfaces.
The laser projector has to be easily stopped if necessary, ensure the po er cord or circuit breaker
is accessible at anytime during the laser sho . Do not use dimmers or electronic s itch to po er .
Refer to local la s for further instructions hen operating the laser projector.
Warning : ! All connections have to be made with the laser projector switched off !
5. peration :
Internal laser service menu:
To navigate inside the service menu use « Enter » and « Return » s itches
then + and – s itches to change the value.
MODE:
SINGLE
Mode selection:
- DMX : DMX Mode / slave
- Single : Single logo selection
- Auto : Auto Mode / Sound to music Mode / Master
DMX adr:
1 Selection of DMX Address (for DMX mode) :
- from 1 to 512
TimeAuto
10 Sec Selection of transitional time bet een scenes hen operating in
automatic mode
LogoRun
1 Selection of the logo in Single mode :
- from 1 to 255
Zoom :
12 General Zoom :
- from 50 to 128
Auto :
Prog 1 Selection of the internal program for Auto mode :
Prog 1/2/3
Sound :
On Activation of Sound to music Mode in Auto mode :
- On or Off
MicroS :
8 Sound detection sensibility level :
- from 0 to 60 (0 lo sensitivity ,60 very high sensitivity)
InvX :
Off Reverse Pan X :
- on or off
InvY :
Off Reverse Tilt Y :
- on or off
3

USB Mode :
Mode USB
When connected to a computer ith mini usb cable, you are able to use it realtime ith the
MiniIlda Sho Laser soft are Tm as ell as do nload logos directly inside the laser memory.
Refer to MiniIlda Sho Laser soft are notice to make these operations.
DMX Channels:
DMX Description
1 0 : OFF Mode
From 64 to 128 : AUTO Mode
From 129 to 192 : SOUND MODE
From 193 to 255 : DMX CONTROL
2 From 1 to 255 : LOGO ( INTERNAL MEMORY can be do loaded via soft are)
3 From 1 to 255 : Stroboscope :0 none , 1 slo - 255 fast
4 Rotation : 0 none
From 1 to 128 : rotation angle
From 129 to 170 : Clock ise speed
From 171 to 212 : Counter-Clock ise speed
From 213 to 255 : Ping Pong style rotation speed
5 Zoom X: 0 none,
From 1 to 128 : Zoom X fixed
From 129 to 255 : Zoom X automatic speed Ping Pong style
6 Zoom Y: 0 none,
From 1 to 128 : Zoom Y fixed
From 129 to 255 : Zoom Y automatic speed Ping Pong style
7 Position X: 0 none,
From 1 to 128 : Position X fixed
From 129 to 255 : Position X automatic speed Ping Pong style
4

8 Position Y: 0 none,
From 1 to 128 : Position Y fixed
From 129 to 255 : Position Y automatic speed Ping Pong style
9 From 0 to 255 : General Analogical Zoom
10 From 0 to 255 : General motor speed from normal to slo
11 From 0 to 255 : Stop time on vector points from normal to slo
12 From 0 to 128 : Bind logos outside indo
From 128 to 255 : Crush logos outside indo
13 Color palette from 0 to 15 palette 1 From 16 to 31 Palette 2 ,From 33 to …….
14 From 0 to 255 : Color Palette speed from slo to fast scrolling
ILDA Mode : (SubD-2 connector)
As soon as one ILDA hardware is connected through the SubD- 5 connector , the laser
automatically switches to it and wait for instructions
Warning : ! All connections have to be made with the laser projector switched off !
DMX- 12 connection:
Only use a DMX cable and 3-pin XLR-plugs and connectors in order to connect the
controller ith the fixture or one fixture to another :
Pin 1= Ground Pin 2 =Data (-) Pin 3 Data (+)
Connection between fixtures:
WARNING !
This product is not meant for a domestic use.
5

After unpacking the product, packaging materials (plastic bags, polystyrene, foam,…)
must not be left within children’s reach, this may be dangerous.
This product must be only used by an adult. Do not let a child use it or play with it.
Do not put this product under these conditions :
- In a damp location
- In a location subject to shock and vibrations
- In a location subject to extreme temperatures ( 45°C/113°F or °C/35.6°F )
Do not let any water, flammable liquids or metal objects enter the product.
In the event of liquids entering the product, unplug the power cable immediately.
Stop immediately using the device in the event of a serious functioning problem, and
contact your reseller for verification, or contact us directly.
Do not open the product. Any operation inside the console must be done by a qualified
technician.
SARL
ZA LA GARE
69620 CHAMELET
FRANCE
TEL : 04 69 66 56 22
6
Table of contents
Other Electroconcept Projector manuals
Popular Projector manuals by other brands

Epson
Epson PowerLite 737c user guide
3M
3M Overhead Projector 1800 Series Illustrated parts breakdown

BenQ
BenQ Home Cinema WI300 quick start guide

Panasonic
Panasonic PT-AE1000U - LCD Projector - HD 1080p operating instructions
Eiki
Eiki LC-XNB5MS Specification sheet
Vivitek
Vivitek DH758UST series user manual
