Elettro 471 User manual

ELETTRO
CF
s.r.l.
1
09/12/14
PLASMA 56 COMPRESSOR INVERTER
POWER SOURCE art. 471 and art.471.48
SERVICE MANUAL
art.471 (Fig.1 3.2.1) art.471.48 (Fig.2 3.2.1)

ELETTRO
CF
s.r.l.
2
09/12/14
CONTENTS
1- GENERAL INFORMATION .............................................................................................................. 3
1.1 - Introduction...................................................................................................................................... 3
1.2 - General service policy....................................................................................................................... 3
1.3 - Safety information. ........................................................................................................................... 3
1.4 - Electromagneticcompatibility. .......................................................................................................... 3
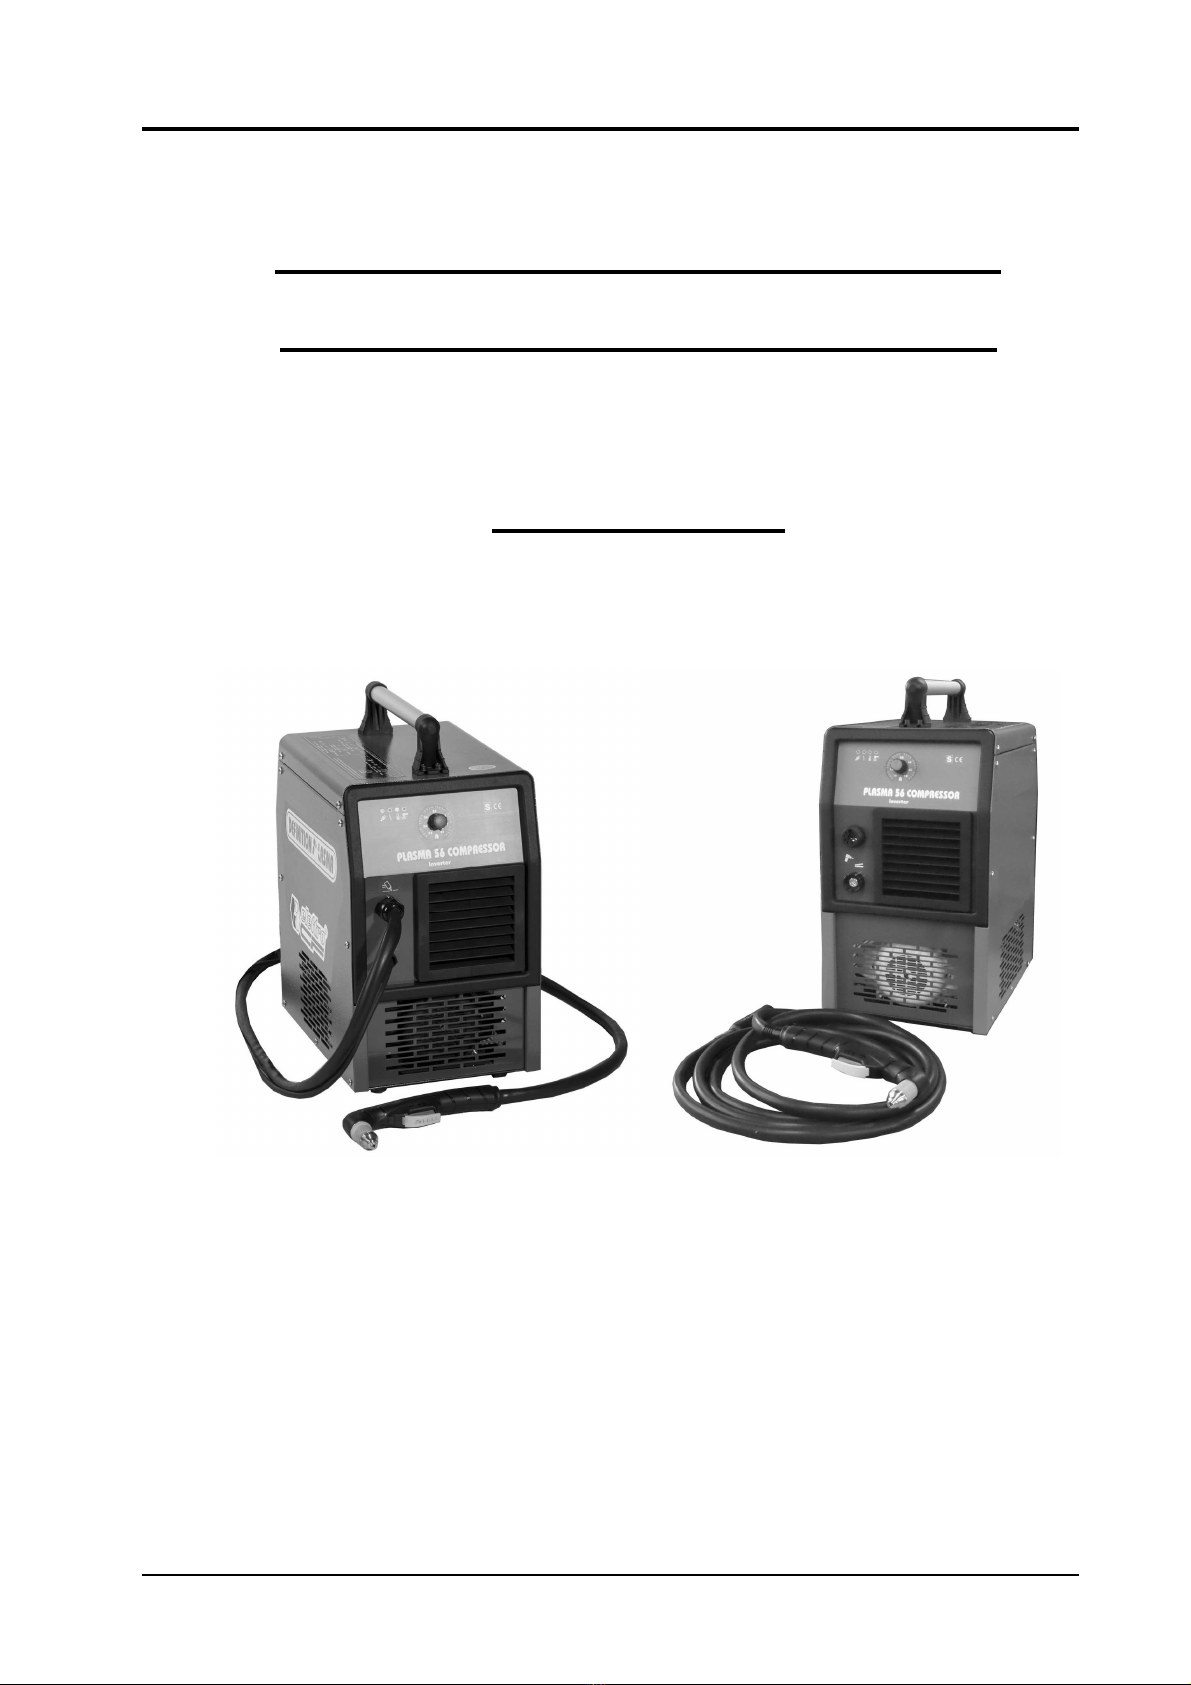
2- SYSTEM DESCRIPTION................................................................................................................... 4
2.1 - Introduction...................................................................................................................................... 4
2.2 - Technicalspecifications. ................................................................................................................... 4
2.3 - Description of power source art. 471................................................................................................. 4
3- MAINTENANCE ............................................................................................................................... 7
3.1 - Periodic inspection, cleaning............................................................................................................. 7
3.2 - Operating sequence (fig. 3.2.1).......................................................................................................... 7
3.2.1 - Power source commands and signals............................................................................................... 8
3.2.2 - Power source operation .................................................................................................................. 9
3.3 - Troubleshooting................................................................................................................................ 11
3.3.1 - The power source does not start, led (A) off.................................................................................... 11
3.3.2 - Power source powered, led (A) lit, fan (9)stopped. ......................................................................... 13
3.3.3 - Power source powered, the signals do not indicate correct values. ................................................... 13
3.3.4 - The start button produces no effect.................................................................................................. 14
3.3.5 - No gas flows from the torch............................................................................................................ 15
3.3.6 - Gas flows from the torch, the pilot arc does not light (contact tip voltage missing) .......................... 16
3.3.7 - In open circuit operation, the output voltage is not regular............................................................... 17
3.3.8 - Irregular pilot arc starts, unstable pilotarc....................................................................................... 19
3.3.9 - Transfer arc does not take place or is too weak for cutting ............................................................... 21
3.4 - Alarm signals.................................................................................................................................... 23
3.4.1 - Led (C) lit = temperature outside limits........................................................................................... 23
3.4.2 - Led (D) lit = low gas pressure......................................................................................................... 23
3.4.3 - Led (B) steadily lit = power sourceblocked .................................................................................... 24
4- COMPONENTS LIST......................................................................................................................... 25
4.1 - Power source art. 471........................................................................................................................ 25
4.2 - Table of components......................................................................................................................... 25
4.3 - List of spare parts.............................................................................................................................. 25
5- ELECTRICAL DIAGRAMS ............................................................................................................... 26
5.1 - Power source art. 471........................................................................................................................ 26
5.2 - Waveforms. ...................................................................................................................................... 26
5.2.1 - Open-circuit output voltage, interrupted after approximately 300 msec. for missing pilot arc current
(par. 3.3.6, 3.3.8) .............................................................................................................................26
5.2.2 - Open-circuit rectifier output voltage, interrupted after approximately 300 msec., for missing pilot
arc current (par. 3.3.7). ....................................................................................................................26
5.2.3 - Open-circuit inverter output voltage, interrupted after approximately 300 msec. for missing pilot
arc current (par. 3.3.7). ....................................................................................................................27
5.2.4 - Pilot arc current signal for its maximum time, approximately 2 sec., with the torch free in the air
and thus without transfer arc (par. 3.3.8)...........................................................................................27
5.3 - Filter board (10)................................................................................................................................ 28
5.4 - Igbt board (46).................................................................................................................................. 29
5.5 - Secondary board (70) ........................................................................................................................ 30
5.6 - Panel board (60) ............................................................................................................................... 31
5.7 - Control board (63) ............................................................................................................................ 32

ELETTRO
CF
s.r.l.
3
09/12/14
1
- GENERAL INFORMATION
1.1 - Introduction.
The purpose of this manual is to train personnel assigned to carry out maintenance on the
power source art. 471 for plasma cutting systems.
The power source exists in two variants:
•art. 471 (3.2.1-Fig.1)
•art. 471.48 (3.2.1-Fig.2)
Art. 471 is equipped with a 4 m, ECF-71 torch with direct connection consisting of:
•power source start contact
•negative potential (-) eyelet
•Gas hose
Art. 471.48 is equipped with 8-pin Easy Fit fixed adapter (48), where:
•1-2 pin torch button
•7-8 pin torch recognition
•4-5 pin pilot arc current
1.2 - General service policy.
It is the responsibility of the customer and/or operator to use the equipment appropriately, in
accordance with the instructions in the Instruction Manual, as well as to maintain the equipment
and related accessories in good working condition, in compliance with the instructions provided
in the Service Manual.
Any internal inspection or repairs must be carried out by qualified personnel who are
responsible for any intervention on the equipment.
It is forbidden to attempt to repair damaged electronic boards or modules; replace them with
original ELETTRO CF s.r.l. spare parts.
1.3 - Safety information.
The safety notes provided in this manual are an integral part of those given in the Instruction
Manual. Therefore, before working on the machine, please read the paragraph on safety
instructions in the aforementioned manual.
Always disconnect the power cord from the mains, and wait for the internal capacitors to
discharge (1 minute) before accessing the interior of theequipment.
Some internal parts, such as terminals and swirl rings, may be connected to mains or
otherwise hazardous potentials. It is therefore forbidden to work with the safety guards removed
from the machine unless strictly necessary. In this case, take special precautions such as wearing
insulating gloves and footwear, and working in a perfectly dry environment with dryclothing.
1.4 - Electromagnetic compatibility.
Please read and observe the instructions provided in the paragraph “Electromagnetic
compatibility” of the Instruction Manual.

ELETTRO
CF
s.r.l.
4
09/12/14
2
- SYSTEM DESCRIPTION
2.1 - Introduction.
The PLASMA 56 COMPRESSOR is a plasma arc system for cutting electrically conductive
materials.
It is made up of an electronic power source (art. 471 or art. 471.48) with three-phase
compressor and a set of accessories for use in manual applications.
The power source is controlled by microprocessor circuits, which manage the operative
functions of the cutting system and operator interface.
2.2 - Technical specifications.
To verify the technical specifications, see the machine plate, Instruction Manual, and Sales
Catalogue.
2.3 - Description of power source art. 471
Art. 471 is a controlled current direct current power source composed of a three-phase
compressor and made up of a three-phase rectifier bridge, a DC/AC converter (inverter) and an
additional rectifier bridge.
It may be powered at 400 Vac.
Referring to the electrical diagram, you can identify the main blocks that make up the power
source.
The main switch (58) powers the filter board (10) which contains the filter to reduce
conducted interferences reflected in the mains and the compressor (4) through the remote-control
switch (6).
The integrated circuit U1 on igbt board (46) generates the 13.8 Vdc service voltage to
power the electronic boards; the transformer TF1, together with the rectifier D1, generates the
isolated supply voltage for the torch start button circuit, on the panel board (60).
The relay K2 drives the coil of remote-control switch (6) based on the commands received
from the control board (63). The remote-control switch (6) brings power to the compressor (4)
that produces the compressed air required to power the torch.
The coil of remote-control switch (6), as well as the fans (9) are always powered at 230
Vac.
The rectifier bridge (13) is connected to the output of the filter board (10), and rectifies the
mains voltage at the filter board (10) output into direct current equivalent to 560 Vdc,
approximately. This voltage, applied to the inverter, made up of the igbt board (46) and the igbt
modules (44), is converted once again into square-wave alternating voltage, suitable for
powering the power transformer(53).
The 4 resistors (42) connected to J2 of igbt board (46) limit the current in the electrolytic
capacitors on the igbt board (46), which in turn level the direct current rectified by the bridge
(13).
Their interruption makes these capacitors isolated and useless, while a short-circuit will
damage the capacitors.
The igbt board (46) contains the TA to detect the current at the primary circuit of the
transformer (53). Its signal is used by the control board (63) to adjust the pilot arc and cutting
current.
The secondary transformer circuit (53) is made up of 4 separate identical windings, connected
to a shared point on the terminal S2-S5 of the secondary board (70), to form a dual central socket
winding. The other ends of the 4 windings are connected to terminals of the diode (68) to rectify
the alternating current generated by the inverter (46). Inserted between the + output of the diode
and the + terminal of the secondary board (70) (terminal L2), the inductor (52) is connected to

ELETTRO
CF
s.r.l.
5
09/12/14
level the power source output current.
In this way the direct current voltage at the output of the secondary board (70) and present at
its terminals (-) and (+) is available for the power source output.
The resistor (72) connected to CN2 of secondary board (70) helps balance the currents
between the secondary windings of the transformer (53).
If interrupted, it may cause unstable operation both in the pilot arc and while cutting, while a
short-circuit will definitely damage the secondary board (70).
The secondary board (70) includes the nozzle relays RL1 and RL3 to enable the nozzle
voltage, and the solenoid with reed bulb RL2 to detect the cutting current on the earth conductor
of the power source (workpiece potential).
When the two relays are in resting condition (thus with power source on or with pilot arc),
they provide on terminal F1, corresponding to the torch nozzle terminal, the same voltage present
on terminal L2 of the secondary board (70), corresponding to the + output of the power source.
When the torch with pilot arc lit is moved close to the workpiece, the solenoid with reed bulb
detects the current passing through the earth conductor of the power source, and commands the
switch from pilot arc to transfer arc, by means of the nozzle relays RL1 and RL3, which cut off
voltage on the nozzle terminal F1.
The reed RL2 simultaneously sends the same signal to the control board (63), which starts
the transfer arc working mode(cutting).
The secondary board (70) includes the Hall-effect current transducer to detect the cutting
current. Its signal is used by the control board (63) to limit the maximum output current of the
power source.
The cutting current is adjusted by the inverter, made up of the igbt board (46) and igbt
modules (44), appropriately controlled by the control board (63).
The control board (63) contains the main power source microprocessor, and supervises
management of the other boards.
It adjusts the cutting current, generates the PWM signal to be sent to the igbt (44) through
the isolated drive circuits built into the same board, and also handles diagnostics of the power
source, managing the control panel consisting of the panel board(60).
Given the particular configuration of the inverter (control board (63) with built-in drive
circuits connected directly to the igbt (44)), quite these drive circuits suffer damage
following an igbt (44) fault. For this reason we recommend simultaneously replacing the
control board (63) along with the igbt (44). Otherwise, the new igbt controlled by defective
drive circuits would again be damaged. Similarly, should it be necessary to replace the
control board (63) following a fault in the igbt drive circuits, we recommend that you also
replace the igbt (44) at the same time.
The panel board (60), mounted on the front panel, acts both as a control panel for the power
source, and as an input and conditioning interface for those signals especially affected by
disturbances because they arrive from critical areas of the system.
These signals include:
−Start power source,
−Torch type recognition (only art. 471.48)

ELETTRO
CF
s.r.l.
6
09/12/14
The panel board (60) contains the following control elements:
−Potentiometer to adjust the cutting current.
−A set of leds to indicate the operating status.
The signals processed by the electronic boards and present at their connectors are listed in the
table in chapter five of thismanual.

ELETTRO
CF
s.r.l.
7
09/12/14
3
- MAINTENANCE
WARNINGS
ANY INTERNAL INSPECTIONS OR REPAIRS MUST BE CARRIED OUT BYQUALIFIED
PERSONNEL.
BEFORE BEGINNING MAINTENANCE OPERATIONS, UNPLUG THE POWER SOURCE
FROM THE MAINS AND WAIT FOR THE INTERNAL CAPACITORS TO DISCHARGE (1
MINUTE).
3.1 - Periodic inspection, cleaning.
Periodically open the power source grids and check inside the aeration tunnel.
Remove any dirt or dust to ensure smooth air flow, and thus adequate cooling of the internal
parts of the power source.
Check the condition of the output terminals, output and power supply cables of the power
source; replace if damaged.
Check the condition of the internal power connections and connectors on the electronic
boards; if you find “loose” connections, tighten or replace theconnectors.
3.2 - Operating sequence (fig. 3.2.1).
The following sequence represents correct functioning of the machine. It may be used as a
guiding procedure fortroubleshooting.
It must be carried out after each repair without anyerrors.

ELETTRO
CF
s.r.l.
8
09/12/14
3.2.1 - Power source commands and signals.
Fig.1 (Art.471)
Fig.2 (Art.471.48)

ELETTRO
CF
s.r.l.
9
09/12/14
3.2.2 - Power source operation.
NOTE
Operations marked with this symbol refer to operator actions.
♦The operations marked with this symbol refer to machine responses that must occur following
an operator action.
System shut off and unplugged from the mains.
Connect the torch to the power source (only art. 471.48)
Connect the cable of the positive pole of the power source to the workpiece.
Connect the power source to the mains.
Close the switch (O) on the power source.
♦System powered, led (A) lit, fan running.
♦On front panel, leds (C) and (D) off; led (B) lit for the first 5 seconds (mains
voltage analysis and selection), then off.
Correct? NO (see 3.3.1, 3.3.2, 3.3.3).
YES
WARNING
DURING THE FOLLOWING TESTS, DO NOT POINT THE TORCH AT PEOPLEOR
PARTS OF THE BODY, BUT ALWAYS TOWARDS AN OPEN SPACE OR THE
WORKPIECE.
Press the torch start button and hold it down.
♦Gas flows from the torch a n d the pilot arc starts for the maximum pilot arc time
(2 sec.). The gas continues to flow for approximately another 100 sec. after the
start button is released (post-gas time).
Correct? NO (see 3.3.4, 3.3.5, 3.3.6, 3.3.7, 3.3.8).
YES
With pilot arc lit, place the torch near the workpiece.
♦Begin cutting. Adjust the knob (F) to the current level suited to the kind of
cutting.

ELETTRO
CF
s.r.l.
10
09/12/14
Correct?
YES
NO (see 3.3.9).
Release the torch start button.
♦The arc shuts off immediately. The gas continues to flow for the post-gas time
(approximately 100 seconds after the start button is released) to cool the torch.
Correct? NO (see 3.3.5),
YES
REGULAR OPERATION.

ELETTRO
CF
s.r.l.
11
09/12/14
3.3 - Troubleshooting.
WARNINGS
ANY INTERNAL INSPECTIONS OR REPAIRS MUST BE CARRIED OUT BYQUALIFIED
PERSONNEL.
BEFORE REMOVING THE PROTECTIVE GUARDS AND ACCESSING INTERNAL
PARTS, DISCONNECT THE POWER SOURCE FROM THE MAINS AND WAIT FOR THE
INTERNAL CAPACITORS TO DISCHARGE (1 MINUTE).
NOTE
Items in boldface describe problems that may occur on the machine (symptoms).
Steps marked with this symbol refer to situations for which the operator must determine the
causes (causes).
♦Operations preceded by this symbol refer to actions the operator must perform in order to
solve the problems (solutions).
3.3.1 - The power source does not start, led (A) off.
MAINS SUITABILITY TEST.
No voltage at the power source input, because the mains surge protector is tripped.
NO Correct?
YES
♦Eliminate any short-circuits in the connections between the power cable, switch
(58), filter board (10) and igbt board (46).
♦Make sure that the terminals U, V and W on filter board (10) are not short-
circuited between themselves or towards earth. If short-circuited, disconnect the
wires from terminals U, V and W of filter board (10) from the terminals of the
rectifier bridge (13) and repeat the tests. If the short-circuit is still present, replace
the filter board (10). If the short-circuit has been removed, make sure the rectifier
bridge (13), igbt (44) and igbt board (46) are intact, and replace any defective
components.
♦Mains not suited to power the power source (ex.: insufficient installed power).
MAINS CONNECTION TEST.
Rectifier bridge (13) input terminals (wires from terminals U, V and W of filter board
(10)) = approximately 3 x 400 Vac, according to mains voltage, with switch (58) closed.
YES
Correct?
NO
♦Check power cable and plug and replace if necessary.
♦Check the switch (58) and replace if defective.
♦Check the mains voltage conditions, and especially that none of the power supply
three phases is missing.

ELETTRO
CF
s.r.l.
12
09/12/14
♦Check the integrity of the rectifier bridge (13), igbt (44) and the igbt board (46)
and replace any defective components.
♦Replace the filter board (10).
SERVICES POWER SUPPLY TEST.
Igbt board (46), connector J3, terminals 1 (+) - 5 (-) = +25 Vdc, approximately; terminals 4
(+) - 5 (-) = +13.8 Vdc, approximately.
YES
Correct?
NO
♦Check the wiring between J3 igbt board (46) and CN9 control board (63).
♦With the power source off, temporarily disconnect the connector CN1 on
secondary board (70), and repeat the test of the voltages on the connector J3 of
igbt board (46). If the values are correct, replace the secondary board (70). If
incorrect, with the power source off, also disconnect CN9 on control board (63)
and repeat the test of the voltages on the connector J3 of igbt board (46). If the
values are correct, replace the control board (63). If incorrect replace the igbt
board (46).
PANEL BOARD (60) POWER SUPPLY TEST.
Panel board (60), connector CN1, terminals 1 (+) - 10 (-) = +5 Vdc.
YES
Correct?
NO
♦Check the wiring between CN1 panel board (60) and CN2 control board (63).
♦With the power source off, temporarily disconnect the connector CN1 on panel
board (60) and make sure that the voltage on connector CN2, control board (63),
terminals 1 (+) - 10 (-) = +5 Vdc. If the result is correct replace the panel board
(60); if incorrect replace the control board (63).
♦Replace the control (63) and/or panel boards (60).
♦Check the wiring between CN1 panel board (60) and CN2 control board (63).
♦Replace the control (63) and/or panel boards (60).

ELETTRO
CF
s.r.l.
13
09/12/14
3.3.2 - Power source powered, led (A) lit, fan (9) stopped.
FAN (9) TEST.
Fan (9) fast-on terminals = 230 Vac, approximately, with mains at 230 Vac, after closing
switch (58).
NO Correct?
YES
♦Make sure that there are no mechanical impediments blocking the fan (9).
♦Replace the fan (9).
♦Check the wiring between fan (9) and connector J1, terminals 2 and 6 on igbt board (46).
♦Check the presence of the power supply three phases on terminals U, V and W on filter
board (10), with a voltage value equivalent to the supply voltage of the power source. If
incorrect, check the cable, power plug and switch (58) and replace if defective.
♦Check the presence of 400V approx. on connector J6, terminals 1 and 4 on igbt board (46).
♦Replace filter board (10).
♦Replace igbt board (46).
3.3.3 - Power source powered, the signals do not indicate correct values.
INITIAL TEST.
Upon start-up, green led (A) lit, leds (C) and (D) off, led (B) lit for the first 5 seconds, then
off.
YES
Correct?
NO
♦See Alarm signals, par. 3.4.
♦Carry out the SERVICES POWER SUPPLY TEST and PANEL BOARD (60)
POWER SUPPLY TEST in par. 3.3.1.
♦Replace the control (63) and/or panel boards (60).
♦Correct operation.

ELETTRO
CF
s.r.l.
14
09/12/14
3.3.4 - The start button produces no effect.
START BUTTON TEST.
Panel board (60), terminals CN4 (+) and CN3 (-) = +24 Vdc (button contact open) and RL1
on panel board (60) resting, with start button on torch released; 0 Vdc (contact closed) and
RL1 powered, with button pressed.
YES
Correct?
NO
♦Check the wiring between torch and terminals CN3 and CN4 of panel board (60)
(art. 471).
♦Check the wiring between terminals CN3 and CN4 of panel board and terminals 1
and 2 fixed adapter (art. 471.48).
♦Check the wiring between connector CN2, terminals 2, 4 of panel board (60) and
terminals 7, 8 of the central adapter on power source (art. 471.48).
♦For art. 471 make sure that the torch recognition jumper is present on pin 2,4 of
connector CN2 panel board (60).
♦Make sure that the nozzle guard is correctly mounted on the torch and in good
working order. If defective or showing signs of wear, replace.
♦Check torch button. If defective, replace.
♦Make sure that connector CN8, on panel board (60), terminals 1 (+) and 2 (-) =
+24 Vdc, approximately, with power source powered. If correct, replace the panel
board (60). If incorrect, with power source off temporarily, disconnect the
connector CN8 from panel board (60) and make sure that the voltage on connector
J7 of igbt board (46), terminals 1 (+) and 2 (-) = +24 Vdc approximately. If
correct check the wiring between CN8 panel board (60) and J7 igbt board (46), or
replace the panel board (60). If incorrect check the power supply conditions of the
power source (see par. 3.3.1) and/or replace the igbt board (46).
START COMMAND TEST.
Control board (63), connector CN2, terminals 11 (+) and 12 (-) = +13.8 Vdc, (RL1 contact
open) with torch start button released; 0 Vdc (contact closed) with button pressed.
YES
Correct?
NO
♦Check the wiring between CN1 panel board (60) and CN2 control board (63).
♦Temporarily disconnect, with power source off, connector CN1 from panel board
(60) and check the resistance between terminals 11 and 12 of CN2 control board
(63) = approximately 25 Kohm. If incorrect, replace control board (63). If correct
replace relay RL1 on panel board (60) or panel board (60).
♦Replace control board (63).

ELETTRO
CF
s.r.l.
15
09/12/14
3.3.5 - No gas flows from the torch.
COMPRESSOR TEST.
Terminals of remote control switch coil (6) = 230 Vac, approximately, with torch button
pressed. The time o f t h e o p e r a t io n c o nt r o l o f t h e c o mp r e s s o r d e p e n ds on the
pre-gas and post-gas times and on the testing conditions.
YES
Correct?
NO
♦Check the wiring between coil (A1-A2) of the remote-control switch (6) and J1
igbt board (46).
♦Check the wiring between J3 igbt board (46) and CN9 control board (63).
♦Make sure that the supply voltage to the fan (9) is correct, see par. 3.3.2. (this
voltage is the same that powers the coil of the remote-control switch (6)).
♦With power source off, check the resistance between the terminals (A1-A2) of the
remote-control switch (6) = 500 ohm, approximately. If 0 ohm (short-circuit),
replace r e mo t e - co nt r o l s w it c h (6) and filter board (10).
♦Replace the control (63) and/or igbt (46) boards.
♦With power source off, check the resistance between the terminals (A1-A2) of the remote-
control switch coil (6) = 500 ohm, approximately. If > Mohm (winding broken), replace
remote control switch (6).
♦Make sure there are no occlusions in the gas hoses c o m i n g o u t of the
c o m p r e s s o r .
♦Replace the compressor (4).

ELETTRO
CF
s.r.l.
16
09/12/14
Correct?
NO
3.3.6 - Gas flows from the torch, the pilot arc does not light (contact tip voltage missing).
NOTE
Some of the following tests may be checked only in the second after pressing the torch start
button, due to failure by the pilot arc to strike.
WARNING
FOR THE FOLLOWING TESTS UNSCREW THE NOZZLE HOLDER (26) FROM THE TORCH,
REMOVE THE ELECTRODE (23), THE DIFFUSOR (24), THE NOZZLE (25) AND AT LAST
REASSEMBLE THE NOZZLE HOLDER (26).
POWER SOURCE OUTPUT VOLTAGE TEST.
Front panel output (G) and output “- “secondary board (gnd) = fig. 5.2.1 with start button
pressed fig. 5.2.1 (open-circuit output voltage, interrupted after approximately 300 msec., for
missing pilot arc current).
YES
♦Go to par. 3.3.7.
NOZZLE VOLTAGE TEST.
Secondary board (70), terminal F1 and “-” (gnd) = fig. 5.2.1, with start button pressed (open-
circuit output voltage, interrupted after approximately 300 msec., for missing pilot a r c
current).
NO Correct?
YES
♦Check connections between torch and boards of the power source; more
specifically, between terminals 5 and 6 of the fixed torch fitting and terminal F1
on secondary board (70) (nozzle potential); between the central terminal of fixed
torch fitting and terminal (-) on secondary board (70).
If you find loose connections, tighten them and replace any damaged components
(art. 471.48).
♦Check the conditions of the torch cables and their correct connection on the
secondary boards (70) and on the panel board (60) (art.471).
♦Check the condition of the fixed adapter (48), torch cable and torch, especially
make sure there are no short-circuits or isolation leaks between the conductors or
between the contacts of the fixed adapter (48). Replace any worn or damaged
components (art. 471.48).
♦With the power source off, temporarily disconnect terminal F1 from secondary board (70) and
check the resistance between the terminals F1 and L2 on secondary board (70). Correct value
= 0 ohm (N.C. contacts of the relays RL1 and RL3, serial connected). If > Mohm (circuit
broken), replace RL1 and/or RL3 on secondary board (70) or replace the secondary board
(70).
♦Replace the panel board (60).

ELETTRO
CF
s.r.l.
17
09/12/14
3.3.7 - In open circuit operation, the output voltage is not regular.
WARNING
FOR THE FOLLOWING TESTS UNSCREW THE NOZZLE HOLDER (26) FROM THE TORCH,
REMOVE THE ELECTRODE (23), THE DIFFUSOR (24), THE NOZZLE (25) AND AT LAST
REASSEMBLE THE NOZZLE HOLDER (26).
SECONDARY CIRCUIT RECTIFIER OUTPUT VOLTAGE TEST.
Secondary board (70), terminals L1 and S2-S5 (gnd) = fig. 5.2.2, with start button pressed
(open-circuit rectifier output voltage, interrupted after approximately 300 msec., for missing
pilot arc current).
NO Correct?
YES
♦Check the connection of the choke (52) with the terminals L1 and L2 on
secondary board (70).
♦Make sure the reed bulb RL2 is properly mounted between the L2 and (+)
terminals on secondary board (70).
♦Check the continuity between the terminals S2-S5 and (-) and that the Hall-effect
current transducer (SH1) is properly mounted on secondary board (70).
♦Check the wiring between output (G), and the terminal (+) of the secondary board
(70).
♦Replace the secondary board (70).
INVERTER OUTPUT VOLTAGE TEST.
Secondary board (70), terminals S1 and S2-S5 (gnd) = fig. 5.2.3, with start button pressed
(open-circuit inverter output voltage, interrupted after approximately 300 msec., for missing
pilot arc current).
Repeat the measurement with terminals S3, S4, and S6 in place of S1 = same waveform.
NO Correct?
YES
♦Make sure the connections of the secondary windings of the transformer (53) are
correct and intact on terminals S2-S5, S1, S3, S4, and S6 of secondary board (70).
If you find loose connections, tighten and replace any components with damaged
terminals.
♦Replace the secondary board (70).
♦Check the wiring between J7 igbt board (46) and CN8 control board (63).
♦With the power source off, temporarily disconnect the secondary windings of the transformer
(53) from terminals S1, S3, S4 and S6 of secondary board (70), and check the integrity of the
secondary rectifier, testing the resistance between each of the terminals S1, S3, S4 and S6 of
secondary board (70) and terminal L1 (“+” rectifier potential) and terminal 1 of CN2 on
secondary board (70) (“-” rectifier potential). For each measurement point, the correct value =
diode joint in one direction and > Mohm with the instrument probes reversed. If short-
circuited or low-resistance replace the defective diodes or replace the secondary board(70).

ELETTRO
CF
s.r.l.
18
09/12/14
♦Check the wiring and integrity of the resistor (72) with connector CN2 on secondary board
(70). Correct value of the resistor (72) = 10 Kohm.
♦Check conditions of the transformer (53). Replace if damaged or showing signs of burns.
♦Make sure the connections are correct and intact in the primary windings of the transformer
(53) on terminals Q1 and Q2 on igbt board (46). If you find loose connections, tighten and
replace any components with damaged terminals.
♦With the power source off, temporarily disconnect the terminals of the primary windings of
the transformer (53) from terminals Q1 and Q2 on igbt board (46), and check the
resistance between the terminals Q1 and Q2 on igbt board (46). Correct value =
>Mohm in all measurements. If you find a short-circuit or low resistance, replace the igbt
board (46).
♦Check the integrity of the igbt modules (44), checking the resistance between each of the
terminals Q1 and Q2 of igbt board (46) with the (+) and (-) terminals of igbt board (46). For
each measurement point, the correct value = diode joint in one direction and > Mohm with the
instrument probes reversed. If short-circuited or low-resistance replace the defective igbt
module (44) and/or replace the igbt board (46).
♦Check the wiring between drive terminals of the igbt modules (44) and connectors CN3, CN4,
CN5 and CN6 on control board (63), taking care to observe the polarity of these connections.
WARNING
In the case of a fault of an igbt module (44) or a drive section of the control board (63),
we recommend that you also replace both the igbt module (44) and the control board (63)
at the same time. An igbt fault quite frequently damages the drive section to which it is
connected. Similarly, a drive section fault quite frequently damages the igbt to which it is
connected.
♦Check the wiring and integrity of the resistors (42) with connector J2 on igbt board (46).
Correct value of the resistors (42) = 6 ohm.
♦Check the presence of the power supply three phases on terminals U, V and W of filter
board (10).
♦Check the presence of approximately 560 Vdc, on the (+) and (-) terminals on igbt board
(46). If incorrect, carry out the MAINS CONNECTION TEST, par. 3.3.1.
♦Replace the filter (10) and/or igbt (46) and/or control (63) and/or secondary board (70).

ELETTRO
CF
s.r.l.
19
09/12/14
3.3.8 - Irregular pilot arc starts, unstable pilot arc.
PLASMA GAS PRESSURE TEST.
Gas pressure correct in the plasma chamber of the torch.
YES
Correct?
NO
♦Check obstructions and/or presence of gas in the gas hose coming out of the
compressor (4).
♦Replace compressor (4).
WARNING
FOR THE FOLLOWING TESTS UNSCREW THE NOZZLE HOLDER (26) FROM THE TORCH,
REMOVE THE ELECTRODE (23), THE DIFFUSOR (24), THE NOZZLE (25) AND AT LAST
REASSEMBLE THE NOZZLE HOLDER (26).
PILOT ARC VOLTAGE TEST.
Secondary board (70), terminal F1 and output “-” (gnd) = fig.
5.2.1, with start button pressed (open-circuit output voltage, interrupted after approximately
300 msec., for missing pilot arc current).
YES
Correct?
NO
♦Check the presence of the power supply three phases on terminals U, V and W of
filter board (10).
♦Go to par. 3.3.6.
WARNING
Due to lighting the pilot arc, some instruments may not be suitable for measuring signals
in the following tests. Given the sensitivity of the measuring points, we urge you to use the
utmost care and precision, scrupulously following the instructions provided in the present
manual and using only instruments certified compatible with these phenomena.

09/12/14
ELETTRO
CF
s.r.l.
20
PILOT ARC CURRENT TEST.
Control board (63), connector CN10, terminals 2 – 3 (gnd) = fig. 5.2.4, with pilot arc lit (pilot
arc current signal for its maximum time, approximately 2 sec., with the torch free in the air
and thus without the transfer arc).
YES
Correct?
NO
♦Check the wiring between CN10 control board (63) and CN1 secondary board
(70).
♦Make sure the current transducer SH1 is properly mounted on secondary board
(70).
♦Check the supply voltage of current transducer SH1 on secondary board (70),
connector CN1, terminals 1 (+) and 3 (-) = +13.8 Vdc, approximately. If incorrect,
with power source off, temporarily disconnect connector CN10 from c o n t r o l
board (63) and check the resistance between the terminals 1 and 3 of CN1
secondary board (70) = approximately 2.7 Kohm. If 0 ohm (short-circuit) replace
the secondary (70) and control (63) boards. If >Mohm (circuit broken) replace the
secondary board (70).
♦With power source off, temporarily disconnect CN1 from secondary board (70)
and check the resistance between terminals 2 and 3 of CN10 on control board
(63). Correct value = two diodes junction in one direction and >Mohm with the
instrument probes reversed. If incorrect, replace control board (63).
♦Make sure the TA SH1 is properly mounted on igbt board (46), and check its
wiring with terminals FS3 and FS4 on control board (63).
♦With the power source off, temporarily disconnect the wires from terminals FS3
and FS4 on control board (63) and check the resistance between the terminals FS3
and FS4 on control board (63). Correct value = two diodes junction in both
directions. If incorrect, replace control board (63).
♦Make sure that the power source regularly delivers open-circuit output voltage,
performing if necessary, the tests in par. 3.3.7.
♦Replace the control (63) and/or igbt (46) and/or secondary boards (70).
♦For art. 471: check the conditions of the torch cables and their correct connection on the
secondary boards (70) and on the panel board (60) and check the integrity of the gas hose and
its connection with the compressor (4).
♦For art. 471.48: check the integrity and the continuity of wiring of the terminals 4 and 5 of the
fixed connection for torch (E-fig.2) and terminal F1 on secondary board (70). Check the
conditions of fixed connection and torch cable; replace if aged or damaged.
♦Check the electrode, swirl ring and torch nozzle; replace if worn or damaged.
♦Make sure the internal parts of the torch are properly insulated, including cables; if in doubt,
replace the entire torch.
♦Replace the control (63) and/or igbt (46) and/or secondary board (70).
This manual suits for next models
1
Table of contents