Elitar Electronic EL-D904 User manual

4Ch Enhanced H.264 DVR
User Manual
EL-D904
VER 1.07

EL-904
1
Precautions
All the safety and operation instructions should be read before the DVR is operated.
All the safety and operation instructions should be retained for future reference.
Comply with operating instruction and notice warning information.
Do not use strong or abrasive detergents when cleaning the DVR.
There are no user-serviceable parts inside. Contact qualified service personnel for
maintenance.
Do not expose the DVR to water or moisture and do not try to operate it in wet areas.
Well-chosen cover is needed when you put the DVR in outdoor areas.
Make sure that two ends of the power port are plugged.
Do not drop metallic parts through slots or slop the DVR with any liquid.
Do not attempt to disassemble the DVR.
Contact qualified service personnel if the following situation happens:
The power-supply cord or plug is damaged.
The DVR has been exposed to rain or water.
The DVR does not operate normally by following the operating instructions.
The DVR falls to the ground or its cover is damaged.
When replacement parts are required, make sure that the service technician has used
replacement parts specified by original seller or that these parts have the same
characteristics as the original ones. Unauthorized substitutions may result in fire,
electric shock, or other hazards.
Use only with a mounting accessory recommended by original seller.
Never push objects of any kind into this DVR through openings as they may touch
dangerous voltage points or short cut parts that could result in a fire or electric shock.
Certify operating safety by qualified installer.
If an outside cable system is connected to the DVR, be sure the cable system is
grounded so as to provide some protection against voltage surges and built-in static
charges.
All normal precautions to avoid component damage due to electrostatic discharge
should be taken during installation and operation.
To prevent electric shock, do not remove screws or covers.

EL-904
2
CONTENT
Precaution
1. Introduction.........................................................................................................................4
1.1 DVR Features.........................................................................................................4
1.2 Product Outlines.....................................................................................................4
1.3 Front Panel.............................................................................................................4
1.4 Rear Panel..............................................................................................................5
1.5 IR Remote Control..................................................................................................5
1.6 Mouse.....................................................................................................................6
2. Quick Installation Guide.....................................................................................................7
2.1 Install the HDD Drive..............................................................................................7
2.2 USB connector on Rear panel................................................................................7
2.3 Cameras installation...............................................................................................7
2.4 Peripheral installation .............................................................................................7
2.5. Alarm / Sensor installation .....................................................................................7
3. Start up DVR system..........................................................................................................8
3.1 Mouse Operating....................................................................................................8
3.2 Screen icon information..........................................................................................9
4. Main Menu......................................................................................................................... 11
4.1 Main Menu Overview............................................................................................11
4.1.1 OSD Menu Tree..........................................................................................12
4.2 Channel set up .....................................................................................................13
4.2.1. Area Set up................................................................................................14
4.3 RECORD SET UP................................................................................................14
4.3.1 Record Schedule Set up.............................................................................15
4.3.2 Continuous recording Set up......................................................................15
4.3.3 Motion Recording Set up............................................................................16
4.3.4 Sensor recording Set up.............................................................................17
4.4. BACK UP.............................................................................................................17
4.5. Network ...............................................................................................................18
4.5.1 Network mode ............................................................................................19
4.5.1.1 Static IP............................................................................................19
4.5.1.2 PPPOE Set up..................................................................................20
4.5.1.3 DHCP Set Up ...................................................................................20
4.5.2 DDNS SET UP ...........................................................................................20
4.5.3 Mobile Phone connect Setup......................................................................21
4.6. SYSTEM..............................................................................................................22

EL-904
3
4.6.1 Date/ Time Set up.......................................................................................23
4.6.1.1 Day light saving time set up..............................................................23
4.6.2 Password Set up ........................................................................................24
4.6.3 Language Set up........................................................................................24
4.6.4 Buzzer Set up.............................................................................................25
4.6.5 Sensor Set up.............................................................................................25
4.6.5.1 Sensor Input.....................................................................................26
4.6.5.2 Relay Output ....................................................................................26
4.6.6 DVR ID SETUP ..........................................................................................27
4.7 Hard Disk Set up...................................................................................................27
4.7.1 HDD info Summary.....................................................................................28
4.7.2 HDD Format ...............................................................................................28
4.8 Display Info SetUp................................................................................................29
4.9 Version Setup.......................................................................................................29
4.10 Monitor Set Up....................................................................................................30
4.10.1 VGA Resolution ........................................................................................31
4.11 Playback .............................................................................................................31
4.11.1 Playback Time search...........................................................................32
4.11.2 Playback Event search..........................................................................33
5. Remote access program:....................................................................................................34
5.1 Net finder installation............................................................................................34
5.2 How to use the net finder to link with DVR............................................................35
5.3 Remote Access through Internet Explorer:...........................................................36
5.3.1 Description of Central Management Software (CMS):................................37
5.3.3 Network Setting of Central Management Software (CMS):.........................37
Appendix I: How to load PC player: .......................................................................................42
Appendix II: How to upgrade the firmware:...........................................................................43
Appendix III: Specification of H.264 DVR...............................................................................45

EL-904
4
1.Introduction
1.1 DVR Features
Powerful Enhanced H.264 compression/ G.723 audio compression
4ch real time recording@ 720x480 resolution
Triplex operation: View live / playback video and remote access simultaneously
Recording picture rate (up to 120 FPS/ NTSC, 100 FPS/ PAL)
Recording frame rates of each camera dynamically adjusted by setting
Built in USB memory stick for video clip export
Data format compatible with Windows
Powerful Alarm Processor allows flexible alarm trigger and response configuration
Programmable motion detection area and sensitivity for each camera individually
Intelligent algorithm refreshing main monitor display dynamically
User friendly video search
Password to secure installation authorization
System auto reboot after power interruption
System software stored in nonvolatile memory, free from hard disk crash
P/ T/ Z control available
Remote monitoring and control through Internet or Ethernet
High definition Video quality
Support High definition PC monitor ( support VGA up to 1680x1050)
Multiple network users access Simultaneously
Mobile connection selectable
Support 3.5” SATA HDD and External USB HDD Bay
1.2 Product Outlines
4ch DVR is a cost-effective and easy-to-use multiplexed digital video recorder, equipped
with powerful Enhanced H.264 video & G.723 audio compression engine.
1.3 Front Panel
USB
H.264 Real-time D1 DVR
HDD IR
EL-904
5
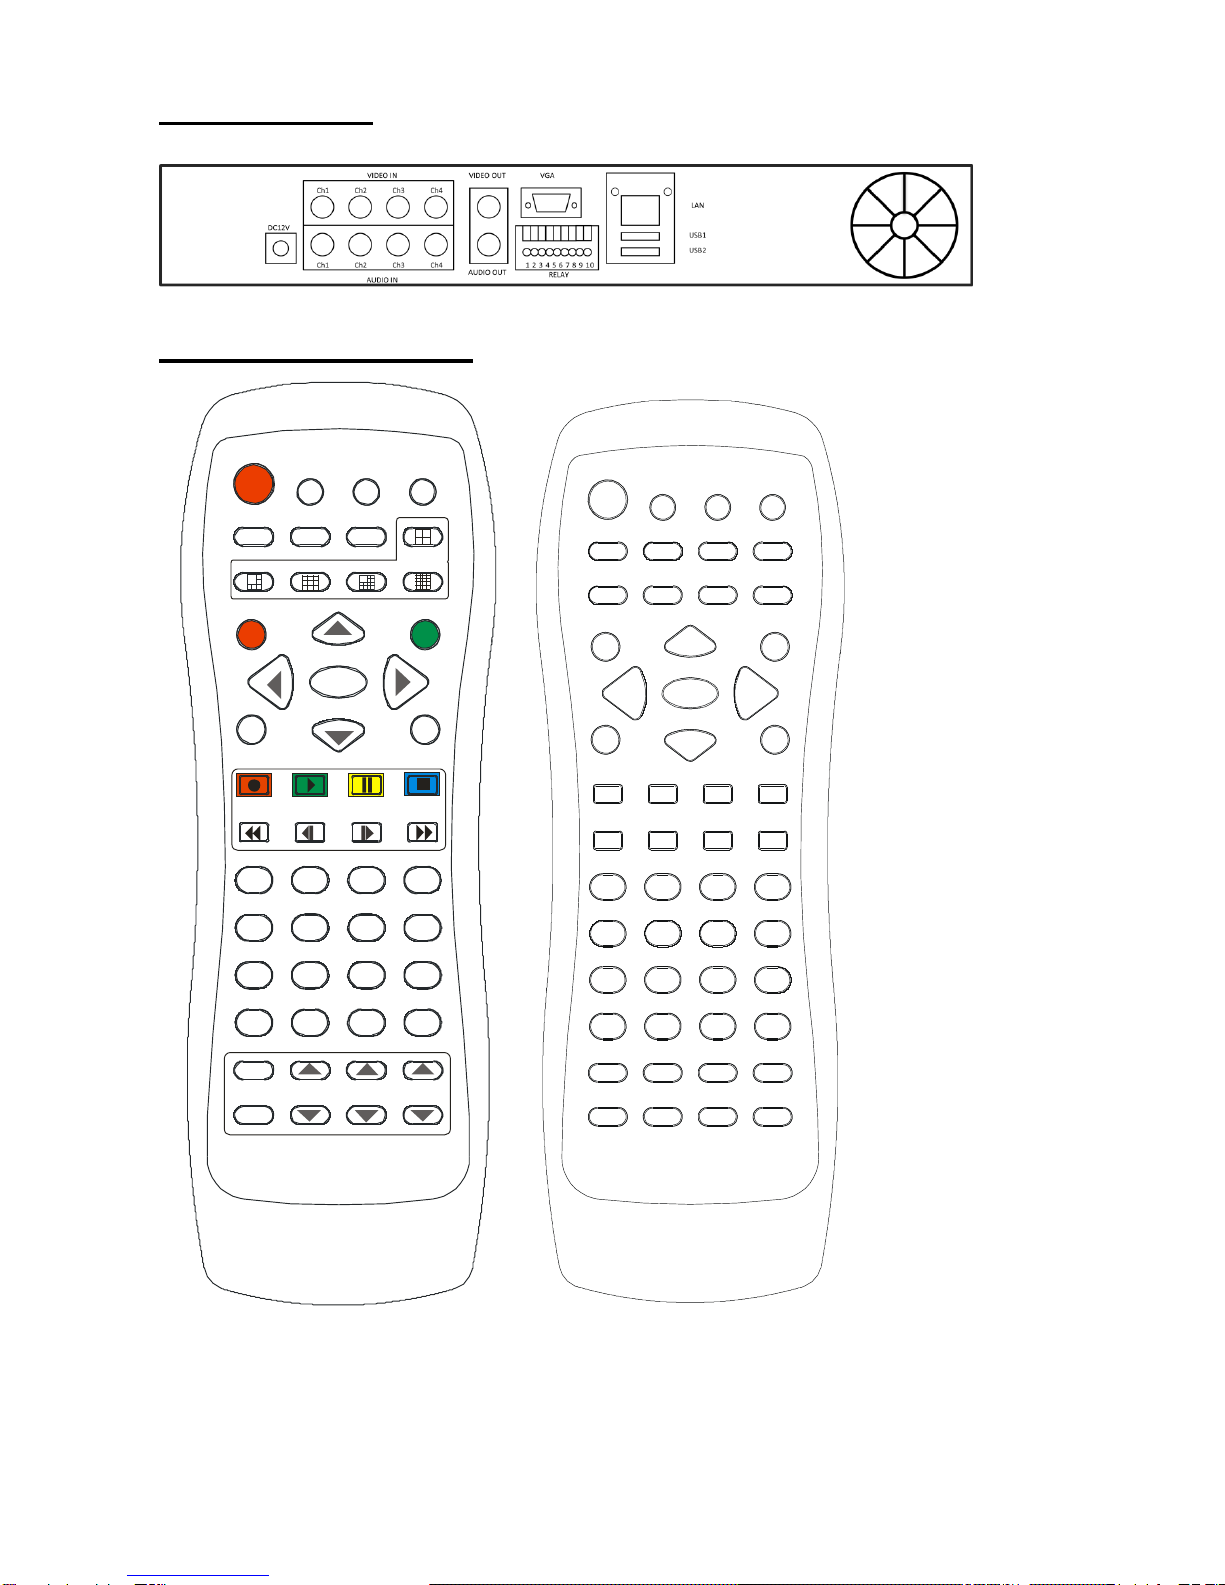
1.4 Rear Panel.
1.5 IR Remote Control
ENTER
+-
1
16
15
1211
8
7
14
10/0
6
13
9
5
4
32
PRE
CALL FOCUS ZOOM IRIS
LOCK ESC
AUDIO BACKUP SEARCH
USB
ID ZOOM
MENU
Digital Video Recorder
123 4
56 7 8
910 11 12
13 14 15
16 17 18
19 20 21
22 23 24 25
26 27 28 29
30 31 32 33
34 35 36 37
38 39 40 41
42 43 44 45
46 47 48 49
50 51 52 53

EL-904
6
1
Menu
28
Forward
2
Audio
29
Fast Forward
3
Search
30
Camera 1
4
Backup
31
Camera 2
5
ID
32
Camera 3
6
Zoom
33
Camera 4
7
USB
34
Camera 5
8
4 Split
35
Camera 6
9
6 Split
36
Camera 7
10
9 Split
37
Camera 8
11
13 Split
38
Camera 9
12
16 Split
39
Camera 10
13
Lock
40
Camera 11
14
UP
41
Camera 12
15
Escape
42
Camera 13
16
LEFT
43
Camera 14
17
ENTER
44
Camera 15
18
RIGHT
45
Camera 16
19
+
46
Preset
20
DOWN
47
Focus In
21
-
48
Zoom In
22
Record
49
Iris In
23
Play
50
Call
24
Pause
51
Focus Out
25
Stop
52
Zoom Out
26
Fast Backward
53
Iris Out
27
Rewind
Re: 1. The default password for Lock button is 0000.
2. If you want to use one IR remote control to control more than 1 DVR, please
press ID first to select the DVR ID you want to control.
1.6 Mouse
The left button of mouse is use to choose or
confirm the setter. The scroll in the center is
used to change the setting or (plus/minus the
digits). The right button is applied to exit the
setting.[

EL-904
7
2.Quick Installation Guide
2.1 Install the HDD Drive
. The following figures illustrate how to install HDD into the DVR.
Step1: Unscrew the cover of DVR and slide backward the chassis’s top cover and
move it upward
Step2: Install the internal HDD Disk (SATA interface) and make sure the HDD cables
connected well.
Step3: Put back the chassis’s cover back and then screw the cover.
2.2 USB connector on Rear panel
USB connectors on the rear panel is designed for USB mouse/ USB Disk (back up or
Storage).
2.3 Cameras installation
Use “In” standard BNC Port on the DVR real panel
1. Video
2. Ground
2.4 Peripheral installation
Please make sure the cables of the peripheral device such as Monitor, Cameras,
audio, USB mouse, network cable etc connected well with DVR.
2.5. Alarm / Sensor installation_
The DVR provides 4 sets alarm input / 1 sets alarm output. Each set of sensors has
two lines: Signal and ground in order to sense the sensor’s status.
Connect with Alarm Devices
Note:
1
2

EL-904
8
1. Relay output: COM+NO COM+NC
2. Alarm input: Short-circuit between Alarm1 ~ 4 and GND is recognized as alarm by default. Alarm 1 ~ 4 will
be corresponding to Camera 1 ~ 4.
NC = Normal Close. NO = Normal Open.
3. Sensor input is RECOGNIZED as LOW when alarm signal is on a level with GND, and it is recognized as HIGH
when alarm signal is FLOATING or 5V. Following is internal circuit.
3.Start up DVR system
After Start up the DVR, please power on and turn on the power switch. The DVR will
automatically detect the HDD information and then the unit will enter into the real
time display mode.
3.1 Mouse Operating
Mouse Operating system :
1. Click left side of mouse, the icons of
screen shown.
2. Click right side of mouse again, the
icons will disappear.
Internal Circuit
D1
5
V
4ch Real time H.264
DVR
System checking -----
Version 1.1.32
HDD Checking---------
SATA 1-------Formatting
EL-904
9
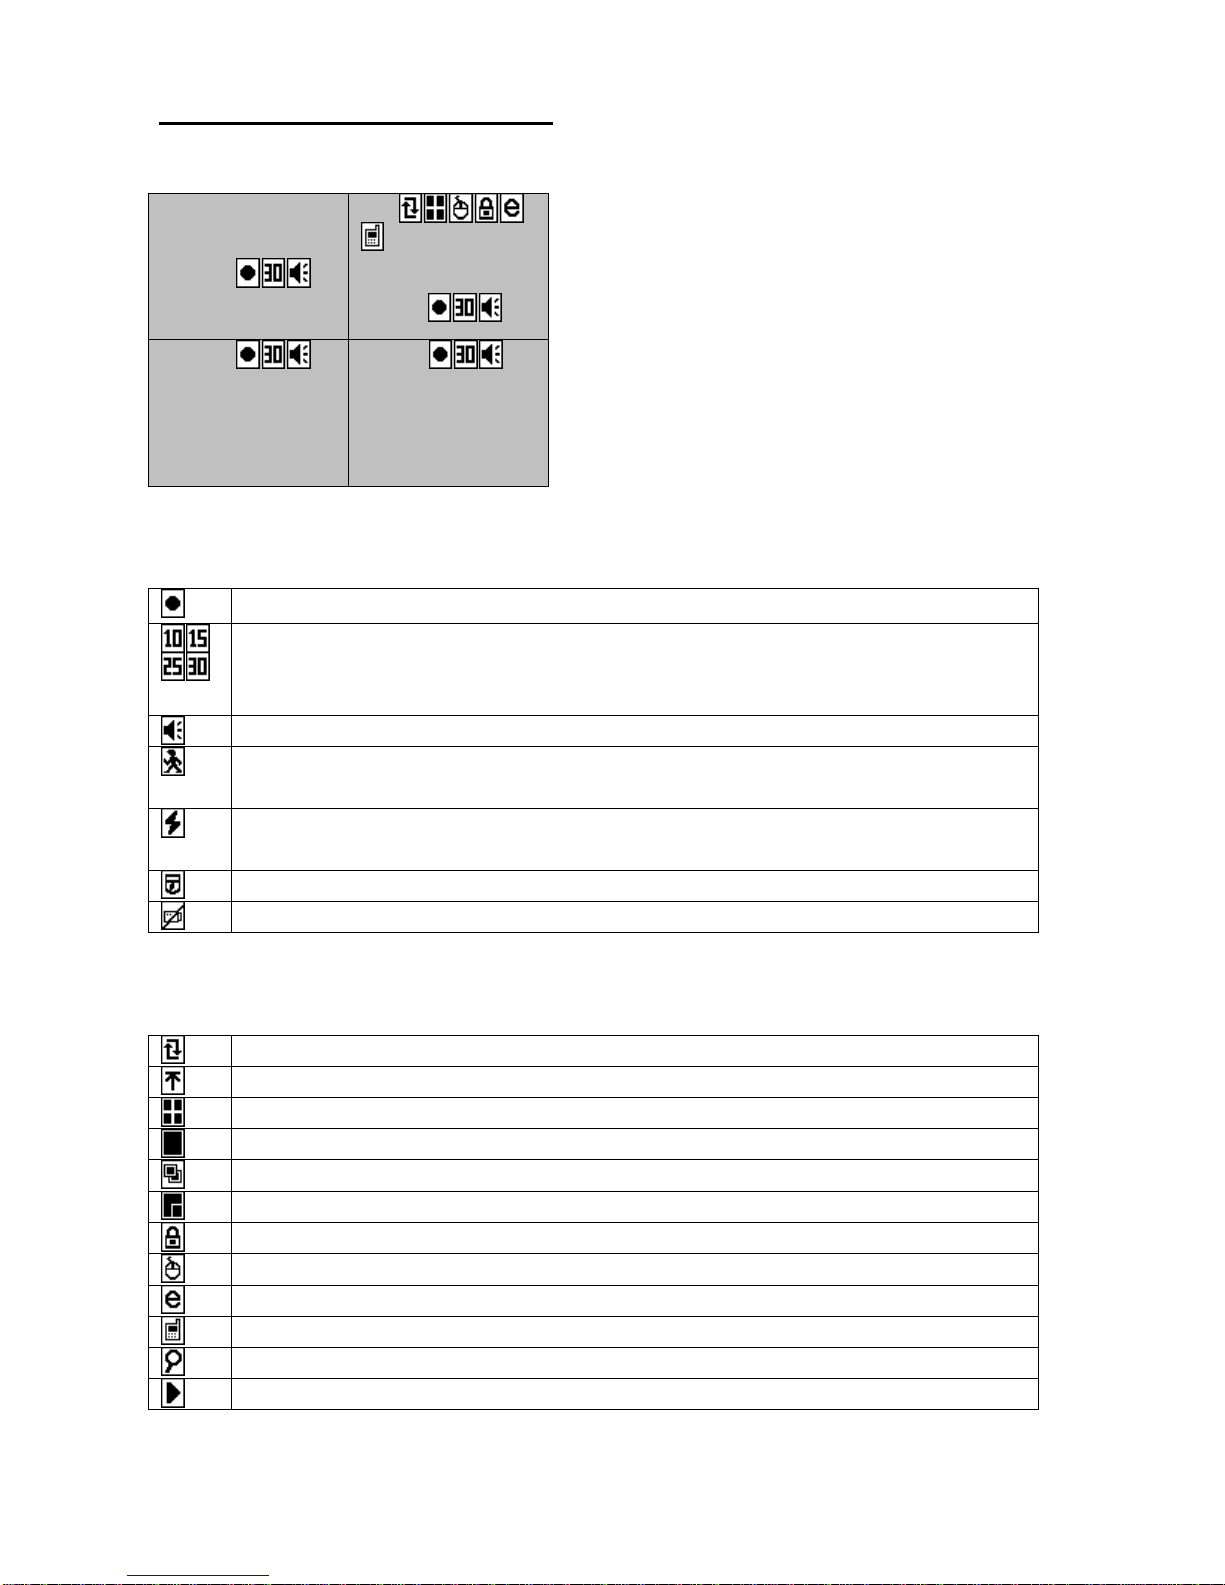
3.2 Screen icon information
On the below screen, there are the icons to show the status and operation. They are
described as the following:
1
2
3
HD1 50%
4
12/07/09 15:20:14
Display icons for each camera :
Recording on:
Recording frame rate display:
NTSC: [10][15][30]
PAL: [10][15][25]
Audio ON
Motions detect ON and triggering recording, that signal will be
flashing.
Alarm recording mode ON, and when triggering recording, that
signal will be flashing.
P/T/Z camera installed/ In Full screen, can control P/T/Z.
Video Loss
Display icons for system status:
OVERWRITE mode
Not overwrite mode and recording stop when HDD Full
Quad Split channel
Full screen display
AUTO SEQUENCE
(PIP) Picture in Picture
LOCK
USB mouse linkage
Remote clients connecting
Mobile Phone connecting
Searching mode
Playback mode

EL-904
10
Live / Record Mode Icons :
HD1
Working HDD
98%
Left capacity of HDD space
09/08/12
Date
11:25:26
Time
說明:
Quad mode
Press the icon, can get into the OSD
menu
Playback
Back up / Press the left side of mouse,
can get into the back up OSD or do the
quick back up.
Playback Icons :
Stop
<<
Backward x2/x4/x8/x16/x1/2/x1/4/x1/8
<
Play back x1
>
Play forward x1
>>
Forward x2/ x4/x8/x16/x1/2/x1/4/x1/8
II
Pause
Back up
Quad display

EL-904
11
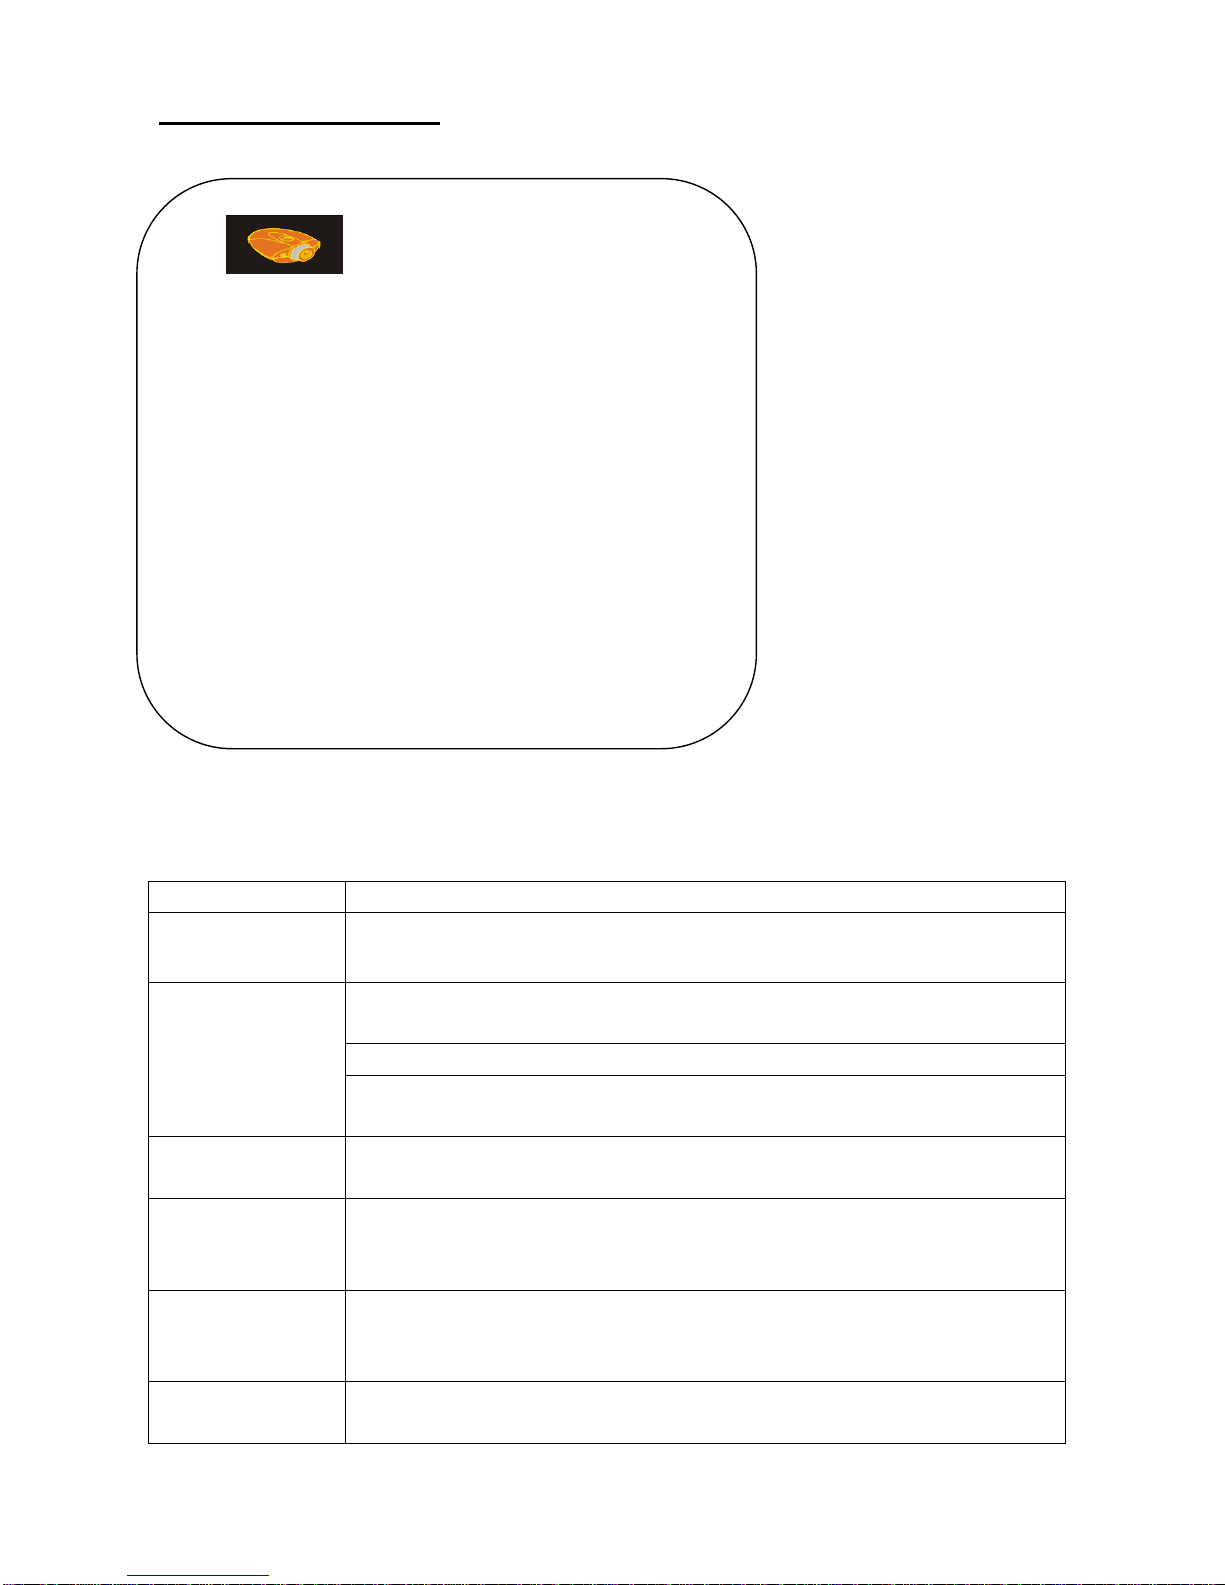
4.Main Menu
4.1 Main Menu Overview
Figure4.1.1: Main Menu
Press button to enter main menu. (Figure 4.1.1) The Main menu contains
the majority of programmable options for the DVR. Each item in the Main menu is
described in this chapter. Main menu items are appeared in the same order they
appear in the menu.
As following are basic steps to set menu item values/ parameters:
1. Use mouse to select setup item.
2. Press left side of mouse button to enter submenu.
3. In submenu, use, please scrolls of mouse to decide the value (+/-) to change
parameters.
4. Press” right side of mouse to go back to previous MENU page or MAIN MENU
page.
Main Menu

EL-904
12
4.1.1 OSD Menu Tree
Menu tree provides user an overview of the main menu. This menu tree is also a
quick reference for Main Menu.
1.Channel Set up
1.Camera no
2.Camera title
3. Record rate
4. Audio Record
5. Camera color
6. Motion detect Set
7. RS485 ID
8. Baud rate
9. P/T/Z speed
2.Record set up
1. schedule set up
2. Continuous Set up
3. Motion Record
4. Alarm Record
3. Back UP set up
1. Back up time
2. Media: ( USB)
4. Network Set up
1.Network model
2 DDNS Set up
3.Mobile phone connect set up
5. System Set up
1. DATE/ TIME
2. Password set up
3. Language set up
4. Buzzer set up
5. Sensor set up
6. DVR ID set up
6. HARD DRIVE SET UP
1. Hard drive info summary
2. HDD format
3. Overwrite Enable
4. Auto Format Time
7. DISPLAY SET UP
1. DATE/TIME
2. Live title
3. PB Title
4. Event status
5. DVR status
6.. Board color
8. Version Set up
1. Load factory
2. Format USB
3. Firmware upgrade
4. Load PC player
9. Motion Set up
1.VGA resolution
2.Control Bar
3.motion trace mark
4. Sequence time.
5. call monitor time
6. mouse moving speed
EL-904
13
4.2 Channel set up
MAIN MENU --> Channel Set Up
In Channel set up function, users can adjust Channel title, color adjustment for each
channel, up the motion detect area and speed dome setting.
CAMERA
[ 01 ] The camera no willing to set up
TITLE
Each camera can set up 8 characters. ( from number/
English/ Russian optional )
RECORD
RATE
NTSC:[30 FPS][15 FPS][0 FPS]
PAL: [25 FPS][15FPS][0 FPS]
[0 FPS]: means that the camera will not record at any mode.
Recording resolution is decided by the record mode during
setting
AUDIO
RECORD
Set up audio function / Default to be [on] The compression
audio method is G.723
Color
Adjustment
BRIGHTNESS [ 3 2 ]
CONTRAST [ 4 2 ]
SATURATION [ 3 8 ]
AREA SETUP
Motion area to be (16x16), (click mouse twice to decide
choose all chosen or all off. Can move mouse cursor to
decide the area.
SENSITIVITY
The Sensitivity of motion detects. There are three levels
[HIGH][MIDDLE][LOW]
Channel Set up
Camera [01]
Title [xxxx]
Record Rate [30 fps]
Audio Record [ON]
Brightness [32]
Contrast [42]
Saturation [38]
Area Set up
Sensitivity [high]
RS485 ID [001]
Protocol [Elitar]
Baud rate [9600]
PTZ speed [05]
EL-904
14
RS485 ID
Set up RS485 ID for each camera if connect with P/T/Z. ID
value from [001]~[256]
PROTOCOL
Choose the protocol of P/T/Z/ Default to be PELCO-P( Elitar
/ Pelco P/ , PELCO-D)
BAUD RATE
RS485t Speed [2400][4800][9600]
SPEED
PTZ speed setting from 01][02]~[09][10]
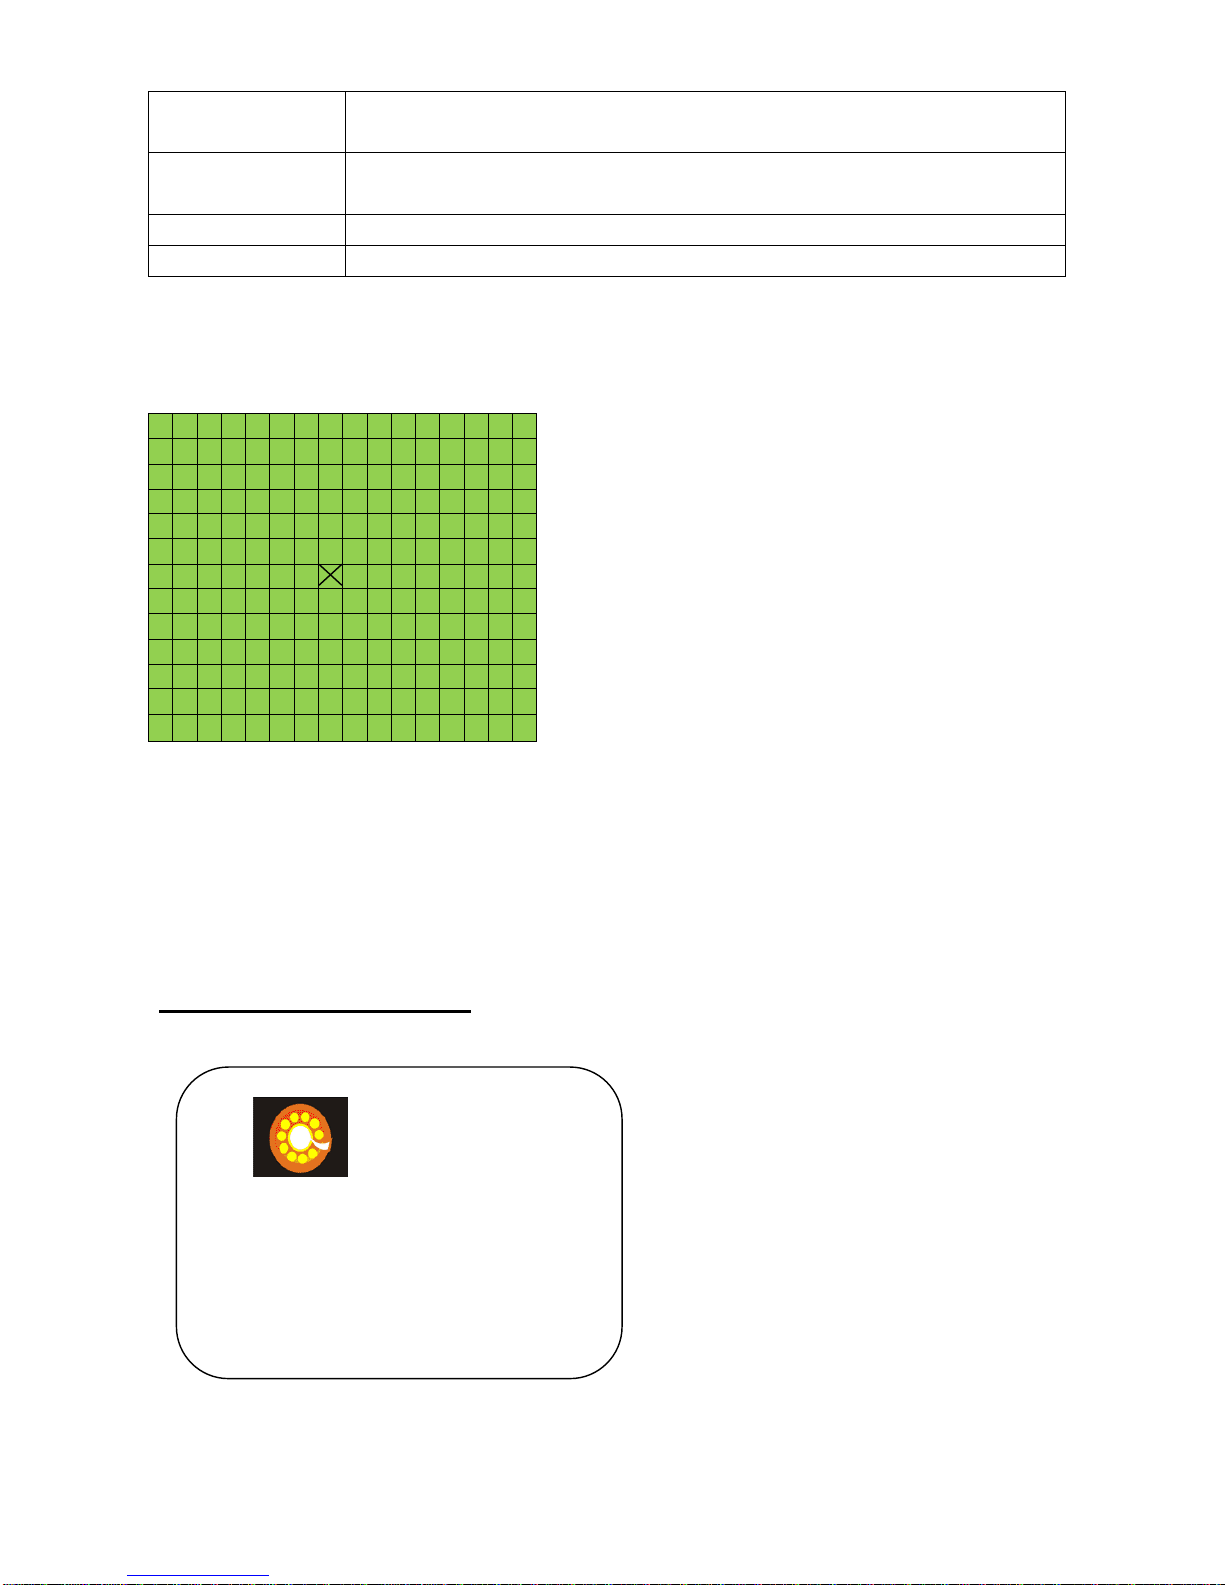
4.2.1. Area Set up
MAIN MENU --> Channel Set upArea Set up
In the motion area set up, there are 16x16 blocks. Users can move the cursor on the block
and double click the mouse. Then the area can be chosen to when the motion being
detected. While you click the cross in the center (or double press the enter button on the
IR remote control), it will choose the whole screen to be the detected area or clear all set
area.
4.3 RECORD SET UP
MAIN MENU --> Record set up
This menu allows you to set for recording functions on DVR such as schedule recording/
recording modes (alarm / sensor recording). .
Record Set up
Schedule
Continuous Set up
Motion Record
Alarm record
Record OSD INFO [OFF]

EL-904
15
SCHEDULE
Recording according to schedule
CONTINUOU
S RECORD
Recording continuously
MOTION
RECORD
Recording according to motion detect setting
ALARM
RECORD
Recording according to alarm triggering
RECORD
OSD INFOR
Record together with OSD Date/ time. Default to be OFF
4.3.1 Record Schedule Set up
MAIN MENU --> Record Set up --> Record schedule set up
This item allows you to set Record schedule to be “Continuous recording (Blue )/
Motion recording (Red ) / Sensor Alarm recording (Yellow )/ None-Recording
(Green ) / Continuous + Motion Recording (Pink ) / Continuous + alarm recording
(Aquamarine ). You can use the mouse scroll or the +/- button on the IR remote control
the change the setting. In order to apply the setting to the whole day, you can single click
the mouse left button (or double press the ENER button on the IR remote control) on the 00
column of left.
4.3.2 Continuous recording Set up
MAIN MENU --> Record Set up --> Continuous Recording
This item allows you to set the recording parameters such as video quality / recording
Continuous Record
Record quality [Super High]
Record Resolution [704x480]
EL-904
16
resolution.
QUALITY
There are four levels. HIGH/ STANDARD/ NORMAL
The higher quality, the bigger file size of video.
RECORD
RESOLUTION
NTSC: [704X480][704X240][320X240]
PAL: [704X576][704X288][320X288]
4.3.3 Motion Recording Set up
MAIN MENU --> Record Set up --> Motion Recording
This item allows you to set the parameters in motion recording mode such as video quality /
frame rate/ Pre or post- recording time.
QUALITY
There are four levels. SUPER HIGH/ HIGH/
STANDARD/ NORMAL
The higher quality, the bigger file size of video
RECORD RESOLUTION
NTSC: [704X480][704X240][320X240]
PAL: [720X576][704X288][320X288]
PRE RECORD
The system will automatically store the file
before events.
POST RECORD TIME:
After motion triggering, the recording time can be
set up from [10][20]~[50][60]
Motion Record
Record quality [High]
Record Resolution [720x480]
Pre record time [30] Sec
Post record time [30] sec

EL-904
17
4.3.4 Sensor recording Set up
MAIN MENU --> Record Set up --> Sensor Recording Set up
This item allows you to set the parameter in sensor recording mode such as video quality /
frame rate/ pre or post- recording time.
QUALITY
There are four levels. SUPER HIGH/ HIGH/ STANDARD/ NORMAL
The higher quality, the bigger file size of video
RECORD
RESOLUTION
NTSC: [720X480][720X240][360X240]
PAL: [720X576][720X288][360X288]
PRE RECORD
The system will automatically store the file before events.
POST RECORD
TIME:
After motion triggering, the recording time can be set up from
[10][20]~[50][60]
4.4. BACK UP
MAIN MENU --> Back Up
Alarm Record
Record quality [Super High]
Record Resolution [704x480]
Pre record time [30]
Post record time [30] Sec
Back up Set up
HDD Record files Summary
YY/MM/DD HH:MM
Begin 09/02/21 10:50
End 09/02/21 14:50
Backup Time Length:
Begin 09/02/21 10:50
End 09/02/21 14:50
Backup Media: USB [ENTER]

EL-904
18
In this item, users can realize the time of the full recording time on HDD and also choose
the time for back up. After finishing choosing the period of back up, then users has to
choose the device for back up, In the back up devices, user can use USB disk to do the
back up.
HDD
Summary
That shows the current recording time ( start to end ) in the
HDD.
Back up time
length
Please choose the back up BEGIN and END TIME.
Back up
Media
Please enter USB back up to do the back up operation.
NOTE: USB disk will be formatted by DVR and if the backup warning shown on the
screen as the following, that means the storage is not enough and please change
another USB disk to do back up.
BACKUP WARNNING:
REQUIRE STORAGE: 352 MB
USB DRIVE STORAGE: 1 GB
FORMATAND BACKUP: [ENTER]
PROCESSING, PLEASE WAIT...
4.5. Network
Main Menu Network
In the network setting, there are network mode (DHCP/ PPPOE/Static IP address) and
DDNS set up for dynamic IP address.
Network Set up
Mode: [Static]
DDNS Setup
Mobile Phone connect Set up

EL-904
19
4.5.1 Network mode
MAIN MENU --> Network --> Network modes
In the Network mode, there are three kinds of connection to choose (Static IP address/
PPPOE/ DHCP Set up)
● Static IP address: You can select this option to enter IP address directly to access LAN or WAN. (Please
refer to 4.9.5.4 for more details)
● DHCP: If your network uses the DHCP server, select this option. According to this setting, the DVR will be
assigned an IP address from the DHCP server automatically. Every time when the DVR starts up,
please make sure that the DHCP server is set to assign a static IP address to the DVR.
● PPPoE: Select PPPoE mode, if your application requires a direct connection from an ADSLmodem through
the DVR's RJ-45 LAN port. The user ID and password are necessary to network connection
through PPPoE mode. (Please refer to 4.9.5.5 for more details)
4.5.1.1 Static IP
MAIN MENU --> Network --> Network mode -> Static Set up
Static Set up
Port [00080]
IP [192.168.001.001]
G/W [192.168.001.254]
Mask [255. 255.255.000]
DNS [000.000.000.000]
MAC [00-06-00-00-00-00]
Status Disconnect
[ENTER]
Table of contents
Popular DVR manuals by other brands


Sharp
Sharp TU-R252H Operation manual

Harman
Harman AMX NMX-NVR-N6123 user manual

Avtech
Avtech AVC700 user manual

SLD Security & Communications
SLD Security & Communications BLR-3004 Operation instructions

Digital Watchdog
Digital Watchdog VMAX AHD CORE DW-VAC44 user manual

LTS
LTS LTD8308K-ETC quick start guide


