Elitech ChloroChek Chloridometer 3400 User manual
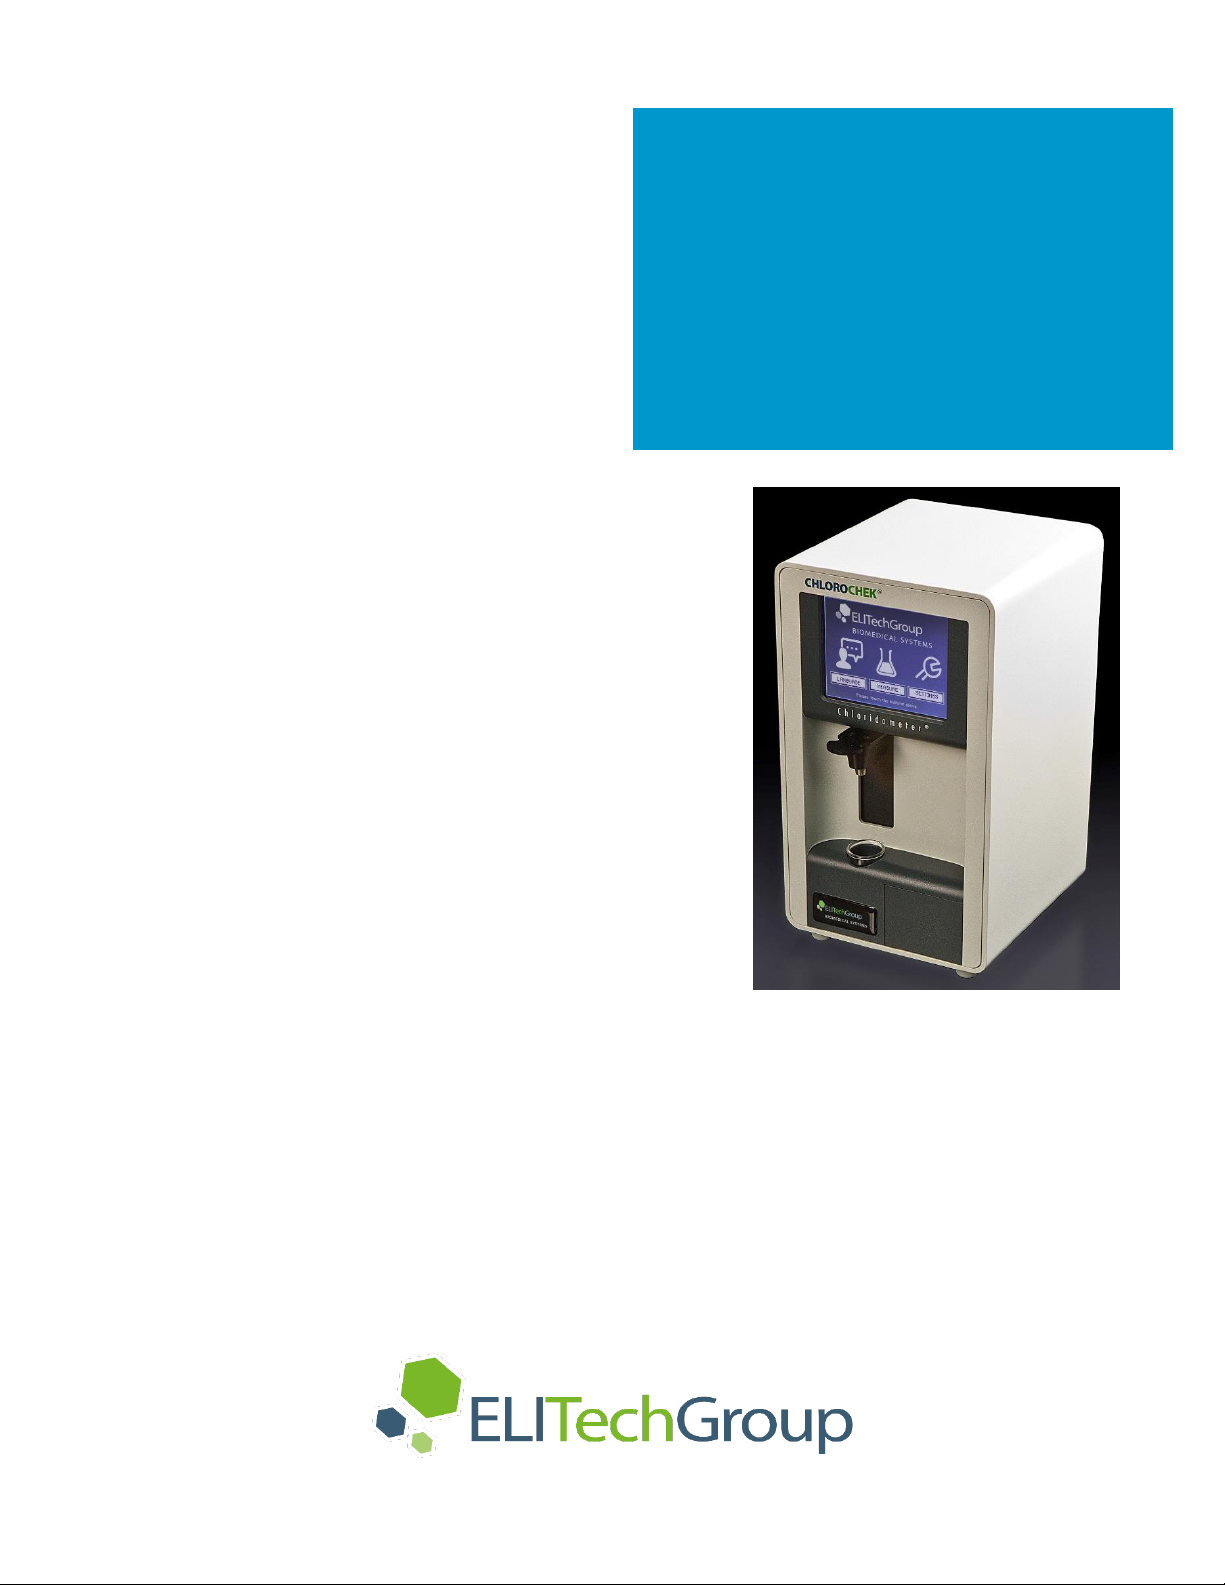
CHLOROCHEK®
M O D E L 3 4 0 0
User’s Manual
CHLORIDOMETER®
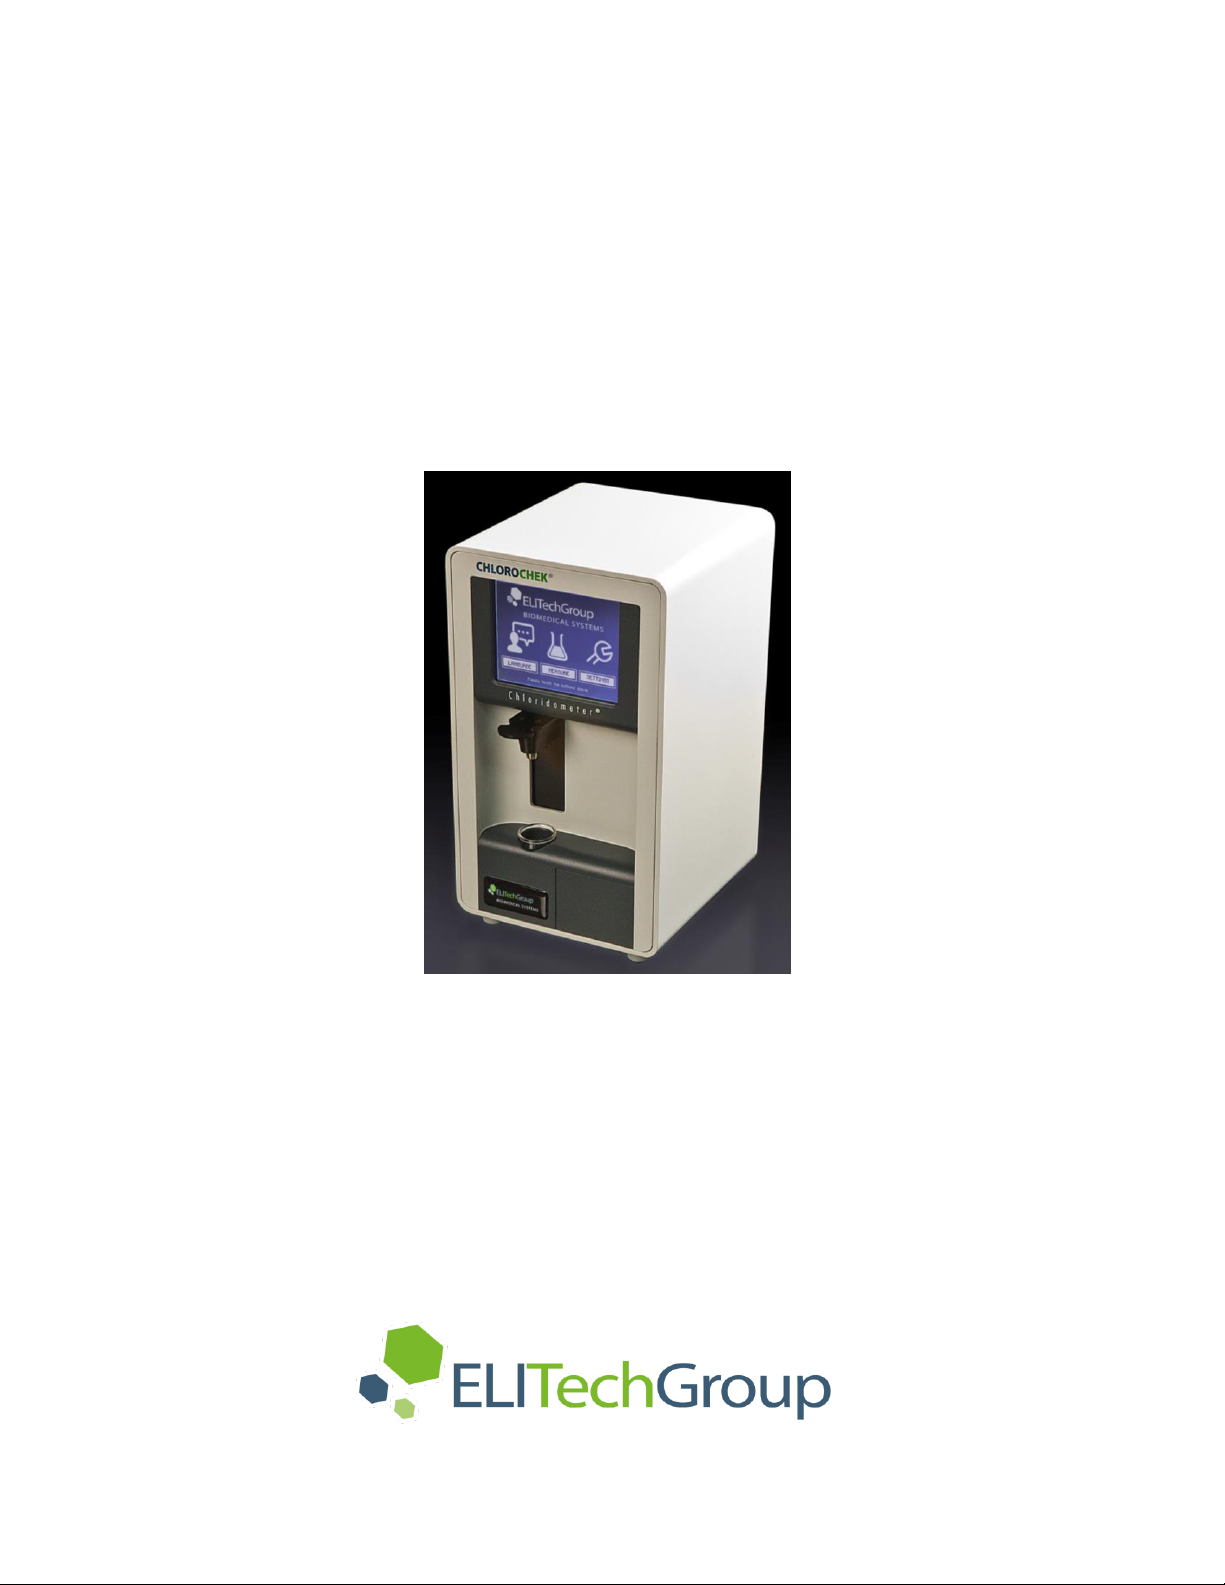
CHLOROCHEK®
Chloridometer®
Sweat Chloride Analyzer
Model 3400
USER’S MANUAL
57-2006-03B
(Last update 10/14/2020)

2
©2017 ELITechGroup Inc. All rights reserved. Printed in the United States of
America. The information in this document is subject to change without
notice.

3
TABLE OF CONTENTS
Section 1 - Introduction
1.1 ChloroChek Description............................................................................4
Section 2 - Safety and Handling Information
2.1 System Certification .................................................................................9
2.2 Buffer Solution, Gelatin Solution, and Standard Solution ........................10
Section 3 - Operating the ChloroChek
3.1 Menu Structure ........................................................................................11
3.2 Setup and Initial Description ....................................................................12
3.3 Installing Electrodes .................................................................................13
3.4 Preparing the Working Solution ...............................................................14
3.5 Conditioning .............................................................................................15
3.6 Quality Control .........................................................................................19
3.7 Sample Measurement ..............................................................................20
3.8 Ending a Measurement Series……………………………………………………………….24
Section 4 - Preventive Maintenance and Troubleshooting
4.1 Error Messages and Troubleshooting ......................................................26
4.2 Cleaning the Electrodes............................................................................27
4.3 Calibration and Meter Check....................................................................29
4.4 Cleaning the ChloroChek ..........................................................................30
4.5 Changing the Power Fuses or Voltage Setting..........................................31
Section 5 - Digital Data Management
5.1 Digital Data Output ..................................................................................32
5.2 Lab Options Menu Structure ....................................................................34
5.3 Log Format Options..................................................................................35
5.4 CSV Format...............................................................................................36
5.5 XML Format ..............................................................................................38
5.6 Legacy CSV Format ...................................................................................41
5.7 Error Messages.........................................................................................42
5.8 Checksums................................................................................................43
5.9 Using a Barcode Scanner for ID Input.......................................................44
Appendix A
Specifications..........................................................................................................45
Appendix B
Customer Service Information................................................................................46
Appendix C
Consumables, Accessories, and Replacement Parts...............................................47
Appendix D
Flow Charts for Sample Measurement using ID Management…………………………….48
Appendix E
Theory of Operation ...............................................................................................55
Appendix F
Reference Intervals for Sweat Chloride ..................................................................56
Appendix G
Returning Products for Warranty, Service, or Repair .............................................57
Appendix H
Performance Data...................................................................................................58
Appendix I
Bibliography............................................................................................................60

4
SECTION 1
INTRODUCTION
1.1 ChloroChek Description
INDICATIONS FOR USE
The ChloroChek Chloridometer test system is intended for the quantitative in vitro diagnostic determination of
chloride in human sweat using the principle of coulometric titration. Sweat chloride measurements are used in
the diagnosis of Cystic Fibrosis. It is for use in Clinical Laboratory settings. The ChloroChek Chloridometer test
system consists of the ChloroChek Chloridometer and the ChloroChek Reagent Set.
The ChloroChek Reagent Set (REF: SS-248), is to be used on the ChloroChek. It is used as the titration matrix
during the titration process.
The 100 mmol/L NaCl/H2O Standard Solution (REF: SS-251), is to be used on the ChloroChek. It is used as a
calibration verifier, and quality control solution.
ELITech Group Sweat Controls (REF: SS-150), levels #1, #2, and #3, are to be used on the ChloroChek. They are
used as quality control solutions.
SAMPLE INFORMATION
Specimen
Human sweat collected with ELITech Group’s Macroduct® Collector or by other means (see CLSI C34-A3 guideline
for more information).
Storage
Sweat is stable for at least 72 hours across a reasonable temperature range, 25-77 ˚F, (2-25˚C) without significant
evaporation when stored in 0.2-mL microcentrifuge tubes with snugly fitting caps (see CLSI C34-A3 guideline for
more information).
Interferences
Any salts containing chloride or other halides (halogens) such as fluoride, bromide, or iodide will interfere and
cause an elevated reading. CLSI acknowledges this in the C34-A3 guideline. “In addition to chloride, other halides
such as bromide and iodide are also detected using a chloridometer. Therefore, if a sweat sample contains other
halides in addition to chloride, they will be detected and can falsely elevate the sweat chloride result.” (1). Halides
including chloride may be present in lotions or creams, so it is important that the patient’s skin is properly
cleaned prior to collecting the sweat. Refer to the CLSI C34-A3 guidelines for cleaning the skin prior to pilocarpine
iontophoresis. Improperly cleaned skin prior to sweat collection can lead to higher than normal results, thus
leading to false intermediate or false positive results.
CAUTION!
It is critical that the skin is free of contamination before collecting a sweat sample to be used.
SPECIFICATION OF SAFE USE
Using this instrument in a manner not specified by ELITech Group may impair the safety protection designed into
the equipment and may lead to injury.
SAFE USE ENVIRONMENT
This device has been designed for indoor use only, between 41-104 °F, (5-40 C), maximum relative humidity
80%, at up to 87.8 °F (31 C). For use at altitudes up to 2000 meters.
For use with a supply voltage of 85 to 264 Volts AC @ 50 to 60 Hz, 10%. Transient Overvoltage Category II.
Pollution Degree 2 in accordance with IEC 664 (non-conductive pollution).

5
SECTION 1
INTRODUCTION
1.1 ChloroChek Description (continued)
PRECAUTIONS AND WARNINGS
•This equipment is for professional in vitro diagnostic use.
•Take standard precautions and adhere to good laboratory practices.
•To avoid contamination, clean the skin thoroughly and use clean or single use laboratory equipment while
collecting the sweat sample.
•To avoid contamination, use clean or single use laboratory equipment during the analysis of the sweat
sample on the ChloroChek.
•When opening the 100 mmol/L NaCl/H2O Standard Solution (REF: SS-251) ampule, carefully break ampule at
the correct location. The SS-251 ampule has a One Point Cut (OPC). Locate this point and break ampule by
pushing the top of the ampule back while holding onto the base. It is recommended to use a plastic sleeve
when breaking ampules. ELITech Group provides two protective sleeves with each new box of sweat controls
(SS-150).
•The reagent set contains acetic acid and nitric acid. If discharged in the plumbing system, rinse with plenty of
water.
The symbols defined below may appear on the packaging material of the instrument or supplies, on the serial
number label or in the operating instructions:
In-vitro diagnostic device
This product conforms to EC Directive 98/79 for in-vitro diagnostic devices
Attention! (refer to documentation) Please follow the safety notices in the equipment operating
instructions.
General Warning, Risk of Danger
Expiration Date
Batch Code
Catalog Number (Model Number
Consult Instructions For Use
Serial Number
RoHS Directive 2011/65/EU
Manufacturer
6
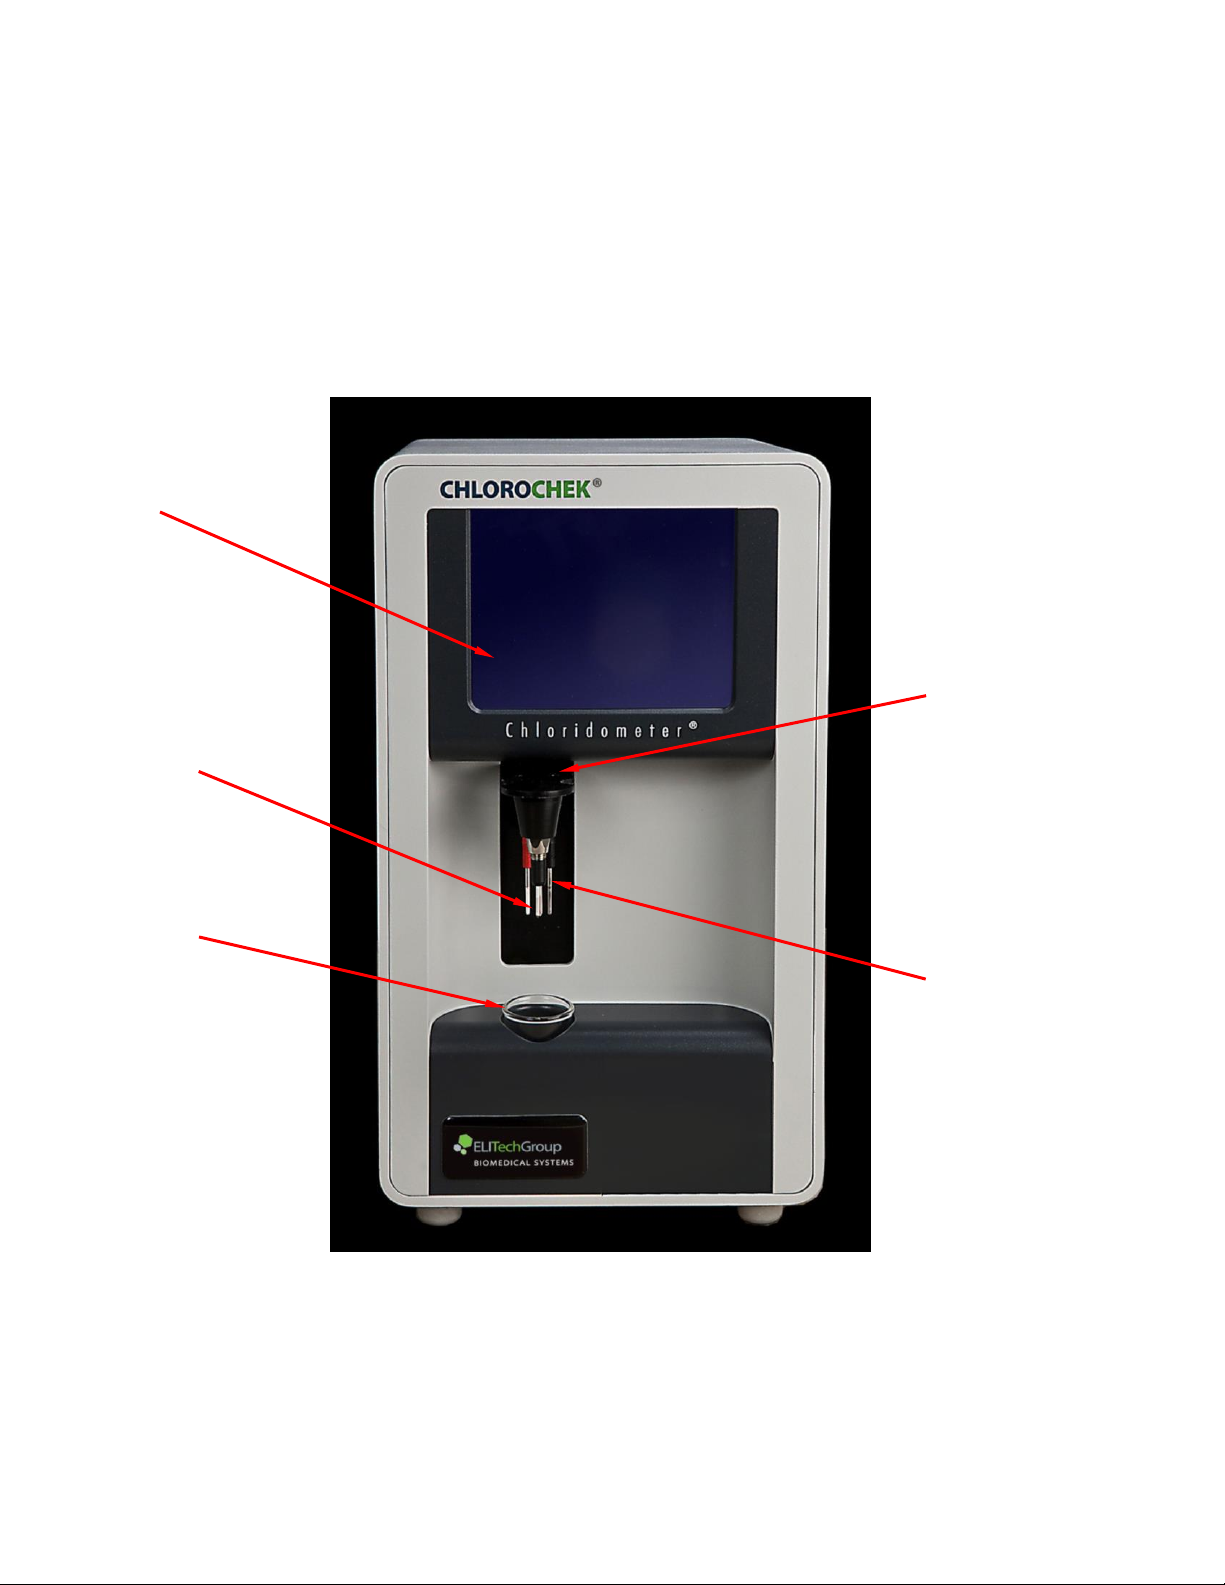
SECTION 1
INTRODUCTION
1.1 ChloroChek Description (continued)
Touch Screen/
Display
Measurement Electrode
Titration Beaker
and Holder
Handle for lowering
the electrode
carriage into the
titration beaker.
Pipette guides are
on the side of the
handle.
Instrument Front
Silver Electrodes
(Black housing = cathode
Red housing = anode)

7
SECTION 1
INTRODUCTION
1.1 ChloroChek Description (continued)
Instrument Rear Panel
Power Entry Module
Power Switch
I/on O/off
Product
Model/Serial
Number Label
Fuse holder for two-
phase fuse
protection of power
supply
COM 1 –Serial data
input port (Not
active in this model)
COM 2 –Serial data
output port. RS232
port.
USB data output
port.

8
SECTION 1
INTRODUCTION
1.1 ChloroChek Description (continued)
Unpacking the ChloroChek
After receipt of the shipment, the chloride meter should be immediately unpacked and checked for obvious signs
of damage sustained during shipping. If any damage is found, notify the manufacturer or distributor (see
appendix B for manufacturer contact information).
The packaging for this equipment was specially designed to ensure safe and hygienic transport. The packaging is
reusable. Please save the packaging in case the unit needs to be shipped back to ELITech Group for repairs or
service.
Packaging Contents
Check to make sure the contents of the shipment are complete.
Accessories and consumables included in the shipment:
Reference Number
Item Description
Quantity
Model 3400
ChloroChek Chloridometer
1
RP-481
Silver Electrode, red housing (anode)
1
RP-482
Silver Electrode, black housing (cathode)
1
RP-483
Measurement Electrode
1
RP-484
Titration Beaker
2
RP-485
Magnetic Stir Bar
2
RP-486
Magnetic Stir Bar Retriever
1
RP-487
Silver Cleaning cloth
1
RP-535
Data Cable Set (RS232/USB)
1
SS-248
Reagent Set (37 x 10 mL of SS-248BS, 1 x 30 mL of SS-248GS)
1
SS-251
100 mmol/L NaCl.H2O standard solution, 10 x 1.0 mL ampule
4
SS-150
Sweat Control Solutions, (level #1, level #2, level #3, 12 x 0.75 mL
ampule of each level)
1
AC-178
10 µL fixed volume pipette
1
SS-253
Pipette tips for ChloroChek (box of 960 tips)
1
AC-071
Ampule Organizer
1
AC-180
Squirt Bottle for Water (500 mL)
1
Power Cord
1
Document Pack including User Manual
1

9
SECTION 2
SAFETY AND HANDLING INFORMATION
2.1 System Certification
The ChloroChek is an electronic laboratory measurement device. It should therefore be handled according to the
safety provisions and precautions for electric measurement, control, and laboratory equipment.
Warning!
An apparatus with CLASS I construction shall be connected to a power outlet with a protective grounding
connection. Where the power plug or an appliance coupler is used as the disconnect device, the disconnect
device shall remain readily operable. To disconnect the equipment from the power remove the power plug
from the power outlet.
Provisions of Certification
CE compliance requires that the device together with the buffer solution, gelatin solution, and standard solution
and accessories be used in the manner described in this manual. Any deviation from the specification or
independent modification of the device, the buffer solution, gelatin solution, and standard solution or accessories
without the express consent of the manufacturer may result in a violation of CE requirement. Such action
invalidates the compliance statement and transfers responsibility to the originator of said actions.
NOTE:
If the equipment is to be decommissioned, make sure it is sufficiently disinfected. This will make sure the
equipment has been decommissioned in accordance with local accident prevention guidelines.
ChloroChek does not emit harmful substances during operation or when switched off.

10
SECTION 2
SAFETY AND HANDLING INFORMATION
2.2 Buffer Solution, Gelatin Solution, and Standard Solution
SS-251 100 mmol/L NaCl/H2O Standard Solution
Composition: 100 mmol/L sodium chloride in distilled water.
Container: Clear glass One Point Cut (OPC) ampule.
Nominal Volume: 1 mL.
Storage and Shelf Life: Up to the expiration date indicated on the packaging when stored in the ampule at 41-
113°F, (5˚ C to 45 ˚C). Do not use after expiration date.
Once ampule has been opened the shelf life is up to ½ hour at 71.6°F, (22˚ C).
The 100 mmol/L NaCl/H2O Standard Solution is not dangerous according to EC Directive 67/548/EEC.
NOTE:
The 100 mmol/L NaCl/H2O Standard Solution consists of chemicals. All precautionary measures and regulations
must be followed (do not swallow, do not taste, always wear gloves, etc.).
The ampules have a blue dot colored breaking ring. The ampule can be opened manually by breaking it off at this
point. Follow all safety precautions for the handling of glass (splintering, breakage, etc.).
Buffer Solution and Gelatin Solution (Working Solution)
The Buffer Solution and Gelatin Solution are hazardous materials according to EC Directive 67/548/EEC.
Information of safety and handling can be found in the attached safety data sheets.
The shelf life of a fresh Working Solution (a vial of Buffer Solution plus 20 drops of Gelatin Solution), is maximum
of 14 days when kept in a sealed opaque vessel and stored at 25-46.4°F, ( 2˚C to 8˚C). Working Solution (which
contains silver chloride) that is to be used for measuring purposes should be used as soon as possible since it can
react photochemically with light (reduction of the precipitated silver chloride into elementary silver). It is
recommended that a new working solution is prepared for each measurement series. The on-board stability of
the working solution is 24 hours at room temperature.
SS-248BS Buffer Solution:
Composition: Solution of: diluted acetic acid and nitric acid, pH 1.12.
Container: Screw top plastic vials.
Nominal Volume: 10 mL.
Storage and Shelf Life: Up to the expiration date indicated on the packaging when stored in the ampule at 41-
113°F, (5˚ C to 45 ˚C). Do not use after expiration date.
SS-248GS Gelatin Solution:
Composition: Gelatin Solution with pH indicator, pH 5-7.
Container: Screw top dropper bottle plastic vials.
Nominal Volume: 30 mL.
Storage and Shelf Life: Up to the expiration date indicated on the packaging when stored in the ampule at 41-
113°F, (5˚ C to 45 ˚C). Do not use after expiration date.
Read the Safety Data Sheets (SDS) for Buffer Solution and Gelatin Solution.
CAUTION!
Disposal of all waste material should be in accordance with local, state and Federal regulatory requirements.
The reagent set contains acetic acid and nitric acid. If discharged into the plumbing system, rinse with plenty of
water.

11
SECTION 3
OPERATING THE CHLOROCHEK
3.1 Menu Structure
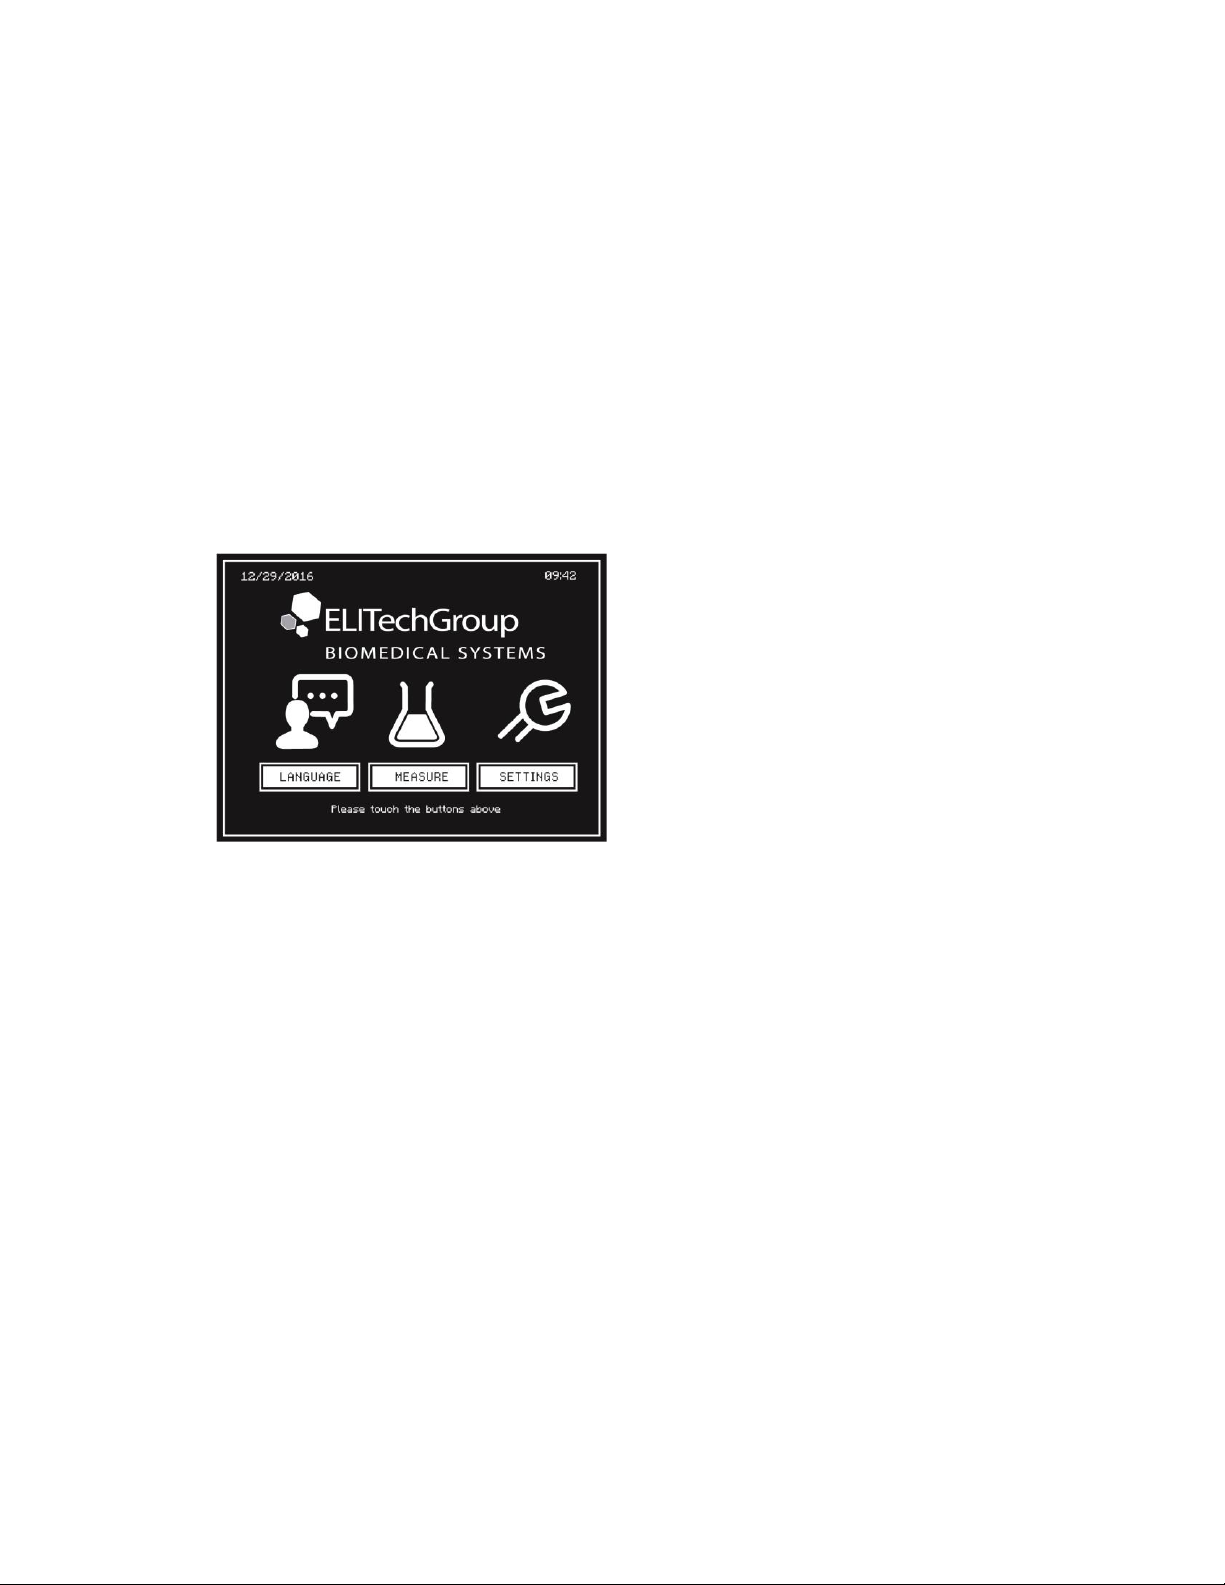
12
SECTION 3
OPERATING THE CHLOROCHEK
3.2 Initial Setup and Description
1Place the instrument onto a flat and solid surface, such as a laboratory table. Avoid direct sunlight on the
LCD screen for easier reading.
2Use the provided power cord to connect power from an outlet to the power entry module.
NOTE:
Ensure that the line voltage matches the voltage indicated by the arrow on the power entry module of the
instrument. If it does not, see Section 4.5 to change the voltage on the instrument.
3Turn the power switch ON (I). After a short self-test the welcome screen appears on the display. This
screen features three touch-sensitive buttons. This is the home screen:
4Operating the ChloroChek is very easy using the touch screen display. Users can select between the
menu items LANGUAGE, MEASURE, or SETTINGS by touching the corresponding button.
In the LANGUAGE menu, the user can select between German, English, Spanish, French, and Brazilian
Portuguese.
In the SETTINGS menu, user can perform basic settings; to leave this menu press BACK. Setting options
include Info (displays brief information about the system), Display (adjust contrast of the screen), Screen
saver (select the amount of time until the screen saver activates, from 1 minute to 60 minutes). In order
to avoid damage to the screen it is recommend that the screen saver be used.
The Settings menu contains the ID Management options. Users may select from automatic, numeric,
alphanumeric, or none for ID type for a series of measurements (Batch ID) and individual samples
(Sample ID). Automatic IDs will assign running numbers automatically, numeric IDs are assigned manually
using the on-screen numeric keypad, alphanumeric IDs are assigned manually using the on-screen
alphanumeric keypad, and selecting none will not assign any ID to batches or samples. Prompts during
sample measurement are dependent on selection of ID type and will be discussed in section 3.7.
In the Settings menu there are also the Lab and Service menus. The date and time displayed on the
ChloroChek is changed inside the Lab menu. The Lab menu can be password protected with a password
set by the lab if they desire. The Service Menu is protected by a manufacturer generated password. Only
trained personnel should access this Service menu.
In the MEASURE menu user can prepare the instrument for operation.
13
SECTION 3
OPERATING THE CHLOROCHEK
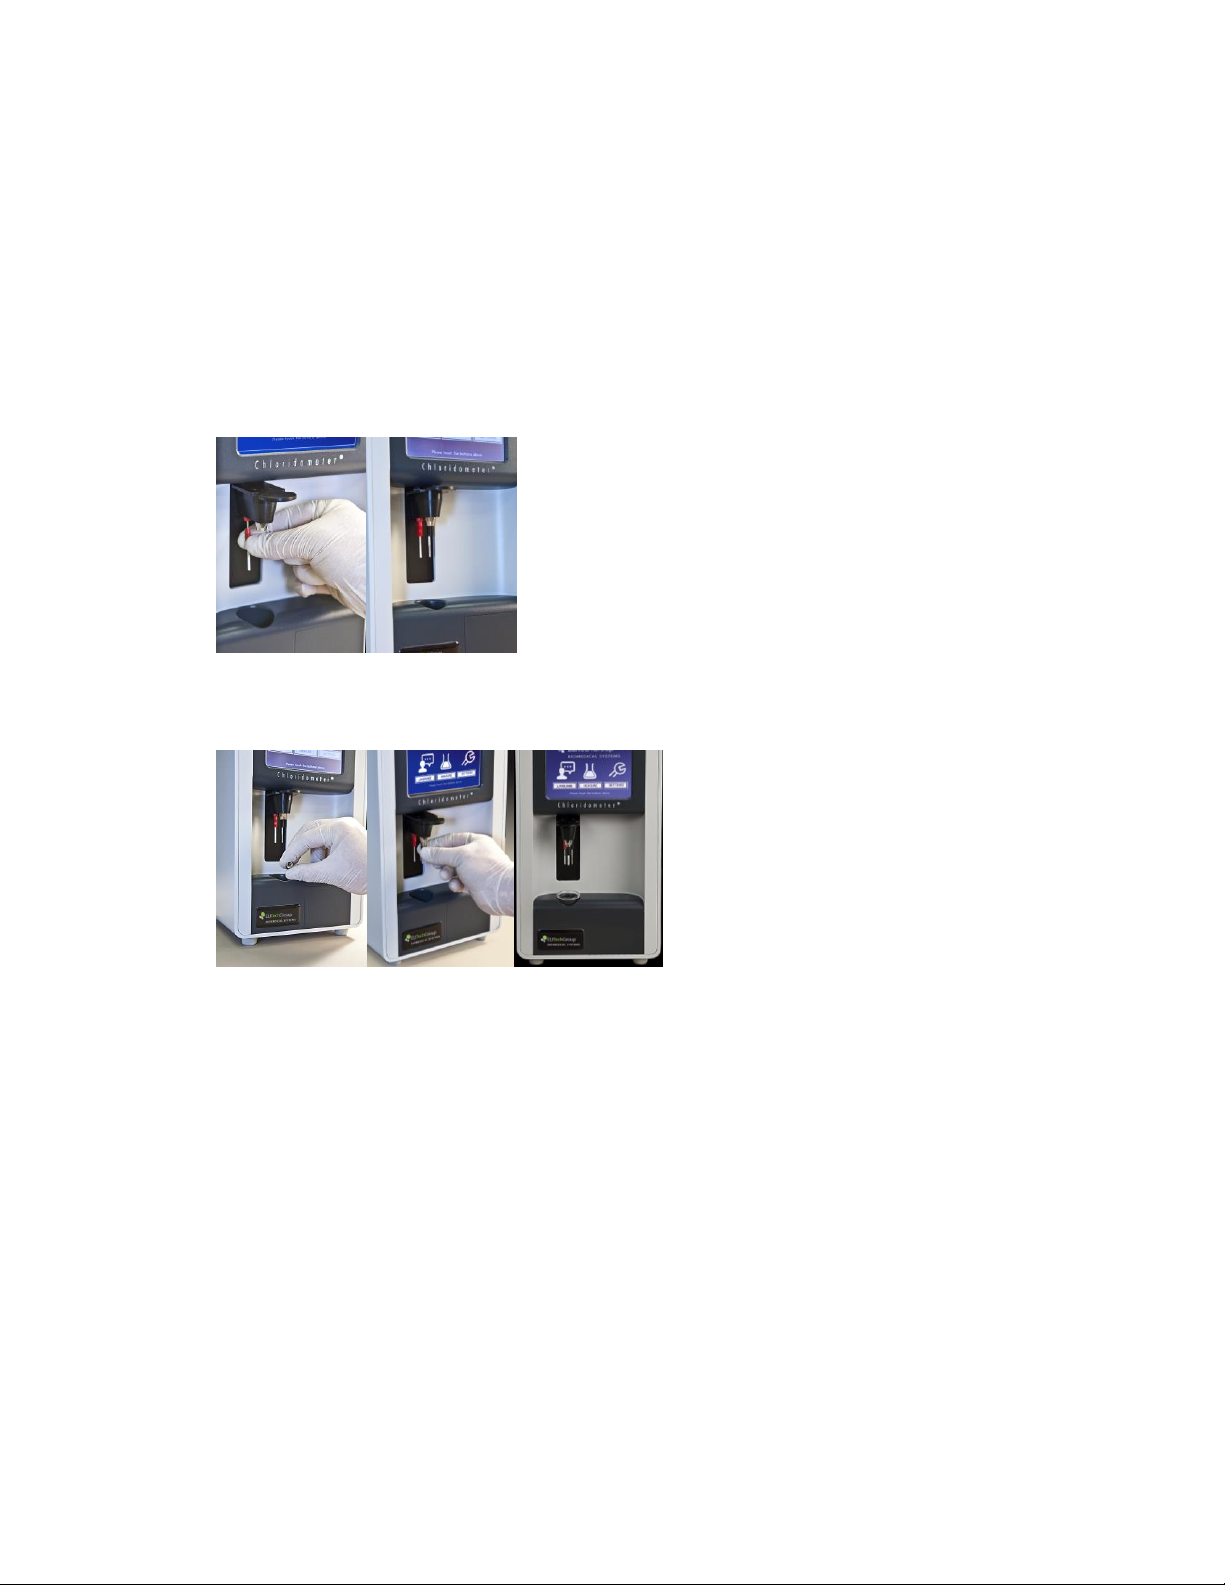
3.3 Installing Electrodes
Hands should be gloved so that the electrodes and beaker are not contaminated.
1The Electrode Carriage must be in the up position.
2Install the anode (red housing) and cathode (black housing) electrodes in the appropriate colored
receptacle. The short side of the electrode goes into the receptacle leaving the long end exposed.
3Install Measurement Electrode. The Measurement Electrode must be aligned to match the 3-pin
connections without binding. Push the Measurement Electrode straight into the receptacle when the
pins have been correctly aligned. The Measurement electrode is not screwed into place.
14
SECTION 3
OPERATING THE CHLOROCHEK
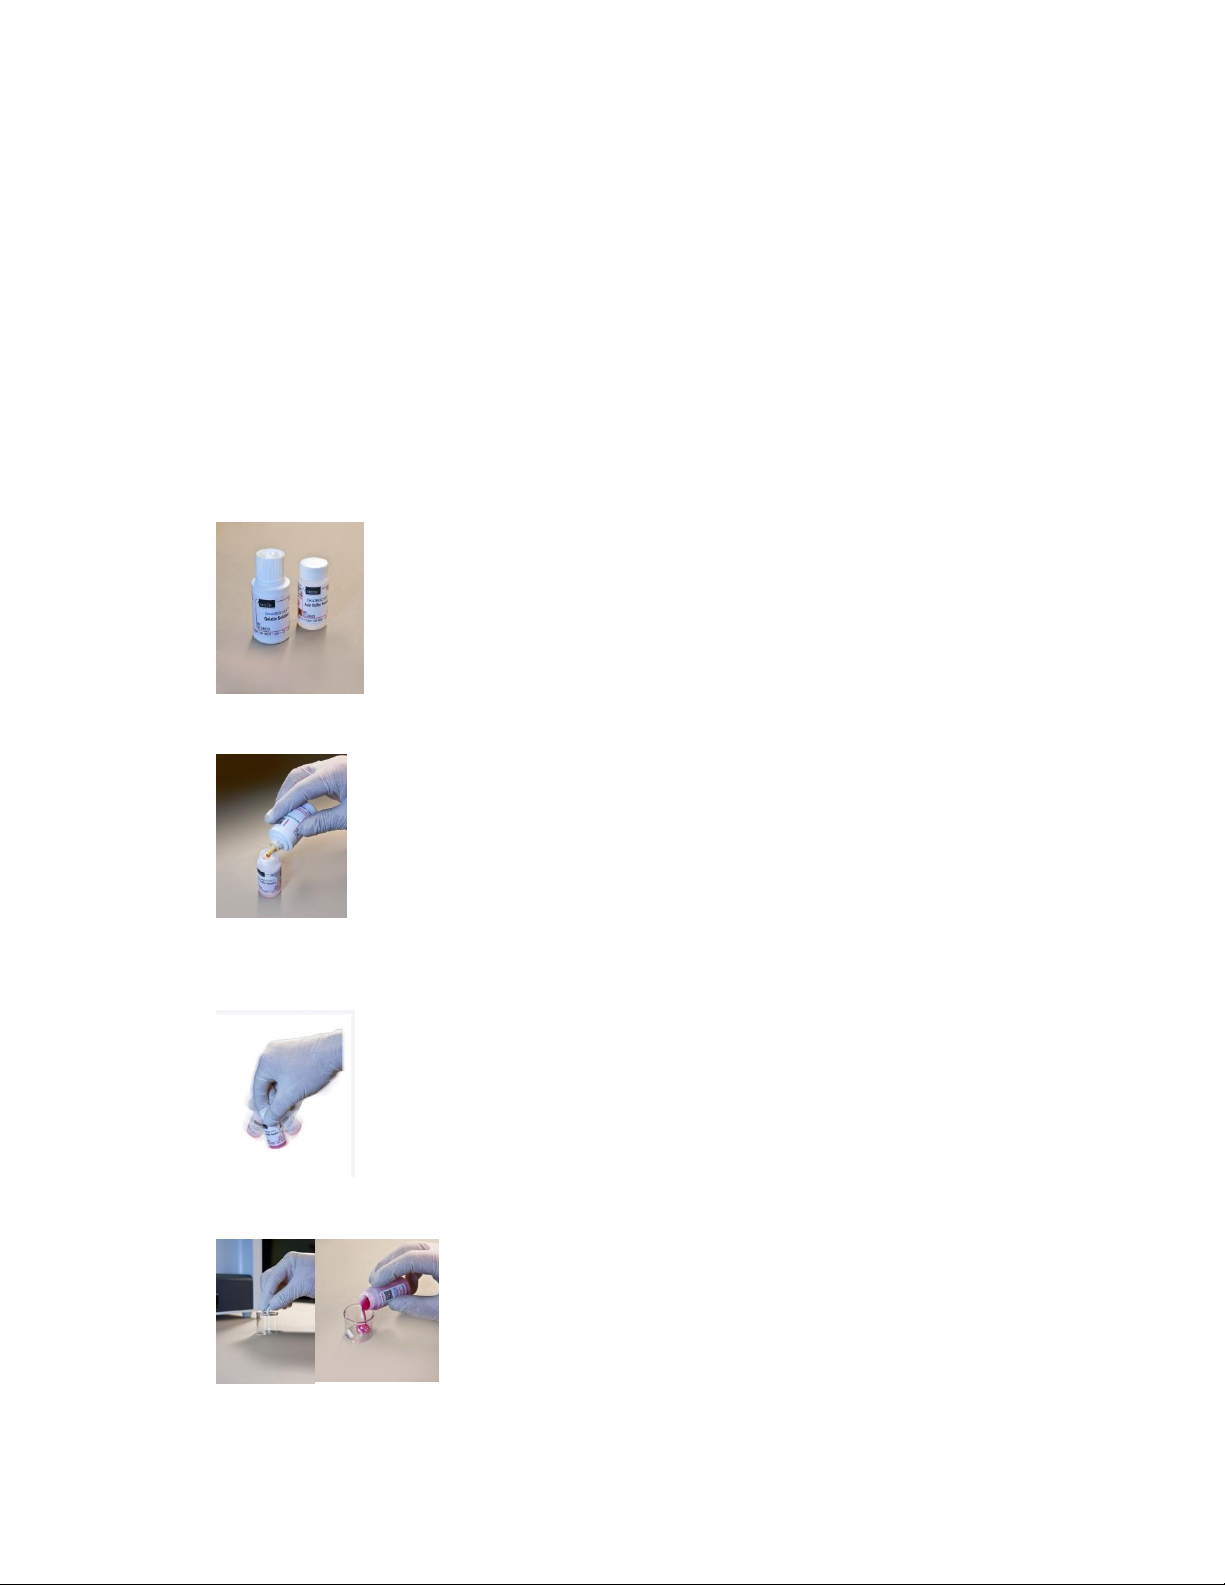
3.4 Preparing the Working Solution (Reagents)
A fresh Working Solution must be prepared each day before using the ChloroChek.
Appropriate good laboratory practices should be followed, including using appropriate personal protective
equipment (PPEs). Refer to SDS.
NOTE:
The Reagent Set (SS-248) contains 1 bottle of SS-248GS and 37 flasks for SS-248BS. The 1 bottle of SS-248GS
contains enough Gelatin Solution to prepare all 37 flasks of SS-248BS. Each flask of SS-248BS contains 10 mL of
Buffer Solution.
1Add 20 drops of Gelatin Solution (SS-248GS) to one flask of Buffer Solution (SS-248BS).
2Put the cap back on the flask and carefully swirl or invert it to mix it thoroughly. This forms the “Working
Solution.”
3Place the Magnetic Stir Bar (RP-485) in the Titration Beaker (RP-484). Pour the freshly prepared Working
Solution into the Titration Beaker.

15
SECTION 3
OPERATING THE CHLOROCHEK
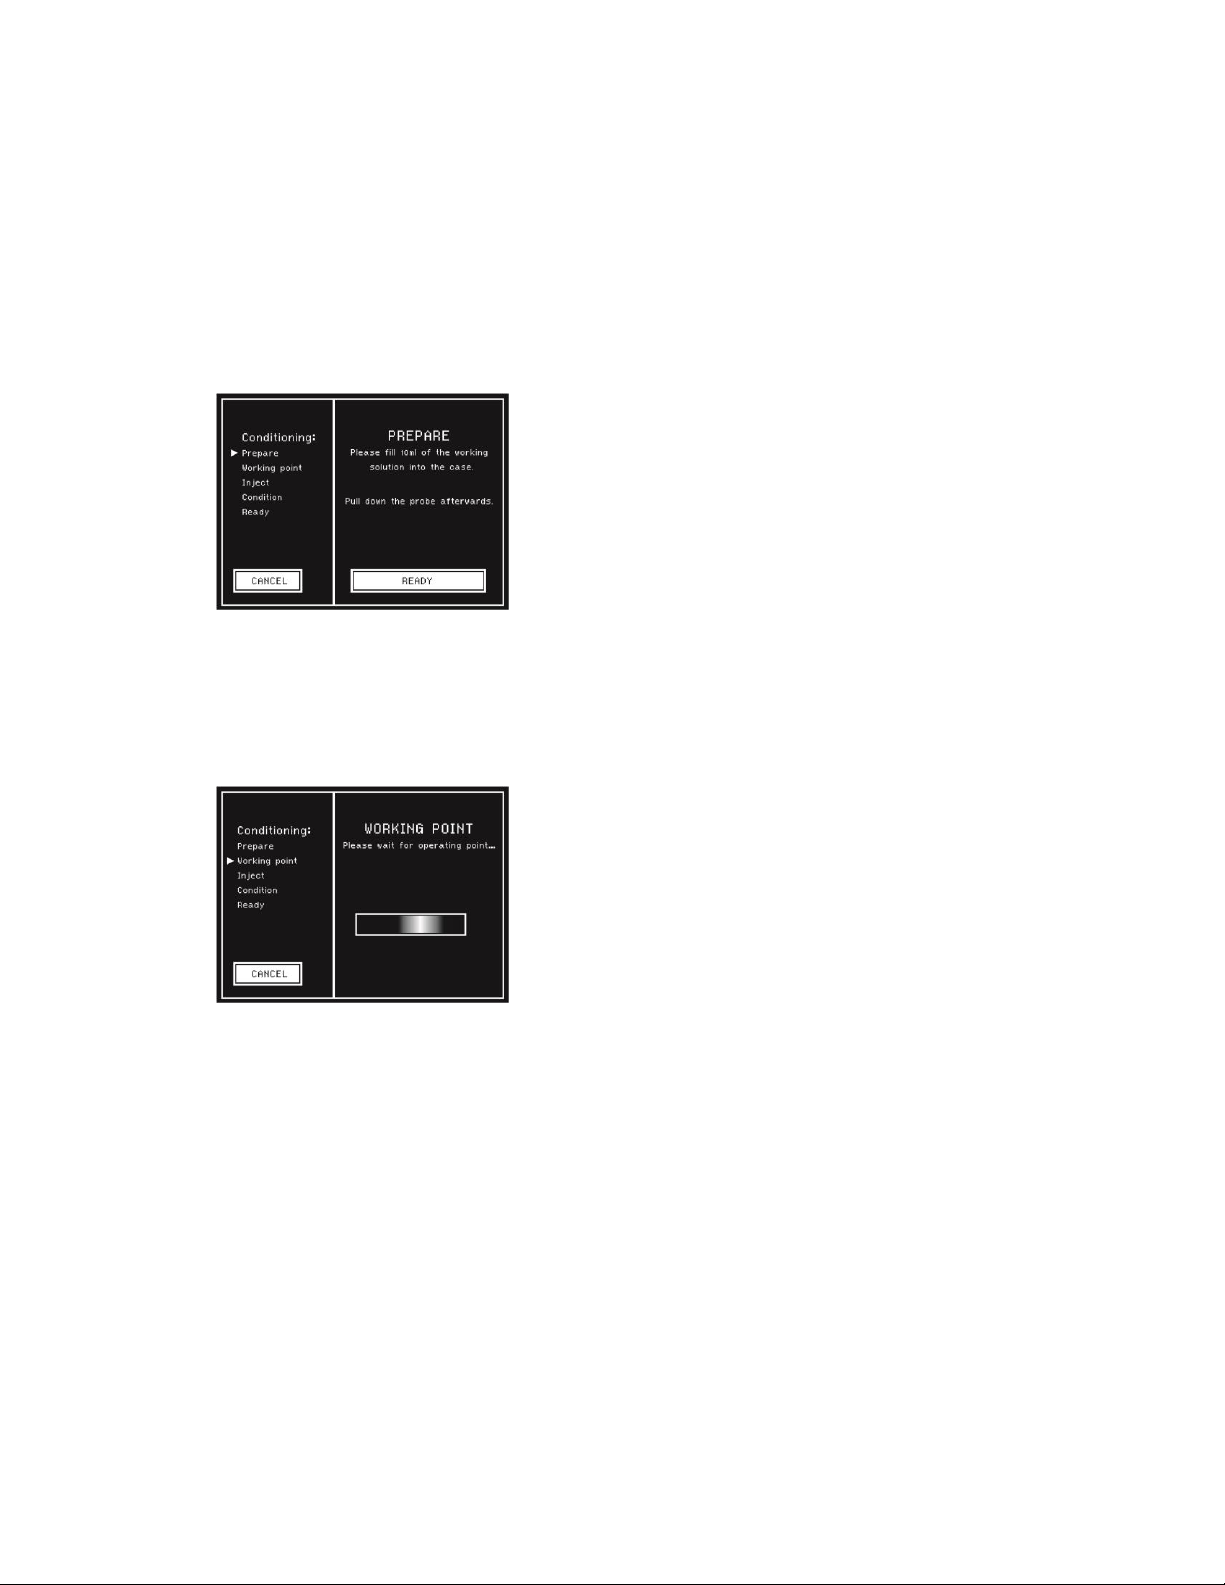
3.5 Conditioning
NOTE:
Conditioning must take place whenever a new Working Solution is prepared and used. A new Working Solution
should be prepared and used each day.
1With the instrument on, press MEASURE on the display.
2Place the filled titration beaker in the beaker receptacle.
3Lower the handle to bring the electrode set down into the Working Solution and the Ready button will
appear.
16
SECTION 3
OPERATING THE CHLOROCHEK
3.5 Conditioning (continued)
4Press the READY button on the display.
NOTE:
Pressing CANCEL ends the conditioning cycle and returns user to the Main screen. If this is done, the Working
Solution must be replaced.
5In the following display, the user will be asked to wait until the system has reached its Working Point. A
runtime display under the message visualizes this process. Proceed immediately to the next step.

17
SECTION 3
OPERATING THE CHLOROCHEK
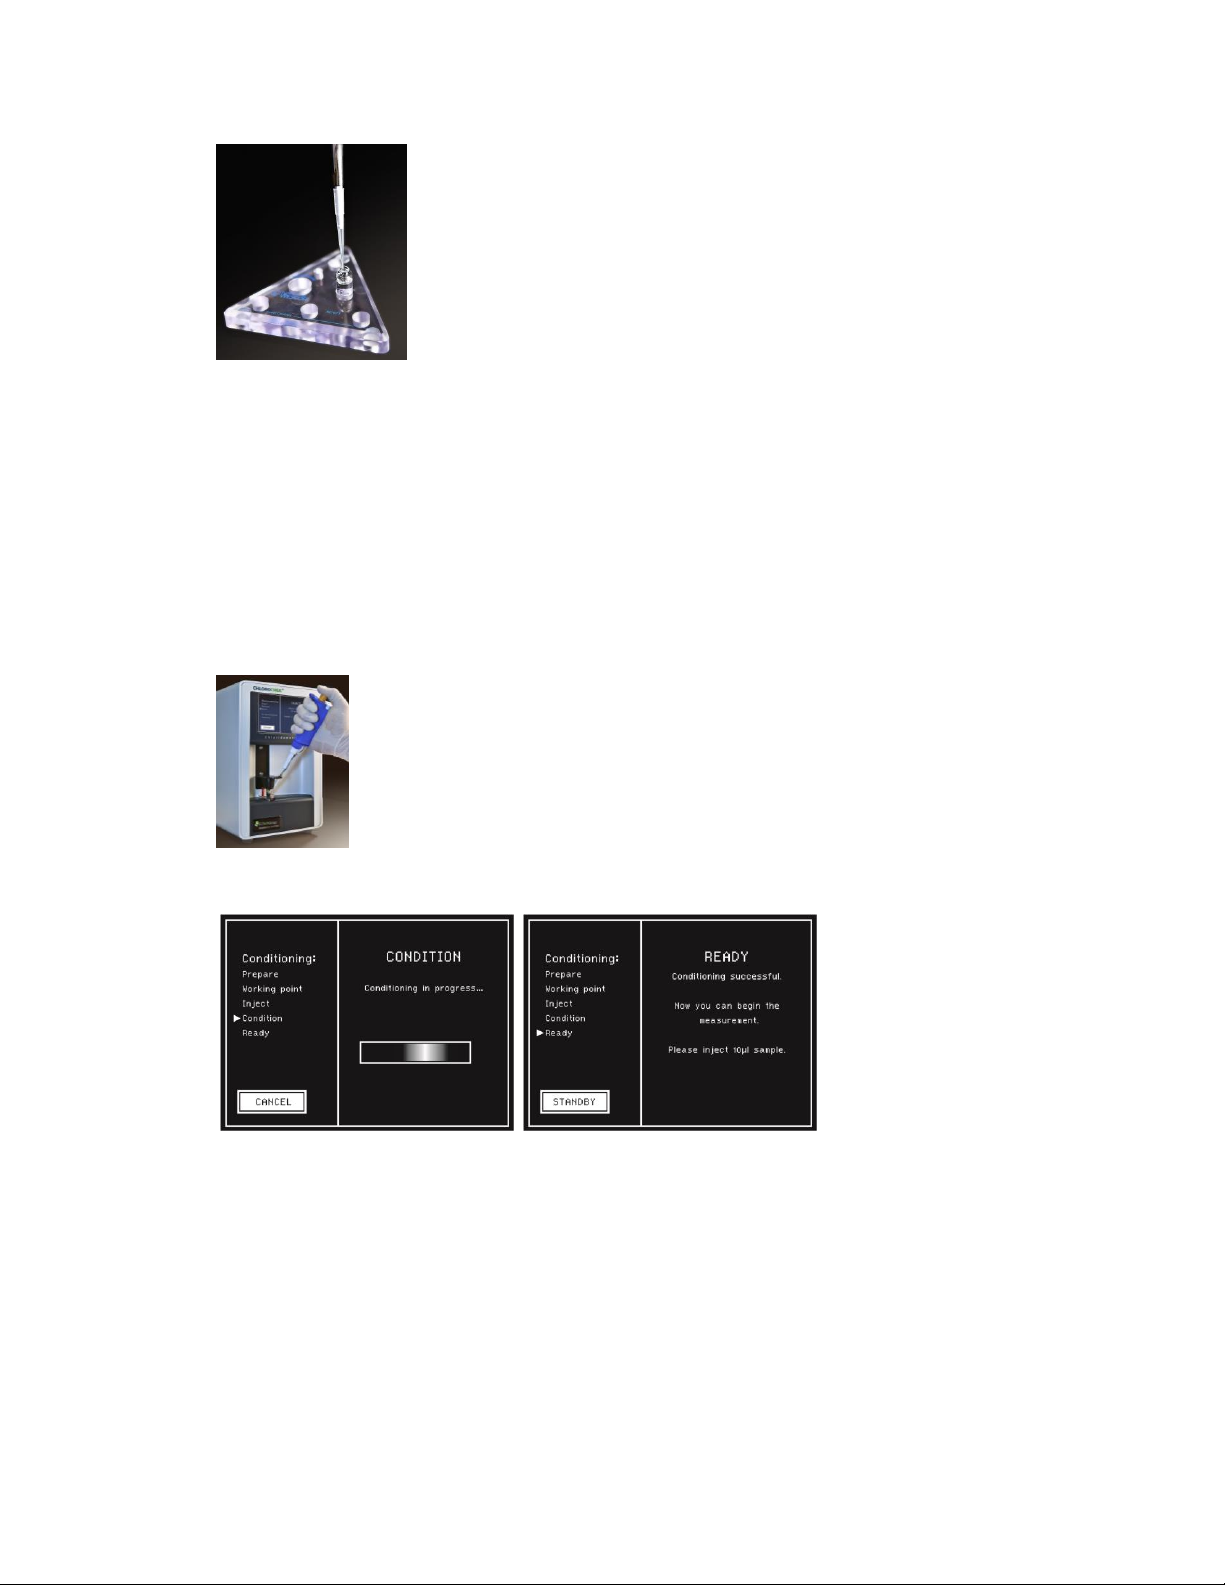
3.5 Conditioning (continued)
6After the working point is reached, user will be instructed to pipette 10 µL of the 100 mmol/L NaCl/H2O
Standard (SS-251) into the Working Solution.
To open the standard, first ensure that the fluid is in the bottom of the ampule. Hold the One Point Cut
(OPC) ampule of SS-251 steady in one hand. With the other hand, carefully break off the head of the
ampule with only slight pressure across the printed point (blue dot) on the neck of the ampule. Use a
protective plastic sleeve when opening the ampule.
7Place a correctly-sized pipette tip onto a 10 µL fixed-volume piston pipette. ELITech Group has an
appropriate pipette (AC-178) and pipette tips (SS-253) available.
8Place the pipette tip well into the 100 NaCl/H2O mmol/L Standard Solution, holding the tip in the
solution during the entire filling phase. Avoid drawing air into the pipette during the filling phase. Allow
the piston to smoothly and slowly retract until it has returned to its initial position. Wait for about one
second and then remove the pipette tip from the solution. If there are drops on the outside of the
pipette tip, carefully remove them with a lint free tissue—do not draw out any solution from the pipette
tip (through capillary forces of the paper tissue)—or if necessary, repeat the process with a new pipette
tip.
18
SECTION 3
OPERATING THE CHLOROCHEK
3.5 Conditioning (continued)
9Using one of the pipette guides found on the sensor carriage, place the loaded pipette tip as near as
possible in the center of the stirring Working Solution. Dispense the sample above the working solution,
allowing the sample to drop into the working solution. Avoid dispensing the sample near the electrodes
or the sides of the beaker. Press the pipette piston down to the second pressure point to completely
eject the solution. Remove the pipette from pipette guide and discard the tip.
10 When the ChloroChek recognizes the added standard solution, the display will read: CONDITIONING.
11 When the conditioning is complete, the ChloroChek is ready to use.
NOTE:
In cases where conditioning is not successful, user must clean the electrodes and prepare a new Working Solution
(see Section 3.3).
NOTE:
On rare occasions the ChloroChek may skip the conditioning step and move directly to the ‘Conditioning
Successful’ screen. This usually happens when the electrodes are new or extremely clean. If this occurs and
‘Conditioning Successful’ appears on the screen, run the Quality Control solutions (Section 3.5). If Quality Control
solutions produce the expected results, the ChloroChek is validated and ready to test unknown samples.

19
SECTION 3
OPERATING THE CHLOROCHEK
3.6 Quality Control
To ensure adequate quality control, Sweat Control Solution (SS-150) should be run at all three levels and the 100
mmol/L NaCl/H2O Standard Solution (SS-251) should be assayed before running any patient samples. This must be
done at least once a day and after conditioning with a freshly prepared Working Solution.
The control frequency should be adapted to Quality Control procedures of each laboratory and any regulatory
requirements. Results should be within the defined ranges.
If values fall outside of the defined ranges, then clean the measurement electrodes (see Section 4.2) or check the
accuracy of the pipette (see Section 4.1). Quality control materials should be used in accordance with local, state,
and/or federal guidelines.
NOTE:
Over time and use the anode (red housing) silver electrode will be used up as it precipitates with the chloride
ions. This electrode will have to be replaced periodically as it gets smaller. As long as the ChloroChek passes
quality control the anode is still usable for sample measurement.
Table of contents
Popular Test Equipment manuals by other brands

Cablescan
Cablescan 90 Series Setup manual

Teledyne
Teledyne USB-PD TDMP instruction manual

DAKOTA ULTRASONICS
DAKOTA ULTRASONICS PR-8V Operation manual

JDS Uniphase
JDS Uniphase IP Video Test Option HST-3000 Product guide

Vermason
Vermason 223002 Installation, operation and maintenance

Agilent Technologies
Agilent Technologies 1100 Series user guide


