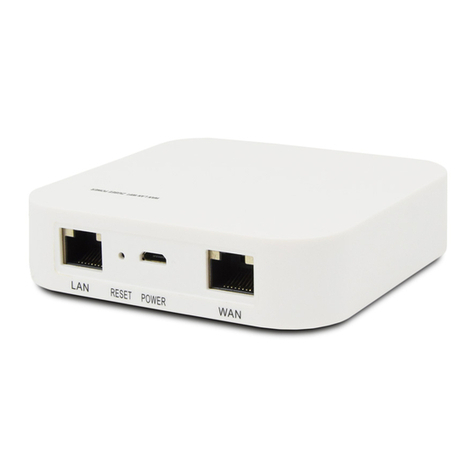
Elitegroup Computer Systems GWS-HZW1 User manual


i
Table of Contents
Product Introduction 1
Model 1
What’s in the Box? 2
Installing Micro SIM Card 3
Steps 3
Power on your device 4
Steps 4
Product Feature 5
LED Indicator Behavior 6
Using GWS-HZW1 7
Powering the System 7
System Login 7
Program Examples 16
Intel Quark - Programming GPIO From Linux 16
Digital GPIO - Sysfs Interface 16
GPIO Information 16
Examples For LED GPIO Control Method 16
產品介紹 18
型號 18
包裝內容 19
安裝MicroSIM卡 20
步驟 20

ii
設備供電 21
步驟 21
產品規格特色 22
指示燈行為 23
使用GWS-HZW1 24
系統啟動 24
系統登錄 24
網路設定 26
WiFi網路設定 29
Bluetooth設定連結 31
4GLTE網路設定 32
程式範例 33
IntelQuark-ProgrammingGPIOFromLinux33
DigitalGPIO -SysfsInterface 33
GPIOInformation 33
L E D G P I O 的 控 制 方 法 舉 例 3 3
注意事項 35

1
Product Introduction
Model
GWS-HZW1
Reset
Power Switch
DC Input Port
Debug Client Port
5
5
7
7
1
1
2
2
3
3
4
4
6
6
USB Port
LAN Port
SIM Card Slot

2
What’s in the Box?
GWS-HZW1 Home Gateway
User Quick Guide
Power Adapter (12V DC, ASIAN POWER DEVICES INC.
WA-24Q12FU) *
Note: *Only the enclosed adapter can be used to this
device.

3
Installing Micro SIM Card
1. Locate the SIM card slot.
2. Insert the Micro SIM card gently.
Steps:

4
Power on your device
1. Plug the adapter to AC wall outlet.
2. Connect the Power adapter to the device.
3. Turn the power switch to the ON position.
Note: *LED power indicator in RED, gateway in boot
up stage.
Steps:

5
Product Feature
Connectivity
LAN port, support WiFi and Bluetooth
Interface
DC-in port, USB port, SIM card slot, reset, LAN port,
Debug client port, power switch
Dimensions & Weight
Dimension: 128 × 117 × 38.7 mm
Weight: 335 g
Environmental Conditions
Operational temperature range:
0°C to +45°C (32°F to 113°F)
Storage temperature range:
-20°C to +60°C (-4°F to 140°F)

6
LED Indicator Behavior
No. LED Color Function
1 Power Blue/Red
1. Power on => Red
2. Boot up and OS is work-
ing => Blue
2 LTE Blue Enable => Blue
3 WiFi Blue Enable => Blue
4 BLE Blue Enable => Blue
5 Zigbee Blue Enable => Blue
6 Z-Wave Blue Enable => Blue
7 Battery Blue
1. Charging => Blue
2. Charging complete =>
off
6 7
15
23 4

7
Using GWS-HZW1
Login as ‘root’ and then issue a ‘poweroff’ or ‘reboot’
command.
Powering the System
root@WR-IntelligentDevice:~# poweroff
Or send ssh remote command to GWS-HZW1.
root@WR-IntelligentDevice:~# reboot
ecs@ecs-IoT:~$ ssh root@192.168.0.1 poweroff
root@192.168.0.1’s password:
ecs@ecs-IoT:~$
ecs@ecs-IoT:~$ ssh root@192.168.0.1 reboot
root@192.168.0.1’s password:
ecs@ecs-IoT:~$
The system can be accessed and controlled via a Linux
shell called ‘console’ by using micro-USB. The users may
procedures of the following sections.
System Login

8
If using serial console or terminal emulator, the serial port
settings are
Setting Value
Baud 115200
Parity No
Data Bit 8
Stop Bit 1
Flow Control No
When using Secure Shell (or SSH), you can establish the
communication through LAN 1 port, which is the RJ45 port
right next to the USB port and is assigned with an IP address
Fig 1: the location of LAN 1 port
The login account used here is ‘root’.

9
networking (LAN) of GWS-HZW1.
If you use a serial console, you might setup networking by
manual. Otherwise the networking is workable.
Step 1. Check the network interfaces by executing the
Step 2. Activate the network interface (e.g. eth0).
Step 3. If the interface matching failed, please edit /etc/
network/interfaces directly and then either restart the
service or reboot the system to make the change effect.

10
The way to set DHCP connection is as follow:
vi /etc/network/interfaces

11
The way to set static IP connection is as follow:
eth0:0

12
Step 1. Check the network interfaces by executing the
command.
-
Step 2.
-
- connmanctl services
- connmanctl
- agent on
-

13

14
Input the following commands.
Send shell command.
(Connect)
- bluetoothctl
- agent on
- power on
- scan on
- scan off
- devices
- pair BT MAC Address
- trust BT MAC Address
(Disconnect)
- disconnect BT MAC Address
- remove BT MAC Address

15
Input the following commands.
Choose one ot the following three commands(1~3) based
on the corresponding LTE module.
- 1.
2. pppd call UC20 & --> QuecTel UC21-JMINPCIE
3. pppd call UC20 & --> QuecTel EC21-AU
-

16
Program Examples
For GWS-HZW1 board, most of the GPIO features can be
achieved through the Linux Sysfs interface and can be
you how to activate some features by using some simple
shell commands. Of course, besides using shell commands,
operations. All the concerned programs can be written in
your desired language.
Following commands can display the system’s GPIO
information, showing which IO port is being assigned to
which module or Sysfs.
Command : cat /sys/kernel/debug/gpio
- Set GPIO pins

17
- Set the direction of GPIO(INPUT or OUTPUT)
- Set GPIO swtich
- Inquire the current GPIO value
Table of contents
Popular Gateway manuals by other brands
WELLTECH
WELLTECH 2504 user guide

OBLO Living
OBLO Living DOC400 user manual
SMC Sierra Monitor
SMC Sierra Monitor FS-IOT-BACX Startup guide
Shenzhen Hongdian Technologies
Shenzhen Hongdian Technologies A50E quick start guide
Gardena
Gardena Smart System Operator's manual
MSA
MSA fieldserver ProtoAir FPA-C41 operating manual

