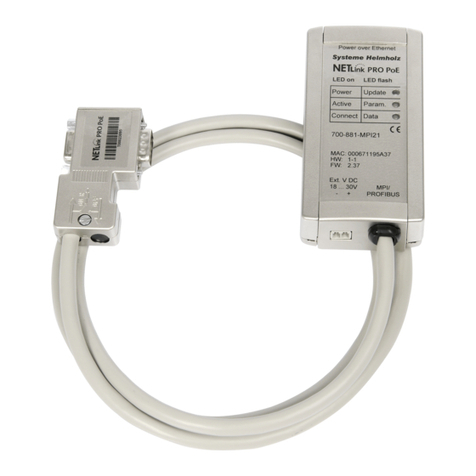
Helmholz NETLink PRO Series User guide

Helmholz GmbH & Co. KG | Hannberger Weg 2 | 91091 Großenseebach | Germany
Phone: +49 9135 7380-0 | Fax: +49 9135 7380-110 | E-Mail: info@helmholz.de | Internet: www.helmholz.de
NETLink®PRO family
Application Examples with RFC 1006
Edition 7 / 05.11.2017
Helmholz products
S7/S5 OPC-Server V4.10.2.9117 (Company Helmholz)
Products of other manufacturers
INAT-OPC-Server (INAT GmbH)
Indusoft Web Studio V7.0 (Indusoft)
InTouch V9.5 (Wonderware GmbH)
KEPserverEx V5.4.135.0 (KEPware Inc.)
PROCON-Win V5.3 (GTI Control)
VisAM Win32 (VISAM GmbH)
WinCC V7.4 (Siemens AG)
WinCC flexible 2005/2007 (Siemens AG)
ZenOn V6.2 (COPA-DATA)

All rights are reserved, including those of translation, reprinting, and
reproduction of this manual, or parts thereof. No part of this manual
may be reproduced, processed, copied, or transmitted in any way
whatsoever (photocopy, microfilm, or other method) without the
express written permission of Helmholz GmbH & Co.KG, not even
for use as training material, or using electronic systems. All rights
reserved in the case of a patent grant or registration of a utility mod-
el or design.
Copyright ©2009 by
Helmholz GmbH & Co.KG
Hannberger Weg 2, 91091 Grossenseebach, Germany
Note:
We have checked the content of this manual for conformity with
the hardware and software described. Nevertheless, because devia-
tions cannot be ruled out, we cannot accept any liability for com-
plete conformity. The information in this manual is regularly up-
dated. When using purchased products, please heed the latest ver-
sion of the manual, which can be viewed in the Internet at
www.helmholz.com, from where it can also be downloaded.
Our customers are important to us. We are always glad to receive
suggestions for improvement and ideas.
STEP ,Protool, Starter, Micromaster, and SIMATIC are registered trademarks of SIEMENS AG
MS-DOS and Windows are registered trademarks of Microsoft Corporation.

NETLink®PRO family Application Examples
3
Revision history of this document:
Edition
Date
Revision
1
07.05.2008
First edition
2
07.04.2010
PRO family updated
3
29.11.2010
KEPserverEx V5.4.135.0 updated
4
04.07.2011
Helmholz OPC Server V4.0.6.4908 updated
5
05.08.2011
Added Indusoft Web Studio V7.0 and PROCON-Win V5.3
6
15.08.2012
Added WINCC V7.0
7
04.10.2017
Added WINCC V7.4
8
30.10.2017
KEPServer V6.2.429.0 updated

NETLink®PRO family Application Examples
4
Contents
1Overview 6
1.1 Application and function description 6
1.2 Information in the figures 6
2RFC 1006 Activation via the Web Interface 7
2.1 Requirements 7
2.2 Adapting the configuration side 7
3Helmholz OPC-Server V4.12.0.11527 9
3.1 Configuration of the communication partner 9
3.2 Setting up the OPC Toolbox demo client 11
4INAT-OPC-Server (INAT GmbH) 14
4.1 Configuring the INAT OPC server 14
4.2 INAT-OPC Client 15
5Indusoft Web Studio V7.0 17
5.1 Configuring the Indusoft communication driver 17
5.2 Setting up values to visualize 19
6InTouch V9.5 (Wonderware GmbH) 22
6.1 Starting the System Management Console 22
6.2 Configuring the Device Group 22
6.3 Configuring the Wonderware Client 23
7KEPserverEx V6.2.429.0 (KEPware Inc.) 24
7.1 Configuring KEPserverEx 24
7.2 Starting the OPC quick Client 33
8PROCON-Win V3.2 (GTI Control) 34
8.1 Configuring the driver and connection 34
8.2 Creating a Picture 37
9VisAM Win32 (VISAM GmbH) 41
9.1 Configuring VisAM Win 32 41
9.2 Starting visualization 44

NETLink®PRO family Application Examples
5
10 WinCC V7.4 (Siemens AG) 45
10.1 Add the protocol driver 45
10.2 Creating a variable 46
11 WinCC flexible 2005/2007 (Siemens AG) 48
11.1 Configuring connections 48
11.2 Configuring the PG/PC interface 49
12 ZenOn V6.2 (COPA-DATA) 50
12.1 Configuring Zenon 50
12.2 Setting the driver 51
12.3 Driver configuration 51
12.4 Integrating variables in images 52
13 Address conversion table 53
14 Troubleshooting 54
15 Directory of Sources 56

NETLink®PRO family Application Examples
6
1Overview
1.1 Application and function description
This document is intended as a supplement to the NETLink®
product line manuals.
Many visualization manufacturers support the TCP/IP protocol
‘RFC1006’ also known as ‘ISO on top of TCP’ to be able to com-
municate with S7-300/S7-400 systems, for example.
If this ‘RFC1006’ function is activated for example in the NET-
Link®PRO, explicit adaptations must be made to the software
products. This manual describes step by step the basic settings
of a small selection of visualization solutions for transferring
data via this communication path.
In firmware versions from 2.3 of the NETLink ® PRO family
adapters the "RFC1006" function is always active.
It is assumed that the reader is familiar with the development
environment of the software solutions mentioned in this doc-
ument, as only the points specific to the connection are de-
scribed
More extensive support with commissioning and parameteriza-
tion of the various SCADA-, HMI/OPC server systems is avail-
able directly from the manufacturers in question.
At this point is not described how a Internet teleservice via
VPN and port forwarding is implemented with a NETLink®
Ethernet gateway.
1.2 Information in the figures
Many of the figures in this document contain settings and di-
rections for use marked or highlighted in red.
Please pay attention to
the information in the
figures

NETLink®PRO family Application Examples
7
2RFC 1006 Activation via the Web Interface
The examples described here are based on NETLink models
with firmware versions less than V2.3 (e.g. NETLink ® PRO).
Prior to the use with this device the RFC 1006 functionality has
to be set manually.
A detailed description is also given in the accordingly manual!
We generally recommend upgrading your NETLink®products
with the last firmware version, so you can always use the latest
features.
2.1 Requirements
The NETLink®Ethernet gateway is connected to the PC via a
network card. One of the SCADA/OPC server programs de-
scribed below is also installed on this PC. The Webinterface
function must not be deactivated. It is accessed via one of the
installed Internet browsers (for example, Mozilla Firefox, Op-
era, Konqueror, or Internet Explorer).
You do not need to install any additional drivers for the NET-
Link®.
The applications described here were performed on the Win-
dow XP operating system with service package 2 and 3.
2.2 Adapting the configuration side
As soon as the Web interface is opened by entering the rele-
vant URL ‘http://<ip address>’, the link to “Configuration” opens.
As soon as you have answered the security query, you can write
to all parameters.
From version 2.3 there is a text field: "RFC mode is always acti-
vated". In this case, you can skip this section.
The ‘RFC 1006 interface ON/OFF’ option is activated by entering
“ON” and confirming with the “OK” button (see Fig.)
In the next window, the settings are displayed again and must
be confirmed with “OK” before they are finally transferred to
the NETLink®device.
The following figure shows the configuration screen in the
NETL ink ® PRO web interface. In the current firmware
versions of other NETLink ® Ethernet variants is this manual
assignment not necessary.
affects only the products:
700
-881-MPI11 and
700
-881-MPI12

NETLink®PRO family Application Examples
8
Configuration menu in NETLink®PRO:
After the new parameterization data have been stored, the
NETLink®PRO is restarted to activate the new configuration.
Rebooting can take up to
15 seconds.

NETLink®PRO family Application Examples
9
3Systeme Helmholz OPC-Server
V4.12.0.11527
The following steps must be performed in the described se-
quence (Version November 2017):
3.1 Configuration of the communication partner
Start the “Configuration S7-OPC Server” program module via
Start/Programs/Systeme Helmholz/S7-OPC-Server:
•Select tab card “Devices”.
•In this example, click device 0 and then select “S7-TCP/IP”
from the pull-down menu.
•Go to the tab “Connections” in the right sub window.
•Click „Change…“to create a new connection.
It opens a new connection window

NETLink®PRO family Application Examples
10
•The PLC no. and Rack in this example is not relevant
•Enter the NETLink®address in the IP address field
•Enter the MPI address of the connected PLC in “Slot”
•Finally set the type of PLC you are working with.
•Close the window by clicking “OK”.
Complete your connection settings with “Apply“
Next, select the main tab “Connections”
•Click the Button “Scan”.
Enter the configured device number (possible 0 to 15). In this
example -> 0
•Confirm with “OK”
The connection to the adapter should be established and dis-
played.

NETLink®PRO family Application Examples
11
•The CPU can be determined with “Test” (this feature is op-
tional and must not be executed in mandatory).
•The connection test was successful and can be confirmed
with “OK”.
The OPC server is now fully configured for a NETLink® to PLC
connection.
If you want to set up multiple connections within a device, the
“PLC no.” has to be unique for each connection. These num-
bers must be different.
3.2 Setting up the OPC Toolbox demo client
The following steps are provided as an example only and are
not obligatory for customer applications. They serve as a visual
check whether data exchange is taking place.
Start program module “OPC Toolbox demo client” with
Start/Programs/Systeme Helmholz/S7-OPC-Server. The various tab
cards are displayed below.
The “OPC Servers" field opens first:
Choose the CPU address
as
PLC-number to pre-
vent duplicates

NETLink®PRO family Application Examples
12
•the tree structure can be open by clicking the plus sign in
front of “Local”
•open “Data Access V3” in a similar manner
•open “Helmholz S7/S5 OPC Server” similarly
•Double-click “Helmholz.OPc.S7.DA.1”
•The “group” opens in the left field.The green circle indicates
that the connection has been started.
Now switch to the “DA Browse” tab card.
•open“opcda://Helmholz.OPC.S7.DA.1/{…” in the tree structure
•A device is displayed when it has been found (in this case
“0.0”).
•On opening the device, the data access objects are searched
from the CPU and then listed.
•Transfer the selected items into the left column by double
clicking (multiple selections possible).

NETLink®PRO family Application Examples
13
Now switch to the “DA Items” tab card.
•The connection quality status is displayed in the “Quality”
column
•Currently, only the permissible name range elements are dis-
played under "Value".
•Every item can be edited by selecting it and then clicking the
“Properties” button.
•The changes are adopted with “Apply” and “OK”.
Further examples of the syntax of various items:

NETLink®PRO family Application Examples
14
4INAT-OPC-Server (INAT GmbH)
The following steps must be performed in the described se-
quence (status May 2008):
4.1 Configuring the INAT OPC server
The following dialog box opens when you select “Configura-
tion->AccessPathDefinition” from the menu:
A new connection is generated via menu “Configuration->New”
in dialog box “Access Path Definition”.
The following dialog box opens.
When you have confirmed the new connection with the OK
button, you can set the parameters in the subsequent dialog
box:

NETLink®PRO family Application Examples
15
The most important entries are:
•The IP address of the target station
•Connection properties RFC1006
The RFC1006 setting is configured via the “ISO-on-TCP” but-
ton.
4.2 INAT-OPC Client
Select the OPC Server.
Once the server is configured, you can access the data of the
controller via the OPC Client.
You can select the OPC server from which the configured data
will be fetched via menu item “File->New”.

NETLink®PRO family Application Examples
16
Configuring visualization data
•First of all, create a "Group"
•Menu “Group->Add Group…”
•Then select menu “Item->Add Item…”
•Important! In field “Access Path” you must enter the name of
the connection exactly as designated in the OPC server
•For "Item Name" enter the variable from the SPC
•Finally press button “Add Item” and then “OK”

NETLink®PRO family Application Examples
17
5Indusoft Web Studio V7.0
The following steps must be performed in the described se-
quence (status August 2011). The user should be familiar with
IWS or at least have the “Getting Started” guide and the Indu-
soft-driver specs “SIETH” at hand.
5.1 Configuring the Indusoft communication driver
Choose the tab „Comm“ in „Project Explorer“, then right-click
on “Drivers” and choose “Add/Remove drivers”:
Pick the “SIETH“ driver out and add it by clicking “Select>”and
confirm with “OK”:
Press „Help“ before you
select the driver in order
to open the correspon
d-
ing driver manual.

NETLink®PRO family Application Examples
18
•In the „Project Explorer“, tab „Comm“ right-click on the driv-
er “SIETH” and from the context menu choose “Settings”:
Under “Serial Encapsulation” choose “TCP/IP” and under “IP
Address” enter the IP address of the NETLink. Everything else
will be left default:

NETLink®PRO family Application Examples
19
5.2 Setting up values to visualize
In the tree of the “Project Explorer” under “Drivers” -> “SIETH”
you can find a “Main Driver Sheet”. Double-click either this or
any other driver sheet:
On this “Driver Sheet”you have to configure any values you
choose to visualize.
•After double-clicking the first empty cell in the column “Tag
Name” a dialog window opens, in which to choose the tag to
specify. In this example the tag is called “Mbyte”:

NETLink®PRO family Application Examples
20
•Enter the IP address of the adapter, the rack number and the
slot (the PLCs MPI address) under the column “Station”using
this format:
<IP address> : <Rack> : <Slot>
•Adjacent enter the memory address of the variable you want
to access on the PLC under the column “I/O Address”
(for further information please consult the “SIETH” driver
manual):
This manual suits for next models
2
Table of contents
Other Helmholz Gateway manuals

Helmholz
Helmholz WALL IE 700-860-WAL01 User manual

Helmholz
Helmholz PN/CAN Gateway Layer 2 User manual

Helmholz
Helmholz 700-671-PNC01 User manual

Helmholz
Helmholz PN/CAN gateway User manual

Helmholz
Helmholz 700-672-PNC01 User manual

Helmholz
Helmholz WALL IE User manual

Helmholz
Helmholz PN/CAN gateway User manual

Helmholz
Helmholz NETLink User manual

Helmholz
Helmholz NETLink 700-881-MPI21 User manual

Helmholz
Helmholz PN/CAN gateway User manual