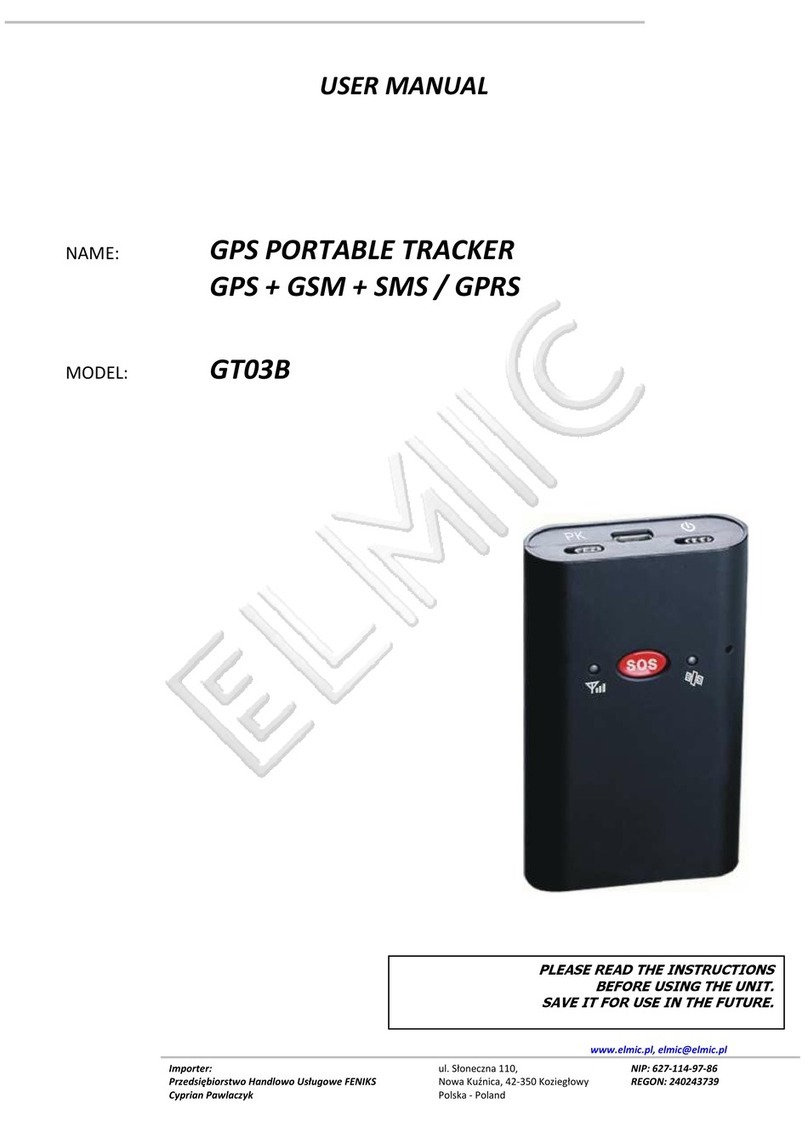
Elmic GT300 User manual

Importer:
Przedsiębiorstwo Handlowo Usługowe FENIKS
C prian Pawlacz k
ul. Słoneczna 110,
Nowa Kuźnica, 42-350 Koziegłowy
Polska - Poland
NIP: 627
-
114
-
97
-
86
REGON: 240243739
www.elmic.pl
,
USER MANUAL
N ME:
GPS PORTABLE TRACKER
GPS + GSM + SMS / GPRS
MODEL:
ELMIC GT300
PLEASE READ THE INSTRUCTIONS
BEFORE USING THE UNIT.
SAVE IT FOR USE IN THE FUTURE.

Strona 2 z 11 rev. 1.0.1
USER MANUAL: GT300 GPS PORTABLE TRACKER
www.elmic.pl
,
Safety Warning & Attentions .................................................................................................................................... 3
1. Attention ....................................................................................................................................................... 3
2. Attention for operation of this product ........................................................................................................ 3
3. Operation and maintenance ......................................................................................................................... 3
Product Overview - odel: GT300 ............................................................................................................................ 3
1. Accessories: ................................................................................................................................................... 3
2. Appearance: .................................................................................................................................................. 4
3. Usage: ........................................................................................................................................................... 4
4. Performance parameters: ............................................................................................................................. 4
5. LED Indicators Status: ................................................................................................................................... 5
Buttons instruction ................................................................................................................................................... 5
Getting Start ............................................................................................................................................................. 6
1. Install the SI card ....................................................................................................................................... 6
2. Power on ....................................................................................................................................................... 6
3. Charging battery ........................................................................................................................................... 6
Device functions and Parameter setting .................................................................................................................. 6
1. Settings of APN ............................................................................................................................................. 6
2. Set DNS Server .............................................................................................................................................. 6
3. Add Family Numbers via S S command ...................................................................................................... 6
4. Delete Family Numbers via S S ................................................................................................................... 7
5. Add/delete Family Numbers via platform .................................................................................................... 7
6. Call Family Numbers ..................................................................................................................................... 7
7. Answer phone calls ....................................................................................................................................... 7
8. Set White List ................................................................................................................................................ 7
9. Set call reminder mode ................................................................................................................................. 7
10. Control volume.......................................................................................................................................... 7
11. Set SOS Number ........................................................................................................................................ 7
Operation .................................................................................................................................................................. 8
1. Arm/disarm ................................................................................................................................................... 8
2. Vibration Alarm ............................................................................................................................................ 8
3. SOS Alarm ..................................................................................................................................................... 8
4. Geo-fence Alarm ........................................................................................................................................... 8
5. Low battery Alarm ........................................................................................................................................ 8
6. Voice monitor ............................................................................................................................................... 9
7. Check location ............................................................................................................................................... 9
8. Reboot the terminal ...................................................................................................................................... 9
Working mode setting .............................................................................................................................................. 9
odel1: Locating in a regular time interval mode ............................................................................................... 9
odel2: Locating according to vibration mode (default) ..................................................................................... 9
ode3: Locating according to command ............................................................................................................. 9
Appendix .................................................................................................................................................................10
Battery security ...................................................................................................................................................10
Warranty instructions and service ..........................................................................................................................10
Statement ...............................................................................................................................................................10
Troubleshooting ......................................................................................................................................................11

Strona 3 z 11 rev. 1.0.1
USER MANUAL: GT300 GPS PORTABLE TRACKER
www.elmic.pl
,
Introduction
Thank you for choosing this GPS Portable Tracker. Please read this Manual carefully to fully understand its usage, perfect
functions and simple operation. The Company reserves the right to modify this Manual from time to time without prior
notice. Before using this product, please read these ttentions carefully to ensure safe and proper operation of this
product.
Safet Warning & Attentions
1. Attention
•Do not place this product on an uneven or unstable table-board to prevent failure or damage caused by falling.
•Only the battery designated by the Company can be used on this product. pplication of other products may lead to
leakage, overheating, blowout and fire of the battery.
•Do not crash, vibrate, or throw device in order to avoid failure and fire.
•Do not use this product in a place with flammable and explosive gas; otherwise, product failure and fire may be
caused.
•Do not place this product in a place with high temperature, high humidity or large amount of dust; otherwise,
product failure may be caused.
2. Attention for operation of this product
•Do not dismantle or remodel this product, otherwise, damage, creepage and electrical fault may be caused to this
product.
•Place tiny metal objects such as drawing pin at a place far away from the speaker. s the speaker has magnetic
property while working, it will attract these tiny metal objects, which may lead to personal injuries or damage of the
speaker.
3. Operation and maintenance
•Please keep this product dry, as rainwater, moisture, humidity and liquids or moisture content may contain mineral
matters that erode the circuit.
•Do not keep this product in any place with high temperature. s high temperature may shorten the lifespan
of electronic device, damage the battery and cause deformation or melting of certain plastic parts and components.
•Do not keep this product in any place with low temperature. s when being moved from a place with low
temperature to a place with normal temperature, it may generate humidity inside, which may cause damage of circuit
board.
•Do not attempt to dismantle this product. s improper handling by nonprofessional personnel may cause damage of
the device.
•Do not toss, knock or shake this product, as tough operation mode may damage the motherboard inside the device.
•If this product is made wet by mistake, shut it down, remove the battery, and restart the product after confirming
it complete dry after 24 hours.
•Use clean and dry soft cloth to clean the lens, infrared lamp and light sensor.
Warning: improper operation will void warranty!
Product Overview - Model: GT300
1. Accessories:
Device
Power cord
Charger
User Manual
Battery
Please make sure that all accessories are complete. Pictures are for indication and illustration purposes only.
GPS
Portable
tracker

Strona 4 z 11 rev. 1.0.1
USER MANUAL: GT300 GPS PORTABLE TRACKER
www.elmic.pl
,
2. Appearance:
3. Usage:
•for person
•for bikes
•for cars
•for vans
•for trucks
•for camper
•for buses
•for motorcycle
•for other vehicles
4. Performance parameters:
Serial Specifications Technical parameters
1 Dimension 73 (L) x 45 (W) x 16 (H) mm
2 Weight 54 g
3 Backup Battery 1200 mAh / 3.7V
4 Talk Time 7 hours
5 Standby Time 98 hours
6 GS Frequencies 850/900/1800/1900 Hz
7 GPRS Class 12
8 GPS Channel 20
9 GPS Sensitivity -159dBm
10 Acquisition Sensitivity -144dBm
11 Position Accuracy 10m
12 GS /GPS Antenna Built-in design
13 LED Indicator GS -green, GPS-blue, Power-red
14 Data Transmit TCP, S S

Strona 5 z 11 rev. 1.0.1
USER MANUAL: GT300 GPS PORTABLE TRACKER
www.elmic.pl
,
5. LED Indicators Status:
GPS LED Indicator – Blue
Status Implication
Slow Flashing (interval 2s) Searching GPS signal
Slow flashing (flash 0.1s after every 3s ) GPS signal has been acquired successfully
Continuously in dark GPS stop working
GSM LED Indicator – Green
Status Implication
Flashing (flash 1s after every 3s) Receive GS signal normalny
Quick flashing (interval 0.3s) GS initialization
Slow flashing (flash 0.1s every 3s) GPRS on Line
Solid Green onitor function is activated
OFF No GS Signal / SI card not instaled
Power Status – Red
Status Implication
Flashing (interval 0.3s) Low battery
Slow flashing (interval 2s) Full charge
Slow flashing (flash 0.1s every 2s) Normal operating
Solid Red Charging
OFF Low battery/Power off/without battery / troubleshot
Notice: Ignition detection indication: three LED indicators take turns flashing.
Buttons instruction
No. Button Graphic Function Introduction
Operation Function
1
SOS button
Long press SOS alarm
Short press during calls Hang off
2
Family Number button 1
Long press Call
Short press when calls coming
in
nswer
Short press during calls Turn on the volume
Long press during calls Change to speaker mode
3
Family Number button 1
Long press Call
Short press when calls coming
in
nswer
Short press during calls Turn down the volume
Long press during calls Change to speaker mode
4
Mode button
Short press twice in a row rm/disarm
Long press Send location to platform
automatically once
5 Power ON/OFF
Long press Power on/off

Strona 6 z 11 rev. 1.0.1
USER MANUAL: GT300 GPS PORTABLE TRACKER
www.elmic.pl
,
Getting Start
Please follow below instructions for ensuring safe and correct use.
1. Install the SI card
•Turn off the terminal
•Open the USB rubber plug
•Put the GSM SIM card in the SIM card slot until you hear the “click” sound.
•Please turn the terminal off before you remove the SIM card.
Note: ake sure there is enough credit on the SI card. If you will be using the GPRS function, you should pay
attention to the current SI card GPRS charge.
ust turn off the terminal before removing the SI card. Removing SI card while there is external power supply
connected is forbidden.
2. Power on
Long press “ON/OFF” button to turn the terminal on/off.
3. Charging battery
When the red LED light is flashing quickly, it means the battery is low and needed to be charged in time. nd please charge
before using at the first time.
•Connect the charger to power;
•Open the rubber plug;
•Connect the charger into the USB slot;
•This process may take 4-6 hours. During this period, it is normal that the terminal, battery and the charger
become hot.
•If the red LED is continuously bright, it means it is charging. If the red LED is flashing slowly, then it means it is
fully charged.
WARNING: The terminal must be placed in a ventilated place in 0℃-4℃. And using the charger your distributor provides
is a must. Using not certificated charger might cause danger and will be considered against the warranty terms.
Charger from the manufacturer is recommended.
Device functions and Parameter setting
1. Settings of APN
To set up the PN parameter, please send SMS command to the number of device. The device will reply “OK”
automatically after setting successfully. The SMS command is as following:APN,APN’s name#
E.g: APN,internet# (“internet” is the APN of carrier)
The device will reply “OK” if setting successfully.
Note: The APN of some countries have user name and password, you may need to send S S command as following:
APN,APN name,user name,password#
e.g: APN,internet,CLIENTE,A ENA#
2. Set DNS Server
Please send SMS command to the number of terminal so as to set up the DNS parameter. The terminal will reply “OK”
automatically after setting successfully.
Send SMS command: SERVER,1,DNS,Port,0#
e.g. SERVER,1,gt300.goobaby.net,8827,0#
3. Add Family Numbers via S S command
Add two Family Numbers Send SMS command: FN,A,Phone Number1,Phone Number2# ( means add numbers)
e.g. FN,A,13510***360,1351***85136#
Add one Family Number To add the first Family Number, send SMS comman: FN,A,Phone Number1#
e.g. FN,A,13510***360#
To add the first Family Number, send SMS comman: FN,A,,Phone Number2#
e.g. FN,A,, 1351***85136#

Strona 7 z 11 rev. 1.0.1
USER MANUAL: GT300 GPS PORTABLE TRACKER
www.elmic.pl
,
4. Delete Family Numbers via S S
Send SMS command: FN,D,1,2# (D means delete the number)
1,2 means sequence numbers OR Send SMS command: FN,D,Phone Number#
5. Add/delete Family Numbers via platform
You can set SOS numbers via the platform when the terminal connects to the platform.
6. Call Family Numbers
Long press Family Number buttons can call preset numbers. Short press SOS button can hang off the call.
NOTE: When the people you call pick up the phone, the terminal will vibrate slightly.
7. Answer phone calls
Short press either one of the Family Number buttons to pick up the call. nd short press SOS button to reject or end the
call. Long press either one of the Family Number buttons to turn on the speaker. White list numbers can be set via the
platform that the distributor provides.
8. Set White List
Normally, the terminal can only answer phone calls from SOS number and Family Numbers. It can also receive calls from
white list numbers (15 numbers at most) on platform.
9. Set call reminder mode
There are three ways of call reminder mode: ringtone, vibration, and both ringtone and vibration.
Send SMS command: CALL ODE, code of call reminder mode#
Code: 0 –ringtone; 1 – vibration; 2 – both ringtone and vibration (default)
e.g. CALL ODE, 1# means call reminder mode is vibration.
10. Control volume
During the call, short press Family Number 1 button to turn up the volume and Family Number 2 button to turn down the
volume. When the volume reaches the limit, the button light will be all bright.
11. Set SOS Number
Add SOS number Via S S command
Send SMS command: SOS, A,number1,number2,number3 #( means add number).
You could set 3 SOS numbers in maximum. If set successfully, the terminal will reply “ok”.
e.g. SOS,A, 13510****60,135116****6,136126****8# (set all 3 SOS numbers)
SOS,A, 13510****60# (set the first SOS number)
SOS,A, ,135116****6# (set the second SOS number)
SOS,A, , ,136126****8# (set the third SOS number)
Delete SOS Numbers
Send SMS command: SOS, D,1,2,3# (D means delete SOS number)
e.g. SOS, D,1# means delete the first number
SOS, D,3# means delete the third number
If you do not know the sequence number, you can also delete the number by SMS command like this: SOS, D,number#
e.g. SOS, D, 13527852360# means delete this SOS number directly.
It will reply “OK” if the number is deleted successfully.
Add SOS numbers via platform
You can set SOS number via the platform after activating the terminal.

Strona 8 z 11 rev. 1.0.1
USER MANUAL: GT300 GPS PORTABLE TRACKER
www.elmic.pl
,
Operation
1. Arm/disarm
Via ode Button
Short press twice in a row to arm the terminal. In arm condition, short pressing twice in a row will disarm the terminal.
Via calls
ny SOS numbers call the terminal (must be the SOS numbers), and then end up the call in 10s by the mobile side to arm
the terminal. The terminal will reply a SMS message “OK”. During arm state, any SOS numbers call the terminal (must be
the SOS numbers), and then end up the call in 10s to disarm the terminal. If the call does not end up, it will enter the
monitoring condition.
Via S S command
ny SOS number can send SMS command“111” to arm the terminal (must be the SOS number). nd it will automatically
reply “OK” if set successfully. ny SOS number can send SMS command“000” to disarm the terminal (must be the SOS
number). nd it will automatically reply “OK” if set successfully.
NOTE: When the vibration alarm is off, the arm function will not be executed.
2. Vibration Alarm
When the terminal is in arm state, there will be a vibration alarm sent to the SOS numbers in 10s if it detects vibration.
If the GPS is located, the terminal will send accurate address information. If GPS is not located, the terminal will send LBS
address information instead. nd if GPS is located in 5 minutes later, the terminal will send accurate address information.
e.g. GPS address information:
“vibration alarm: Bao’an Road, Bao’an District, Shenzhen, Guangdong (N22.57139,E113.87710)
e.g. LBS address information:
“vibration alarm: nearby Bao’an Road Bao’an District, Shenzhen, Guangdong (22.571,113.876)”.
When vibration alarm is on and GPS is located successfully but there is no GPS connection, the terminal will send longitude
and latitude location to pre-set SOS numbers. When the GPS is not located and there is no GPRS connection, then the
terminal will not get any location information so it will send “Vibration alarm! Please notice.” To pre-set SOS numbers.
NOTE: The interval of vibration alarm could not be less than 5 minutes. If could not send messages, please check your
SI card balance.
3. SOS Alarm
Press SOS button for more than 3s to activate SOS alarm, meanwhile you could feel the vibration twice, and then the
terminal will send an address information message to the SOS number. If GPS is located, the terminal will send accurate
address information.
e.g.: “Emergency call (LBS): Bao’an Road, Bao’an District, Shenzhen, Guangdong (N22.57139,E113.87710)”.
If GPS is not located, the terminal will send a LBS location information.
e.g.: “Emergency call (LBS): nearby Bao’an Road Bao’an District, Shenzhen, Guangdong (22.571,113.876)”. Then it will dial
the SOS numbers in cycle, if any SOS number answer the call, it will stop calling. If there’s no response after all the number
been dialed for three cycles, it will stop.
If the GPS is located, but the GPRS connection between the terminal and platform is abnormal, then the terminal will reply
to the SOS with the website of the longitude and latitude information.
e.g. SOS! <01-08 17:36>http://maps.google.com/maps?q=N22.577156,E113,916748”
If the GPS is not located, and the GPRS connection between the terminal and platform is abnormal, then the terminal will
not able to get the location information. It will reply to SOS number: “SOS larm! Please pay attention!”
NOTE: SOS number needs to be set in advance.
4. Geo-fence Alarm
Geo-fence function is off as default. You can log in the platform to turn on and set the Geo-fence. In platform, you can set
5 fences in specific area. There are go-out-fence alarm and go-in-fence alarm. When the terminal enters or leaves specific
areas, it will send alarm to SOS number.
5. Low battery Alarm
When battery is low, the terminal will send SMS to SOS numbers.

Strona 9 z 11 rev. 1.0.1
USER MANUAL: GT300 GPS PORTABLE TRACKER
www.elmic.pl
,
6. Voice monitor
When SOS number sends monitor command: ONITOR# to the terminal, the terminal will reply “OK” and call the SOS
number. fter the call connected, the terminal will enter monitor condition. The SOS number can hear the sound around
the terminal.
7. Check location
Ask for address information Send SMS command from SOS number to terminal: POSITION#
fter command is sent successfully, SOS number will receive an accurate location information.
Only SOS number can check location of terminal.
If GPS is located successfully, terminal will reply SMS of an accurate location information.
If GPS is not located, the terminal will send LBS location first. nd then if GPS located within 5mins, the terminal will send
another SMS with accurate location.
e.g. LBS address information: “Current location (LBS): nearby Bao’an Road Bao’an District, Shenzhen, Guangdong
(22.571,113.876)”.
e.g. GPS address information: “ ccurate location (GPS):Bao’an Road, Bao’an District, Shenzhen, Guangdong
(N22.57139,E113.87710)
Ask for coordinates Send SMS command from SOS number to the terminal: WHERE#
Only Family Number or SOS number can apply for replying longitude and latitude from the terminal. If GPS is located, it
will reply current longitude and latitude information. If not located within 5mins, it will reply the latest longitude and
latitude information.
e.g. Lat:N22.571285,Lon:E113.877115,Course:42.20,Speed:0.0740,DateTime:10-11-23 22:28:51
If GPS is not located at all, the terminal will reply after 5mins:“GPS is failed to locate, no data, please try again!”
Ask for Google link Send SMS command from SOS number to the terminal: URL#
If GPS is located, it will reply google link of current longitude and latitude. If not located within 2 mins, it will reply google li
nk of the latest longitude and latitude:
e.g. Google link reply
<DateTime:10-11-23 23:42:51> http://maps. oogle.com/maps?q=N22.571490,E113.877103
If GPS has never been located before, it will reply SMS after 10mins "GPS is fail to locate, no data, please try again!"
Check platform
The terminal will send position information to the platform server timely. The user can check the position on the platform.
The platform website: www.cootrack.com
Please contact your dealer for the login methods and operations.
8. Reboot the terminal
Send SMS command: RESET#
When terminal gets command, it will reboot after 1 min.
Working mode setting
Model1: Locating in a regular time interval mode
fter turned on and sent the first GPS location, the terminal will activate GPS in 30mins. If located, it will send location to
platform and turn off GPS automatically. If fail to locate, then GPS will turn off and send LBS location.
Send SMS command: mode,1#
Model2: Locating according to vibration mode (default)
In this mode, the terminal will turn on GPS as default.
If GPS locates, the terminal will send first GPS location to the platform. If GPS could not locate, it will upload LBS location.
In this mode, if the terminal does not detect any vibration, GPS will be off. nd after it detects vibration, it will start
working again. Send SMS command: mode,2#
Mode3: Locating according to command
In this mode, the terminal will be in Deep Sleep mode. It will not connect with the platform. You can send SMS
command/call to activate checking location function. During this mode, arm/disarm will not be executed. It will reply: “The
terminal is in Deep Sleep mode. Please wake up!”
Send SMS command: mode,3#

Strona 10 z 11 rev. 1.0.1
USER MANUAL: GT300 GPS PORTABLE TRACKER
www.elmic.pl
,
Appendix
Battery security
•Please use the original battery. The warranty will be invalid by using any other accessory. The manufacturer will
not take any responsibility for any damage caused by not using the original battery.
•The new battery can realize the optimal performance after fully- charging for 2 or 3 times.
•The battery can be used for hundreds of times, yet it will wear out eventually. When its talking time and standby
time shrinks sharply, you need a new one.
•Cut off power supply when not using the charger. Don’t charge the battery for more than one week, since over
charging will reduce its using time.
•Do not short-circuit the battery with metal stuff (such as the key in your pocket)
•Do not bend or open the battery.
•Do not put the battery into water or fire.
•The battery should never be charged at temperature below 0 degrees or above 45 degrees Celsius.
Warrant instructions and service
1. The warranty is valid only when the warranty card is properly completed, and upon presentation of the proof of
purchase consisting of original invoice indicating the date of purchase, model and serial No.of the product. We reserve the
right to refuse warranty if this information has been removed or changed after the original purchase of the product from
the dealer.
2. Our obligations are limited to repair of the defect or replacement the defective part or at its discretion replacement of
the product itself.
3. Warranty repairs must be carried out by our uthorized Service Centre. Warranty cover will be void, even if a repair has
been attempted by any unauthorized service centre.
4. Repair or replacement under the terms of this warranty does not provide right to extension or renewal of the warranty
period.
5. The warranty is not applicable to cases other than defects in material, design and workmanship.
Statement
ll rights reserved.
uthor instructions Shenzhen Concox Information Technolog Co., Ltd.
Correction ELMIC / PHU FENIKS POLAND

Strona 11 z 11 rev. 1.0.1
USER MANUAL: GT300 GPS PORTABLE TRACKER
www.elmic.pl
,
Troubleshooting
If there is trouble during using the phone, please read the solution as follow or contact provider.
Common problems Causes Solution
Bad reception
Radio waves can not communicate with
device when it is used in a bad signal area,
like basement or space beside tall building.
Change to a place with good signal.
can not switch on No power Change a new battery
Cannot make voice
monitoring
No preset SOS numbers Set SOS numbers
SIM card is without Caller ID function ctivate the function
GPS is not locating
Keep the device indoor Locating in open space outdoor.
Weak GPS signal Keep the upside of the phone face to sky
There is metal stuff covered the phone. Move away the metal stuff.
Unable to monitor
The called number is not the SOS number Set up SOS number
SIM card without caller ID display function ctive function of caller ID display
can not connect to
the network
The sheet metal of SIM card is dusty. Wipe with a clean wiper.
Invalid SIM card Contact your operator
Out of GSM service area Move back to the GSM service covered area.
weak signal Try again in a strong signal area
can not charge
Voltage is out of charging range of charger. Change to the proper voltage
Use non-standard charger Use charger that come with the package
Poor contact Check if the plug is in.
Red LED is continuous dark when charging It is because the battery is used up ,keep charging
after about half an hour, the LED will turn on
Can not check
address
information
SIM card can not support GPRS functions Please contact the sim card operator to activate GPRS
Reply “no data, please try again” all the
time Please contact with your distributors
It is not a SOS number Please set the number as SOS number
Producer:
Shenzhen Concox Information Technolog Co., Ltd.
China
www.concox.cn
Importer:
Przedsiębiorstwo Handlowo Usługowe FENIKS
ul. Słoneczna 110,
Nowa Kuźnica, 42-350 Koziegłowy
Poland
Table of contents
Other Elmic GPS manuals
