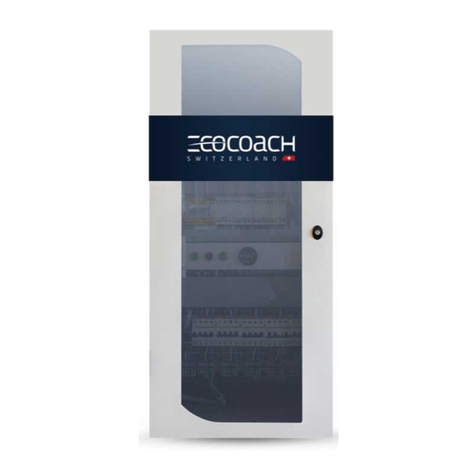
Eltrans Baterie TBA 150 User manual

QUICK GUIDE FOR TBA
rmware V1.070
TBA 150 (24/48/80)
TBA 150 (6/12/24)
TBA 60 (48/110/220)
TBA accumulator battery tester is designed to examine the quality
of lead-acid accumulator battery. Testing can be conducted by
using the program of “5-10 or 20-hour current discharge”. Each
device also has the “Discharge by Manually Specied Current”
program. Parameters of the discharge process are recorded in the
tester non-volatile memory which is divided into 16 independent
registers called register banks. The register data may be recorded
and transferred from the tester by means of a USB ash drive.
Table of Contents
1. Quick guide. page 2
2. Description of the device dashboard. page 2
3. Connecting batteries to the tester. page 3
4. Starting the tester in the “Discharge” mode. page 4
5. Starting the tester in the “5h, 10h, 20h Discharge” mode. page 6
6. Discharge of a battery with the rated voltage other than the basic voltages
determined for given types of battery testers. (Other battery). page 8
7. Saving the recorded data to a USB memory stick. page 10
8. Deleting recorded data. page 11
9. Device security and alarms. page 12
10. Responding to alerts. page 13
11. Protection from power outage . page 13
12. Tester menu and settings . page 14

www.eltransbaterie.eu page 2
Quick guide for TBA rmware V1.070
1. Quick guide.
2. Description of the device dashboard.
This quick guide refers to the following battery
testers:
TBA 150 (24/48/80V)
TBA 150 (6/12/24V)
TBA 60 (48/110/220V)
1
2
3
4
5
6789
Display
Presents information on selected settings
and the current state of the device.
Safety switch
Enables immediate (emergency) cessation
of the device operation.
ON
Launches the discharge process.
OFF
Temporarily halts the discharge process.
Adjuster
Enables setting the value of a given parameter.
F1, F2, F3 function buttons
Designed to select options on the display.
USB slot
Enables transfer of data recorded during
atest to a data carrier of pendrive type.
1
2
3
4
5
6
7
8
9
The presented screenshots with the voltage and
current values refer to TBA 60 and are the same
for the other testers.

www.eltransbaterie.eu page 3
Quick guide for TBA rmware V1.070
3. Connecting batteries to the tester.
The battery which is to be tested should be attached to the tester
connector with appropriate polarity. Reverse polarity will prevent the
tester from starting. Safety switch (Emergency Stop) should be set in
the ON position – Depressed. After switching the 230V, 50 Hz supply
voltage the following home screen is displayed on the tester (gure 1)
Choose „Next” by pressing the [F3] button to proceed to the next
screen.
The device tests the voltage of the connected battery. If a battery with
a rated voltage is attached to the tester:
for TBA 150 (24/48/80) – 24V, 48V or 80V,
for TBA 150 (6/12/24) – 6V, 12V or 24V,
for TBA 60 (48/110/220) – 48V, 110 V or 220V,
the type of the battery is determined. (Figure 2) presents an exemplary
screenshot after attaching a 48V battery.
If a battery with another rated voltage is attached to the tester (gure
3), further proceeding should be conducted in accordance with point
6 (Discharge of a battery with the rated voltage other than the basic
voltages determined for given types of battery testers. (Other battery).
NOTE!
In any case, make sure the displayed voltage value of the connected
battery is appropriate.
Choose „Next” by pressing the [F3] button to proceed to the next
screen.
On the Select Job Mode screen (gure 4) use the [F2] button to choose
the „Discharge” mode with manual voltage setting or the 5h, 10h, 20h
Discharge Current mode in which the device will choose the discharge
current value appropriate for the selected rated capacity of the battery.
To proceed to the next screen choose „Next” by pressing the button
[F3] .
gure 1
gure 2
gure 3
gure 4

www.eltransbaterie.eu page 4
Quick guide for TBA rmware V1.070
4. Starting the tester in the “Discharge” mode.
On the Select Job Mode screen (gure 4) choose the rst „Discharge”
mode
To proceed to the next screen choose „Next” by pressing the button
[F3] .
Discharge parameters setting. (gure 5)
Set the required discharge current value Ir by means of the adjuster.
This value can be corrected in the course of the battery discharge
process.
Using the [F2] button place the cursor on „Uk” and set the nal voltage
value by means of the adjuster.
Using the [F2] button place the cursor on „Time” and set the discharge
time by means of the adjuster.
Choose „Next” by pressing the [F3] button to proceed to the next
screen .
Data logging screen. (gure 6)
Using the [F2] button place the cursor on „Data logging” and by means
of the adjuster choose the number of memory bank where the data
will be recorded during the battery test. You can select only the empty
banks which is a protection against erasure of data from previous
recordings. In order to avoid recording choose the „No” option.
Using the [F2] button place the cursor on „Period” and set the period
of data recording by means of the adjuster.
The change of the data recording period implies the change of the
Time of Data Recording whose value is displayed.
Deleting and saving of the banks were described in point 5 of the
manual.
To proceed to the next screen choose „Next” by pressing the button
[F3].
Discharge home screen. (gure 7)
Press the (green) [ON] button – The discharge will begin, fans cooling
resistors will start working, too.
gure 5
gure 6
gure 7
gure 4

www.eltransbaterie.eu page 5
Quick guide for TBA rmware V1.070
Description of the displayed parameters (gure 8):
„Q” - charge collected from the discharging battery
„E” - energy collected from the discharging battery
„U” - present voltage of the discharging battery
„Ir” - set discharge current
(correction by means of the adjuster is possible)
„t” - discharge time which increases or decreases depending on the
“Counter Settings”
„G” - the number of enabled resistors enforcing the discharge current
The end of the discharge process occurs when the battery achieves the
nal voltage declared in the settings
(gure 9)
or when the set discharge
time is over (gure 10).
Fans work for three minutes after the end of the discharge. Blowing
process enables faster cooling of the resistors.
When the blowing time is over, information about reason for the end
of the discharge will remain on the display: „U” if the battery voltage at
the „Uk” link achieved the set value (gure 11) or „t” if the set discharge
time was over (gure 12).
Press the F1 [End] button to return to the main menu of the tester.
At any moment of the discharge process you may turn off the discharge
current by pressing the [OFF] (red) button.
This possibility should be treated as a temporary halt to the discharge
process.
Press the [ON] (green) button to reactivate the discharge process.
To permanently nish the discharge process, press the F1 „End” button.
gure 8
gure 9
gure 11
gure 10
gure 12

www.eltransbaterie.eu page 6
Quick guide for TBA rmware V1.070
5. Starting the tester in the “5h, 10h, 20h Discharge” mode.
If a battery with a rated voltage is attached to the tester:
for TBA 60 (48/110/220) – 48V, 110 V or 220V,
for TBA 150 (24/48/80) – 24V, 48V or 80V,
for TBA 150 (6/12/24) – 6V, 12V or 24V,
the following modes can be selected by means of the [F2] button
(gure 13):
• 5h Discharge Current – determining battery efciency according
to Q5
• 10h Discharge Current – determining battery efciency according
to Q10
• 20h Discharge Current – determining battery efciency according
to Q20
To proceed to the next screen choose „Next” by pressing the button
[F3].
Discharge parameters setting (gure 14):
Using the [F2] button and the adjuster set:
- value of rated capacity of the tested battery „Qn”,
- the nal voltage of the discharged cell „Vk”,
- in the case of the TBA 60 tester set the correct number of tested
cells (this parameter is unavailable in the TBA 150 testers).
To proceed to the next screen choose „Next” by pressing the button
[F3].
Data logging screen. (gure 15)
Using the [F2] button place the cursor on Data logging and by means
of the adjuster choose the number of memory bank where the data
will be recorded during the battery test. You can select only empty
banks which protects against erasure of data from previous recordings.
Inorder to avoid recording set No.
Using the [F2] button place the cursor on Period and set the period
of data recording by means of the adjuster.
The change of the data recording period implies the change of the
Time of Data Recording whose value is displayed.
Deleting and saving of the banks is described in point 5 of the manual.
To proceed to the next screen choose „Next” by pressing the button
[F3].
Discharge home screen. (gure 16)
After pressing the (green) [ON] button the discharge current will ow,
and the fans which cool the tester heaters will start working.
gure 13
gure 14
gure 15
gure 16

www.eltransbaterie.eu page 7
Quick guide for TBA rmware V1.070
Description of the displayed parameters (gure 17):
„Q” - charge collected from the discharging battery
„V” - average voltage value per cell
„U” - present voltage of the discharging battery
„c” - battery efciency coefcient (%) [(Q/Q5) x 100%]
„t” - discharge time which increases or decreases depending on the
“Counter Settings”
„G” - the number of enabled resistors enforcing the discharge current
„T”k - resistance chamber temperature
The discharge is over when either the battery voltage achieved the
set value „Vk” (gure 18) or the set discharge time was over „t” (gure 19).
Blowing is on for 3 minutes after the end of the discharge. The blowing
process allows for faster cooling of resistors.
When the blowing time is over, the display will show the information
on the discharge end reason: „U” - when the set nal voltage of the
„Vk” cell achieved the set value (gure 20) or „t” - when the set discharge
time was over (gure 21).
Press the [F1] „End” button to return to the main menu of the tester.
At any moment of the discharge process you may turn off the discharge
current by pressing the [OFF] (red) button.
This possibility should be treated as a temporary halt to the discharge
process.
Press the [ON] (green) button to reactivate the discharge process.
To permanently nish the discharge process, press the F1 [End] button.
gure 17
gure 18
gure 20
gure 19
gure 21

www.eltransbaterie.eu page 8
Quick guide for TBA rmware V1.070
6. Discharge of a battery with the rated voltage other than the basic voltages
determined for given types of battery testers. (Other battery).
The device recognises „Other Battery” (gure 22) if the detected voltage
is not identied with one of the basic voltages for a given tester type:
for TBA 60 (48/110/220) – 48V, 110 V or 220V,
for TBA 150 (24/48/80) – 24V, 48V or 80V,
for TBA 150 (6/12/24) – 6V, 12V or 24V,
however, it is within the range of voltages operated by a given tester
type:
for TBA 60 (48/110/220) – from 20V to 248V,
for TBA 150 (24/48/80) – from 5V to 92V,
for TBA 150 (6/12/24) – from 4V to 32V.
To proceed to the next screen choose „Next” by pressing the button
[F3].
Discharge parameters setting. (gure 23)
Set the required discharge current value Ir by means of the adjuster.
The value can be corrected during the battery discharge process.
Using the [F2] button place the cursor on „Uk” and set the nal voltage
value of the battery by means of the adjuster.
Using the [F2] button place the cursor on „Time” and set the discharge
time by means of the adjuster.
To proceed to the next screen choose „Next” by pressing the button
[F3].
Data logging screen. (gure 24)
Using the [F2] button place the cursor on Data logging and by means
of the adjuster choose the number of memory bank where the data will
be recorded during the battery test. You can select only empty banks
which protects against erasure of data from previous recordings. In
order to avoid recording set No.
Using the [F2] button place the cursor on Period and set the period
of data recording by means of the adjuster.
The change of the data recording period implies the change of the
Time of Data Recording whose value is displayed.
Deleting and saving of the banks is described in point 5 of the manual.
To proceed to the next screen choose „Next” by pressing the button
[F3].
Discharge home screen. (gure 7)
Press the (green) ON button and the discharge will begin, fans cooling
resistors will start working, too.
gure 23
gure 24
gure 25
gure 22

www.eltransbaterie.eu page 9
Quick guide for TBA rmware V1.070
Description of the displayed parameters (gure 26):
„Q” - charge collected from the discharging battery
„E” - energy collected from the discharging battery
„U” - present voltage of the discharging battery
„Ir” - set discharge current
(correction by means of the adjuster is possible)
„t” - discharge time which increases or decreases depending on the
“Counter Settings”
„G” - the number of enabled resistors enforcing the discharge current
The discharge process is over when the battery reached the nal
voltage set in the „Uk” settings (gure 27) or when the set time was
over (gure 28).
Blowing is on for 3 minutes after the end of the discharge. The blowing
process allows for faster cooling of resistors.
When the blowing time is over, the display will show the information
on the discharge end reason: „U” - when the „Uk” battery voltage
achieved the set value (gure 29) or „t” - when the set discharge time
was over (gure 30).
Press the F1 [End] button to return to the main menu of the tester.
At any moment of the discharge process you may turn off the discharge
current by pressing the [OFF] (red) button.
This possibility should be treated as a temporary halt to the discharge
process.
Press the [ON] (green) button to reactivate the discharge process.
To permanently nish the discharge process, press the F1 [End] button.
gure 26
gure 27
gure 29
gure 28
gure 30

www.eltransbaterie.eu page 10
Quick guide for TBA rmware V1.070
7. Saving the recorded data to a USB memory stick.
Managing the recorded data is possible in the Logging and USB
Memory menu.
To select the Logging and USB Memory menu, press the [F1] – „Menu”
button on the home screen (gure 31).
Settings and additional options menu. (gure 32)
Using the [F2] button select the Logging and USB Memory menu and
then press the [F3] – „OK” button.
Logging and USB Memory screen (gure 33) allows you to manage
recorder banks. Select a bank by means of the adjuster.
Pink colour means that the Bank is full – there are recorded logging
data.
Green colour means that the data from the Bank have just been saved
to a USB memory stick.
Grey colour means that the Bank is empty.
There are 16 banks in total, each bank can contain 512 records.
Records are saved in the following time interval (the period of record
saving):
The frequency of record saving is set before the discharge process.
Transfer of data from the tester memory to a PC should be performed
by using a USB memory stick.
For USB memory sticks with the capacity up to 2 GB select the FAT16
le system while formatting them.
For USB memory sticks with the capacity over 2 GB select the FAT32
le system while formatting them.
The device does not support media formatted in the NTFS le system.
After placing the USB memory stick in the USB slot and locating the
cursor by means of the adjuster on a selected Bank, press the [F3] –
„Save” button. The data will be saved in a moment and the cursor will
change its colour to green.
Logging data les are saved in the CSV format – this format is supported
by popular spreadsheets.
As CSV is a text le in which the data are separated by a ‚;’ sign, you
can view its contents by using a text editor.
gure 32
gure 33
gure 31

www.eltransbaterie.eu page 11
Quick guide for TBA rmware V1.070
8. Deleting recorded data.
Deleting recorded data is possible in the Logging and USB Memory
menu.
To select the Logging and USB Memory menu, press the [F1] – „Menu”
button on the home screen. (gure 34)
Settings and additional options menu. (gure 35)
Select the „Logging and USB Memory” menu by pressing the [F2]
button and then press the [F3] - „OK” button
The „Logging and USB Memory” screen (gure 36) allows for managing
the recorder banks. Select a bank by means of the adjuster. The record
of the selected bank is deleted by means of the [F2] - „Delete” button
The tester is equipped with functions warning against a wrong decision
(gure 37).
To permanently delete the content of the data Bank, press the [F1]
- „Yes” button
When the Bank data deletion is over, the cursor will change its colour
to grey (gure 38).
During one operation it is possible to delete data from only one
selected bank.
gure 35
gure 36
gure 37
gure 38
gure 34

www.eltransbaterie.eu page 12
Quick guide for TBA rmware V1.070
9. Device security and alarms.
The battery tester has security measures whose work is signalized
by alarms on the display.
Security measures and alarms warn the User against incorrect handling
and protect the device from damage.
Every time the alarm is displayed, the discharge current is prevented
from owing through the tester.
I. Starting the tester without the battery connected. (gure 39)
Solution to the problem: the battery should be connected.
II. Reverse connection of the battery. (gure 40)
The warning is displayed if a battery is connected contrary to the
(+/-) signs.
At the same time the sound signalization will inform about reverse
polarization.
The system will prevent further work until the battery is appropriately
connected.
Solution to the problem: the battery should be connected in accordance
with the (+/-) signs.
III. Reverse connection of the battery after pause and restart of the
discharge process. (gure 41)
If the pause of the process occurs (by the [OFF] button being pressed),
information about the end of the discharge process is displayed.
The battery can now be disconnected and connected again, however,
its reverse connection will prevent the tester from further work.
Solution to the problem: the battery should be connected in accordance
with the (+/-) signs.
IV. Switching on the tester with the [safety switch] off. (gure 42)
Solution to the problem: the [safety switch] should be turned on.
V. Overcurrent protection (gure 43) – the discharge current value
exceeds the maximum value.
The display will show the “Current Overload” information when the
battery current exceeds
102.5A – for TBA 60
152.5A – for TBA 150
Solution to the problem: Cancel the emergency message following
instructions in point 10. If the alarm occurs again, contact the support
service.
gure 40
gure 41
gure 42
gure 39
gure 43

www.eltransbaterie.eu page 13
Quick guide for TBA rmware V1.070
VI. Thermal protection.
(gure 44)
The “Temperature Exceeded” information
will appear when the temperature of the chamber exceeds 100°C
orthermal security measures of the heater are activated.
Solution to the problem: Check if the device has proper ventilation.
Cancel the emergency message following instructions in point 10.
Ifthe alarm occurs again, contact the support service.
In order to enable further work, the reason for the alert should be
eliminated, e.g. the Emergency STOP safety switch should be turned on,
the [F3] - [Failures] button should be pressed.
The display will show information about emergencies, e.g. “Emergency
STOP”. (gure 45)
In case of any of the emergencies, after their cancellation or termination,
press the [F3] - „Failures” button to open the list of failures and cancel
the alert by means of the [F2] - „Cancel” button.
Failures can not be deleted if the emergency is not resolved, e.g. the
emergency switch is on.
Press the [F2] - „Cancel” button to delete the emergency and then
press the [F1] - „Exit” button.
The basic screen can be seen on the display (gure 46).
Press the [F1] - „Exit” button to leave the basic screen and allow for
the further work of the device.
The battery tester is protected from power failure. During the
discharge process current data are saved in a non-volatile memory
every 5 minutes. If power failure and power return occurred during
the test, the display will show the message in (gure 47).
Press the [F3] - [Yes] button to continue the process.
Checking the voltage of the connected battery. (gure 48)
If the value of the displayed voltage is consistent with the voltage of
the tested battery, press the [F3] - „Next” button.
Then the tester will display the parameters of the battery before the
power outage and will be prepared to continue the test.
To cancel the further discharge process, press the [F1] - „Cancel” button.
gure 45
gure 46
gure 47
gure 44
10. Responding to alerts.
11. Protection from power outage .
gure 48

www.eltransbaterie.eu page 14
Quick guide for TBA rmware V1.070
12. Tester menu and settings .
Additional information and tester settings are available in the „menu”.
To access „Menu”, press the [F1] - „Menu” button on the home screen
(gure 49).
Setting and additional options menu. (gure 50)
Using the cursor [F2] select a menu command and conrm by means
of the [F3] - „OK” button.
„Logging and USB Memory” are described in point 6 and 7 of this
quick guide.
I. Last test data. (gure 51)
This function allows you to review data from the last discharge test
performed.
The data are stored in the device memory until the power is switched off.
II. Choosing the cell type. (gure 52)
By means of the adjuster you can change the cell type: Acid / Alkaline.
If you choose Acid cells, the device will assign voltage parameters of
the tested cells in accordance with acid cells during the 5h/10h/20h
Discharge.
If you choose Alkaline cells, only one available “Discharge” mode will
be available with the maximum current of:
40A for TBA 60
100A for TBA 150
III. Tester Settings . (gure 53)
Using the [F2] cursor select the menu command and conrm by means
of the [F3] - „OK” button.
gure 50
gure 51
gure 52
gure 49
gure 53

www.eltransbaterie.eu page 15
Quick guide for TBA rmware V1.070
gure 55
gure 56
gure 57
gure 54
a) System information. (gure 54)
This screen presents information connected with the model of the
tester, the unique identication number of the device, rmware version,
temperature of the chamber and the remaining time of blowing.
b) Clock settings. (gure 55)
This function allows you to set the current date and time. The device
keeps date and time correctly without mains power supply for about
90 days. After this period the date and time should be set again. To set
the date and time, use the [F2] button and the adjuster, and conrm
the setting by pressing the [F3] - „OK” button.
c) Counter settings. (gure 56)
This function allows you to set the mode of counting time during a
battery test.
If the parameter is set to: Backwards - the battery test time counts
down to „0”.
If the parameter is set to: Forwards - the battery test time counts to
a set value.
To change parameters, use the adjuster and the [F3] - „OK” button.
d) Language settings . (gure 57)
This feature allows you to change the language in which information
is presented on the display.
To change parameters, use the adjuster and the [F3] - „OK” button.
TBA tester with rmware V1.070 is designed for three languages:
Polish, English and Romanian.
This manual suits for next models
1
Table of contents
Popular Batteries Pack manuals by other brands
Ryobi
Ryobi R36BTY6 manual

Photogenic Professional Lighting
Photogenic Professional Lighting AKB-1 Operational manual
Panasonic
Panasonic CF-VZSU26U operating instructions
DeWalt
DeWalt XR Li-ION DCR020 user manual
LIVOLTEK
LIVOLTEK BLF51 Series user manual

EINHELL
EINHELL Power-X-Change operating instructions
