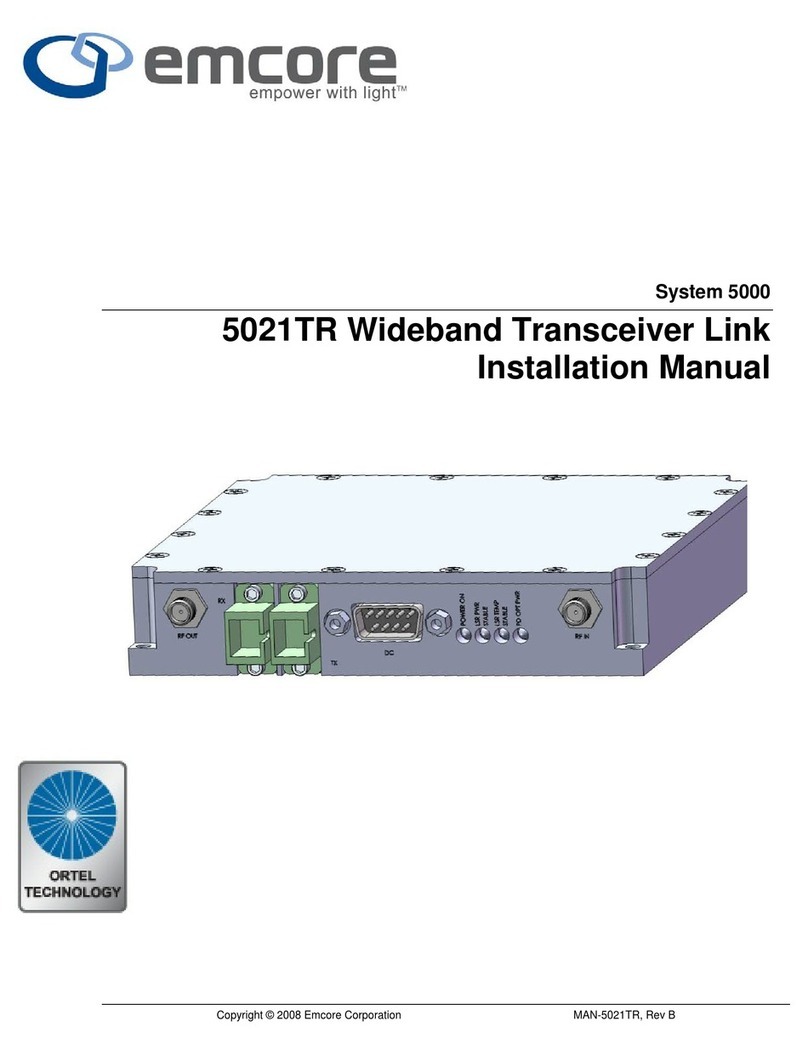
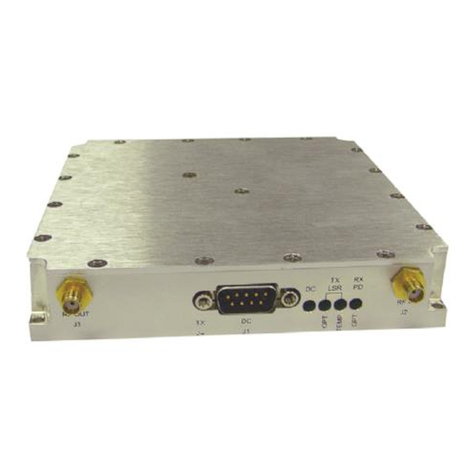
Emcore ORTEL 5016 Series User manual

Operator's Manual
Series 5016
Model 5016A
Model 5016B
Model 5016C
Model 5016D
MAN-5016 Rev A
2015 West Chestnut Street
Alhambra, California 91803
(626) 293-3400
Fax: (626) 293-3428
www.emcore.com

Ortel, A Division of Emcore MAN-5016 Rev A
Series 5016
2
Disclaimer
Every attempt has been made to make this material complete, accurate, and up-to-date. Users are
cautioned, however, that Ortel reserves the right to make changes without notice and shall not be
responsible for any damages, including consequential, caused by reliance on the material presented,
including, but not limited to, typographical, arithmetical, or listing errors.
Copyright Information
© 2004 by Ortel
Ortel, A Division of Emcore
Alhambra, California, 91803, USA
March 2004

Ortel, A Division of Emcore MAN-5016 Rev A
Series 5016
3
WARNINGS, CAUTIONS, AND GENERAL NOTES
Safety Considerations
When installing or using this product, observe all safety precautions during handling and operation.
Failure to comply with the following general safety precautions and with specific precautions described
elsewhere in this manual violates the safety standards of the design, manufacture, and intended use of
this product. Ortel assumes no liability for the customer's failure to comply with these precautions.
Calls attention to a procedure or practice, which if ignored, may result in damage to the system
or system component. Do not perform any procedure preceded by a CAUTION until described
conditions are fully understood and met.
Electrostatic Sensitivity
ESD = Electrostatic Sensitive Device
Observe electrostatic precautionary procedures.
Semiconductor laser transmitters and receivers provide highly reliable performance when operated in
conformity with their intended design. However, a semiconductor laser may be damaged by an
electrostatic charge inadvertently imposed by careless handling.
Static electricity can be conducted to the laser chip from the center pin of the RF input connector, and
through the DC connector pins. When unpacking and otherwise handling the transmitter, follow ESD
precautionary procedures including use of grounded wrist straps, grounded workbench surfaces, and
grounded floor mats.
Exposure to electrostatic charge is greatly reduced after the transmitter has been installed in an
operational circuit.
If You Need Help
If you need additional help in installing or using the system, need additional copies of this manual, or
have questions about system options, please call Ortel's Sales Department.

Ortel, A Division of Emcore MAN-5016 Rev A
Series 5016
4
Service
Do not attempt to modify or service any part of the system other than in accordance with procedures
outlined in this Operator's Manual. If the system does not meet its warranted specifications, or if a
problem is encountered that requires service, return the apparently faulty plug-in or assembly to Ortel for
evaluation in accordance with Ortel's warranty policy.
When returning a plug-in or assembly for service, include the following information: Owner, Model
Number, Serial Number, Return Authorization Number (obtained in advance from Ortel's Customer
Service Department), service required and/or a description of the problem encountered.
Warranty and Repair Policy Warranty and Repair Policy Warranty and Repair Policy
Warranty and Repair Policy Warranty and Repair Policy
The Ortel Quality Plan includes product test and inspection operations to verify the quality and reliability
of our products.
Ortel uses every reasonable precaution to ensure that every device meets published electrical, optical,
and mechanical specifications prior to shipment. Customers are asked to advise their incoming
inspection, assembly, and test personnel as to the precautions required in handling and testing ESD
sensitive opto-electronic components.
These products are covered by the following warranties:
1. General Warranty
Ortel warrants to the original purchaser all standard products sold by Ortel to be free of defects in
material and workmanship for one (1) year from date of shipment from Ortel. During the warranty
period, Ortel's obligation, at our option, is limited to repair or replacement of any product that Ortel
proves to be defective. This warranty does not apply to any product, which has been subject to
alteration, abuse, improper installation or application, accident, electrical or environmental over-
stress, negligence in use, storage, transportation or handling.
2. Specific Product Warranty Instructions
All Ortel products are manufactured to high quality standards and are warranted against defects in
workmanship, materials and construction, and to no further extent. Any claim for repair or
replacement of a device found to be defective on incoming inspection by a customer must be
made within 30 days of receipt of the shipment, or within 30 days of discovery of a defect within
the warranty period.
This warranty is the only warranty made by Ortel and is in lieu of all other warranties, expressed
or implied, except as to title, and can be amended only by a written instrument signed by an
officer of Ortel. Ortel sales agents or representatives are not authorized to make commitments on
warranty returns.
In the event that it is necessary to return any product against the above warranty, the following
procedure shall be followed:
a. Return authorization shall be received from the Ortel Sales Department prior to returning
any device. Advise the Ortel Sales Department of the model, serial number, and the

Ortel, A Division of Emcore MAN-5016 Rev A
Series 5016
5
discrepancy. The device shall then be forwarded to Ortel, transportation prepaid. Devices
returned freight collect or without authorization may not be accepted.
b. Prior to repair, Ortel Sales will advise the customer of Ortel test results and will advise the
customer of any charges for repair (usually for customer caused problems or out-of-
warranty conditions).
If returned devices meet full specifications and do not require repair, or if non-warranty
repairs are not authorized by the customer, the device may be subject to a standard
evaluation charge. Customer approval for the repair and any associated costs will be the
authority to begin the repair at Ortel. Customer approval is also necessary for any removal
of certain parts, such as connectors, which may be necessary for Ortel testing or repair.
c. Repaired products are warranted for the balance of the original warranty period, or at lease
90 days from date of shipment.
3. Limitations of Liabilities
Ortel's liability on any claim of any kind, including negligence, for any loss or damage arising from,
connected with, or resulting from the purchase order, contract, or quotation, or from the
performance or breach thereof, or from the design, manufacture, sale, delivery, installation,
inspection, operation or use of any equipment covered by or furnished under this contract, shall in
no case exceed the purchase price of the device which gives rise to the claim.
EXCEPT AS EXPRESSLY PROVIDED HEREIN, ORTEL MAKES NO WARRANTY OF ANY
KIND, EXPRESSED OR IMPLIED, WITH RESPECT TO ANY GOODS, PARTS AND SERVICES
PROVIDED IN CONNECTION WITH THIS AGREEMENT INCLUDING, BUT NOT LIMITED TO,
THE IMPLIED WARRANTIES OF MERCHANTABILITY AND FITNESS FOR A PARTICULAR
PURPOSE. ORTEL SHALL NOT BE LIABLE FOR ANY OTHER DAMAGE INCLUDING, BUT
NOT LIMITED TO, INDIRECT, SPECIAL OR CONSEQUENTIAL DAMAGES ARISING OUT OF
OR IN CONNECTION WITH FURNISHING OF GOODS, PARTS AND SERVICE HEREUNDER,
OR THE PERFORMANCE, USE OF, OR INABILITY TO USE THE GOODS, PARTS AND
SERVICE.
Ortel will not be responsible for loss of output or reduced output of opto-electronic devices if the
customer performs chip mounting, ribbon bonding, wire bonding, fiber coupling, fiber
connectorization, or similar operations. These processes are critical and may damage the device
or may affect the device's output or the fiber output.
Ortel test reports or data indicating mean-time-to-failure, mean-time-between-failure, or other
reliability data are design guides and are not intended to imply that individual products or samples
of products will achieve the same results. These numbers are to be used as management and
engineering tools, and are not necessarily indicative of expected field operation. These numbers
assume a mature design, good parts, and no degradation of reliability due to manufacturing
procedures and processes.
Ortel is not liable for normal laser output degradation or fiber coupling efficiency degradation over
the life of the device.

Ortel, A Division of Emcore MAN-5016 Rev A
Series 5016
6
This fiberoptic laser transmitter contains a class IIIb laser product as defined by the U.S. Department of
Health and Human Services, Public Health Service, Food and Drug Administration. This laser product
complies with 21 CFR, Chapter I, Subchapter J of the DHEW standards under the Radiation Control for
Health and Safety Act of 1968. The laser module certification label is located on the top of the transmitter
enclosure and it also shows the required DANGER warning logotype.
INVISIBLE LASER RADIATION
AVOID DIRECT EXPOSURE TO BEAM
PEAK POWER 30 mW
WAVELENGTH 1300/1550 nm
CLASS IIIb LASER PRODUCT
THIS PRODUCT COMPLIES WITH 21 CFR
CH
A
PTER I SUBCH
A
PTER J
DANGER
The Ortel laser products are used in optical fiber communications systems for radio frequency and
microwave frequency analog fiberoptic links. In normal operation, these systems are fully enclosed and fully
shielded by the hermetically sealed laser metal package. Laser bias current is limited by the internal control
circuitry. The transmitters are coupled to glass fiber and have 1300 nm optical output wavelength with
typically .5 to 7 mW output power depending on the model. The optical radiation is confined to the fiber
core. Under these conditions, there is no accessible laser emission and hence no hazard to safety or
health. Variations in the different models reflect the bandwidth, optical output, noise, and distortion of the
laser.
Since there is no human access to the laser output during system operation, no special operator precautions
are necessary when fiber is connected to the transmitter and receiver. During installation, service or
maintenance, the service technician is warned, however, to take precautions, which include not looking
directly into the fiber connector or the fiber, which is connected to the fiber connector before it is connected
to the fiberoptic receiver. The light emitted from the fiberoptic connector or any fiber connected to the
connector is invisible and may be harmful to the human eye. Use either an infrared viewer or fluorescent
screen for optical output verification. All handling precautions as outlined by the FDA and ANSI Z136.2 and
other authorities of class IIIb lasers must be observed.

Ortel, A Division of Emcore MAN-5016 Rev A
Series 5016
7
Table of Contents
Chapter 1 General Information ....................................................................................................8
Description...................................................................................................................... 8
Specification ................................................................................................................... 8
Identification and Model Numbers.................................................................................. 10
Options ........................................................................................................................... 11
Chapter 2 Safety Precautions .......................................................................................................12
ESD Sensitive................................................................................................................. 12
Power Supply ................................................................................................................. 12
Input RF Power............................................................................................................... 12
Grounding....................................................................................................................... 12
Storage ........................................................................................................................... 12
Chapter 3 Operation.......................................................................................................................13
Theory of Operation........................................................................................................ 13
External Displays and Controls ...................................................................................... 13
LED Displays .................................................................................................................. 13
Status Monitors............................................................................................................... 13
Alarm Functions.............................................................................................................. 14
Internal Control Circuits.................................................................................................. 14
Optical Power Stabilization............................................................................................. 14
Temperature Stabilization .............................................................................................. 15
Chapter 4 Installation and Setup Procedures.............................................................................16
Unpacking and Visual Infection ...................................................................................... 16
Operating Conditions...................................................................................................... 16
Connection Instructions.................................................................................................. 16
Electrical Connections.................................................................................................... 16
DC Connection ............................................................................................................... 16
RF Connection................................................................................................................ 17
Chapter 5 Performance Verification Procedures........................................................................18
Broadband Amplitude Response and VSWR................................................................. 18
Noise Figure Measurement ............................................................................................ 19
Linearity Test - Two Carrier Test.................................................................................... 21

Ortel, A Division of Emcore MAN-5016 Rev A
Series 5016
8
Chapter 1 - General Information
1.1 DESCRIPTION
This manual describes the following fiberoptic transceivers model numbers:
5016A/B/C/D
These fiberoptic products are designed to carry RF and microwave signals using singlemode
optical fiber. They contain InGaAsP high-speed semiconductor lasers and photodiodes in a
patented high-speed package. Featured in the package is a coaxial input and a built-in
thermoelectric cooler (TEC). The 5016 A/B/C/D uses a high performance, internally isolated DFB
laser operating at a wavelength of 1310 nm.
The 5016x contains electronic circuits to operate the optical components over the operating
temperature range of the product. Also, status monitoring and alarm circuits are included for use
in systems that require self-diagnosis and failure analysis.
The signal input is via a coaxial SMA connector in a 50 ohm input circuit. The optical connectors
available for the user on the standard 5016 A/B/C/D are FC/APC. And use a separate box for the
fiber spool (the 355A Fiber Delay Unit). The 355A Fiber Delay Unit is available in delays from 0.1
sec to 100 sec.
1.2 SPECIFICATIONS
For detailed specifications of an individual product described in this manual, consult the Product
Specification Table (PST) included with your manual. If the PST, is missing you can obtain a
duplicate from the Ortel Sales Department, (626) 293-3400.
Specifications apply over the entire specified operating range of the product and are guaranteed
for 1 year after the date of purchase.

Ortel, A Division of Emcore MAN-5016 Rev A
Series 5016
9
PRODUCT SPECIFICATION
RF Parameters
Frequency Range
5016A 0.1 to 4 GHz
5016B 0.1 to 10 GHz
5016C 1.0 to 15 GHz
5016D 1.0 to 18 GHz
Insertion Loss
Laser -26 dB
Photodiode -8 dB
System -34 dB
Amplitude Response
"A" Version +1, -2 dB
"B" Version +1, -2.5 dB
"C" Version +1, -3.5 dB
"D" Versions +1, -5.5 dB
Input/Output Impedance 50 Ω
Input Return Loss
5016 A/B -9.6 dB
5016 C/D 1 to 10 GHz -9.6 dB
10.1 to 18 GHz -6.0 dB
Output Return Loss
5016 A/B -9.0 dB
5016 C/D 1 to 10 GHz -9.0 dB
10.1 to 18 GHz -6.0 dB
Input 1 dB Compression (typ) +20 dBm
Input Third Order Intercept
100 MHz to 4.0 GHz > +30 dBm
4.0 to 18.0 GHz > +25 dBm
Noise Figure (dB)
100 MHZ 44 dB
4 GHz 49 dB
10 GHz 54 dB
15 GHz 64 dB
18 GHz 69 dB
Optical Parameters
Fiber singlemode (9/125)
Connectors FC/APC
DC Power Requirements
+15 V @ 300 mA (max)
+5 V @ 1.6 A @ +65ºC

Ortel, A Division of Emcore MAN-5016 Rev A
Series 5016
10
Maximum Ratings
Input Power +20 dBm/60 sec
Operating Temperature -20 to 65ºC
Storage Temperature -40 to 85ºC
Mechanical Dimensions
Height 2.37 in
Width 6.0 in
Depth 6.0 in
RF Connector SMA (F)
DC Connector D-sub 9 pin
DC Pinout
Pin No Function
1 +15 Vdc
2 +5 Vdc
3 NC
4 Power Ground
5 Ref. Ground
6 Laser Photodiode Monitor
7 Received optical power
8 Laser current monitor
9 Over temperature alarm
1.3 IDENTIFICATION AND MODEL NUMBERS
Each Ortel product is assigned a unique model number and serial number, which appears on the
label of the transmitter. Model numbers for this series have the form
5016X-nnn
where ‘X’ is a letter designation specifying the model (A, B, C and D) and ‘nnn’ is a three digit
numeric designation for the appropriate optical connector option.

Ortel, A Division of Emcore MAN-5016 Rev A
Series 5016
11
1.3.1 OPTIONS
Changes to the PST can; be accommodated by requesting non-standard options to meet
specific performance requirements. Such options are designated by an alpha-numeric
suffix,
-XNN
where X is alpha, and NN is numeric. Such custom options must be agreed upon in
advance with the Ortel Sales Department.

Ortel, A Division of Emcore MAN-5016 Rev A
Series 5016
12
Chapter 2 - Safety Precautions
2.1 ESD SENSITIVE
Semiconductor lasers and photodiodes are static sensitive devices, and products containing
them should be treated accordingly. Static electricity can be conducted to the laser chip from the
center pin of the RF input SMA connector, and through the DC connector pins. When unpacking
and handling the delay line, prior to install action, use ESD precautionary procedures such as
grounded wrist straps and grounded work mats.
After the delay line is installed in an operational circuit, these pins are protected from casual
contact and ESD sensitivity is greatly reduced.
2.2 POWER SUPPLY
A power supply is required to provide power to the laser, the photodiode and to the temperature
control circuits. Operating the delay line outside of its recommended power supply values may
cause damage to the product. Damage can occur to the laser if the delay line is operated with
one or more supply voltages set improperly. It is recommended that the supply voltages be
turned on simultaneously after the connections have been made to the 9-pin connector. For best
results, avoid connecting the 9-pin connector to the delay line housing while the power supply is
on (see Section 3.3 for connection instructions before applying power).
2.3 INPUT RF POWER
The laser diode can be overdriven and damaged by the application of excessive RF power.
Refer to the specific Product Specification Table for information about the maximum permissible
RF power to the delay line. Do not apply RF power with the delay line turned off.
2.4 GROUNDING
All power supplies should be connected to an earth ground.
2.5 STORAGE
Observe ESD precautions while storing the delay line (i.e., anti-static containers) and store away
from corrosive materials. Storage temperature: -40 to 85ºC.

Ortel, A Division of Emcore MAN-5016 Rev A
Series 5016
13
Chapter 3 - Operation
THEORY OF OPERATION
The Model 5016 series fiberoptic delay line uses an Ortel high-speed laser module to generate an
intensity modulated optical signal at 1300 nm wavelength. The 5016 A/B/C/D uses a high performance
distributed feedback (DFB) laser with a built-in optical isolator. This signal is sent through a length of
singlemode optical fiber and received by a high-speed photodiode, which outputs the RF signal. For more
complete information on the operating principles of analog fiberoptic links, consult Ortel's RF/Microwave
Fiberoptic Link Design Guide.
3.1 EXTERNAL DISPLAYS AND CONTROLS
There are no external controls or adjustments. The laser current is preset at the factory to
provide optimum performance according to the specifications published in the data sheet and the
Product Specification Table.
3.1.1 LED DISPLAYS
There is one externally visible LED that provides information about the operating state of
the delay line. This LED is normally on. If it is off after applying dc power to the delay
line and waiting for a few seconds, recheck all power connections. If the condition
persists, consult with Ortel's Customer Service department.
POWER ON: This LED is normally ON, and indicates that +15 V is present at Pin #1 of
the dc 9-pin connector.
3.1.2 STATUS MONITORS
Three monitor voltages are available on the dc connector. They are designed to provide
information about the operating condition of internal optical power circuits for routine
operational maintenance.
PIN 6: Laser Photodiode Current Monitor. 1 V/mA, ±2% (1.0 MΩload). Provides a
buffered voltage proportional to the photodiode current.
PIN 7: Received Low optical Power. 1 V/mA, ±2% (1.0 MΩload). Provides a buffered
voltage proportional to the photodiode current.
PIN 8: Laser DC Current Monitor. 1 V/100 mA, ±2% (1.0 MΩload). Provides a buffered
voltage proportional to the laser dc current. Measuring and recording this
voltage provides a record of the laser current over time. The normal range is 0.3
to 0.75 V (30 to 75 mA).

Ortel, A Division of Emcore MAN-5016 Rev A
Series 5016
14
3.1.3 ALARM FUNCTIONS
The alarm is designed to interface with user-supplied circuits. The alarm is an open
collector output capable of sinking 20 mA when ON and withstanding 15 Vdc when OFF.
Normal operation of the alarm circuit is the OFF state. A suggested use of the alarm
circuit would be a series connection of an external LED, or a relay, from the system 15 V
supply through a 1 kΩresistor. Assuming negligible voltage drop through the LED or
relay, this would provide a 15 mA activation current when the alarm is active.
The alarm function and pin assignment is as follows.
PIN 9: Laser Temperature. This alarm is ON (sinks current) if the laser substrate
temperature is more than 2oC higher than the factory setpoint. The alarm is not
activated if the temperature is LOWER than the setpoint.
3.2 INTERNAL CONTROL CIRCUITS
The laser module contained in this delay line contains two sensing elements to provide feedback
on the operating conditions of the laser. They are, a monitor photodiode, which provides a
current proportional to the output power of the laser chip, and a thermistor, which provides
information about the temperature of the laser substrate. The entire substrate is mounted on a
Peltier Cooler (thermoelectric cooler), which can heat or cool the laser substrate as necessary to
maintain a constant operating temperature for the laser chip.
The 5000 series delay line contains two feedback control circuits, which use these sensing
elements to maintain stable operation.
3.2.1 OPTICAL POWER STABILIZATION
The optical power control circuit senses the current generated by the monitor photodiode
and compares the resulting voltage against a reference voltage, which is preset at the
factory. A feedback circuit drives a highly stabilized current source, which provides the
dc current for the laser operation. This mode of operation is known as "constant power".
As the laser ages, the control circuit will maintain the optical output power, as sensed by
the internal photodiode, constant by adjusting the laser current to compensate for
changes in chip operating temperature, threshold current, and quantum efficiency. The
power control circuit will not compensate for changes in the laser/fiber coupling
efficiency.
In addition to the dc current supply circuit; there are two additional circuits in the optical
power control circuit. A "slow start" circuit operates when the delay line is switched on.
This circuit increases the laser current over 3 seconds from zero to its operating value.
This eliminates transients and which could damage the laser. A current limiter, preset at
the factory, establishes a maximum value for the laser current. Thus, a failure of the
monitor photodiode will not result in uncontrolled laser current values, which would
destroy the laser.

Ortel, A Division of Emcore MAN-5016 Rev A
Series 5016
15
3.2.2 TEMPERATURE STABILIZATION
The temperature control circuit senses the thermistor resistance in the laser module and
compares it against a variable reference, which is preset at the factory. The error voltage
drives an integrator, which supplies current to the T/E cooler (TEC). The current source
is bipolar, so heating and cooling functions are provided to the TEC.
As with the power control circuit, a current limiter prevents the TEC and laser from
damage due to excessive heating or cooling functions should the thermistor fail.

Ortel, A Division of Emcore MAN-5016 Rev A
Series 5016
16
Chapter 4 - Installation and Setup Procedures
4.1 UNPACKING AND VISUAL INSPECTION
The product described herein was inspected before shipment and found to be free of mechanical
and electrical defects. Observe ESD precautions while handling the delay line. Unpack and
examine the product for any damage due to shipping. Keep all packing materials until you are
satisfied that the product works according to specifications. Verify that the pins and connectors
are free from obvious shipping or handling damage. If damage is discovered, file a claim with the
carrier immediately. Notify the Ortel Sales Department as soon as possible.
4.2 OPERATING CONDITIONS
This product is designed and tested to withstand harsh environmental operating and storage
conditions. The basic design and manufacturing processes have been subjected to rigorous
product qualification tests of temperature cycling, mechanical shock, and vibration. Every
product is warranted to operate within specification over the temperature range from -20 to 65ºC,
and to withstand storage temperatures from -40 to 85ºC without degradation.
4.3 CONNECTION INSTRUCTIONS
To operate the 5016 at room temperature in a laboratory setting, it can be placed on a convenient
flat surface without any particular concern for a good heatsink. In a field-operating environment,
to obtain reliable operation over the full temperature range, make the fiberoptic connections
before applying power to the 5016.
4.3.1 ELECTRICAL CONNECTION
Observe the following procedures while making electrical connection to the delay line.
4.3.1.1 DC CONNECTION
Connect the transmitter to the required dc voltages using a standard 9-pin DSUB
connector. Do not solder wires directly to the pins of the dc connector. The
delay line contains internal regulator and transient suppression circuits. Most
high quality power supplies will provide excellent results. For best results, make
the dc connection to the transmitter before switching on the supply.
When turning the transmitter on, there is a "slow start" circuit that introduces a
2-3 second delay in the turn on. When the LED's are all lit, the 5016 is ready to
use.

Ortel, A Division of Emcore MAN-5016 Rev A
Series 5016
17
4.3.1.2 RF CONNECTION
Apply RF power only after DC power has been applied. Connect the RF signal
source to the SMA input connector. Absolute maximum signal level shall not
exceed 100 mW.
CAUTION: Do not apply excessive torque to the SMA connector. The use of
standard wrenches can lead to a damaged connector. Use 7-9 inch
pounds of torque. The use of a torque wrench is strongly
recommended.
The input impedance of the delay line is 50 ohms. Use signal
sources with the same characteristic impedance. Consult the
Product Specification Table for the maximum input signal level. Do
not exceed this level to avoid damaging the laser diode.

Ortel, A Division of Emcore MAN-5016 Rev A
Series 5016
18
Chapter5 - PERFORMANCEVERIFICATION PROCEDURES
5.1 Broadband Amplitude Response and VSWR
Test Set-Up: See Figure 1. Amplitude and VSWR can be measured with a scalar network
analyzer and a sweeper.
1. Set up the HP8510B network analyzer in the frequency domain with the following
parameters;
Source Power +10 dBm
Step Sweep 801 Points
Start Frequency 1.0 GHz
Stop Frequency 10.0 GHz; "A" versions (set the marker at 4 GHz)
15.0 GHz; "B" versions (set the marker at 10 GHz)
18.0 GHz; "C" versions (set the marker at 15 GHz)
20.0 GHz; “D” versions (set the marker at 18 GHz)
Optical Loss 0 dB
2. Perform a response calibration (you only need the "THRU" connection for this).
3. Connect the delay line- port 1 of the test set to the device input and port 2 to the device
output.
4. Press "Restart Measurement".
5. When the measurement is done, press "Channel 1" and "S21" and "Log Mag".
6. Set the vertical scale for 5 dB/div, the Reference Level and the Reference Position so that
the response is clearly visible in the upper half of the screen. If you are not measuring the
phase response skip to step 12.
VSWR
7. Return to a single channel display. Then, press "Channel 1" and S11.
8. Go to the "Format" menu and press the SWR soft key. Set the vertical scale to 0.5/div. Set
the Reference Level to 1.0 and adjust the Reference Position so that the trace is clearly
visible on the screen.
9. Press "Channel 2" and "S22". Repeat step 16 above.
10. Press "Display", "Dual Channel" then "Overlay" to display S11 and S22 simultaneously. Adjust
the Reference Positions as necessary so that both traces are clearly displayed.
11. Activate the markers. Set Marker 1 at 1 GHz and Marker 2 at 10 GHz for "A" versions,
15GHz for "B" versions, 18 GHz for "C" versions and 20 GHz for "D" versions.
12. Verify that the input and output VSWR (S11 and S22) are less than the specification in the
region between the markers.

Ortel, A Division of Emcore MAN-5016 Rev A
Series 5016
19
13. Activate the Copy menu and copy all on the plotter.
5.2 Noise Figure Measurement
1. Connect equipment as shown in the figure.
2. Set the signal generator to CW and set the output power so that the power into the delay line
is +0 dBm. Perform the signal to noise test at the following frequencies:
"A" version 1.0, 10.0 GHz
"B" version 1.0, 10.0, 15.0 GHz
"C" version 1.0, 10.0, 15.0, 18.0 GHz
"D" version 1.0, 10.0, 15.0, 18.0, 20.0 GHz
Delay
Line
RF
In
RF
Out
F < 7 dB
G > 30 dB
Spectrum
Analyzer
HP 8350B
Signal Generator
Figure 2 - Test Set-up: Signal to Noise

Ortel, A Division of Emcore MAN-5016 Rev A
Series 5016
20
3. Set up the spectrum analyzer as follows:
a. Center frequency frequency under test
b. Span 50 MHz
c. ATTEN 0 dB
d. Scale 10 dB/div
e. RES BW 1 MHz
f. VID BW 300 Hz
4. Activate the marker. Perform a peak search, then set marker to reference level.
5. Verify that the noise floor displayed on the spectrum analyzer is at least 10 dB higher than it
is with the delay line disconnected.
6. Set the marker 15 MHz above the carrier. Using the marker menu activate the noise density
measurement. The marker display will now be in dBm/Hz. Turn off the RF signal and take the
difference between the displayed noise density and the reference level. Since the input signal
is 0 dBm, this difference is the equivalent input noise. Add 174 dB to this number to get the
noise figure. Verify that it meets the specification.
7. Repeat this procedure at the other frequencies.
This manual suits for next models
4
Table of contents
Other Emcore Transceiver manuals
