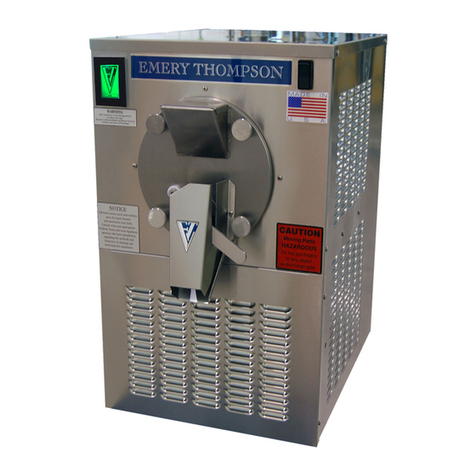
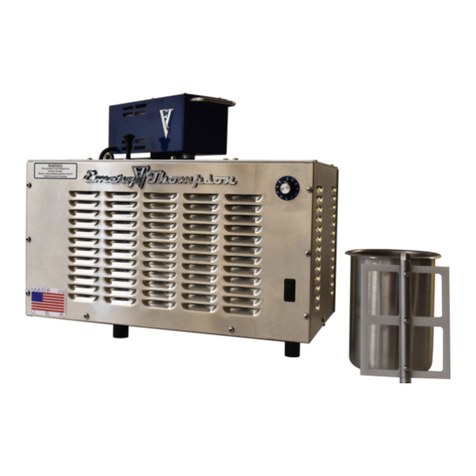
Emery Thompson CB-200 User manual

0
v. 3.07
EMERY THOMPSON
BATCH FREEZER
INSTALLATION
OPERATING, MAINTENANCE
AND CLEANING MANUAL
MODEL CB-200 COUNTERTOP

~ 1 ~
v. 1.23
Congratulations and thank you for purchasing your new model
CB200 batch freezer. With the CB200, you will be able to produce
some of the finest Super Premium Hard Ice Cream, Fresh Fruit
Sorbets, Artisan Gelatos, Old World Italian Ice and New England
Style Frozen Lemonade. Your new machine has been built for
speed, versatility, and longevity, as well as safety. It has been
meticulously crafted and tested to give you many years of satisfied
service. Please be sure to go over the entire instruction manual
prior to using your new machine.
STATE LAW REQUIRES THAT THE ELECTRIC POWER TO
THIS MACHINE BE INSTALLED BY A LICENSED
ELECTRICIAN –ONLY
FAILURE TO ADHERE TO THIS WILL VOID YOUR WARRANTY

~ 2 ~
v. 1.23
YOUR FROZEN DESSERTS
(FREEZING UP YOUR MACHINE)
What you did wrong!
When our customers first run their new Emery Thompson CB-200,
what we too often hear is how they froze the machine up solid and
the machine just stopped spinning.
Here is a list of what went wrong:
1. They did not read the instruction manual. Unlike a cell phone
(that does not come with an instruction manual), your
investment comes with a very comprehensive manual. Your
new batch freezer is not “Intuitive.” You must read and
understand the entire instruction manual –and especially
read the warnings! It’s a lot of money to spend and not
operate it properly.
2. If the scraper blades (the two long pieces of Delrin plastic)
are not installed properly, the machine will start making
noise in a few minutes and either freeze up or take three
times as long to make a batch. The curved tip of the blade
goes to the back of the machine and the other tip of the blade
which is cut off on a 90 degree angle goes to the front of the
machine. If this is wrong the machine will not operate
properly. You need to be aware of this Each and Every time
you assemble the machine. We have added a dimple on the
front of each blade so that you can more easily see which
way the front of the blade faces.

~ 3 ~
v. 1.23
3. You cannot do “test” half batches. You must have two quarts
of product in the freezing cylinder of the CB-200 in order to
make a batch. Less than this will freeze up the machine! Do
not turn on the refrigeration switch with only water in the
machine. Water is not a dairy blend nor is it a water ice. No
sugar or no dairy and your machine will freeze up solid.
4. YOUR BLEND: You’re going to have to trust me on this one
–I’ve been building and running Emery Thompson Batch
Freezers since I was sixteen years old. Your “blend” which
came from a magazine, cookbook or you made it up will
work fine in your home ice cream freezer or a cheap Italian
or Chinese machine. Why? Because it takes a very long time
to freeze –40 minutes or more as compared to ¼ of that time
in your new Emery Thompson. And it has little or no
freezing capabilities beyond your home refrigerator. Your
Emery Thompson has tremendous freezing ability. But
without the proper level of solids, your recipe is going to
freeze up in a modern piece of dairy equipment. Solids come
in the form of sugars, cream and some nuts like cashews.
Splenda, Stevia and Xylitol have no solids.. Milk does not
have enough solids. Coconut water has virtually no solids.
Cream of Coconut does. While you can use all these products
in your formula, they alone will not freeze. You are welcome
to call us and we can discuss your formula with you… but
physics and the laws of freezing cannot be changed. Water
and flavor do not alone make a sorbet and milk alone does
not make an ice cream.

~ 4 ~
v. 1.23
CAUTION
On 115 volt models of
the CB200:
Be sure that the batch freezer
is the ONLY appliance
running on the circuit you
use, otherwise, overload
WILL occur!
No toasters No blenders
No microwaves
No coffeepots No irons

~ 5 ~
v. 1.23
SUPPLEMENTAL
BULLETIN
PLEASE NOTE THAT DEPENDING ON THE
MANUFACTURING DATE OF YOUR MACHINE, THERE
ARE TWO FEATURES THAT MAY HAVE CHANGED:
1) The refrigeration
control is a toggle switch.
2) We have incorporated
an external, resettable
circuit breaker, located at
the top rear panel of the
machine.

~ 6 ~
v. 1.23
TABLE OF CONTENTS
IMPORTANT WARNING INFORMATION
page 1
DON'T DO THIS! (AND WHY)
page 2
ELECTRICAL LOAD WARNING
page 4
SUPPLEMENTAL BULLETIN
Page 5
Section 1:
OVERVIEW
page 7
Section 1:
UNPACKAGING
page 8
Section 2:
WORK AREA REQUIREMENTS
page 9
Section 3:
SAFETY
page 10
Section 4:
OPERATION
page 12
Section 5:
CLEANING, ASSEMBLY, AND SANITIZING
page 14
Section 6:
CARE and MAINTENANCE
page 16
Section 7:
RECIPES
page 18
Section 8:
PARTS DIAGRAMS
page 20
DIAGRAM 3-A
DIAGRAM 3-B
DIAGRAM 5-A
page 20
page 21
page 22
Section 9:
WARRANTY
page 23

~ 7 ~
v. 1.23
Section 1: OVERVIEW

~ 8 ~
v. 1.23
Section 1: UNPACKAGING
Your CB200 will arrive to you on a small pallet with a
heavyweight cardboard box covering it. The machine and pallet
combined weigh approx. 175 pounds; the machine by itself weighs
118 pounds. Please use a helper to unpackage and move the
machine safely.
Upon delivery, immediately inspect the pallet and packaging for
any sign of damage. If possible, have the delivery driver wait if
you suspect damage and follow below:
Begin by cutting all the way around the cardboard box at 2" above
the pallet surface. Use a short box-cutter, and go around the box
several times to cut all the way through the cardboard. Once cut
through, lift the box straight up and off the pallet/machine.
Carefully remove the shrink-wrap off of the exterior of the
machine.
The machine is bolted through its' feet from the underside of the
pallet. Use a 1/2" wrench to remove all four bolts, and the
machine will be free of the pallet. With the assistance of a helper,
lift the machine and move to your work area.
The pallet and box can be saved so that if the machine is ever
moved, it can be done so safely.

~ 9 ~
v. 1.23
Section 2: WORK AREA REQUIREMENTS
As stated in section 1, the machine weighs 118 pounds, and has
some momentum when running, so it is necessary to position it on
a solid work surface that can easily support this weight, and resist
wobbling. For reference, the machine height should be set up so
that the top of the spout is at chest height of the operator.
ELECTRICAL CONNECTION: The model CB200 machine
comes with a 72 inch long flexible power cord that has an L14 - 20
locking male plug installed on it. It MUST ONLY be connected to
a matching receptacle which has been wired to a dedicated and
fused 20-amp circuit. Your machine has a wiring tag on its cord,
as well as electrical specifications on its serial number tag on the
rear of the machine. Your electrician can also call us for technical
information if necessary during business hours.
Clearance around the machine is critical for airflow and
performance. Also, please be sure to remove all plastic protective
film from the sheet metal surfaces. The distance away from walls,
other equipment, etc. should be 8" in the rear, 18" on each side,
18" on top, and its' front open to the room. It also should remain
on the four feet it was shipped on, not only for airflow but also for
cleaning beneath it.
The surrounding area should be kept free of clutter, the floors dry,
and with at least some air circulation.

~ 10 ~
v. 1.23
Section 3: SAFETY
First, be sure to read and understand this machine manual, and
familiarize yourself and other operators with the machine features,
its operation, cleaning, and maintenance.
Your machine is equipped with several important safeguards that
should never be removed or altered. DO NOT remove the
following items:
Inlet spout combination lid and gate –restricts fingers
from coming in contact with moving blades/dasher, and
helps control splashing.
Door discharge guard –restricts fingers and utensils
from coming in contact with moving blades/dasher.
Also, in combination with the discharge chute, funnels
product into smaller containers neatly.
The sides, front, and rear section of the machine have ventilation
openings in them. All but the rear panel are louvered to deflect
food and splashing liquids away from the inside. Never spray
water directly at/into these openings.
If your machine is set up with a plug on the end of its cord, make
absolutely sure your hands are dry when plugging it in, or
unplugging it.
When operating the machine, avoid distractions such as
conversations, television, small children, etc.
The door and the dasher are heavy parts, and are slippery when
wet. Use extreme care handling them. Keep the floor and work
area neat and dry to avoid slippage. Do not use the top of the
machine as a storage spot.

~ 11 ~
v. 1.23
Section 3: SAFETY (Cont’d)
In addition to the above:
DO NOT operate your machine unless it is connected to a
circuit wired, grounded, and properly fused by a licensed
electrician.
DO NOT put fingers, hands or any utensils in either the inlet
spout or door outlet.
DO NOT operate the machine unless it is properly
assembled and all guards are in place.
DO NOT force any of the (washable) parts together or
into/on the machine. All parts should fit together easily.
DO NOT operate the machine with the freezing cylinder
empty.
DO NOT turn on the machine’s refrigeration switch with
only water in the freezing cylinder.
DO NOT let your product over-freeze during production.
This is the most common mistake a new operator makes.

~ 12 ~
v. 1.23
Section 4: OPERATION
Your new CB200 batch freezer is very easy to operate, having only
two controls on it. The dasher/blade assembly (mixer or beater) is
controlled by an illuminated rocker switch at the upper left-hand
corner of the machine. When the switch is "rocked" upward, it
illuminates signifying that the dasher is spinning. This switch also
functions as a circuit breaker to protect the drive motor. If your
product is being over-frozen and gets too stiff, the switch will
automatically trip like a circuit breaker, and automatically switch
itself off.
The second control is for the refrigeration, and is an ON/OFF
toggle switch. Turning the switch on will start the refrigeration
process. Products freeze at different times, so it is best to log
actual freezing times for repeatability. Eight to ten minutes is a
good starting point. NEVER LEAVE THE MACHINE
UNATTENDED WHILE IN OPERATION. As mentioned in the
above paragraph, if the machine is allowed to run too long or left
unattended it will eventually freeze your product solid and turn
itself off. The machine will then be unusable until either your
product thaws, or the product is manually removed from the
cylinder.
Also remember that different products will take on different
amounts of air (overrun), so depending on the product you are
making, you will be filling your machine with less than the 3
quarts/liters maximum output capacity.

~ 13 ~
v. 1.23
Section 4: OPERATION (Cont’d)
The normal sequence of operation, assuming the machine is
cleaned and sanitized, would be as follows:
- flip the inlet spout guard open.
- pour in the mix/ingredients.
- close the inlet spout guard
- turn on the beater switch (upper left).
- turn the toggle switch to the ON position.
- check the stiffness of the mix by slightly and quickly opening the
gate to allow a small amount of product to come out.
- when the desired stiffness is achieved, MAKE SURE you
immediately turn off the refrigeration.
- open the discharge gate and allow the product to come out as fast
as it will flow, and fill your container(s).
See the next section for cleaning and sanitizing.

~ 14 ~
v. 1.23
Section 5: CLEANING , ASSEMBLY and SANITIZING
Note: Your local or state health inspector will always have
jurisdiction over the methods and chemicals that he/she prefers for
use on this machine. Our instructions are based on industry
standards, and should be discussed with your inspector.
The first step toward insuring a clean and sanitary machine is to
identify the various parts that will or could come in direct or
indirect contact with food. (see diagram 5-A, p.19) These parts
have to be cleaned and sanitized at the end of each use or period of
use that lasts one hour or more without refrigeration/freezing. In
other words, if you leave mix residue in the machine for an hour or
more before your next batch, the machine should be disassembled,
cleaned, and sanitized. All of the parts to be cleaned are
dishwasher top rack safe, or can be manually cleaned with warm
water and dish washing detergent, along with an abrasive hand
pad. The inside surface of the freezing cylinder will have to be
manually washed with detergent and thoroughly rinsed.
Once the parts have been hand or machine washed, then dried,
there are three areas that require a coating of food-grade grease on
them prior to assembly, the rear section of the dasher shaft, the
door outer surface where the gate slides against it (see diagram 5-
A, p.19), and the inside (bore) of the white rear bushing in the
cylinder. On the dasher shaft, coat the surface of the last 2 1/2
inches of the REAR of the shaft with a film of food grease, then
install two blade springs, the blade, and then while holding that
blade on do the same for the other blade. Then smear grease into
the bore of the white plastic bushing that goes through the freezing
cylinder. Now the dasher can be inserted into the freezing cylinder.

~ 15 ~
v. 1.23
Section 5: CLEANING, ASSEMBLY and SANITIZING (Cont’d)
Put the drive end of the dasher into the bushing in the rear of the
cylinder, and push it all the way into the bushing. Rotate the
dasher assembly so it engages onto the drive motor, and the
assembly moves backward until the blades touch the rear of the
cylinder. Wipe off any excess food grease that has smeared off at
the bushing.
Smear a thin film of food grease on the door surface where the
round discharge gate slides against it during opening and closing of
the handle. (see diagram 5-A, p.19) The round gate has an O-ring
under it, and if the O-ring gets dry, it has a tendency to roll out of
its groove. Check and be sure the small round bushing is in the
pocket on the backside center of the door, and put the door in place
on the two mounting studs. The nose of the dasher shaft should go
into the round bushing in the door. Now install and evenly tighten
each of the two knurled knobs. The unit is now ready for
sanitizing.
Sanitization is the important step of using a chemical to kill any
remaining bacteria just prior to introducing food products to the
machine. Emery Thompson uses and recommends the sanitizer
"Stera-Sheen Green Label" made by Purdy Products Company.
Mix a 2-quart batch of sanitizer (following the manufacturer's
instructions) and pour the mixture into the CB200. Turn on the
beater motor, and agitate this mixture for a full minute (NOTE: DO
NOT run the refrigeration at this time!) After a minute, discharge
the sanitizing fluid, and from this point forward, do not put fingers
or dirty utensils on any surface that could introduce bacteria into
your product. The sanitizer (once diluted) is food-safe, and does
not need to be rinsed from the machine with water.

~ 16 ~
v. 1.23
You are now ready to add your product to the machine! BE SURE
that when making any product that will take on air, enough room is
left in the freezing cylinder to accommodate it. (i.e.- ice cream mix
add approximately 2 quarts, and w/ 50% overrun you will yield 3
finished quarts)
Section 6: CARE and MAINTENANCE
One of the best features of an Emery Thompson batch freezer is
the small amount of maintenance and the ease of care required to
keep it running and looking new. The materials we use for our
parts are the best available for their intended purpose, and are
designed for maximum longevity.
The outer casing of your machine is all heavy-gauge stainless steel,
and will only require a daily wipe down w/ a mild detergent and
warm water. Using a stainless steel cleaner/polish will also help
keep it looking new.
There are three areas mentioned previously that require food
grease to be applied daily: the area of the dasher shaft that goes
through the rear bushing in the cylinder, the door face where the
gate slides against it, and the bore of the rear bushing. (see diagram
5-A, p.19) Keeping these three areas clean and lubricated will
directly affect the life of the parts involved, and must be addressed
DAILY.
Your machine should be operated in the cleanest environment
possible, but the potential exists for an eventual accumulation of
dust/lint/debris on the surface of the condensing fins. This is the
area just behind the expanded metal grate on the rear surface of the

~ 17 ~
v. 1.23
Section 6: CARE and MAINTENANCE (Cont’d)
machine. It can be cleaned using a strong (shop-type) vacuum
cleaner with a soft brush attached.
The following parts are wearable and should be inspected at least
weekly:
DIAGRAM 5-A
APPROX. LIFE
Part # SEAL011 - o-ring, square, inside rear bushing 1,000 hrs./ 1 year
Part # SPRG005 - blade Springs ................................2,000 hrs./2 years
Part # BRNG002 - bearing, dasher front.................... 2,000 hrs./2 years
Part # BLAD010 - blade, scraping...........................5,000 hrs./4.5 years
Part # SEAL013 - o-ring, gate ...................................1,000 hrs./ 1 year
Part # FAST024 - washer, Teflon...............................1,000 hrs./ 1 year
Part # SEAL012 - o-ring, door seal ..........................4,000 hrs./ 4 years
Part # SPRG006 - spring, gate pressure ...................4,000 hrs./ 4 years
If your batch freezer has been stored in an unheated area and is
brought into a warm area for use, allow it to sit for at least 12 hours
in the warmer temperature; condensation could build up on cold
surfaces.
Never transport, store, or use your machine in any position other
than upright on its feet; Oil in the refrigeration system could
travels into areas of the machine's piping where it could remain
trapped.
Your machine has been tested and is rated for use in ambient air
temperatures as high as 104 degrees Fahrenheit, and as low as 50
degrees Fahrenheit. Operation in temperatures at the high end of
capacity may slightly increase freezing time and vice versa at the
cold end.

~ 18 ~
v. 1.23
Section 7: RECIPES
The following recipes are very basic, and require few ingredients,
but are a good starting point to familiarize yourself with freezing
times and consistencies, as well as begin to form a production
routine. NEVER put undissolved sugar into your machine for any
recipe. Dissolve it first, then add to machine.
Lemon Ice
-2 quarts of cool tap water
-1pounds of sugar
-Zest grated from 2 large lemons
-10 ounces of fresh-squeezed lemon juice
Mix the sugar with the water in a clean container until the sugar is
dissolved. Slowly pour this into your CB200 machine. Add the
lemon juice and lemon zest; start the dasher and set at 234 RPM.
Then turn on the refrigeration and freeze for 8-10 minutes,
depending on desired consistency. Store and serve at 16 degrees F.
Coffee Ice Cream
-2 quarts 14% ice cream mix
-1/2 ounce of vanilla extract
-1 ounces Taster’s Choice instant coffee crystals
-Hershey’s chocolate syrup to taste
Pour first three ingredients into machine and start dasher. Turn on
refrigeration, and freeze for 10-12 minutes. Add chocolate syrup
approximately one tablespoon at a time to taste (takes away
bitterness of coffee).

~ 19 ~
v. 1.23
Section 7: RECIPES (Cont’d)
Bordeaux Wine Sorbet
-1 pound of sugar
-24 ounces of tap water
-1 bottle (750 ml) red Bordeaux wine
-12 ounces red raspberries
-(optional) 4 grams of stabilizer
Mix the sugar with the water in a clean container until the sugar is
dissolved. Slowly pour this and the remaining ingredients into the
machine; start dasher, then the refrigeration. Freeze for
approximately 12 minutes
Fresh Mango Sorbet
-1 pound of sugar
-26 ounces of tap water
-3 pounds of fresh mango
-juice of one lemon
Mix the sugar with the water in a clean container until the sugar is
dissolved. Slowly pour this and the remaining ingredients into the
machine; start dasher, then the refrigeration. Freeze for
approximately 12 minutes.
Table of contents
Other Emery Thompson Freezer manuals
Popular Freezer manuals by other brands
Heinner
Heinner HCF-H306F+ quick start guide
Frigidaire
Frigidaire FFU17FK1CW Factory parts catalog

Baltimore Aircoil Company
Baltimore Aircoil Company S3000E Operating and maintenance instructions

ekwb
ekwb EK-MLC PHOENIX Series user guide
Kernau
Kernau KFUF 08252.1 W Instruction booklet
Frigidaire
Frigidaire FFU1764F Factory parts catalog
