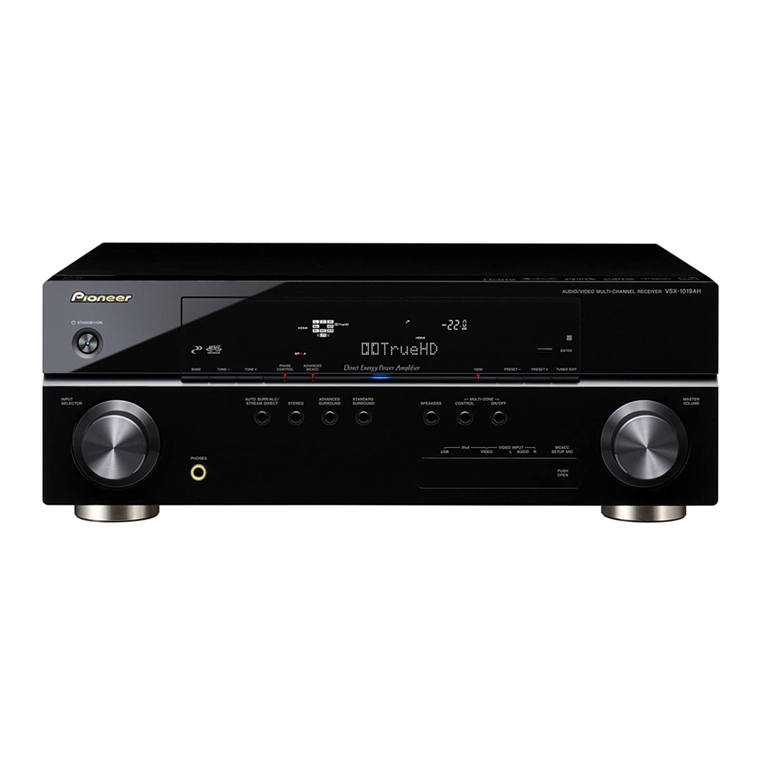
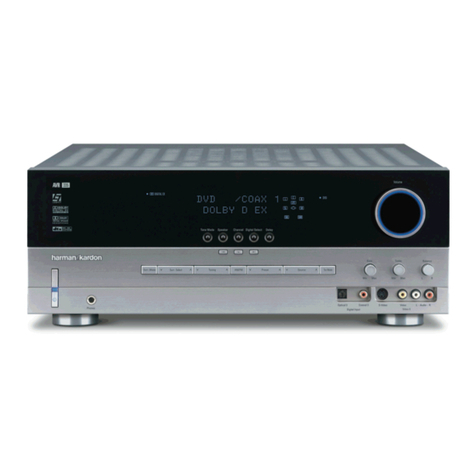
Emotiva BASXMR1-L User manual


Important Safety Precautions and Explanation of Symbols
!
The exclamation point within an equilateral triangle is intended to alert the user to the presence of
important installation, operation, and service instructions in this manual.
The lightning ash with arrowhead symbol within an equilateral triangle is intended to alert the user to the
presence of uninsulated dangerous voltages within the enclosure that may be of sucient magnitude to
constitute a risk of electrical shock to the user.
Please read this manual thoroughly before attempting to install, congure, or operate the BasX MR1L
Cinema Receiver. After successful installation and conguration of the MR1L, be sure to retain this manual
in a safe place for future reference.
Safety is a key component to a long lasting and trouble free installation. Please read and follow all
instructions and heed all warnings on the MR1L and in this manual. The vast majority of the subsequent
safety precautions are common sense. If you are not comfortable with the installation of audio/video
entertainment equipment, you should seek the services of a qualied installation professional or call us for
help.
WARNING: TO REDUCE THE RISK OF FIRE OR ELECTRIC SHOCK, DO NOT USE THE MR1L NEAR WATER
OR IN WET LOCATIONS, DO NOT EXPOSE IT TO RAIN OR MOISTURE, DO NOT EXPOSE IT TO DRIPPING
OR SPLASHING FROM OTHER SOURCES, AND ENSURE THAT NO OBJECTS FILLED WITH LIQUIDS SUCH
AS VASES ARE PLACED ON IT. DOING SO MAY RESULT IN DAMAGE TO THE UNIT AND THE RISK OF
ELECTRIC SHOCK, WHICH MAY RESULT IN BODILY INJURY OR DEATH.
WARNING: TO REDUCE THE RISK OF ELECTRIC SHOCK, DO NOT REMOVE THE COVER FROM THE
MR1L. THERE ARE NO USERSERVICEABLE PARTS INSIDE THE UNIT. REFER ALL SERVICE TO QUALIFIED
SERVICE PERSONNEL.
Do not install the MR1L near or above any heat sources such as radiators, heating vents, or other apparatus’
that produce heat. Do not block any ventilation openings or heat sinks. Avoid installing the unit directly
above other heat-producing equipment unless sucient ventilation or forced-air cooling is provided.
Do not install the MR1L in locations without proper ventilation. The MR1L should not be operated on a bed,
sofa, rug, or similar surface that may block vents. The unit should not be installed in an enclosed location
such as a bookcase, cabinet, or closed equipment rack unless sucient forced-air ventilation is provided.
Always install your MR1L according to the manufacturer’s instructions and only use attachments or
accessories specied by the manufacturer.
Do not install the MR1L on any stand, shelf, or other piece of furniture that is unable to support its weight. If
a cart is used to move the unit, use caution to avoid injury from tip-over.
Connect the MR1L only to power sources of the correct voltage (as shown in this manual and on the
MR1L unit).
Protect power supply cables from being pinched, walked on, or otherwise damaged. Be especially careful
where the power cable enters the power outlet and the unit.
Only connect the MR1L to an electrical outlet or extension cord of appropriate type and rating.
DO NOT defeat the safety purpose of a grounding or polarized plug by removing ground pins or using
unsafe adapters. A polarized plug has two blades - one wider than the other. A grounding plug has a
third ground prong in addition to the two main conductors. The wide blade or third groundling prong is
provided for your safety. If the provided plug does not t your outlet, consult an electrician to replace your
obsolete outlet. If you replace the power cord, only use one of similar type and equal or greater current
rating.
The power cable for the MR1L should be unplugged from the outlet during severe electrical storms, or
when unused for a long period of time.
Only replace the fuse(s) in the MR1L with fuse(s) of proper value and voltage rating.
!

The MR1L should only be cleaned as directed in the manual. Avoid spraying liquids directly onto the unit and
NEVER spray liquids into the vents. Care should be taken so that small objects do not fall into the inside of the
unit.
You should seek service for your MR1L by qualied service personnel if any of the following occur:
1. The power-supply cord or the plug has been damaged.
2. Objects or liquid have fallen or spilled into the vents.
3. The unit has been exposed to rain.
4. The unit exhibits a marked change in performance.
5. The unit has been dropped, or its enclosure or chassis is damaged.
NOTE: TO COMPLETELY DISCONNECT THE MR1L FROM THE AC POWER MAINS, DISCONNECT THE AC POWER
CORD FROM THE AC RECEPTACLE.
NOTE: THE POWER CORD ON THE MR1L MUST REMAIN READILY ACCESSIBLE AT ALL TIMES.
!
CAUTION
CAUTION: TO REDUCE THE RISK
OF ELECTRICAL SHOCK, DO
NOT REMOVE COVER. NO USER
SERVICEABLE PARTS INSIDE.
REFER SERVICING TO QUALIFIED
SERVICE PERSONNEL.
!
Antenna lead-in wire
Grounding conductors
(NEC section 810-20)
Antenna discharge unit
(NEC section 810-20)
Power service grounding
electrode system
(NEC art 250, part H)
Ground clamps
Ground clamp
Electric service
equipment
NEC - National Electrical Code

FCC Interference Statement
1. This device complies with Part 15 of the FCC Rules. Operation is subject to the following two
conditions:
(1) This device may not cause harmful interference, and
(2) This device must accept any interference received, including interference that may cause
undesired operation.
2. Changes or modications not expressly approved by the party responsible for compliance
could void the user’s authority to operate the equipment.
NOTE: This equipment has been tested and found to comply with the limits for a Class B digital
device, pursuant to Part 15 of the FCC Rules. These limits are designed to provide reasonable
protection against harmful interference in a residential installation.
This equipment generates uses and can radiate radio frequency energy and, if not installed
and used in accordance with the instructions, may cause harmful interference to radio
communications. However, there is no guarantee that interference will not occur in a particular
installation. If this equipment does cause harmful interference to radio or television reception,
which can be determined by turning the equipment o and on, the user is encouraged to try to
correct the interference by one or more of the following measures:
• Reorient or relocate the receiving antenna.
• Increase the separation between the equipment and receiver.
• Connect the equipment into an outlet on a circuit dierent from that to which the
receiver is connected.
• Consult the dealer or an experienced radio/TV technician for help.
Radiation Exposure Statement
This equipment complies with FCC radiation exposure limits set forth for an uncontrolled
environment. This equipment should be installed and operated with minimum distance of
20 cm between the radiator & your body.


Page 1
BasX MR1L9.2 Channel Cinema Receiver
Contents
Important Safety Precautions and Explanation of Symbols
FCC Interference Statement
BasX MR1L 9.2 Channel Cinema Receiver ........................................................................ 1
Introduction................................................................................................................................ 3
About This Manual.................................................................................................................... 4
In The Box..................................................................................................................................... 4
Features ........................................................................................................................................ 5
Unpacking.................................................................................................................................... 7
Getting Started........................................................................................................................... 9
Special Features.......................................................................................................................11
BasX MR1L Front Panel..........................................................................................................12
BasX MR1L Rear Panel............................................................................................................14
BasX MR1L Ampliers............................................................................................................18
BasX MR1L Remote Control.................................................................................................19
BasX MR1L Front Panel Display And Menu System.....................................................23
EMO-Q Advanced Automatic Room Correction ..........................................................34
Sound Fields..............................................................................................................................35
Care and Maintenance ..........................................................................................................36
Installing Firmware Updates ...............................................................................................36
Specications............................................................................................................................37
Emotiva Audio Corporation Three-Year Limited Warranty.......................................40
Notes............................................................................................................................................44
BasX MR1L 9.2 Channel Cinema Receiver


Page 3
BasX MR1L9.2 Channel Cinema Receiver
Introduction
Thank you for purchasing our new BasX MR1L Cinema Receiver.
Our BasX product line is dedicated to the philosophy that high-quality products that deliver true
audiophile sound quality do not need to be expensive to buy or complicated to congure and
enjoy. Every model in the BasX line oers all of the essential features you need to maximize your
listening enjoyment.
The BasX MR1L receiver combines a high performance 13.2 channel immersive surround sound
processor, and an audiophile quality 9 channel amplier, in a single chassis. The processor section of
the MR1L supports 4k UHD video, including HDR and Dolby Vision, enhanced ARC (eARC), and the
latest Dolby Atmos®and DTS:X™immersive surround sound formats. The MR1L features six HDMI
2.0b video inputs, all of which support 4k UHD HDR video, and includes support for enhanced ARC
(eARC). The MR1L also oers multiple analog and digital audio inputs, including an internal high
performance Bluetooth input, where you can attach all of your other audio sources.
The amplier section of the BasX MR1L features an audiophile-grade Class A/B output stage, which
delivers impressive amounts of power, with exceptional precision and nesse. The BasX MR1L also
includes a full set of line level 13.2 channel preamp outputs.
The intuitive menu system makes the MR1L simple to congure and operate using either the
front panel controls, and the large bright blue front panel VFD display, or the included illuminated
infrared remote control, and the clear concise on-screen display. The MR1L can also be controlled
by most programmable universal remote controls and whole home automation systems via either
infrared commands or wired commands received by its RS-232 interface.
Like every product in the BasX series, the MR1L includes two critical features that you will not nd in
most other components in its price range: really great audio and video performance and excellent
build quality. The BasX MR1L is a true audiophile component, designed and built by professionals to
deliver the outstanding performance that both audiophiles and casual listeners can appreciate. The
MR1L also features precision high-speed video switches that route video directly from the selected
input to the output without any extraneous processing, ensuring that you’ll continue to get the
absolute best possible picture quality from your HD and 4k UHD video sources, and supports both
ARC and Enhanced eARC.
The MR1L delivers a truly stellar audio and video experience.
Enjoy!
The Emotiva Team

Page 4
BasX MR1L9.2 Channel Cinema Receiver
About This Manual
This manual will provide you with the information you need to get started enjoying your
BasX MR1L Cinema Processor.
We suggest that you read through the entire manual; we kept things as short and direct as
possible. Even if you are an expert user, you will probably nd some interesting information and
useful suggestions.
If you are really in a hurry to get started, please read the Getting Started section (on page 8); you
may then read the remainder of the manual at your leisure.
You may wish to keep a copy of this manual with your records, and record serial numbers or other
purchase information on the Notes page at the back.
In The Box
Included in the box you should nd:
• Your BASX MR1L Receiver.
• An infrared remote control.
• A calibrated microphone to use with EmoQ.
• A high quality commercial AC power cable.
• A trigger cable.
• A printer User Manual.

Page 5
BasX MR1L9.2 Channel Cinema Receiver
Features
The BasX MR1L is a high performance 9.2 channel surround sound receiver with a built-in
9 channel audiophile quality amplier, which features a Class A/B output stage, for superb sound
quality. The processor section of the BasX MR1L includes support for 4k UHD video with HDR,
enhanced ARC (eARC), and the latest Dolby Atmos®and DTS:X™immersive surround sound
formats. It features six HDMI 2.0b video inputs, all of which support 4k UHD HDR video, as well
as HDR10, HDR10+, and Dolby Vision. The MR1L also includes support for enhanced ARC (eARC),
which allows you to enjoy the full range of sound features and formats oered by the apps
on your smart TV. The MR1L also oers multiple analog and digital audio inputs, including an
internal high performance Bluetooth input, and advanced EMO-Q Automatic Room Correction.
The BasX MR1L oers both a full set of 13.2 channel line level audio outputs and nine channels of
amplier outputs - which can be congured as up to seven main and surround speakers and/or
up to two pairs of height speakers.
Features Of The New BasX MR1L:
The Emotiva BasX MR1L cinema receiver combines simplicity of operation, outstanding video and
audio performance, and incredible value. Here are just some of the exciting features oered by
the MR1L:
• Support for current surround sound and immersive audio formats, including Dolby
TrueHD, DTS HD Master Audio, Dolby Atmos®, and DTS:X™.
• Support for both standard ARC (Audio Return Channel) and eARC (Enhanced ARC).
• Superb sound quality delivered by advanced surround sound decoders and highly
optimized analog audio circuitry.
• The line level audio outputs on the MR1L support up to thirteen main and surround
sound channels plus up to two subwoofers.
• The speaker outputs on the MR1L can power up to 9 channels of speakers in various
congurations, including up to seven main and surround speakers and one pair of height
channels, or up to ve main and surround speakers and two pairs of height channels.
• Exceptional video quality, with fast error free switching for up to six HDMI inputs, all
of which support HDMI 2.0b and HDCP 2.2, 4k UHD video, and HDR (including HDR10,
HDR10+, and Dolby Vision).
• An internal AptX-HD Bluetooth receiver for streaming audio from your smart phone and
other mobile audio sources.
• Emo-Q™ Advanced Automatic Room Correction System automatically calibrates the
MR1L for optimal sound quality with your system in your listening room (calibrated
measurement microphone with internal buer amplier included).
• Real time status information provided by a front panel VFD display and a convenient on-
screen display.
• Convenient control options, including a full function illuminated infrared remote control,
front panel menu navigation buttons, and a real front panel Volume knob.

Page 6
BasX MR1L9.2 Channel Cinema Receiver
• A heavy-duty linear power supply powered by a massive toroidal transformer.
• Operation from either 115 VAC or 230 VAC power with automatic line voltage detection
and switching.
• Included infrared remote control provides direct one-button selection of audio and
video sources, access to the MR1L Menu System, and features illuminated soft touch
buttons.
• Multiple remote control options - including RS-232.
• Firmware update via USB stick - no computer connection required.
• Compact form factor and modern aesthetics make it easy to nd a home for the MR1L in
virtually any room or audio rack.
• Full Emotiva Three Year warranty.

Page 7
BasX MR1L9.2 Channel Cinema Receiver
Unpacking
Your Emotiva BasX MR1L 9.2 Channel Cinema Receiver was carefully packed and should reach
you in perfect condition. If you notice any shipping damage or other issues when you unpack it,
please contact Emotiva immediately.
Gently remove your MR1L from the packing carton and remove all wrappings and shipping
material.
It is important to save the box and all packing materials in case your MR1L ever needs to be
moved or shipped back to the factory for service.
We truly value customer feedback and would like to hear from you.


Page 9
BasX MR1L9.2 Channel Cinema Receiver
Getting Started
To get the most from your MR1L we urge you to read the entire manual.
If you cannot wait to listen to some music or watch a few movies, there are only a few things you
really need to do in order to get started, but we do suggest that you at least read all of this Getting
Started section so you don’t miss anything important.
1. Find a secure location for your BasX MR1L.
2. Connect your MR1L to your speakers. (If you choose to do so, you may connect one or
more external ampliers to the 13.2 Channel Analog Outputs on the MR1L, or use a
combination of internal and external ampliers. The 13.2 Channel Analog Outputs on
the MR1L are always active. The Speaker Outputs on the MR1L can be Enabled and
Disabled in the Speaker Setup Menu.)
3. Connect your MR1L to your powered subwoofer if you have one. The MR1L will normally
handle Bass Management so, if you have a choice, use the LFE or line level input on your
sub, and bypass your sub’s crossover, or set it to its highest frequency.
Note: The MR1L has a Subsonic Filter that, by default, will block all frequencies below
approximately 20 Hz from reaching your subwoofer. If you wish to disable this you will
nd it under Crossover settings in the Speaker Setup menu.
4. Connect your MR1L to your projector or TV set. The MR1L has two HDMI outputs, both of
which deliver the same HDMI signal, but only HDMI Output #1 supports eARC.
5. Connect some high quality video and / or audio sources to inputs on your MR1L.
6. Make sure to have your TV or projector set to the correct HDMI input.
7. Congure your MR1L for the speakers you have connected. You will nd these settings in
the Menu under Setup | Speaker Setup.
• Select your speaker setup and how many speakers you have under Speaker Layout.
Note: If you have a two channel system, select 3.1 as your Speaker Layout, and set
Center to None. If you don’t have a subwoofer, select the appropriate Speaker Layout for
your other speakers, then set Subwoofer to None.
Note: If you need to set Subwoofer to None then you MUST set at least one of your other
pairs of speakers as Large (BYPASS). You WILL NOT be able to set Subwoofer to None if
none of your other speakers is Large and is set to Bypass.
• Select whether your height speakers are Reective or Ceiling mounted speakers under
Height SPKR Type. Select Ceiling if you have direct radiating height speakers mounted
high on the wall.

Page 10
BasX MR1L9.2 Channel Cinema Receiver
• Congure the Distance to each speaker from your primary listening position. If you
have a large seating area then set the distance from each speaker to the center of your
listening area. If your room is more or less symmetrical then it’s best to also arrange your
speakers symmetrically.
Note: The distance value will move by one inch each time you press the button; if you hold
the button down the value will jump by feet.
• Congure the Level for each speaker - as measured from your primary listening position.
These will be set by the EMO-Q Automatic Room Correction if you run it later. For now,
you want to set the levels so each speaker is heard at the same level from your primary
listening position. Levels can be set by ear but you will achieve more accurate results if
you use a sound level meter or sound level measurement app on your phone. If you are
setting this by ear, and your room is symmetrical, you should end up with the left and
right speakers in each pair set to about the same level.
Note: When setting speaker levels the goal is to congure the system so that each speaker
plays at the same level. The actual level at which the test tones play will vary depending
on the gain of your ampliers and the eciency of your speakers. The level of the test
tones is controlled by the system’s Volume control. If the test tones seem to be playing too
quietly or too loudly, you may simply exit the Setup Menu, adjust the Volume control, and
reenter the Level Test/Adjust Menu.
• The default Bass Management settings on the MR1L will work well for most systems so
there is no need to adjust them at this time.
Note: By default, if you have one or more subwoofers, then all of your other speakers are
congured with a Bass Management crossover of 80 Hz, and a 12 dB/octave crossover
slope. By default, if you have no subwoofer, then your Front Left and Front Right speakers
are assumed to be full range, and their crossover frequency is set to Bypass, while the
Bass Management crossover on all of your other speakers is set to 80 Hz.
Note: The MR1L does not designate speakers as “large” or “small”. To congure one or
more sets of speakers as “large” or “full range”, go into the Speaker Setup | Crossover
menu, and set the Crossover Frequency for those speakers to Bypass.
Note: While these settings will work well in most systems you may of course change them
to suit your system and your personal listening preferences. For example, many people
with a pair of large front speakers choose a lower Bass Management Crossover setting for
that pair.
While your BasX MR1L has many features and settings you can use to customize it to your
particular preferences, and advanced EMO-Q Automatic Room Correction, all of that can wait until
later. At this point you have made all of the basic conguration settings you need to play a movie
or listen to some music and have it sound great.
Enjoy!

Page 11
BasX MR1L9.2 Channel Cinema Receiver
Special Features
The BasX MR1L is highly congurable. However there are a few important features that are
especially noteworthy.
1. Enhanced ARC Support (eARC)
The MR1L provides full support for standard ARC (Audio Return Channel) for devices that don’t
have eARC support. For devices that support the new eARC (Enhanced ARC) standard the MR1L
will detect this and enable eARC support.
Note: Only HDMI Output #1 on the MR1L supports ARC and eARC.
Note: On most TV sets only one HDMI Input supports eARC, so be sure and connect the MR1L to
that input. In addition to this, on many TV sets, eARC must specically be enabled, so be sure
that eARC is enabled in your TV’s conguration menu.
2. Active HDMI Output Switching
As dened in the HDMI standard, if you have two devices with dierent video capabilities
connected to the two outputs on the MR1L, and both are on, your video source will negotiate a
video format supported by both, and the MR1L will send that same video signal to both devices.
So, for example, if you have a 4k TV, and a 1080p TV, and only the 4k TV is turned on, it will receive
a 4k signal; however, if both TVs are turned on, then both will receive a 1080p video signal
(because that is the highest resolution format that both TVs support). The same requirement is
also true for some other features - like HDR.
Unfortunately, many modern TVs and projectors do not report their status correctly to the
processor and source device. As a result of this, for example, you may nd that you don’t get 4k
video on your 4k TV set unless the 1080p TV set is physically disconnected (unplugged).
The MR1L has a special feature that enables you to avoid this sort of problem. On the MR1L you
have the option to temporarily disable each HDMI Output individually. So, in the example above,
by disabling the HDMI Output connected to the 1080p TV set when that set isn’t in use, you can
prevent it from limiting the 4k video signal being sent to your 4k set.
3. Advanced EMO-Q Automatic Room Correction
The MR1L includes the latest and most advanced version of our EMO-Q Automatic Room
Correction System. EMO-Q now displays a visual interface which includes graphs of both the
measured and corrected room response. Channels can now also be tested individually and the
results adjusted individually.
4. Audiophile Quality Class A/B Ampliers
The MR1L includes both audiophile quality Class A/B ampliers and line level analog preamp
outputs. This enables the MR1L to be used with a combination of passive loudspeakers and
external ampliers.

Page 12
BasX MR1L9.2 Channel Cinema Receiver
BasX MR1L Front Panel
1. Input Select Buttons
Use these buttons to select between inputs on the MR1L.
2. Front Panel VFD Display
The front panel display shows the current status of the MR1L.
Note: By default this display shows the selected audio source, the Volume setting, and the
status of the incoming audio and video signals. The information that is shown, and the
brightness of the display itself, can be congured in the Setup Menu.
3. Power / Standby Button
This button is used to toggle the MR1L between Standby and On modes.
Note: In order for the MR1L to be turned On the rear panel AC Power Switch must be On.
4. Volume Knob
This knob is used to control the Volume on the MR1L.
Pressing the knob also toggles the Mute function On and O.
And pressing and holding the knob will call up the Menu.
5. Mode Select Buttons
Use these buttons to select the audio Playback Mode.
Note: By default the MR1L will automatically choose the best playback mode to use based on
the incoming audio content.
4 51 2 3
MR1
L
INPUTS MODE

Page 13
BasX MR1L9.2 Channel Cinema Receiver
SETUP MENU
Although most users will nd it more convenient to navigate the Setup Menu using the remote
control, the front panel Input Select Buttons, Mode Select Buttons, and Volume Control can also
be used to enter and navigate the Setup Menu.
In order to do so:
• Press and HOLD the Volume Knob for several seconds to enter the Setup Menu.
• Use the Input Select Buttons to move Up and Down in the Setup Menu.
• Use the Mode Select Buttons to move Left and Right in the Setup Menu.
• Pressing the Volume Knob momentarily is equal to the OK Button.
• Press and HOLD the Volume Knob for several seconds to exit the Setup Menu.

Page 14
BasX MR1L9.2 Channel Cinema Receiver
BasX MR1L Rear Panel
1. Subwoofer Outputs
The MR1L has two Balanced Subwoofer Outputs and two Unbalanced Subwoofer Outputs.
All four subwoofer outputs deliver the same audio information.
However there are independent Level Trim and Distance settings for SW1 and SW2.
Note: For either SW1 or SW2 both the Balanced and Unbalanced Subwoofer Outputs are active
at the same time.
Note: If you congure the MR1L to have Two Subwoofers then both the SW1 and SW2 Outputs
will be active. If you congure the MR1L to have One Subwoofer then ONLY the SW1 Outputs
will be active.
2. Stereo Analog Inputs
Use these inputs to connect your analog stereo sources. They might be used to connect the
output of a phono preamp or tuner, or you could connect the analog output of a phone or music
player to one of these inputs with the appropriate adapter cable.
3. Digital Audio Inputs
Use these inputs to connect a digital audio source. The MR1L includes two electrical S/PDIF (Coax)
inputs and two optical S/PDIF (Toslink) inputs. These inputs accept stereo audio at sample rates
up to 24/192k and low bandwidth digital surround sound formats like Dolby Digital and DTS
Digital Surround.
4 65 7 8 10
12
91 2 3
13 14
SW1 BAL SW2 BAL BT ANTENNA EMO-Q MIC IR
IN
TRIG
OUT
SW1 SW2 RRH RMH RFH RBS RS RF C LF LS LBS LFH LMH LRH
(RW) (LW)
13.2 ANALOG
OUTPUTS
ANALOG
INPUTS
AN1 AN2 AN3 AN4
R
L
DIGITAL INPUTS HDMI OUTPUTS HDMI INPUTS
2 1 (eARC) 1 2 3 4 5 6
AC INPUT
115V POWER 230V
UPDATE USB RS232
CO1
OPT1
CO2
OPT2
11 15
5.1.4 CHANNEL CONFIGURATION
LEFT REAR HEIGHTLEFT SURROUNDLEFT FRONT HEIGHTCENTERRIGHT FRONTRIGHT SURROUNDRIGHT REAR HEIGHT
16
RIGHT FRONT HEIGHT LEFT FRONT
LEFT BACK SURROUNDLEFT SURROUNDLEFT HEIGHTCENTERRIGHT FRONTRIGHT SURROUNDRIGHT BACK SURROUND RIGHT HEIGHT LEFT FRONT
7.1.2 CHANNEL CONFIGURATION
(RMH) (LMH)
Table of contents
Other Emotiva Receiver manuals


