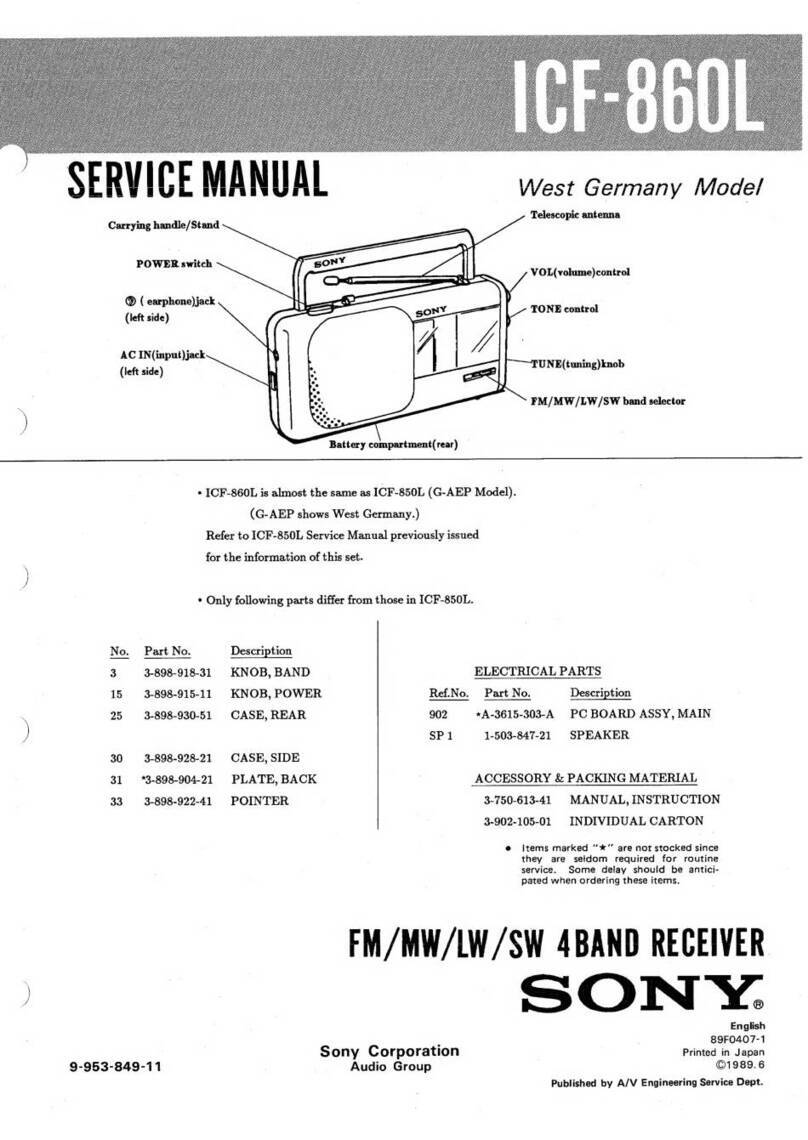
Sony ICF-7700 User manual

PRECAUTIONS
•
Operate
the
unit
only
on
6
V
DC.
For
battery
operation,
use
four
size
AA
(R6)
batteries.
For
AC
operation,
use
the
AC
power
adaptor
recommended
for
this
unit;
do
not
use
any
other
type.
For
car
battery
operation,'
use
the
car
battery
cord
recommended
for
this
unit;
do
not
use
any
other
type.
•
Do
not
leave
the
unit
in
a
location
near
heat
sources,
or
in
a
place
subject
to
direct
sunlight,
excessive
dust,
or
mechanical
shock.
•
Use
the
unit
within
a
temperature
range
of
0°C
to
40®C
(32®F
to
104®F).
if
it
is
used
in
temperatures
outside
this
range,
numbers
may
appear
on
the
frequency
and
clock
display
which
have
nothing
to
do
with
the
frequency
being
received,
if
it
is
used
in
temperatures
lower
than
this
range,
the
numbers
displayed
may
change
very
slowly.
These
irregularities
will
disappear
and
there
will
be
no
damage
to
the
unit
when
the
unit
is
used
in
its
recommended
temperature
range.
•
Should
any
solid
object
or
liquid
fail
into
the
unit,
remove
the
batteries,
and
have
the
unit
checked
by
qualified
personnel
before
operating
it
any
further.
•
Since
a
strong
magnet
is
used
for
the
speaker,
keep
personal
credit
cards
using
magnetic
coding
or
spring-wound
watches
away
from
the
unit
to
prevent
possible
damage
from
the
magnet.
•
When
the
casing
becomes
soiled,
clean
it
with
a
soft
cloth
dampened
with
mild
detergent
solution.
Never
use
abrasive
cleansers
or
chemical
solvents,
as
they
may
mar
the
casing.
If
you
have
any
question
or
problem
concerning
your
unit
that
is
not
covered
in
this
manual,
please
consult
the
nearest
Sony
dealer.
Sony
Corporation
Printed
in
Japan
SONY
3-990-102-23
(1)
FM/LW/MW/SW
PLL
SYNTHESIZED
RECEIVER
ICF-7700
OPERATING
INSTRUCTIONS
Before
operating
the
unit,
please
read
this
manual
thoroughly
and
retain
it
for
future
reference.
OWNER'S
RECORD
The
model
number
is
located
at
the
rear
and
the
serial
number
is
located
in
the
battery
compartment.
Record
the
serial
number
in
the
space
provided
below.
Refer
to
them
whenever
you
call
upon
your
Sony
dealer
regarding
this
product.
Model
No.
iCF-7700
Serial
No.
©
1987
by
Sony
Corporation

To
prevent
fire
or
shock
hazard,
do
not
expose
the
unit
to
rain
or
moisture.
To
avoid
eiectricai
shock,
do
not
open
the
cabinet.
Refer
servicing
to
quaiified
personnei
oniy.
INFORMATION
This
equipment
generates
and
uses
radio
frequency
energy
and
if
not
installed
and
used
properly,
that
is,
in
strict
accordance
with
the
manufacturer's
instructions,
may
cause
interference
to
radio
and
television
reception.
It
has
been
type
tested
and
found
to
comply
with
the
limits
for
a
Class
B
computing
device
in
accordance
with
the
specifications
in
Subpart
J
of
Part
15
of
FCC
Rules,
which
are
designed
to
provide
reasonable
protection
against
such
interference
in
a
residential
installation.
However,
there
is
no
guarantee
that
interference
will
not
occur
in
a
particular
installation.
If
this
equipment
does
cause
interference
to
radio
or
television
reception,
which
can
be
determined
by
turning
the
equipment
off
and
on,
the
user
is
encouraged
to
try
to
correct
the
interference
by
one
or
more
of
the
following
measures:
Reorient
the
receiving
antenna
Relocate
the
equipment
with
respect
to
the
receiver
Move
the
equipment
away
from
the
receiver
Plug
the
equipment
into
a
different
outlet
so
that
equipment
and
receiver
are
on
different
branch
circuits.
If
necessary,
the
user
should
consult
the
dealer
or
an
experienced
radio/television
technician
for
additional
suggestions.
The
user
may
find
the
following
booklet
prepared
by
the
Federal
Communications
Commission
helpful:
"How
to
Identify
and
Resolve
Radio-TV
interference
Problems".
This
booklet
is
available
from
the
U.S.
Govemment
Printing
Office,
Washington,
DC
20402,
Stock
No.
004-000-003454.
Very
weak
or
intenrupted
sound,
or
unsatisfactory
reception.
•
Weak
batteries.
•
Tuning
or
antenna
adjustment
is
not
correct.
(See
page
12.)
•
Weak
signal.
When
in
a
vehicle
or
in
a
building,
listen
near
a
window.
•
Figures
on
the
frequency
display
differ
a
little
from
the
acted
station
frequency.
Tune
more
precisely.
(See
page
12.)
The
preset
station
cannot
be
received
when
preset
tuning.
•
incorrect
preset
station
button
is
pressed.
•
The
preset
station
is
erased.
Preset
the
station
again.
The
radio
does
not
turned
on
at
the
alarm-setting
time.
•
The
STANDBY
button
has
not
been
pressed.
•
The
alarm-setting
time
is
erased.
Set
the
alarm
again.
•
The
MAIN
POWER
switch
is
set
to
OFF.

TROUBLESHOOTING
GUIDE
TABLE
OF
CONTENTS
Should
any
problem
occur
with
the
unit,
make
the
following
simpie
checks
to
determine
whether
or
not
servicing
is
required.
If
the
problem
persists
after
you
have
made
these
checks,
consult
the
nearest
Sony
dealer
for
further
information.
The
power
Is
not
tumed
on
even
If
you
press
the
ON/OFF
button.
•
Weak
batteries.
•
Incorrect
polarity
of
batteries.
(See
page
8.)
•
The
MAIN
POWER
switch
Is
set
to
OFF.
•
The
KEY
PROTECT
is
set.
(See
page
15.)
•
The
AC
power
adaptor,
the
battery
case
or
the
car
battery
cord
Is
disconnected.
•
Battery
operation
is
attempted
while
the
AC
power
adaptor,
the
battery
case
or
the
car
battery
cord
is
connected
to
the
unit,
but
not
to
a
wall
outlet
or
cigarette
lighter
socket.
Each
function
does
not
work
even
If
operating
the
unit.
•
The
KEY
PROTECT
is
set.
(See
page
15.)
Display
Is
dim.
•
Weak
batteries.
•
The
unit
is
being
used
in
extremely
high
temperatures
or
in
a
place
with
excessive
moisture.
Sound
is
not
heard
at
all.
•The
VOLUME
control
is
turned
down
completely.
•
The
earphone
is
plugged
in.
Location
and
function
of
controls
4
How
to
change
the
MW
channel
step
8
Battery
Installation
8
How
to
set
the
clock
10
Radio
operation
12
Preset
tuning
16
How
to
set
the
alarm
18
How
to
set
the
sleep
timer
20
Specifications
21
Troubleshooting
guide
22
Precautions
back
cover
>An
FM/LW/MW/SW
1-12,
15
bands
portable
radio
with
world-wide
band
coverage.
'
A
quartz-controlled
PLL
(Phase
Locked
Loop)
synthesizer
system
using
a
microcomputer
for
easy
pinpoint
tuning.
The
tuned
frequency
is
also
digitally
displayed.
'
Up
to
15
stations
can
be
preset
for
button-touch
tuning.
'An
easy
searching
a
SW
station
with
the
SW
meter
band
select
function.
'
A
timer
standby
function
to
receive
a
desired
broadcast
at
the
desired
time.
'
A
sleep
timer
turns
the
radio
off
automatically
in
65
minutes.

L0GATION
AND
FUNCTION
OF
CONTROLS
SPECIFICATIONS
Refer
to
the
page
indicated
in
#
for
detaiis.
Front
panel
STANDBY
(timer
standby)
button
^
ALARM
TIME
SET
button
0
CLOCK
TIME
SET
button
KEY
PROTECT
button
^
Speaker
Hand
strap
tWi
fwi
<=>
mb
SELECT
<=>
(meter
band
select)
button
Band
select
buttons
(SW,
MW/LW,
FM)
Circuit
system
Frequency
range
Antennas
Speaker
Power
output
Outputs
Power
requirements
Battery
life
Dimensions
Weight
Supplied
accessories
FM:
Superheterodyne
LW/MW/SW:
Dual
conversion
superheterodyne
FM:
76-108
MHz
MW:
530-1,700
kHz
LW:
150-285
kHz
SW:
90-11
m
SW
broadcast
bands
FM/SW:
Telescopic
antenna
MW/LW:
Built-in
ferrlte
bar
antenna
Approx.
7.7
cm
(SVa
Inches)
die.
400
mW
(at
10%
harmonic
distortion)
Recording
output
jack
(minijack)
output
level
0.775
mV
(-60
dB)
output
Impedance
1
kilohm
Earphone
jack
(minijack)
for
8
ohm
earphone
6V
DC
Four
size
AA
(R6)
batteries
DC
IN
6
V
jack
accepts:
Sony
AC-D4S
AC
power
adaptor
(optional)
for
use
on
120
V
AC,
60
Hz
Sony
DCC-127A
or
DCC-240
car
battery
cord
(optional)
for
use
with
12
V
or
24
V
car
battery,
respectively
Sony
EBP-6
battery
case
(optional)
for
use
w'lth
four
size
C
(R14)
batteries.
Approx.
19
hours
of
listening
for
four
hours
a
day
at
a
normal
volume,
using
Sony
batteries
SUM-3
(NS)
Approx.
191.5
X117
X
31.5
mm
(w/h/d)
(75/a
X
45/3
X1V4
inches)
including
projecting
parts
and
controls
607
g
(1
lb
53/3
oz)
including
batteries
Earphone
(1)
Short
wave
guide
(1)
Carrying
case
(1)
SW
compact
antenna
(1)
Design
and
specifications
subject
to
change
without
notice.
OPTIONAL
ACCESSORIES
AC
power
adaptor
Car
battery
cord
Battery
case
Connecting
cord
External
antenna
Earphones
AC-D4S
DCC-127A,
DCO240
EBP-6
RK-69A
(minlplug«-»minlplug)
AN-1
MDR-E122
o

HOW
TO
SET
THE
SLEEP
TIMER
When
you
fall
asleep,
you
can
listen
to
the
radio
by
the
sleep
timer.
•SLEEP
timer
button
®
MAIN
POWER
switch
ON:
To
turn
on
the
radio
or
to
set
the
timer.
OFF;
When
carrying
the
radio.
The
radio
Is
kept
turned
off
even
if
the
ON/OFF
button
is
accidentaiiy
pressed.
ON/OFF
button
®
^
Set
the
MAIN
POWER
switch
to
ON.
2
Press
the
SLEEP
button.
3
Tune
in
the
desired
station
with
the
TUNING/TIME
ADJ
control
and
adjust
the
volume
with
the
VOLUME
control.
The
radio
will
be
turned
off
automatically
after
about
65
minutes.
Example:
To
set
the
sleep
timer
to
an
FM
station
c"
(?.'
I
5
3
3
C
FT
MHz
C.3
U
4
I
S
I
6
I
7
I
e
9
10
II
I
ISllkM
FM
•TUNING
Indicator
Lights
up
when
the
signal
is
received.
•TUNING/TIME
ADJ
(tuning/time
adjustment)
control
®
•
TONE
control
Adjust
the
tone
quality
to
your
preference.
Normally
set
the
control
to
MUSiC.
When
the
noise
is
severe
during
SW
reception,
set
it
to
NEWS.
The
noise
may
be
reduced
to
some
extent
and
the
vocal
part
will
be
heard
more
clearly.
PRESET
buttons
VOLUME
control
to
decrease
the
volume
to
increase
the
volume
To
turn
off
the
radio
before
the
sleep
time
Press
the
ON/OFF
button.
When
you
press
the
SLEEP
button
while
listening
to
the
radio
The
radio
will
be
turned
off
automatically
after
about
65
minutes.
I
I I I I I I
i
I I
1
MIN
MAX

LOCATION
AND
FUNCTION
OF
CONTROLS
Rear
panel
Radio
stand
Lift
up
the
stand
for
table
use.
If
the
stand
comes
off,
put
It
back
into.
For
RADIO
alarm
Tune
in
the
desired
station
following
the
steps
2-5
on
page
12.
3
n*
t
C
C
U>
I
J
Telescopic
antenna
ALARM
selector
ALARM
selector
^
(RADIO/BUZZER)
I
Recording
output
jack
(B
Earphone
jack
When
the
earphone
Is
plugged
In,
the
sound
from
the
speaker
does
not
come
out.
DC
IN
6
V
(external
power
input)
jack
o
MW
CH
STEP
selector
0
For
BUZZER
alarm
The
buzzer
sound
will
come
on
at
the
preset
time.
ALARM
selector
D
n*
I
c
C
U'
I
J
The
BUZZER
ALARM
indicator
appears.
To
stop
the
RADIO
or
BUZZER
alarm
•
Press
the
ON/OFF
button.—The
alarm
sound
will
come
on
again
at
the
same
time
the
next
day.
•
Press
the
STANDBY
button.—The
alarm
setting
is
released.
•
Set
the
MAIN
POWER
switch
to
OFF.—The
power
is
turned
off.
•
Press
the
SLEEP
button
in
BUZZER
alarm
mode.—The
BUZZER
alarm
will
t)e
shut
off
and
the
radio
sound
comes
out
for
the
SLEEP
function.
(For
RADIO
alarm,
the
SLEEP
function
starts
automatically.)
Note:
If
you
forget
pressing
the
STANDBY
button,
the
alarm
sound
will
not
come
out.
Battery
compartment
When
the
alarm
time
Is
reached
while
listening
to
the
radio
For
BUZZER
alarm,
the
buzzer
sound
comes
on.
When
you
press
the
ON/OFF
button
twice,
the
radio
sound
comes
on
again.
Set
the
alarm
time
in
order
not
to
miss
the
reception
time
of
your
desired
radio
program.
It
is
useful
especially
for
receiving
the
SW
stations
since
they
are
not
broadcasted
ail
day
long.

HOW
TO
SET
THE
ALARM
Display
window
The
Indications
appear
as
follows.
■1
Set
the
MAIN
POWER
switch
to
ON.
2
Set
the
alarm
time
by
turning
the
TUNING/TIME
ADJ
control
while
keeping
the
ALARM
button
pressed.
3
Press
the
STANDBY
button.
Example:
To
set
the
alarm
to
6:30
^
o:
I
5
b:3S
f1
luupown
\p
C
i
n
IC
O i
uu
'tHz
laa^"
'
|1
2 3
4
Is
6 7
I
8 9
j
10
11
121^
FU
KEY
PROTECT
indicator
Time/frequency
indicator
MAIN
POWER
indicator
PRESET
number
indicator
Band
indicator
FM,
MW/LW
band
scale
4
Set
the
ALARM
selector
to
RADIO
or
BUZZER.
3
n'
I
C
nAmnwn
C
u.
I
3
""
I
SW
meter
band
scale
CLOCK/AURM/STANDBY/SLEEP
Indicators
BUZZER
ALARM
indicator
The
volume
of
the
alarm
sound
•
The
volume
of
the
radio
sound
can
be
adjusted.
(However,
it
is
audible
even
if
the
volume
is
set
to
MIN.)
•
The
volume
of
the
buzzer
sound
is
always
the
same.
To
check
the
preset
time.
Press
the
ALARM
button.
To
Change
the
alarm
time
Set
the
desired
alarm
time,
the
alarm
time
previously
set
is
erased.

HOW
TO
CHANGE
THE
MW
CHANNEL
STEP
The
MW
CH
STEP
is
preset
at
the
factory
to
10
kHz
to
match
the
frequency
allocation
system
of
the
U.S.A.
and
Canada.
If
you
use
the
radio
where
the
frequency
allocation
system
is
based
on
a
9
kHz
Interval,
such
as
in
the
European
and
other
countries,
set
the
MW
CH
STEP
selector
In
the
battery
compartment
to
9
kHz.
TO
TUNE
IN
A
PRESET
STATION
BATTERY
INSTALLATION
Before
installing
the
batteries,
be
sure
to
check
that
the
MW
CH
STEP
selector
Is
set
correctly.
(See
above.)
Note:
The
unit
cannot
be
operated
on
the
internal
batteries
when
the
AC
power
adaptor,
the
car
battery
cord
or
the
battery
case
Is
connected
to
the
unit.
BATTERY
REPLACEMENT
Replace
all
the
batteries
with
new
ones
when
the
sound
becomes
weak
or
distorted.
Concerning
the
battery
life,
see
"Specifications".
To
replace
the
batteries
Do
It
within
one
minute
since
the
preset
stations
and
the
current
time
will
be
erased
when
more
than
one
minute
has
passed.
After
removing
the
batteries
for
a
long
time
Be
sure
to
preset
the
stations
and
set
the
current
time
and
the
timer
again.
When
the
batteries
are
removed,
the
preset
stations,
the
current
time
and
the
timer-setting
time
will
be
erased.
Insert
the
batteries
with
correct
polarity.
Four
size
AA
(R6)
batteries
■J
Set
the
MAIN
POWER
switch
to
ON.
2
Press
the
ON/OFF
button.
3
Press
the
desired
band
button.
4
Press
the
desired
PRESET
button.
For
removing
the
batteries,
lay
the
battery
strap
underneath
the
batteries.

PRESET
TUNING
ISet
the
MAIN
POWER
switch
Example:
To
preset
an
FM
station
to
to
ON
PRESET
1
button.
2
Press
the
ON/OFF
button.
3
Tune
in
a
desired
station.
(See
page
12.)
4
Press
a
desired
PRESET
number
button
while
keeping
the
ENTER
button
pressed.
3i?.5
«l|
Z
9
4
I
9
I
6
I
7
I
S
9
I
10
n
tZ
||!i"«
FU
The
number
of
stations
you
can
preset
is
15;
five
stations
for
each
band
(FM,
MW/LW,
SW)
can
be
preset
to
each
PRESET
button.
To
change
the
preset
station
Preset
a
station
to
the
desired
PRESET
button;
the
station
previousiy
preset
to
the
button
is
erased.
OTHER
POWER
SOURCES
The
internal
batteries
are
automatically
disconnected
when
the
AC
power
adaptor,
the
car
battery
cord
or
the
battery
case
Is
connected
to
the
DC
IN
6
V
Jack.
House
current
Connect
the
Sony
AC-D4S
AC
power
adaptor
(optional)
to
the
DC
IN
6
V
jack,
and
plug
it
into
a
wall
outlet.
Car
battery
For
use
on
12
V
car
battery,
connect
the
Sony
DCC-127A
car
battery
cord
(optional)
to
the
DC
IN
6
V
jack.
For
use
on
24
V
car
battery,
use
the
Sony
DCC-240
car
battery
cord
(optional).
Battery
case
Connect
the
Sony
EBP-6
battery
case
(optional)
to
the
DC
IN
6
V
jack.
Note:
Use
only
the
recommended
AC
power
adaptor
or
the
car
battery
cord
manufactured
by
Sony.
Polarity
of
the
plugs
of
other
manufacturers
may
be
different.
Poiarlty
of
the
Sony
plug

HOW
TO
SET
THE
CLOCK
To
advance
or
turn
back
the
time
Indication
To
advance
the
time
digits
rapidly,
turn
the
TUNING/TIME
ADJ
controi
quickly.
Turn
it
slowly
to
adjust
the
time
indication
precisely.
Clockwise
To
advance
To
turn
back
Counterclockwise
TO
PRESENT
i^CIDENTAL
CHANGE
OF
THE
RECEIVING
STATION
Press
the
KEY
PROTECT
button.
The
»-n
mark
appears
in
the
display
window,
and
all
the
buttons
on
the
front
panel
and
the
TUNING/TIME
ADJ
control
do
not
work
even
If
they
are
operated
(KEY
PROTECT).
This
function
Is
also
available
when
the
ON/OFF
button
is
set
to
OFF.
To
release
the
KEY
PROTECT
function,
press
the
KEY
PROTECT
button
again
or
set
the
MAIN
POWER
switch
to
OFF.
The
o-n
mark
disappears.
HOW
TO
USE
THE
SUPPLIED
SW
COMPACT
ANTENNA
*1
Fully
pull
out
the
cord
from
the
case.
2
Attach
the
coupler
to
the
telescopic
antenna.
3
When
the
window
can
be
opened:
Extend
the
cord
and
the
case
out
through
the
window,
after
making
sure
there
Is
no
danger.
When
the
window
cannot
be
opened:
Fully
extend
the
cord
along
the
frame
of
the
window.
Coupler
iCF-7700
The
last
station
of
each
band
you
listened
to
Is
memorized
when
you
switched
the
band
to
another.
Therefore,
you
can
go
back
to
the
station
by
pressing
the
band
select
button
again.
Compact
antenna
When
extending
the
cord
outside
Be
careful
not
to
disturb
other
people
and
do
not
let
the
cord
be
touched
by
the
children.
After
using
Wind
the
reel
in
the
direction
of
the
arrow.

RADIO
OPERATION
THE
FREQUENCY
RANGE
AND
THE
TUNING
INTERVAL
OF
EACH
BROADCAST
BAND
Tuning
interval
0.05
MHz
3
kHz
5
kHz
Broadcast
band
Frequency
range
FM
76-108
MHz
LW
150-285
kHz
MW
530-1,700
kHz
SW1
90
meter
band
3,050-3,565
kHz
SW2
75
meter
band
3,700-4,215
kHz
SW3
60
meter
band
4,650-5,165
kHz
SW4
49
meter
band
5,800
-
6,315
kHz
SW5
41
meter
band
6,950
-
7,465
kHz
SW6
31
meter
band
9,375-10,010
kHz
SW7
25
meter
band
11,525-12,160
kHz
SW8
21
meter
band
13,375-14,010
kHz
SW9
19
meter
band
14,975-15,610
kHz
SW10
16
meter
band
17,475-18,110
kHz
SW11
13
meter
band
21,325-21,960
kHz
SW12
11
meter
band
25,475-26.100
kHz
1
Set
the
MAIN
POWER
switch
to
ON.
2Turn
the
TUNING/TIME
ADJ
control
while
keeping
the
CLOCK
button
pressed
to
adjust
the
clock
to
the
current
time.
Example:
To
set
to
15:15
rrn
n
U.U
U
2!L
O
15:
15
When
you
release
the
CLOCK
button,
the
clock
will
begin
to
operate.
Note:
When
the
MW
OH
STEP
selector
Is
set
to
9
kHz,
the
frequency
range
is
531-1,602
kHz
and
the
tuning
inten/al
is
3
kHz.
FOR
SW
RECEPTION
Tune
in
the
desired
station
by
turning
the
TUNING/TIME
ADJ
control.
Since
the
SW
meter
band
Is
switched
by
pressing
the
mb
SELECT
button
(o
or
■=>),
keep
the
button
pressed
for
rapid
selecting.
To
check
the
time
whiie
listening
to
the
radio
•
Press
the
CLOCK
button:
The
current
time
appears.
•
Press
the
ALARM
button:
The
alarm
time
appears.
ZERO
SECOND
ADJUSTMENT
If
you
want
to
adjust
the
time
exactly
to
the
second
with
a
telephone
time
signal,
proceed
as
In
the
following
example.
Example:
To
set
to
19:15
1
Adjust
the
time
indication
to
19:15.
2
Release
the
CLOCK
button
simultaneously
with
the
telephone
time
signal.
The
clock
will
then
begin
to
operate,
showing
the
precise
time
of
day.
Even
when
you
listen
to
the
radio,
you can
adjust
the
clock
to
the
current
time.

RADIO
OPERATION
■
I
<=
mb
SELECT
button
^
HOW
TO
RECORD
RADIO
PROGRAMS
Cassette
recorder
RK-69A
(optional)
Tune
in
a
desired
radio
program
and
set
the
cassette
recorder
to
the
record
mode.
•1
Set
the
MAIN
POWER
switch
to
ON.
2
Press
the
ON/OFF
button.
Example:
To
listen
to
SW
26,100
kHz
f
C
r
C
f
ji>
t
J
I
c
n
i
j
u
luwmrEit
U
kHz
0"
3
Press
the
desired
band
button.
4
Adjust
the
TUNING/TIME
ADJ
control
to
tune
In
a
desired
station.
5
Adjust
the
volume
and
the
tone.
To
tum
off
the
radio,
press
the
ON/OFF
button.
DC
inn
|««'««»|
CD
t
u
U
kHz
|2
|3
|4|sis|7
8
9|
l0|
ll
t2|MI
n
TO
IMPROVE
RECEIVING
CONDITION
FM:
Extend
the
telescopic
antenna
and
adjust
the
length,
direction
and
angle
for
the
best
reception.
SW:
Extend
the
telescopic
antenna
vertically.
MW/LW:
Since
the
reception
Is
affected
by
the
direction
of
the
radio,
rotate
the
unit
horizontally
for
optimum
reception.
Use
the
AN-1
external
antenna
(optional)
if
receiving
condition
Is
unsatisfactory
even
when
the
antennas
are
adjusted.
Note:
In
vehicles
or
in
buildings,
radio
reception
may
be
difficult
or
noisy.
Try
listening
near
a
window.

RADIO
OPERATION
THE
FREQUENCY
RANGE
AND
THE
TUNING
INTERVAL
OF
EACH
BROADCAST
BAND
Tuning
interval
0.05
MHz
3
kHz
5
kHz
Broadcast
band
Frequency
range
FM
76-108
MHz
LW
150-285
kHz
MW
530-1,700
kHz
SW1
90
meter
band
3,050-3,565
kHz
SW2
75
meter
band
3,700-4,215
kHz
SW3
60
meter
band
4,650-5,165
kHz
SW4
49
meter
band
5,800
-
6,315
kHz
SW5
41
meter
band
6,950
-
7,465
kHz
SW6
31
meter
band
9,375-10,010
kHz
SW7
25
meter
band
11,525-12,160
kHz
SW8
21
meter
band
13,375-14,010
kHz
SW9
19
meter
band
14,975-15,610
kHz
SW10
16
meter
band
17,475-18,110
kHz
SW11
13
meter
band
21,325-21,960
kHz
SW12
11
meter
band
25,475-26.100
kHz
1
Set
the
MAIN
POWER
switch
to
ON.
2Turn
the
TUNING/TIME
ADJ
control
while
keeping
the
CLOCK
button
pressed
to
adjust
the
clock
to
the
current
time.
Example:
To
set
to
15:15
rrn
n
U.U
U
2!L
O
15:
15
When
you
release
the
CLOCK
button,
the
clock
will
begin
to
operate.
Note:
When
the
MW
OH
STEP
selector
Is
set
to
9
kHz,
the
frequency
range
is
531-1,602
kHz
and
the
tuning
inten/al
is
3
kHz.
FOR
SW
RECEPTION
Tune
in
the
desired
station
by
turning
the
TUNING/TIME
ADJ
control.
Since
the
SW
meter
band
Is
switched
by
pressing
the
mb
SELECT
button
(o
or
■=>),
keep
the
button
pressed
for
rapid
selecting.
To
check
the
time
whiie
listening
to
the
radio
•
Press
the
CLOCK
button:
The
current
time
appears.
•
Press
the
ALARM
button:
The
alarm
time
appears.
ZERO
SECOND
ADJUSTMENT
If
you
want
to
adjust
the
time
exactly
to
the
second
with
a
telephone
time
signal,
proceed
as
In
the
following
example.
Example:
To
set
to
19:15
1
Adjust
the
time
indication
to
19:15.
2
Release
the
CLOCK
button
simultaneously
with
the
telephone
time
signal.
The
clock
will
then
begin
to
operate,
showing
the
precise
time
of
day.
Even
when
you
listen
to
the
radio,
you can
adjust
the
clock
to
the
current
time.

HOW
TO
SET
THE
CLOCK
To
advance
or
turn
back
the
time
Indication
To
advance
the
time
digits
rapidly,
turn
the
TUNING/TIME
ADJ
controi
quickly.
Turn
it
slowly
to
adjust
the
time
indication
precisely.
Clockwise
To
advance
To
turn
back
Counterclockwise
TO
PRESENT
i^CIDENTAL
CHANGE
OF
THE
RECEIVING
STATION
Press
the
KEY
PROTECT
button.
The
»-n
mark
appears
in
the
display
window,
and
all
the
buttons
on
the
front
panel
and
the
TUNING/TIME
ADJ
control
do
not
work
even
If
they
are
operated
(KEY
PROTECT).
This
function
Is
also
available
when
the
ON/OFF
button
is
set
to
OFF.
To
release
the
KEY
PROTECT
function,
press
the
KEY
PROTECT
button
again
or
set
the
MAIN
POWER
switch
to
OFF.
The
o-n
mark
disappears.
HOW
TO
USE
THE
SUPPLIED
SW
COMPACT
ANTENNA
*1
Fully
pull
out
the
cord
from
the
case.
2
Attach
the
coupler
to
the
telescopic
antenna.
3
When
the
window
can
be
opened:
Extend
the
cord
and
the
case
out
through
the
window,
after
making
sure
there
Is
no
danger.
When
the
window
cannot
be
opened:
Fully
extend
the
cord
along
the
frame
of
the
window.
Coupler
iCF-7700
The
last
station
of
each
band
you
listened
to
Is
memorized
when
you
switched
the
band
to
another.
Therefore,
you
can
go
back
to
the
station
by
pressing
the
band
select
button
again.
Compact
antenna
When
extending
the
cord
outside
Be
careful
not
to
disturb
other
people
and
do
not
let
the
cord
be
touched
by
the
children.
After
using
Wind
the
reel
in
the
direction
of
the
arrow.

PRESET
TUNING
ISet
the
MAIN
POWER
switch
Example:
To
preset
an
FM
station
to
to
ON
PRESET
1
button.
2
Press
the
ON/OFF
button.
3
Tune
in
a
desired
station.
(See
page
12.)
4
Press
a
desired
PRESET
number
button
while
keeping
the
ENTER
button
pressed.
3i?.5
«l|
Z
9
4
I
9
I
6
I
7
I
S
9
I
10
n
tZ
||!i"«
FU
The
number
of
stations
you
can
preset
is
15;
five
stations
for
each
band
(FM,
MW/LW,
SW)
can
be
preset
to
each
PRESET
button.
To
change
the
preset
station
Preset
a
station
to
the
desired
PRESET
button;
the
station
previousiy
preset
to
the
button
is
erased.
OTHER
POWER
SOURCES
The
internal
batteries
are
automatically
disconnected
when
the
AC
power
adaptor,
the
car
battery
cord
or
the
battery
case
Is
connected
to
the
DC
IN
6
V
Jack.
House
current
Connect
the
Sony
AC-D4S
AC
power
adaptor
(optional)
to
the
DC
IN
6
V
jack,
and
plug
it
into
a
wall
outlet.
Car
battery
For
use
on
12
V
car
battery,
connect
the
Sony
DCC-127A
car
battery
cord
(optional)
to
the
DC
IN
6
V
jack.
For
use
on
24
V
car
battery,
use
the
Sony
DCC-240
car
battery
cord
(optional).
Battery
case
Connect
the
Sony
EBP-6
battery
case
(optional)
to
the
DC
IN
6
V
jack.
Note:
Use
only
the
recommended
AC
power
adaptor
or
the
car
battery
cord
manufactured
by
Sony.
Polarity
of
the
plugs
of
other
manufacturers
may
be
different.
Poiarlty
of
the
Sony
plug

HOW
TO
CHANGE
THE
MW
CHANNEL
STEP
The
MW
CH
STEP
is
preset
at
the
factory
to
10
kHz
to
match
the
frequency
allocation
system
of
the
U.S.A.
and
Canada.
If
you
use
the
radio
where
the
frequency
allocation
system
is
based
on
a
9
kHz
Interval,
such
as
in
the
European
and
other
countries,
set
the
MW
CH
STEP
selector
In
the
battery
compartment
to
9
kHz.
TO
TUNE
IN
A
PRESET
STATION
BATTERY
INSTALLATION
Before
installing
the
batteries,
be
sure
to
check
that
the
MW
CH
STEP
selector
Is
set
correctly.
(See
above.)
Note:
The
unit
cannot
be
operated
on
the
internal
batteries
when
the
AC
power
adaptor,
the
car
battery
cord
or
the
battery
case
Is
connected
to
the
unit.
BATTERY
REPLACEMENT
Replace
all
the
batteries
with
new
ones
when
the
sound
becomes
weak
or
distorted.
Concerning
the
battery
life,
see
"Specifications".
To
replace
the
batteries
Do
It
within
one
minute
since
the
preset
stations
and
the
current
time
will
be
erased
when
more
than
one
minute
has
passed.
After
removing
the
batteries
for
a
long
time
Be
sure
to
preset
the
stations
and
set
the
current
time
and
the
timer
again.
When
the
batteries
are
removed,
the
preset
stations,
the
current
time
and
the
timer-setting
time
will
be
erased.
Insert
the
batteries
with
correct
polarity.
Four
size
AA
(R6)
batteries
■J
Set
the
MAIN
POWER
switch
to
ON.
2
Press
the
ON/OFF
button.
3
Press
the
desired
band
button.
4
Press
the
desired
PRESET
button.
For
removing
the
batteries,
lay
the
battery
strap
underneath
the
batteries.

HOW
TO
SET
THE
ALARM
Display
window
The
Indications
appear
as
follows.
■1
Set
the
MAIN
POWER
switch
to
ON.
2
Set
the
alarm
time
by
turning
the
TUNING/TIME
ADJ
control
while
keeping
the
ALARM
button
pressed.
3
Press
the
STANDBY
button.
Example:
To
set
the
alarm
to
6:30
^
o:
I
5
b:3S
f1
luupown
\p
C
i
n
IC
O i
uu
'tHz
laa^"
'
|1
2 3
4
Is
6 7
I
8 9
j
10
11
121^
FU
KEY
PROTECT
indicator
Time/frequency
indicator
MAIN
POWER
indicator
PRESET
number
indicator
Band
indicator
FM,
MW/LW
band
scale
4
Set
the
ALARM
selector
to
RADIO
or
BUZZER.
3
n'
I
C
nAmnwn
C
u.
I
3
""
I
SW
meter
band
scale
CLOCK/AURM/STANDBY/SLEEP
Indicators
BUZZER
ALARM
indicator
The
volume
of
the
alarm
sound
•
The
volume
of
the
radio
sound
can
be
adjusted.
(However,
it
is
audible
even
if
the
volume
is
set
to
MIN.)
•
The
volume
of
the
buzzer
sound
is
always
the
same.
To
check
the
preset
time.
Press
the
ALARM
button.
To
Change
the
alarm
time
Set
the
desired
alarm
time,
the
alarm
time
previously
set
is
erased.

LOCATION
AND
FUNCTION
OF
CONTROLS
Rear
panel
Radio
stand
Lift
up
the
stand
for
table
use.
If
the
stand
comes
off,
put
It
back
into.
For
RADIO
alarm
Tune
in
the
desired
station
following
the
steps
2-5
on
page
12.
3
n*
t
C
C
U>
I
J
Telescopic
antenna
ALARM
selector
ALARM
selector
^
(RADIO/BUZZER)
I
Recording
output
jack
(B
Earphone
jack
When
the
earphone
Is
plugged
In,
the
sound
from
the
speaker
does
not
come
out.
DC
IN
6
V
(external
power
input)
jack
o
MW
CH
STEP
selector
0
For
BUZZER
alarm
The
buzzer
sound
will
come
on
at
the
preset
time.
ALARM
selector
D
n*
I
c
C
U'
I
J
The
BUZZER
ALARM
indicator
appears.
To
stop
the
RADIO
or
BUZZER
alarm
•
Press
the
ON/OFF
button.—The
alarm
sound
will
come
on
again
at
the
same
time
the
next
day.
•
Press
the
STANDBY
button.—The
alarm
setting
is
released.
•
Set
the
MAIN
POWER
switch
to
OFF.—The
power
is
turned
off.
•
Press
the
SLEEP
button
in
BUZZER
alarm
mode.—The
BUZZER
alarm
will
t)e
shut
off
and
the
radio
sound
comes
out
for
the
SLEEP
function.
(For
RADIO
alarm,
the
SLEEP
function
starts
automatically.)
Note:
If
you
forget
pressing
the
STANDBY
button,
the
alarm
sound
will
not
come
out.
Battery
compartment
When
the
alarm
time
Is
reached
while
listening
to
the
radio
For
BUZZER
alarm,
the
buzzer
sound
comes
on.
When
you
press
the
ON/OFF
button
twice,
the
radio
sound
comes
on
again.
Set
the
alarm
time
in
order
not
to
miss
the
reception
time
of
your
desired
radio
program.
It
is
useful
especially
for
receiving
the
SW
stations
since
they
are
not
broadcasted
ail
day
long.

HOW
TO
SET
THE
SLEEP
TIMER
When
you
fall
asleep,
you
can
listen
to
the
radio
by
the
sleep
timer.
•SLEEP
timer
button
®
MAIN
POWER
switch
ON:
To
turn
on
the
radio
or
to
set
the
timer.
OFF;
When
carrying
the
radio.
The
radio
Is
kept
turned
off
even
if
the
ON/OFF
button
is
accidentaiiy
pressed.
ON/OFF
button
®
^
Set
the
MAIN
POWER
switch
to
ON.
2
Press
the
SLEEP
button.
3
Tune
in
the
desired
station
with
the
TUNING/TIME
ADJ
control
and
adjust
the
volume
with
the
VOLUME
control.
The
radio
will
be
turned
off
automatically
after
about
65
minutes.
Example:
To
set
the
sleep
timer
to
an
FM
station
c"
(?.'
I
5
3
3
C
FT
MHz
C.3
U
4
I
S
I
6
I
7
I
e
9
10
II
I
ISllkM
FM
•TUNING
Indicator
Lights
up
when
the
signal
is
received.
•TUNING/TIME
ADJ
(tuning/time
adjustment)
control
®
•
TONE
control
Adjust
the
tone
quality
to
your
preference.
Normally
set
the
control
to
MUSiC.
When
the
noise
is
severe
during
SW
reception,
set
it
to
NEWS.
The
noise
may
be
reduced
to
some
extent
and
the
vocal
part
will
be
heard
more
clearly.
PRESET
buttons
VOLUME
control
to
decrease
the
volume
to
increase
the
volume
To
turn
off
the
radio
before
the
sleep
time
Press
the
ON/OFF
button.
When
you
press
the
SLEEP
button
while
listening
to
the
radio
The
radio
will
be
turned
off
automatically
after
about
65
minutes.
I
I I I I I I
i
I I
1
MIN
MAX
Table of contents
Other Sony Receiver manuals

Sony
Sony AC-110MD User manual

Sony
Sony STR-DH710 - 10str Hifi User manual

Sony
Sony STR-DG710 User manual

Sony
Sony STR-DN1050 User manual

Sony
Sony STR-ZA3000ES User guide

Sony
Sony SDX-520V Series User manual

Sony
Sony ICF ICF-SW11 User manual

Sony
Sony STR-DH810 - Audio Video Receiver User manual

Sony
Sony STR-DN610 User manual

Sony
Sony ICF-SW22 User manual