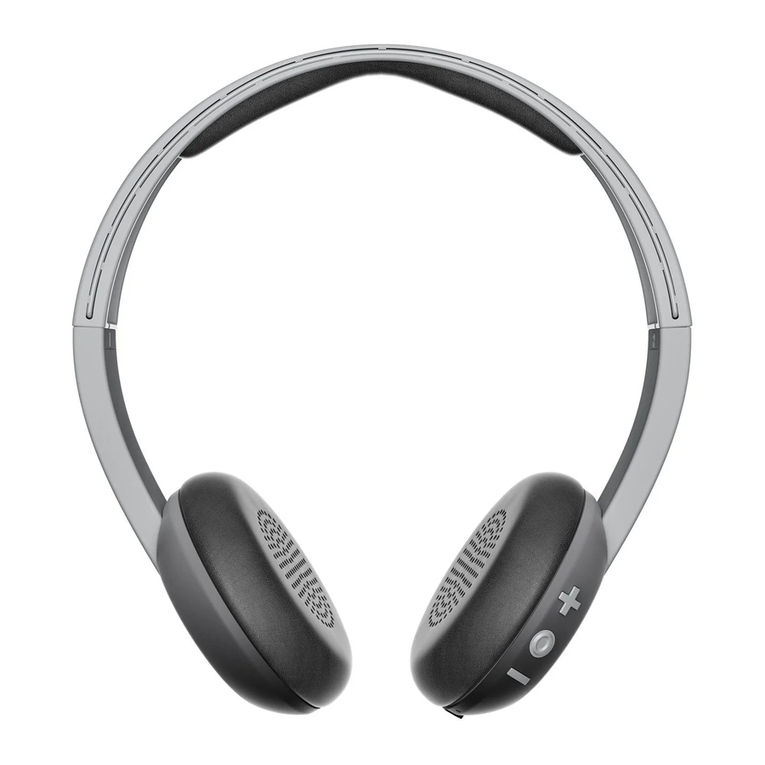
EMPORIA TVHP-22 User manual

WIRELESS TV
HEADPHONES
WITH INTEGRATED HEARING AMPLIFIER

02
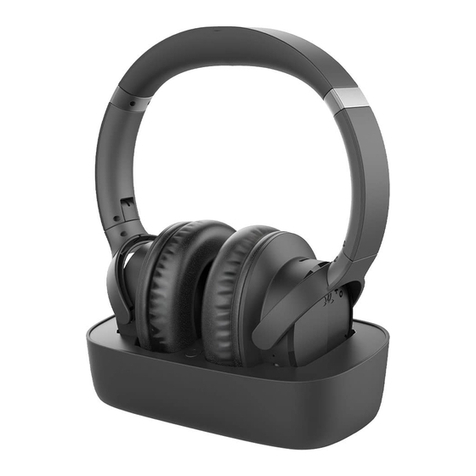
· This wireless headset consists of a headphone (receiver) and a
charging cradle (base station, transmitter) and is equipped with
wireless, digital radio transmission (2.4GHz) according to the latest
technology.
· This device enables the improvement of hearing, especially for
elderly or hearing-impaired people.
· With this device, you can achieve clear sound when listening to music
or TV. The transmitter is connected to the audio source: DVD player,
CD player, TV set, hi- system, iPod,…
· Due to the sound transmission by radio, there are no disturbing
cables at the receiver.
· The special advantage of this device is that, due to the wireless radio
connection between transmitter and receiver, you can move freely
in the room at any time (range approx. 20m in free space) and still
achieve good hearing amplication. At the same time, the sound
transmission can be switched o for intermittent conversation
or talks, which are also amplied by the built-in microphone and
received via the headset.
> The following features characterise this unit:
· Stable digital radio connection (2.4GHz)
· Rechargeable battery with quick-charge function for up to 7 hours
ofoperating time
· Automatic switch-o at the end of the signal
· Ambient noise (voices, conversations, telephone, …) can be amplied
and heard better, at the same time the sound from the audio
transmission (e.g. TV) is muted.
· Dieser Funkkopfhörer besteht aus einem Kopfhörer (Empfänger)
und einer Ladeschale (Basisstation, Sender) und ist mit drahtloser,
digitaler Funk-Übertragung (2.4 GHz) nach neuester Technologie
ausgestattet.
· Dieses Gerät ermöglicht die Verbesserung des Hörvermögens,
speziell für ältere oder hörbeeinträchtigte Menschen.
· Mit diesem Gerät erzielen Sie klaren Klang bei Musik- oder
TV-Wiedergabe. Der Sender wird an die Audio-Quelle angeschlossen:
DVD-Player, CD-Player, TV-Gerät, Hi-System, iPod, ….
· Durch die Tonübertragung per Funk gibt es keine störenden Kabel
am Hörer.
· Der besondere Vorteil dieses Gerätes liegt darin, dass Sie sich
aufgrund der kabellosen Funkverbindung zwischen Sender und
Empfänger jederzeit frei im Raum bewegen können (Reichweite
ca.20m im freien Raum) und trotzdem eine gute Hörverstärkung
erzielen. Gleichzeitig kann die Tonübertragung für zwischenzeitliche
Konversation oder Gespräche, welche ebenfalls durch das
eingebaute Mikrofon verstärkt über das Headset empfangen werden,
weggeschaltet werden.
> Folgende Eigenschaften charakterisieren dieses Gerät:
· Stabile Digital-Funkverbindung (2.4 GHz)
· Akku mit Schnelllade-Funktion für bis zu 7Stunden Betriebszeit
· Automatisches Ausschalten bei Signalende
· Umgebungsgeräusche (Stimmen, Gespräche, Telefon,…) können
verstärkt und besser gehört werden, gleichzeitig wird der Ton von
der Audio-Übertragung (z.B. TV) stummgeschalten.
Keep the packing materials in a safe place in case you need to
transport the unit later. Keep the receipt, it is your guarantee.
Heben Sie die Verpackungsmaterialien an einem sicheren Ort auf,
falls Sie das Gerät später transportieren müssen.
Bewahren Sie die Quittung auf, sie ist Ihre Garantie.
WELCOME

03
Scope of delivery ..............................................................................................04
Device description ...........................................................................................05
· Headphones (receiver and earpiece) .................................................................05
· Charging cradle (base station, transmitter)......................................................06
Commissioning ..................................................................................................07
· Charging cradle ......................................................................................................07
· Audio connections.................................................................................................08
· Headphones (receiver) ..........................................................................................09
· Volume...................................................................................................................... 10
Operation..............................................................................................................10
· Balance ..................................................................................................................... 11
· Mute and sound amplifier.................................................................................... 11
· Interference during playback .............................................................................. 12
· Synchronising the charging cradle and headphones .................................... 12
· Energy-saving mode, automatic switch-off..................................................... 13
· Technical data ......................................................................................................... 14
Appendix............................................................................................................... 14
· Declaration of Conformity.................................................................................... 15
· Warranty................................................................................................................... 15
· General safety instructions ..................................................................................16
· Intended use ...........................................................................................................18
· Cleaning ................................................................................................................... 18
TABLE OF CONTENTS

04 SCOPE OF DELIVERY
Headphones
(receiver and earpiece)
Charging cradle
(base station, transmitter)
Spare earplugs
Mains adapter
Optical audio cable
Audio cable
(Ø3.5mm jack plug)
Kopfhörer
(Empfänger und Hörer)
Ladeschale
(Basisstation, Sender)
Ersatz-Ohrstöpsel
Netzadapter
Optisches-Audio-Kabel
Audio-Kabel
(Ø3.5mm Klinkenstecker)

05
01 Earphones/earplugs
02 Volume control
03 LED power indicator (blue)
04 Mute switch (on/o)
05 On/off switch
06 Microphone
07 Balance control
(left/middle/right)
08 Charging contacts
DEVICE DESCRIPTION
1
2
47
8
6
5
3
Headphones (receiver and earpiece)

06
01 Charging pins
02 LED operation indicator (green)
03 LED charging indicator (charged: green / charging: red)
04 Connection for mains adapter (DC-IN)
05 Connection for audio cable (Ø3.5mm jack)
06 Connection selector switch (audio/optical cable)
07 Connection for optical cable
DEVICE DESCRIPTION
1
4 5 6 7
2 3
Charging cradle (base station, transmitter)

07
Charging cradle
Plug the yellow plug of the mains adapter into the DC-IN socket and
connect the adapter to a properly installed household socket.
The mains voltage must correspond to the voltage indicated on the
adapter (100-240V ~ 50/60 Hz). The mains adapter complies with
the regulations that are mandatory for CE marking. The LED power
indicator starts ashing green and then lights up constantly.
> Caution when using the mains adapter
· It is recommended that only the supplied mains adapter be used.
The mains adapter may only be connected to a mains voltage of
100-240V ~ 50/60Hz. Never attempt to operate the unit with any other voltage.
· Make sure that the power socket used is freely accessible so that the mains plug
can be pulled out immediately if necessary (in the event of malfunctions,
a defect in the unit, or the development of odours or smoke).
· The appliance remains connected to the mains even when it is switched o.
If you are not going to use the appliance for a longer period of time,
pull the plug of the mains adapter out of the socket.
COMMISSIONING

08 COMMISSIONING
> Using the 3.5mm audio cable
Plug the supplied 3.5 mm audio cable into the audio output
(headphone jack) of the unit from which you want to transmit sound
and into the ›AUDIO IN‹ jack of the charger. Set the connection
selector switch to position.
> Using the optical cable
Use the supplied optical audio cable to connect the optical
output of the device from which you want to transmit sound to
the›OPTICAL IN‹ socket of the charger and set the connection
selector to position.
Audio connections
Optical audio cableAudio cable, Ø3.5mm
> Note
If you choose the option of connecting with the optical audio cable, it is necessary
to familiarise yourself with the operation of the device you wish to connect to the
charging cradle (base station). Especially when connecting to a TV set, additional
(sound) settings are often necessary on the TV set in order to enable or adjust the
sound transmission. However, these are individual and dierent for each device
and do not depend on the operation of these headphones.

09
Headphones (receiver)
A rechargeable battery is built into the
headphones. Fully charge the battery before using
it for the rst time:
1. Make sure the on/off switch is in the ›OFF‹
position.
2. Place the headphones (receiver) in the charging
cradle (base station). Make sure that the charging
contacts meet the charging pins exactly.
3. The charging process starts, the LED charging
indicator lights up red.
4. After about 3 hours, the battery should be fully
charged, the LED charging indicator lights up
green.
· The operating time of the headphones with
fully charged batteries is approximately 7 hours,
depending on the volume setting.
· If the battery becomes low, the LED power indicator (blue) on
theheadphones ashes 5 times before the headphones switch o.
Charge the headphones in the charging cradle as described.
COMMISSIONING
> Important notes on handling rechargeable batteries
· Never attempt to charge batteries other than the supplied rechargeable batteries.
· Do not use batteries other than those supplied.
· Never attempt to take the battery apart.
· Never try to expose the batteries to temperatures above 100° C or burn them.
· Do not expose the batteries to excessive heat, direct sunlight or re.
· Do not immerse the batteries in water (or other liquids).
· Keep batteries and rechargeable batteries away from children.

10 OPERATION
1. Switch on the headphones with the on/off switch.
The LED operation indicator ashes blue.
2. Operate your device (TV, audio device, ...) which you have connected
to the charging cradle and select a medium volume.
3. First set a low volume on the headphones and put the headphones on.
4. The sound sent via the charging cradle (base station) is transmitted
to the headphones via radio and played back. As soon as the
headphones receive the transmitted sound, the LED operation
indicator lights up constantly blue.
Volume
5. When connected with the audio cable, the volume can be adjusted
either via the connected device (TV, audio device,…) or with the
volume control ›VOLUME‹ on the headphones.
· Make sure that the volume on the connected device is not set too
low, otherwise the audio signal may be too weak for transmission
and the unit will switch o automatically (see ›Power saving mode‹).
· When connected with the optical cable, the volume can only be
adjusted via the volume control ›VOLUME‹ on the headphones.
6. If the battery becomes low, the blue LED power indicator on the
headphones ashes 5 times before the headphones switch o. Slide
the on/off switch to the ›OFF‹ position and charge the battery.
7. If you want to stop using the headphones, switch the on/off switch
on the headphones to the ›OFF‹ position (blue LED goes out) and
place the headphones back in the charging cradle.
8. After approx.11 minutes, the green LED on the charging cradle
ashes and after approx.15minutes the LED goes out.
9. If you do not use the unit for a longer period of time, disconnect the
base station from the mains.

11OPERATION
> Caution
Excessive volume can permanently damage your hearing. The volume of these
headphones can be set particularly high. Therefore, make sure that the volume is set
to a low level before putting on the headphones. Especially for people with healthy
hearing and for children, listening too loudly can cause irreparable hearing damage.
Balance
With the balance control on the headphones, you can adjust the sound
transmission between the left and right earphones as you wish:
· Turn the control to the left ›L‹ – the sound transmission
via the left earphone is amplied.
· Turn the control to the right ›R‹ – the sound transmission
via the right earphone is amplied.
Mute and sound amplifier
Interruption of the sound playback from the sound source
(audio device, TV set, etc.) / connection of the built-in microphone
forconversations:
· If you want to switch o the sound for a short time during the
headphone transmission, e.g. to conduct a conversation, press
the mute button on the headphones. The LED indicator on the
headphones lights up green.
· An acoustic signal ›beep-beep‹ is audible and the reception of
theaudio signal from the transmitter is interrupted.
· At the same time, the ambient noise received via the built-in
microphone on the headphones is amplied. This provides hearing
amplication during communication.
· If you want to end the communication and enjoy the audio
transmission again, press the mute button on the headphones again.
The LED operation indicator on the headphones lights up blue again.

12 OPERATION
Interference during playback
If interference noises occur during playback,
this may be due to thefollowing reasons:
· The battery in the headphones is too weak: Recharge the battery.
· The distance between the headphones and the charging cradle
(base station) is too great: Reduce the distance.
· The volume of the connected device is too low:
Increase the volume of the connected device
(TV set, audio device, MP3 player, etc.).
Synchronising the charging cradle and
headphones
It can happen that the radio connection between the charging
cradle and the headphones is disturbed and therefore
thetransmission fails.
To synchronise the radio connection, proceed as follows:
· Disconnect the charging cradle (base station) from the mains by
unplugging the mains adapter.
· Switch on the headphones with the on/off switch (position ›ON‹).
· Press and hold the mute button for approx. 5 seconds.
· The blue LED indicator ashes quickly.
· Reconnect the charging cradle (base station) to the mains adapter.
· The charging cradle and headphones are automatically
synchronised and the blue LED operating indicator lights up
constantly again.

13OPERATION
Energy-saving mode, automatic switch-off
The unit is equipped with an automatic switch-o function to avoid
unnecessary energy consumption.
> Note:
This function is regulated by an EU standard and switching o does not represent a
technical defect!
If the unit is not used for a longer period of time, it should be completely
disconnected from the mains to save energy.
· The headphones automatically switch to stand-by mode if no audio
signal is received for approx. 5 minutes (or if the audio signal is too
weak for proper reception).
The blue LED operation indicator ashes. If during this time the
audio signal is reactivated or the volume on the connected unit is
increased again and the headphones receive an audio signal again,
the transmission is continued.
The blue LED operation indicator lights up again.
· If no audio signal is sent to the headphones for approx.10minutes or
if the audio signal is too weak for reception, the headphones switch
o automatically.
The blue LED operation indicator goes out.
· If you want to use the headphones again, rst switch them o
(on/off switch to position ›OFF‹), and then switch them on again
(on/o switch to position ›ON‹).

14 APPENDIX
Emporia Service Centre
· Emporia Service Centre
Monday-Friday, 12-4pm
· UnitedKingdom · EN
www.emporiatelecom.co.uk/
support/contact
+44 1923 9477 78
· Ireland · EN
www.emporiatelecom.ie/
support/contact
+353 0818000 102
· Please have your proof of purchase
ready.
Technical data
· Model: TVHP-22
· Transmission mode:
Digital Hopping System
· Carrier frequency: 2.4 GHz ISM Band I
· Operating voltage:
Transmitter: 5V, 0.55 A
Receiver: 3.7V, 380 mA lithium polymer
battery (built-in)
· Mains adapter:
Input: 110-240V ~ 50/60 Hz, 0.5 A
Output: 5V —… 0.55 A, 2.75W
· Frequency range: 20 Hz – 20 kHz
· Distortion: < 0.5 %
· Signal-to-noise ratio: > 70 dB
· Range: up to 20 m (open range)
· Dimensions (W × H×D)
Base: 12 × 4.1 × 12 cm
Headphones: 13.5 × 23.2 × 2.5 mm
· Weight
Headphones with battery:
approx. 60 g (+/– 5 g)
Total device: approx. 286 g

15APPENDIX
Declaration of
Conformity
· Manufacturer:
emporia telecom GmbH + CoKG
Industriezeile 36 · 4020 Linz · Austria
· Importer:
Emporia UK and Ireland Limited
Cardinal Point, Park Road, Rickmans-
worth, Hertfordshire, WD3 1RE,
UnitedKingdom
· Website:
www.emporiatelecom.co.uk or
www.emporiatelecom.ie
· Brand name: emporia
· Model: TVHP-22 (DH9600)
· Item description:
TV listening aid, radio headphones
The subject of the declaration described
above complies with the relevant Union
harmonisation legislation:
· Directive 2014/53/EU
· Directive 2014/65/EU
The complete text of the EU declaration
of conformity is available at the
following Internet address
https://www.emporia.eu/doc
Responsible for the accuracy of this data
Eveline Pupeter,
CEO, emporia Telecom
01/09/2022
Warranty
· The consumer (customer) is granted
a durability guarantee under the
following conditions, without prejudice
to his claims for defects against the
seller:
· This guarantee applies to new devices
purchased in the European Union. The
guarantor is Emporia UK and Ireland
Limited, Cardinal Point, Park Road,
Rickmansworth, Hertfordshire, WD3
1RE, UnitedKingdom.
· New devices and their components that
show a defect due to manufacturing
and/or material defects within
12 months of purchase will be replaced
or repaired free of charge with a device
that corresponds to the state of the art.
· This guarantee does not apply if the
defect in the equipment is due to
improper handling and/or failure to
observe the operating instructions.
· The proof of purchase, with the date of
purchase, is valid as proof of guarantee.
· To redeem this guarantee, please
contact our hotline.

16
General safety instructions
· Children must not play with the
appliance and must be supervised
when using the appliance. Children
must never use the appliance
unsupervised.
· Do not expose the appliance to
excessive cold or heat (not below 5°C
and not above 35°C) or direct sunlight,
or place it directly next to radiation-
generating appliances and radiators.
· Keep the appliance away from open
ames.
· Do not place burning candles or other
open sources of re on the unit.
· The unit should not be used in extreme
cold.
· Protect the unit from rain and splashing
water.
· The unit should be operated in dry
rooms without exception. Do not
use the unit near water, e.g. bathtub,
kitchen sink, washbasin, etc.
· The unit is not suitable for use in areas
with high humidity (not above ~ 85%).
· Objects lled with liquids (vases,
glasses, ...) must not be placed on the
unit.
· Condensation humidity: Moisture
condenses on and in the appliance
when it is moved from a cold room to
a warm room. Wait until the moisture
in the unit has evaporated and the unit
has adjusted to the room temperature
before operating it. Depending on the
humidity and room temperature, this
may take 2 to 3 hours.
· Do not expose the unit to heavy dirt,
dust or smoke and keep it away from
chemicals.
· Do not expose the unit to falling loads
or shocks. Make sure that no other
objects fall on the unit.
· Do not place the unit on top of other
electrical appliances.
· Do not cover the unit (e.g. with
blankets, curtains, newspapers, etc.).
Do not place the appliance on soft
surfaces (e.g. bed, couch), do not put
blankets or rugs under it.
· If the unit and/or its accessories are
damaged, do not operate it. Take it to a
specialist electrical workshop for repair.
· Do not open the housing of the unit,
there are no operating elements inside.
· Protect the cable. The cable must not
be stepped on or crushed or trapped
between two objects or a door.
APPENDIX

17
· Check the cable of the mains adapter
from time to time for possible damage.
If the cable is damaged, the unit must
not be put into operation. Contact a
specialist workshop.
· Do not attempt to repair defective units
yourself.
· Disconnect the unit from the mains
during thunderstorms (risk of
overvoltage) or when not in use for a
longer period of time.
· Do not insert any other objects (nails,
needles, pins, etc.) into the openings of
the unit. Do not touch the contacts with
metallic objects or bare ngers.
· Do not modify the appliance and use it
only for the functions described in the
instructions.
· For the safety of your children, do not
leave any packaging parts (plastic bags,
foils, cardboard, etc.) within reach.
Danger of suocation!
· Never immerse the unit in water or
other liquids. Risk of electric shock!
· To prevent the non-slip rubber studs
on the underside of the appliance base
from leaving marks on your furniture,
make sure that the furniture surface is
free of acid or grease.
· If you notice smoke or odours during
operation, or if liquid enters the
appliance, disconnect the appliance
from the mains immediately.
· Keep these instructions for future
reference and observe the safety
instructions each time you use the
appliance. In the event of improper
handling and/or non-observance of
the safety instructions, no guarantee/
liability can be accepted for any
damage that may occur.
APPENDIX

18
Intended use
This unit is a consumer electronics
device. It must not be used outside
closed rooms and in tropical climates.
Itmay only be used in conjunction
with external devices that comply with
the regulations that are mandatory for
CEmarking. Do not modify the unit
bytampering with it, this could result
indamage to property or personal
injury for which no guarantee/liability
can be accepted.
Do not use any accessories other than
those described in this manual.
Cleaning
· Be sure to disconnect from the mains
before cleaning.
· The surface should be wiped from time
to time with a soft, possibly slightly
damp cloth.
· Never use abrasive cleaning agents or
cleaning solvents for cleaning, as this
could damage the appliance.
· Do not use abrasive cleaning utensils
to avoid scratching the surface of the
appliance.
· Make sure that no water enters the
housing.
· Never immerse the unit or accessories
in water or other liquids. Risk of electric
shock!
APPENDIX

19
Disposal
· Disposal of packaging
Packaging and packaging aids
are recyclable and should be
returned for reuse.
· Disposal of batteries
Rechargeable batteries and
batteries do not belong in
household waste! As a consumer,
you are legally obliged to return used
rechargeable batteries and batteries.
You can return them to the local
collection points in your municipality or
to specialist retailers.
· Disposing of the product
When this product has reached
the end of its life, please do not
throw it into the household
waste. For the sake of the
environment, take it to a materials or
recycling centre where old appliances
are accepted and recycled in an
environmentally friendly manner.
APPENDIX

TVHP-22_BDA-V1-EN · 092022 Misprints, errors and technical changes reserved.
EMPORIA Telecom
GmbH & Co. KG
customercar[email protected]
Industriezeile 36
4020 Linz · Austria
www.emporia.eu
Table of contents

