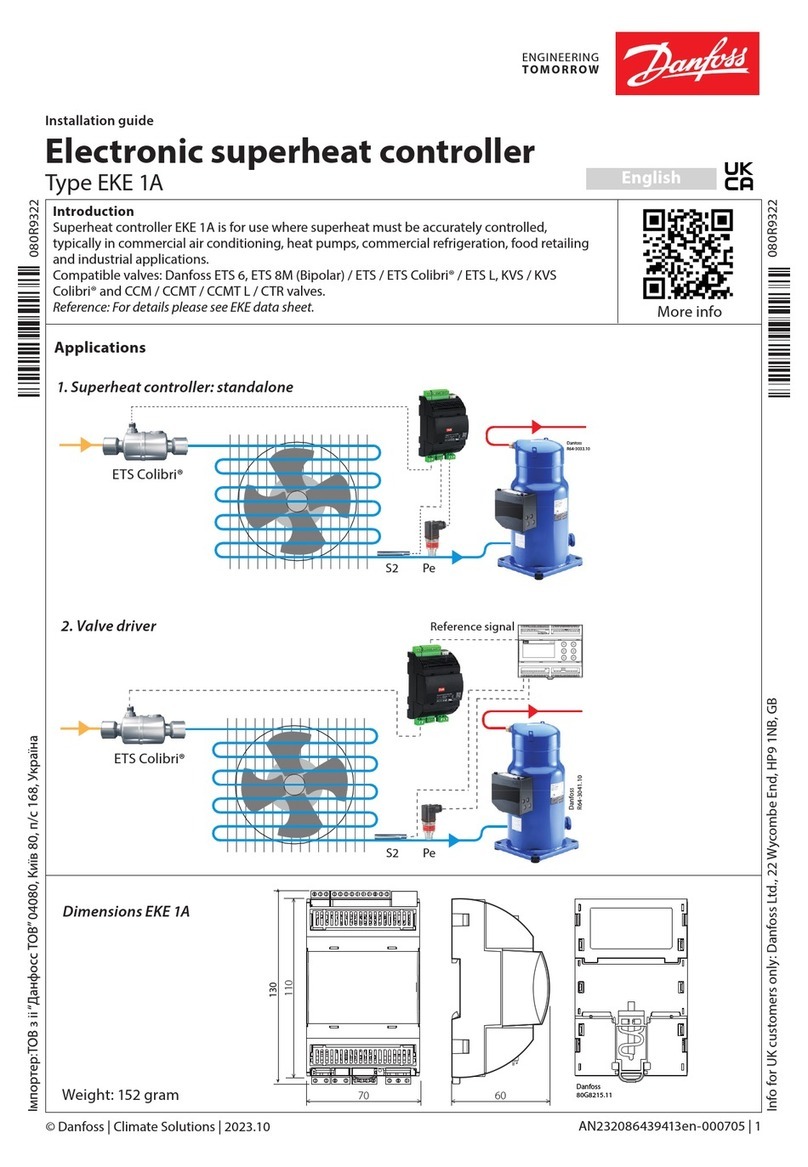
EMUS G1 User manual

G1 Battery Management System
User Manual 2.7.1

emusbms.com
2
Table of contents
PREFACE 8
INTRODUCTION 12
CHAPTER 1: SYSTEM STRUCTURE OVERVIEW 18
CONTROL UNIT 18
1.1 USB DATA INTERFACE 19
1.2 RS232 DATA INTERFACE 19
1.3 CAN DATA INTERFACE 20
1.4 SERIAL CELL COMMUNICATION DATA INTERFACE 20
1.5 GENERAL PURPOSE INPUTS AND OUTPUTS 20
1.6 CURRENT SENSOR INPUTS 21
1.7 SOC OUTPUT 21
1.8 SPEED SENSOR INPUT 22
1.9 CELL MODULES 22
1.9.1 Cell Module Selection Recommendations 23
1.10 CENTRALIZED CAN CELL GROUP MODULE 24
1.11 CELL COMMUNICATION ADAPTERS 25
1.11.1 Top and Bottom Isolators 25
1.11.2 CAN Cell Grop Modules 26
1.11.3 Tesla Module retrofit BMS 26
1.12 CURRENT SENSORS 27
1.12.1 Bus Bar Type 27
1.12.2 Closed Loop Type 28
1.13 3RD PARTY CAN CURRENT SENSORS 28
1.14 SMARTPHONE CONNECTIVITY MODULE 29
1.15 DISPLAY UNIT 29
1.16 CAN SPLITTER /FILTER 30
1.17 SOFTWARE 31
1.17.1 EVGUI Android and iOS applications 31
1.17.2 Control Panel 32

emusbms.com
3
CHAPTER 2: FUNCTIONALITY OVERVIEW 34
2.1 CELL MONITORING 34
2.1.1 Distributed Regular Cell Monitoring 34
2.1.2 Distributed Grouped Cell Monitoring 35
2.1.3 Centralized Cell Monitoring 36
2.1.4 Temperature measurement 38
2.1.5 Tesla Module cell monitoring 38
2.2 CURRENT MEASUREMENT 39
2.2.1 EMUS current sensors 39
2.2.2 3rd party CAN current sensors 39
2.3 SOC ESTIMATION 39
2.3.1 SOC legacy adjustment algorithm 40
2.3.2 Integrated SOC/SOH estimator (gen1 algorithm) 40
2.3.2.1 SOH algorithm 42
2.4 CHARGING PROCESS AND CHARGING DEVICE CONTROL 42
2.4.1 Charging Interlock 48
2.5 BATTERY PROTECTIONS 48
2.5.1 Contactor pre-charge 50
2.5.2 External contactor deactivation 51
2.6 POWER REDUCTIONS 51
2.7 WARNINGS 52
2.8 HEATER AND COOLING FAN CONTROL 53
2.8.1 Climate Control 54
2.9 DC/DC CONVERTER CONTROL 54
2.10 PSU UNDER-VOLTAGE SENSE CONTROL 55
2.11 BATTERY CONTACTOR CONTROL BY “IGNITION”56
2.12 OPTIMISED BATTERY CHARGING 56
2.13 STATISTICS 56
2.14 EVENTS 60
2.15 VEHICLE SPEED MEASUREMENT 61
2.15.1 Energy consumption calculation 62
2.15.2 Remaining distance estimation 63
2.16 COMMUNICATION WITH EXTERNAL DEVICES 64

emusbms.com
4
2.17 MASTER/SLAVE 64
2.18 INDICATION 64
2.18.1 Charging status indication 64
2.18.2 Buzzer 65
2.18.3 Low battery indication 65
CHAPTER 3: INSTALLATION 67
3.1 CONTROL UNIT 67
3.1.1 Choosing the power supply strategy 68
3.2 CELL MODULES 70
3.3 TESLA MODULE 74
3.4 CURRENT SENSOR 75
3.4.1 EMUS current sensor 75
3.4.2 3rd Party current sensor 76
3.4.3 CAN Current Sensor 77
3.5 CELL COMMUNICATION ADAPTERS 77
3.6 CAN BUS 78
3.7 CENTRALIZED CAN CELL GROUP MODULE 80
3.8 CAN SPLITTER /FILTER 83
3.9 SMARTPHONE CONNECTIVITY MODULE 84
3.10 DISPLAY UNIT 85
3.11 BATTERY FUSE 85
3.12 CONTACTOR 86
3.13 PRE-CHARGE SUB-CIRCUIT 86
3.14 CHARGER 87
3.14.1 CAN-based chargers 88
3.14.2 CAN chargers/inverters 89
3.14.3 Non-CAN chargers 90
3.14.4 Analog signal-controlled chargers 90
3.15 COOLING FAN 91
3.16 HEATER 92
3.17 INDICATORS 92

emusbms.com
5
3.18 INSULATION FAULT DETECTOR 93
CHAPTER 4: CONFIGURATION 94
4.1 EMUS BMS CONTROL PANEL 94
4.2 SERIAL DATA INTERFACE 95
4.3 CHARGING DISABLE 96
4.4 CAN DATA INTERFACE 96
4.5 CELL COMMUNICATION DATA INTERFACE 97
4.6 CAN CELL GROUP MODULE CONFIGURATION 98
4.7 EXTERNAL TEMPERATURE BREAKOUT BOARD CONFIGURATION 100
4.8 MAXIMUM BALANCING CURRENT PARAMETER 100
4.9 CHARGING PROCESS 101
4.9.1 CAN chargers / inverters 104
4.10 PROTECTIONS 104
4.11 LOAD POWER REDUCTIONS 105
4.12 WARNINGS 106
4.13 CURRENT MEASUREMENT 107
4.14 SOC ESTIMATION 109
4.14.1 SOC legacy adjustment algorithm 109
4.14.2 SOC/SOH estimator (gen1 algorithm) 111
4.14.2.1 Tuning parameters 111
4.14.2.2 Cell model reference settings 112
4.14.2.3 SOC-OCV dependency curve of cell 113
4.14.2.4 SOC dependency on temperature 113
4.15 HEATER CONTROL 114
4.16 COOLING FAN CONTROL 114
4.17 BATTERY CONTACTOR CONTROL 115
4.18 DC/DC CONVERTER CONTROL 115
4.19 I/O PINS 116
4.20 DISPLAY UNIT 120
4.21 DISTANCE PARAMETERS 120
4.22 MASTER/SLAVE 121
CHAPTER 5: MAINTENANCE 124

emusbms.com
6
5.1 CALIBRATION OF CELL MODULE TEMPERATURE SENSORS 124
5.2 RE-CALIBRATION OF CURRENT SENSOR 125
5.3 MASTER CLEAR 126
5.4 SETTING UP PASSWORD 126
5.5 EXPORTING AND IMPORTING CONFIGURATION 127
5.6 CONTROL UNIT FIRMWARE UPDATE 128
5.7 CAN CELL GROUP MODULE FIRMWARE UPDATE 128
5.8 DISPLAY UNIT FIRMWARE UPDATE 129
5.9 EXPORTING AND IMPORTING STATISTICS 129

emusbms.com
7
Release notes:
Revision Date
Revision
Author
Changes
2018-11-11
1.2.1
MM
Fixed some mistakes and inaccuracies in chapters 3.2.13.1,
3.2.13.2, 3.2.13.3, 4.13, and 4.14.
2018-12-07
1.3.0
MM
Updated company name and links. Updated information about
new and obsolete products.
2019-08-11
1.4.0
MD
Manual information updated. Chapters 5.2, 5.13 added.
Obsolete products removed from manual. New products
uploaded. New mechanical drawings made.
2020-12-08
1.6.0
HS
Added new chapters (2.1.3, 2.1.4, 2.3.2, 2.3.2.1, 2.7, 4.1, 4.9,
4.11.2, 4.11.2.1, 4.11.2.2, 4.11.2.3, 4.11.2.4), added BMS battery
cells arrangements configuration examples,
all products technical information has been transferred to
separate datasheet documents.
2021-08-17
1.7.0
HS
Added new chapters (1.12.3, 2.1.5, 3.3). Detail description of
the EMUS Tesla Module (TES011C) retrofit BMS.

emusbms.com
8
Preface
List of Abbreviations
BMS
Battery Management System
CU
Control Unit
CM
Cell Module
CGM
CAN Group Module
CCGM
Centralized CAN Group Module
CR
Carrier Return
LF
Line Feed
USB
Universal Serial Bus
CP
Control Panel
PWM
Pulse Width Modulation
List of Figures
Figure 0-1 Distributed regular ......................................................................................................................................................................... 14
Figure 0-2 Distributed grouped ...................................................................................................................................................................... 15
Figure 0-3 Centralized CCGM ...........................................................................................................................................................................16
Figure 0-4 G1 Distributed Master/Slave redundancy ................................................................................................................................17
Figure 1-1 EMUS G1 Control Unit................................................................................................................................................................... 18
Figure 1-2 Control Unit’s pins - fixed in red, general purpose remappable in green, and special purpose remappable in
blue ...........................................................................................................................................................................................................................19
Figure 1-3 Example SOC Output connection circuit ..................................................................................................................................21
Figure 1-4 Speed IN connection diagram....................................................................................................................................................22
Figure 1-5 A standard 3A module Cell Module..........................................................................................................................................23
Figure 1-6 Centralized CAN group module CCGM022C......................................................................................................................... 24
Figure 1-7 Top and Bottom Isolators.............................................................................................................................................................25
Figure 1-8 CAN Cell Group Module...............................................................................................................................................................26
Figure 1-9 Tesla Module (TES011C) retrofit BMS.......................................................................................................................................27
Figure 1-10 EMUS G1 Dual Range Current Sensor: Bus Bar type..........................................................................................................28
Figure 1-11 EMUS G1 Dual Range Current Sensor: Closed Loop type................................................................................................28
Figure 1-12 EMUS G1 Smartphone Connectivity Module.......................................................................................................................29
Figure 1-13 EMUS G1 Display Unit................................................................................................................................................................ 30
Figure 1-14 EMUS G1 CAN Splitter (Chogori connectors) ...................................................................................................................... 31
Figure 1-15 EMUS G1 CAN Splitter (Molex connectors).......................................................................................................................... 31
Figure 1-17 Get it on Google Play..................................................................................................................................................................32
Figure 1-17 Download on Apple App Store ................................................................................................................................................32
Figure 1-18 EMUS Control Panel.....................................................................................................................................................................33
Figure 2-1 Cell communication data flow: when using Top and Bottom Isolators......................................................................... 34
Figure 2-2 Cell communication when using CAN Cell Group Modules. .............................................................................................35

emusbms.com
9
Figure 2-3 Cell communication when using Centralized CAN Cell Group Modules. ......................................................................37
Figure 2-4 CCGM Temperature status.......................................................................................................................................................... 38
Figure 2-5 EMUS Equivalent circuit model................................................................................................................................................... 41
Figure 2-6 Formula for SOH ............................................................................................................................................................................ 42
Figure 2-7 Contactor pre-charge timing diagram.................................................................................................................................... 50
Figure 2-8 Power supply unit voltage sense example circuit schematic............................................................................................ 55
Figure 2-9 PSU under-voltage sense control ..............................................................................................................................................56
Figure 2-10 Battery contactor control by "Ignition" sequence..............................................................................................................56
Figure 2-11 Charging indicator timing..........................................................................................................................................................65
Figure 2-12 Sound indicator timing...............................................................................................................................................................65
Figure 2-13 Low battery indicator timing.....................................................................................................................................................66
Figure 3-1 Correct installation of Control Unit and distribution of power supply to other EMUS G1 BMS components ...68
Figure 3-2 Power supply strategy 1 ...............................................................................................................................................................68
Figure 3-3 Power supply strategy 2 ...............................................................................................................................................................69
Figure 3-4 Power supply strategy 3 ...............................................................................................................................................................70
Figure 3-5 Correct way of wiring a cell communication daisy chain: (a) Top and Bottom Isolators; (b) CAN Cell Group
Module.....................................................................................................................................................................................................................71
Figure 3-6 3MTM ScotchlokTM butt connector..............................................................................................................................................72
Figure 3-7 Cell Modules Wires Positioning..................................................................................................................................................73
Figure 3-8 EMUS Tesla Module (TES011C) connectors............................................................................................................................74
Figure 3-9 Installed EMUS Tesla Module (TES011C) .................................................................................................................................75
Figure 3-10 EMUS G1 Current Sensor connection diagram. ..................................................................................................................75
Figure 3-11 Correct EMUS G1 Bus Bar Current Sensor installation......................................................................................................76
Figure 3-12 Correct EMUS G1 Closed loop type Current Sensor installation....................................................................................76
Figure 3-13 CAN current sensor......................................................................................................................................................................77
Figure 3-14 Correct way of connecting the TOP/BOT Isolator to the Control Unit.........................................................................77
Figure 3-15 High-speed CAN network specified in ISO-11898-2 standard.......................................................................................78
Figure 3-16 Cells connection, with e.g 8 cells in series ............................................................................................................................ 81
Figure 3-17 CCGM Battery, Ext. Temperature Sensors installation....................................................................................................... 81
Figure 3-18 CCGM CAN port pinout..............................................................................................................................................................82
Figure 3-19 Power supply connection for CCGM.......................................................................................................................................82
Figure 3-20 Temperature Breakout Board connection possibility to CCGM .................................................................................... 83
Figure 3-21 CAN Splitter connection............................................................................................................................................................ 83
Figure 3-22 EMUS G1 Smartphone Connectivity Module connection diagram.............................................................................. 84
Figure 3-23 EMUS G1 Display Unit wiring................................................................................................................................................... 85
Figure 3-24 Connecting contactor to EMUS G1 Control Unit: (a) directly, when the rated current of the contactor coil is
less than 0.5A; (b) through a relay, when the rated current of the contactor coil is 0.5A or more.............................................86
Figure 3-25 Contactor pre-charge sub-circuit connection diagram....................................................................................................87
Figure 3-26 Correct CAN charger and charger contactor connection in respect of the battery, battery fuse, and main
contactor ............................................................................................................................................................................................................... 88
Figure 3-27 CAN Charger/Inverter system...................................................................................................................................................89
Figure 3-28 Correct connection of a non-CAN charger in respect of the battery, battery fuse, and main contactor: using

emusbms.com
10
a third-party electromechanical contactor...................................................................................................................................................90
Figure 3-29 Correct analog signal controlled charger and charger contactor connection in respect of the battery, battery
fuse, and main contactor....................................................................................................................................................................................91
Figure 3-30 : Cooling fan connection diagram............................................................................................................................................91
Figure 3-31 Heater connection diagram.......................................................................................................................................................92
Figure 3-32 Examples of connecting visual or audial indicators to the Control Unit (left to right): an indication lamp, a
self-oscillating buzzer, and an LED.................................................................................................................................................................93
Figure 3-33 Example of connecting a third-party insulation fault detector to the Control Unit.................................................93
Figure 4-1 Data Transmission to Display parameters...............................................................................................................................95
Figure 4-2 Disable Charging Button ..............................................................................................................................................................96
Figure 4-3 CAN communication parameters...............................................................................................................................................96
Figure 4-4 Cell communication parameters ................................................................................................................................................98
Figure 4-5 CAN Devices in unconfigured list ..............................................................................................................................................98
Figure 4-6 CAN Devices in configuration table before commit ............................................................................................................99
Figure 4-7 CAN Devices in configuration table after commit ................................................................................................................99
Figure 4-8 CAN Devices in configuration table after committing failed.............................................................................................99
Figure 4-9 External Temperature Breakout board configuration........................................................................................................100
Figure 4-10 Location of "Maximum balancing current" parameter....................................................................................................100
Figure 4-11 Single protection example.......................................................................................................................................................105
Figure 4-12 Single reduction example ........................................................................................................................................................ 106
Figure 4-13 Single warning example ........................................................................................................................................................... 107
Figure 4-14 Current measurement parameters........................................................................................................................................ 107
Figure 4-15 Isabellenhütte sensor configuration....................................................................................................................................108
Figure 4-16 State of Charge estimation type ............................................................................................................................................ 109
Figure 4-17 "Battery Pack" parameter box..................................................................................................................................................110
Figure 4-18 SOC at low voltage warning.....................................................................................................................................................110
Figure 4-19 State of Charge parameters .....................................................................................................................................................110
Figure 4-20 Tuning Parameters......................................................................................................................................................................112
Figure 4-21 Cell Model Reference Settings ................................................................................................................................................113
Figure 4-22 SOC-OCV dependency curve of cell......................................................................................................................................113
Figure 4-23 Heater and Fan parameters......................................................................................................................................................114
Figure 4-24 Battery Contactor Control parameters..................................................................................................................................115
Figure 4-25 DC/DC Converted Control parameters ................................................................................................................................. 116
Figure 4-26 Pin mapping settings ................................................................................................................................................................ 119
Figure 4-27 Display Unit settings in Control Panel.................................................................................................................................. 120
Figure 4-28 Distance Parameters................................................................................................................................................................... 121
Figure 4-29 Master/Slave parameters .......................................................................................................................................................... 121
Figure 4-30 Master/Slave Configuration parameters ............................................................................................................................. 122
Figure 4-31 Master/Slave BMS list table..................................................................................................................................................... 122
Figure 4-32 CAN Splitter Configuration button ....................................................................................................................................... 122
Figure 4-33 Master/Slave Protection and Reduction table................................................................................................................... 123
Figure 5-1 External temperature sensor calibration window................................................................................................................ 125

emusbms.com
11
List of Tables
Table 2-1 List of supported chargers and their communication protocols ...................................................................................... 43
Table 2-2 List of protections and their descriptions ................................................................................................................................ 48
Table 2-3 List of reductions and their descriptions................................................................................................................................... 51
Table 2-4 List of warnings and their descriptions......................................................................................................................................52
Table 2-5 List of statistics and their descriptions.......................................................................................................................................56
Table 2-6 List of events and their descriptions...........................................................................................................................................60
Table 3-1 Recommended cell terminal bolt ................................................................................................................................................72
Table 3-2 Maximum bus line lengths ............................................................................................................................................................79
Table 4-1 Tuning parameters...........................................................................................................................................................................111
Table 4-2 Cell model reference settings......................................................................................................................................................112
Table 4-3 Pin function names ......................................................................................................................................................................... 116
Table 4-4 List of master slave protections/reductions and their descriptions................................................................................ 123

emusbms.com
12
Introduction
The recent and ongoing development in the technology of rechargeable lithium batteries has
been steadily increasing their performance and making them more safe, reliable, cheap, and
easy to manufacture. All of this resulted in an increasing popularity of rechargeable lithium
batteries, not only in portable consumer electronics, but also in traction, energy storage,
maritime, industrial, military, aerospace and other applications, where the high energy density,
negligible memory effect, low self-discharge rate, and long-life cycle of lithium batteries are
highly desired characteristics.
Despite the advantages, all rechargeable cells of lithium chemistry have a very strict allowed
voltage range and certain charging temperature limitations. If operated outside these limits, they
will fail prematurely and pose safety risks due to reactive components inside them. Also, because
the mentioned applications usually require battery voltage to be significantly higher than that
of a single cell, several cells must be connected in series to attain the desired voltage. This creates
another problem: since lithium chemistry cells are very intolerant to overcharging, they do not
have a natural equalization mechanism when connected in series (such as gassing in lead acid
batteries), and any disbalance of charge between the cells will amplify with each cycle of
operation if no countermeasures are taken, rapidly decreasing the usable capacity of the whole
battery pack, and potentially causing its premature failure. In order to overcome these problems
and to fully exploit the advantages of rechargeable lithium batteries, it is necessary to use an
intelligent battery management system that can autonomously monitor the battery parameters
at individual cell level in real time, and prevent them from going outside the safe operation
limits.
EMUS, UAB has developed the EMUS G1 BMS precisely for that purpose. It is a highly flexible,
state of the art digital battery management system with a unique set of features and utility
functions, that is designed to make the use of rechargeable lithium batteries straightforward and
virtually maintenance-free, regardless of the battery size, cells arrangement (series or parallel),
capacity, voltage, and other factors.
This document covers all aspects of using the EMUS G1 BMS, and aims to provide the user with
an in-depth knowledge about its core functionality and utility functions, as well as with
information about its proper installation and configuration together with connection diagrams,
examples, and recommendations - all in order to help to utilize all of its capabilities and prevent
most commonly faced issues.

emusbms.com
13
NOTE: Using EMUS G1 BMS requires at least basic knowledge in electronics and
electrical engineering. The use of EMUS G1 BMS in any way other than it is intended,
especially if that compromises its core functions, including modification of its
components, is considered improper and will void any warranty. EMUS, UAB will not
be held responsible for damage to the battery or any other consequences in case
EMUS G1 BMS is used improperly and reserves the right to not provide any technical
support in such case.

emusbms.com
14
EMUS G1 system can be used for any types of battery cells arrangements, below are provided 4
basic BMS configurations examples:
•G1 Distributed Regular –for simple cases, when all battery cells are connected only in
series (max. 40-60 cells in series);
Figure 0-1 Distributed regular

emusbms.com
15
•G1 Distributed Grouped –battery cells are grouped into particular packs and each pack
combined with CAN Cell Group Modules (CGM), then all (max. 32) CGMs are connected
via CAN to main Control Unit;
Figure 0-2 Distributed grouped

emusbms.com
16
•G1 CCGM Centralized –for applications when batteries are split into separate blocks up
to 16 cells and connected in series or/and parallel (max. 32 CCGMs for one Control Unit),
recommended for cells with capacities up to ~70Ah;
Figure 0-3 Centralized CCGM

emusbms.com
17
•G1 Distributed Master/Slave redundancy –it can be combination of G1 Distributed
regular and/or G1 Centralized. For applications which require high modularity, scalability,
redundancy; several G1 systems can be combined using Master/Slave control units;
Figure 0-4 G1 Distributed Master/Slave redundancy

emusbms.com
18
Chapter 1: System structure overview
EMUS G1 BMS is a digital, distributed topology battery management system that consists of a
main controller, several cell controller boards (one for each individual cell), cell communication
adapters, a current sensor, and few other optional components that all serve different purposes.
The following subsections "System structure overview" and "Functionality overview" respectively
outline the role of each of these components and describe how they function and interact with
each other in order to execute the core and utility functions of the battery management system.
1.1 Control Unit
EMUS G1 Control Unit is the main controller that autonomously executes all core and utility
functions of battery management. It interacts with all other first-party and third- party
components in the system using various inputs, outputs and interfaces that are populated on its
main 22 pin and secondary 8 pin connectors.
Figure 1-1 EMUS G1 Control Unit
Depending on their purpose, all Control Unit pins can be divided into two categories: fixed and
remappable. Fixed pins that dedicated for digital communication interfaces and power supply,
and their position on the connector is permanent. Remappable pins are quite the opposite –
they can be mapped with various functions during configuration, meaning the default function
of one pin can be remapped onto another pin. They are also further divided into general purpose
and special purpose categories. A general-purpose pin has a standard set of mappable functions,
while a special purpose pin can also be mapped with certain function that is unique to that pin
and cannot be mapped on others. Each of these pins is marked with its default function on the
enclosure of the Control Unit. More detailed information about pin functions in chapter: (4.195
I/O Pins). In the picture below illustrated EMUS G1 Control Unit pins, detailed information about
other EMUS products can be found in their datasheet.

emusbms.com
19
Figure 1-2 Control Unit’s pins - fixed in red, general purpose remappable in green, and special purpose
remappable in blue
1.2 USB data interface
The Control Unit has a USB interface that is intended for quick and straightforward connection
to a host device (e.g. computer, tablet, smartphone) when configuration, diagnostics, or
maintenance is needed. Provided USB adapter in EMUS G1 Control Unit is populated on the
main 22 pin connector as the “USBPWR”, “GROUND”, “USB D-”, and “USB D+” pins, detailed
information about other EMUS products can be found in their datasheet.
Although aimed for connecting to first-party applications on the host device, the USB interface
can also be used with custom third-party applications developed by the users. It is based on a
USB to serial converter chip from FTDI, and the required USB drivers are royalty-free. The
protocol that defines the format of the data exchanged between the Control Unit and the host
application is described in an openly available document called “EMUS G1 Control Unit Serial
Protocol”that can be found in Support page.
1.3 RS232 data interface
The protocol used for data exchange over the Control Unit’s RS232 interface is the same as the
one used in data exchange over the USB interface, thus both interfaces are functionally identical.
However, RS232 is inherently more robust than USB and is therefore more suitable for
continuous BMS activity monitoring –either directly by a third-party controller, or by using the
optional first-party EMUS G1 BMS components that are dedicated for this purpose. The RS232
interface is populated as the “DISP. RX”, “DISP.TX” and “GROUND” pins on the main 22 pin
connector of the EMUS G1 Control Unit, detailed information about other EMUS products can
be found in their datasheet. The protocol that defines the format of the data exchanged between
the Control Unit and the host application is described in an openly available document called
“EMUS G1 Control Unit Serial Protocol” that can be found in Support page.

emusbms.com
20
1.4 CAN data interface
Because of its popularity in automotive, industrial, and many other applications, EMUS G1
Control Unit is also equipped with a non-isolated CAN 2.0A/B interface. It is populated in EMUS
G1 Control Unit as the “CAN+”, “CAN-”, and “GROUND” pins on the main 22 pin connector,
detailed information about other EMUS products can be found in their datasheet.
This interface is multipurpose, and enables the Control Unit to:
•Communicate with other CAN-equipped EMUS G1 BMS components;
•Control certain third-party charging devices;
•Transmit BMS activity data (either periodically or by request);
•Receive new configuration parameter values and other special messages.
The message format of the latter two follows a special proprietary CAN protocol that is described
in a separate document called “EMUS G1 Control Unit CAN Protocol” that can be found in
Support page. EMUS Support Team can also provide DBC file used to apply in CAN protocol
described names, scaling, offsets, and defining information, to data transmitted within a CAN
frame. The CAN protocol can be configured according to the customer's needs, for more detailed
1.5 Serial cell communication data interface
The serial cell communication interface is dedicated for connecting a certain type of cell
communication adapters and enables the Control Unit to communicate with the individual cell
controller boards (cell modules). It consists of pins on the main EMUS G1 Control Unit 22 pin
connector of as: “CELL RX-”, “CELL RX+”, “CELL TX-” and “CELL TX+”, detailed information about
other EMUS products can be found in their datasheet.
1.6 General purpose inputs and outputs
Pins that fall into the general-purpose output category are populated on the EMUS G1 Control
Unit main 22 pin connector as the following: BAT.LOW, HEATER, CHG.IND, BUZZER, CHARGER.
They all share identical internal circuitry, and depending on the mapped function, are intended
for driving relays, indicators, etc., or transmitting logic signals to various third-party devices.
Likewise, pins that fall into the general-purpose input category are populated on the same EMUS
G1 Control Unit connector as the following: FAST CHG., AC SENCE, IGN.IN.
They are used by the Control Unit to read various logic signals from third-party devices.
As mentioned already at the beginning of this subsection, general purpose inputs and outputs
Other manuals for G1
1
Table of contents
Other EMUS Controllers manuals
Popular Controllers manuals by other brands
ARAG
ARAG Bravo 3 Series ADDITION TO INSTRUCTION BOOKLET

fluidra
fluidra Astral Pool SLX Light Connect Lite installation instructions

National Instruments
National Instruments 73 Series manual
Johnson Controls
Johnson Controls M9220-GGx-3 series installation instructions
Analog Devices
Analog Devices dBCool ADT7467 manual
SMC Networks
SMC Networks JXCL1 Series Operation manual
