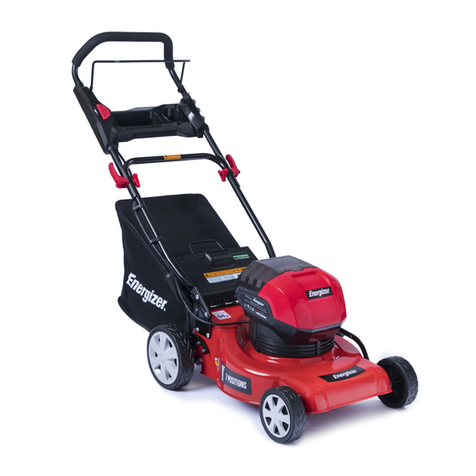
Energizer ELMC20V-UK User manual

ORIGINAL INSTRUCTIONS
1
©2018 Energizer. Energizer and certain graphic designs are trademarks of Energizer Brands,
LLC and related subsidiaries and are used under license by Builder SAS.
All other brand names are trademarks of their respective owners.
Neither Builder SAS nor Energizer Brands, LLC is affiliated with the respective owners of their
trademarks.
CORDLESS LAWNMOWER
ELMC20V-UK
USER GUIDE

ORIGINAL INSTRUCTIONS
2
©2019 Energizer. Energizer and certain graphic designs are trademarks of Energizer Brands, LLC and related
subsidiaries and are used under license by Builder SAS.
All other brand names are trademarks of their respective owners.
Neither Builder SAS nor Energizer Brands, LLC is affiliated with the respective owners of their trademarks.

ORIGINAL INSTRUCTIONS
3
Let's get started.
You're excited to power up, so we'll keep this brief !

ORIGINAL INSTRUCTIONS
4
9.9kg
20-65mm
2x20V d.c.
Sound power level: 90,2 dB(A); Sound pressure level: 77,9 Db(A); Guarantee sound power level: 94 dB(A)
Vibration: 0,50 m/s²K= 1,5 m/s

ORIGINAL INSTRUCTIONS
5

ORIGINAL INSTRUCTIONS
6

ORIGINAL INSTRUCTIONS
7
IMPORTANT
READ CAREFULLY BEFORE USE.
KEEP FOR FUTURE REFERENCE.
Safe operating practices for electrically powered
lawnmowers
Training
a) Read the instructions carefully. Be familiar with the controls
and the correct use of the machine.
b) Never allow children or people unfamiliar with these
instructions to use the machine. Local regulations can restrict
the age of the operator.
c) Never operate the machine while people, especially children,
or pets are nearby.
d) Keep in mind that the operator or user is responsible for
accidents or hazards occurring to other people or their
property.
Preparation
a) While operating the machine always wear substantial
footwear and long trousers. Do not operate the machine when
barefoot or wearing open sandals. Avoid wearing clothing that
is loose fitting or that has hanging cords or ties.
b) Thoroughly inspect the area where the machine is to be
used and remove all objects which can be thrown by the
machine.
c) Before using, always visually inspect to see that the blade,
blade bolt and the blade assembly are not worn or damaged.
Replace worn or damaged components in sets to preserve
balance. Replace damaged or unreadable labels.
Operation
a) Operate the machine only in daylight or in good artificial
light.

ORIGINAL INSTRUCTIONS
8
b) Avoid operating the machine in wet grass.
c) Always be sure of your footing on slopes.
d) Walk, never run.
e) Mow across the face of slopes, never up and down.
f) Exercise extreme caution when changing direction on slopes.
g) Do not mow excessively steep slopes.
h) Use extreme caution when reversing or pulling the machine
towards you.
i) Stop the blade(s) if the machine has to be tilted for
transportation when crossing surfaces other than grass, and
when transporting the machine to and from the area to be
used.
j) Never operate the machine with defective guards or shields,
or without safety devices, for example deflectors and/or grass
collector, in place.
k) Switch on the motor carefully according to instructions and
with feet well away from the blade(s).
l) Do not tilt the machine when switching on the motor, except
if the machine has to be tilted for starting. In this case, do not
tilt it more than absolutely necessary and lift only the part,
which is away from the operator.
m) Do not start the machine when standing in front of the
discharge opening.
n) Do not put hands or feet near or under rotating parts. Keep
clear of the discharge opening at all times.
o) Do not transport the machine while the power source is
running.
p1) Stop the machine, and remove plug from the socket. Make
sure that all moving parts have come to a complete stop.
p2) Stop the machine, and remove the disabling device. Make
sure that all moving parts have come to a complete stop
whenever you leave the machine,
before clearing blockages or unclogging chute,
before checking, cleaning or working on the machine,

ORIGINAL INSTRUCTIONS
9
after striking a foreign object. Inspect the machine for
damage and make repairs before restarting and operating
the machine;
if the machine starts to vibrate abnormally (check immediately)
inspect for damage,
replace or repair any damaged parts,
check for and tighten any loose parts.
Maintenance and storage
a) Keep all nuts, bolts and screws tight to be sure the machine
is in safe working condition.
b) Check the grass collector frequently for wear or
deterioration.
d) On machines with multi blade, take care as rotating one
blade can cause other blades to rotate
e) Be careful during adjustment of the machine to prevent
entrapment of the fingers between moving blades and fixed
parts of the machine.
f) Always allow the machine to cool down before storing
g) When servicing the blades be aware that, even though the
power source is switched off, the blades can still be moved.
h) Replace worn or damaged parts for safety. Use only
genuine replacement parts and accessories.
Before using the charger, read all instructions and
cautionary markings on the charger, battery pack and the
product using the battery pack.
Keep the battery charger, batteries and the cordless tool out
of children’s reach.
Do not use damaged battery chargers.
Do not use the supplied battery charger to charge other
cordless tools.
This charger is not intended for any uses other than
BATTERY AND CHARGER SAFETY
WARNINGS

ORIGINAL INSTRUCTIONS
10
charging rechargeable batteries. Any other use may result in
risk of fire, electric shock or electrocution.
Do not place any object on top of the charger or place the
charger on a soft surface that may result in excessive
internal heat. Place the charger in a position away from any
heat source.
Do not operate the charger if it has received a sharp blow,
been dropped or otherwise damaged in any way. Have it
checked by an electrician or power tool repairer.
Do not disassemble charger. Take it to an electrician or
power tool repairer when service or repair is required.
Incorrect reassembly may result in a risk of electric shock,
electrocution or fire.
To reduce risk of electric shock, unplug the charger from the
outlet before attempting any cleaning. Removing the battery
pack will not reduce this risk.
Never attempt to connect 2 chargers together.
DO NOT store or use the tool and battery pack in locations
where the temperature may reach or exceed 40℃(such as
inside sheds or metal buildings in summer).
The charger is designed to operate on standard household
electrical power. Do not attempt to use it on any other
voltage!
The battery pack is not fully charged out of the carton. First
read the safety instructions and then follow the charging
notes and procedures.
In heavy use the battery pack will become warm. Allow
the battery pack to cool to room temperature before
commencing with the charging.
The longest life and best performance can be obtained if the
battery pack is charged when the air temperature is
between 18 - 24℃. Do not charge the battery pack in an air
temperature below 10℃. or above 40℃. This is important
and will prevent damage to the battery pack.
Do not incinerate the battery pack even if it is seriously
damaged or is completely worn out. The battery can
explode in a fire.
Never attempt to open the battery pack for any reason. If the
plastic housing of the battery pack breaks or cracks,
immediately discontinue use and do not recharge.
During charging, the battery must be placed in a well
ventilated area.

ORIGINAL INSTRUCTIONS
11
Charging the battery
1. Take the battery pack out of the equipment. Do this by pressing the side pushlock buttons.
2. Check that your mains voltage is the same as that marked on the rating plate of the battery
charger. Insert the power plug of the charger into the socket outlet. The RED LED will then
begin to light.
3. Insert the battery pack into the battery charger .then the red LED on charger will begin to
Green flash light.
4. You will find a label with “Charger indicator” of the LED indicator on the charger.
The battery pack can become a little warm during the charging. This is normal.
If the battery pack fails to charge, check:
Voltage at the power socket
Whether there is good contact at the charging contacts.
Whether the battery pack is warm or not, The battery protection system will not allow the
battery to be charged if the battery temperature is over 40℃after use, allow the battery
pack to cool to room temperature before commencing with the charging.
If the battery pack still fails to charge, send the charging unit and the battery pack to our
customer service center.
To ensure that the battery pack provides long service, you should take care to recharge it
promptly. You must recharge the battery pack when you notice that the power of the cordless
vacuum drops. Never allow the battery pack to become fully discharged. This will cause it to
develop a defect.
Battery capacity indicator
Press the switch for the battery capacity indicator . The battery capacity indicator shows the
charge status of the battery using 4 LEDs as following:
All 4 LEDs are lit:
The battery is fully charged.
3 LED(s) are lit:
The battery has approx 75% remaining charge.
2 LED(s) are lit:
The battery has approx 50% remaining charge.
1 LED is lit:
The battery will be empty soon, please recharge the battery.
5.8 Charger indicator
Indicator status
Explanations and actions
Ready for use
The charger is connected to the mains and is ready for use; there is
no battery pack in the charger.
Charging
The charger is charging the battery pack in charge mode.

ORIGINAL INSTRUCTIONS
12
Battery pack is full of charge.
Charging is finished and battery pack in the charger.
The temperature of battery is too high or too low, the charger is
under protection status. The charging function can be recovered
after the temperature is normal.
Unrecoverable battery malfunction.
Explanation of symbols
General hazard safety alert.
Read instruction manual.
Pay attention that bystanders are not injured through foreign objects thrown from the
machine.
Warning: Keep a safe distance from the machine when operating.
Beware of sharp blades. Blades continue to rotate after the motor is switched off
–
Remove disabling device before maintenance”
Wait until all machine components have completely stopped before touching them. The
blades continue to rotate after the machine is switched off, a rotating blade can cause injury.
Do not use the machine in the rain or leave it outdoors when it is raining.
INTENDED USE
The lawn mower is intended for private use i.e. for use in home and gardening environments.
Private use of the lawn mower refers an annual operating time generally not exceeding that of 50 hours, during which time the
equipment is primarily used to maintain small-scale, residential lawns and home/hobby gardens. Public facilities, sporting halls,
and agricultural/forestry applications are excluded.
Important. Due to the high risk of bodily injury to the user, the lawn mower may not be used to trim bushes, hedges or shrubs, to
cut scaling vegetation, planted roofs, or balcony-grown grass, to clean (suck up) dirt and debris off walkways, or to chop up tree or
hedge clippings. Moreover, the lawn mower may not be used as a power cultivator to level out high areas such as molehills.
For safety reasons, the lawn mower may not be used as a drive unit for other work tools or toolkits of any kind, unless they have
been expressly permitted by the manufacturer.
The equipment is to be used only for its prescribed purpose. Any other use is deemed to be a case of misuse. The user / operator
and not the manufacturer will be liable for any damage or injuries of any kind caused as a result of this.
Please note that our equipment has not been designed for use in commercial, trade or industrial applications. Our warranty will be

ORIGINAL INSTRUCTIONS
13
voided if the machine is used in commercial, trade or industrial businesses or for equivalent purposes.
TECHNICAL SPECIFICATIONS
PRODUCT ELEMENTS
1. Switch bar
2. Top push bar
3. Lower push bar bracket
4. Carry handle
5. Grass basket
6. Cutting height adjustment lever
7. Ejection flap
8. Switch button
9. Cutting height scale
10. Washer
11. Cutting knife
12. Safety plug
13. Cable clip
14. Lever indicator
15. Handle of grass basket
16. Screw knob
17. Bolt
ASSEMBLY (Fig. 4).
The lawn mower is delivered partly assembled. See fig 3. The push bar and the grass basket must be assembled before
using the lawn mower. Follow the instructions step by step and refer to the pictures when assembling.
Mounting the lower push bar bracket
1. Insert the left lower push bar into the handlebar mount and
secure with the scew knob (Fig. 4a).
2. Assembly right push bar in the same way as left bar. See
Fig. 4b.
Mounting the top push bar
Align the hole on the top push bar with the hole on low
push bar, then insert the bolt and fasten it with the screw
knob. See fig 4c & 4d.
Mounting the cable clip
Mount the two cable clips seperately onto the low and top push
bar. See fig 4c & 4d.
Mounting the handle onto the grass basket
Press one end of the handle into the hole on the gass basket,
then press another end. Please referring to the pic 4g.
Mounting the grass basket
1. Flip the ejection flap upward with left hand.
2. Hoop the basket onto the machine. Pls referring the
Fig.4h.
OPERATION
Filling level indicator of the grass collector
The grass box is equipped with a filling level indicator. which is
opened by the airflow that the lawn mower generates during
operation. If the flap closes during mowing, the grass collecting
device is full and must be emptied. To ensure the proper
functioning of the fi lling level indicator, the holes under the flap
must always be kept clean and passable.
Safety plug
For safety, the machine equipped the safety plug (12) in the
battery compartment.
Before working, you need to insert this safety plug into the
compartment (See fig.5a).
Before do any adjustment of the cutting height or do any
maintenance, or changing blade, you must pull the safety plug
out of the compartment.
Adjusting the cutting height
Caution!
Adjust the cutting height only when the machine has been
switched off and the safety plug(12) has been pulled out.
Before you begin to mow, check to ensure that the blade is not
blunt and that none of the fasteners are damaged. To prevent
any imbalance, replace blunt and/or damaged blades. To carry
out this check, first switch off the motor and pull out the safety
plug.
The cutting height is adjusted as follows:
1. Push the cutting height adjustment lever (6) outwards.
2. Press down or pull upward the lever (6) to the desired cutting
detached (to be emptied) and the motor is still running. A
rotating blade can cause serious injuries!
Always carefully fasten the chute fl ap and grass basket.
Switch off the engine before emptying the grass basket.
Always ensure that a safe distance (provided by the length
of the long handles) is maintained between the user and
the mower housing. Be especially careful when mowing
and changing direction on slopes and inclines. Maintain a
solid footing and wear sturdy, non-slip footwear and
long trousers.
Always mow along the incline (not up and down). For
safety reasons, the lawn mower may not be used to mow
inclines whose gradient exceeds 15 degrees.
Use special caution when backing up and pulling the lawn
mower. Tripping hazard!
Working advice
It is recommended that you overlap the mowing swaths.
Only use a sharp blade that is in good condition. This will
prevent the grass blades from fraying and the lawn from
turning yellow.
Try to mow in straight lines for a nice, clean look. The
swaths should overlap each other by a few centimeters in
order to avoid stripes.
How frequently you should mow your lawn is determined
primarily by the speed at which the grass grows. In the
main growing season (May- June) you will probably need
to mow the lawn twice a week, otherwise just once a
week. The cutting height should be between 4 - 6cm and

ORIGINAL INSTRUCTIONS
14
height.
3. Press the lever (6) into the corresponding recess and check
that make sure it is securely seated in the recess.
Reading off the cutting height
The cutting height can be set between 25-75 mm in 6 intervals,
and can be read off on the scale.
Installing the battery pack (Fig. 5b)
Open the battery cover as shown in Fig. 5b. Then insert the two
batteries in the mounts as shown in Fig. 5b.
Note!
Use only batteries which are charged to the same level. Never
combine full and half-full batteries.
Always charge the two batteries simultaneously.
The equipment‘s operating time depends on the battery with the
lower charge level. The two batteries must always be fully
charged before use.
Close the battery cover by swinging it down, and make sure
that it latches in place correctly.
Switching on/off the machine (Fig 5c & 5d)
To prevent the equipment switching on accidentally, the lawn
mower is equipped with a safety switch.
To switching on the machine, Keep pressing the button on the
top push handle and meanwhile pull the switch bar as show Fig
5c & 5d. The start time can amount to several seconds.
To stop the machine, just release the switch handle. The
machine will completely stopped in 3 senconds.
Caution!
Never open the chute fl ap when the grass bag has been
the amount of growth before mowing again should be 4 -
5cm. If the grass is allowed to grow somewhat longer for
whatever reason, do not make the mistake of cutting it
back to the normal height in one go. This will harm the
lawn. Never cut it back by more than half the height in one
go.
Keep the underside of the mower housing clean and
remove grass build-up. Deposits not only make it more
diffi cult to start the mower; they decrease the quality of
the cut and make it harder for the equipment to bag the
grass.
Always mow along inclines (not up and down). You can
prevent the lawn mower from slipping down by holding a
position at an angle upwards.
Select the cutting height according to the length of the
grass. Make several passes so that no more than 4cm of
grass are cut at one time.
Switch off the motor before doing any checks on the
blade. Keep in mind that the blade continues to rotate for
a few seconds after the motor has been switched off .
Never attempt to manually stop the blade. Regularly check
to see if the blade is securely attached, is in good
condition and is sharp. If the contrary is the case, sharpen
the blade or replace it. In the event that the blade strikes
an object, immediately switch off the lawn mower and wait
for the blade to come to a complete stop. Then inspect the
condition of the blade and the blade mount. Replace any
parts that are damaged.
As soon as grass clippings start to trail the lawn mower, it
is time to empty the grass basket. Important!
Before taking off the grass basket, switch off the motor
and wait until the blade has come to a stop.
To take off the grass basket, use one hand to lift up the chute fl
ap and the other to grab onto the basket handle. Remove the
basket. For safety reasons, the chute fl ap automatically falls
down after removing the grass basket and closes off the rear
chute opening. If any grass remains in the opening, it will be
easier to restart the engine if you pull the mower back
approximately 1m.
Do not use your hands or feet to remove clippings in or on the
mower housing, but instead use suitable tools such as a brush
or a hand broom.
In order to ensure that the majority of grass clippings are
picked up, the inside of the grass basket must be cleaned
after each use.
Reattach the grass basket only when the motor is
switched off and the blade has stopped.
Lift up the chute fl ap with one hand and, holding the grass
basket by its handle with the other hand, hang in the
basket from the top.
MAINTENANCE
Danger!
Pull the safety plug before carrying out any cleaning work.
Cleaning
• Keep all safety devices, air vents and the motor housing free
of dirt and dust as far as possible. Wipe the equipment with a
clean cloth or blow it with compressed air at low pressure.
• Do not clean the lawn mower with running water, particularly
with high-pressure water.
• We recommend that you clean the device immediately each
time you have finished using it.
• Clean the equipment regularly with a moist cloth and some soft
soap. Do not use cleaning agents or solvents; these could
attack the plastic parts of the equipment. Ensure that no water
can seep into the device.
• For best results, clean the lawn mower with a brush or rag.
Maintenance
• Worn out or damaged blades, blade mounts, and bolts should
be replaced as a set by an authorized professional in order to
keep the equipment in balance.
• Ensure that all mounting components (i.e. screws, bolts, nuts
blade and make sure that it is tightly fastened. If the blade
is completely worn out, it must be immediately replaced or
ground sharp again. An excessively vibrating mower
means that the blade is not properly balanced or has
become deformed from striking an object. In this case, the
blade must be repaired or replaced.
• There are no parts inside the equipment which require
additional maintenance.
Replacing the blade (Fig 6)
For safety reasons, we recommend having the blade
replaced by an authorized professional. Important! Wear
work gloves! Only replace the blade with a genuine Einhell
replacement blade, as this will ensure top performance
and safety under all conditions.
Carry out the following steps to change the blade:
1. Remove the battery pack as show fig 6a.
2. Remove the safety plug (see Fig.6b).
3. Loosen the blade screw in anti-clockwise show as fig.
6c.
4. Remove the blade and replace with a new one. When
fitting the blade, make sure it is installed in the
clockwise direction. The blade‘s air vanes must

ORIGINAL INSTRUCTIONS
15
etc.) are always tightened so that the equipment can be safely
operated at all times.
• Frequently check the grass catch assembly for signs of wear.
• Replace excessively worn or damaged parts immediately.
• In order to ensure that you enjoy the equipment for many
years to come, all screwed parts, as well as the wheels and
axles, should be cleaned and lubricated.
• Keeping your lawn mower in good condition not only ensures a
long lifespan and high performance, but also enables the
equipment to thoroughly cut your grass with minimal effort.
• The blade is subjected to more wear and tear than any other
component. Therefore, routinely check the condition of the
project into the motor compartment. The dome
mounts must be aligned with the punch holes in the
blade.
5. Then retighten the fastening screw with the universal
wrench. The tightening torque should be approx. 25
Nm.
At the end of the season, perform a general inspection
of the lawn mower and remove any grass and dirt which
may have accumulated. At the start of each season,
ensure that you check the condition of the blade. If repairs
are necessary, please contact our customer service center.
Use only genuine spare parts.
ENVIRONMENT PROTECTION
In order to prevent the machine from damage during transport, it is delivered in a sturdy packaging. Most of the
packaging materials can be recycled. Take these materials to the appropriate recycling locations. Take your unwanted
machines to your local dealer. Here they will be disposed of in an environmentally safe way.
Discarded electric appliances are recyclable and should not be discarded in the domestic waste! Please actively
support us in conserving resources and protecting the environment by returning this appliance to the collection
centres (if available).

ORIGINAL INSTRUCTIONS
16
WARRANTY
The manufacturer warrants the product against defects in materials and workmanship for a period of 2 years
from the date of purchase to the original purchaser. The guarantee applies when the product is used as a home
tool. The warranty does not extend for failures due to normal wear and tear.
The manufacturer agrees to replace the spare parts that are classified as defective by a designated distributor.
The manufacturer will not accept responsibility for the replacement of the machine, either partially or in full, and /
or consequential damages.
The warranty does not cover failures due to:
• Insufficient maintenance.
• Assembly, adjustment or abnormal operation of the product.
• Spare parts that are subject to wear.
Nor does the guarantee extend to:
• Cost of freight and packaging.
• The use of the tool for any other purpose than for which it was designed
• Use and maintenance of the machine in a manner not described in the user's manual.
As part of our policy of continuous product improvement, we reserve the right to alter or modify specifications
without prior notice. As a result, the product may differ from the information contained herein, but any alteration
will only be implemented without prior notice if it is classified as an improvement of the previous specification.
READ THE MANUAL CAREFULLY BEFORE USING THE MACHINE.
When ordering spare parts, please quote the part number or code, this can be found in the parts list included in
this manual.
Keep the purchase receipt; Without it, no guarantee will be valid.
In order to get help about your lawn mower we invite you to go through this link or to call us by phone
+33 (0)8.20.20.22.68:
https://services.swap-europe.com/contact
You need to create a "ticket" via their platform.
Login or create your account
Put your tool reference
Choose the subject of your request
Explain your problem
Attach these files: the invoice or receipt, the nameplate picture (serial number), the picture of the part you need
(for example: pins on the transformer plug that broke away)
We offer you a warranty extension to 1 year. To profit it, please follow the below proceeding:
Connect on the website:

ORIGINAL INSTRUCTIONS
17
Insert your contact details
Register your tool with:
oThe reference
oThe serial number
oThe date you bought the tool
Generate automatically the PDF warranty certificate and print it.

ORIGINAL INSTRUCTIONS
18
DECLARATION OF CONFORMITY
BUILDER SAS
32, rue Aristide Bergès -Z1 31270 Cugnaux - France
Tel. +33 (0) 5.34.502.502 Fax: +33 (0) 5.34.502.503
Declares that the machine named below
Cordless Lawnmower
ELMC20V-UK
Serial number: 20190818598-20190819197
Complies with the following European Directives:
Machinery Directive 2006/42/EC
EMC Directive 2014/30/EU
Other applicable Directives:
Noise Directive 2000/14/EC Annex VI and 2005/88/EC
2011/65/EU (RoHS) Directive and 2015/863/EU
Measured sound power level: 90.2 dB(A) K= 3 dB(A)
Guaranteed Sound Power Level: 94 dB(A)
Notified Body 0036
TÜV SÜD Industrie Service GmbH •Westendstrasse 199 •80686 München •Deutschland
Applicable harmonized standards:
EN60335-1:2012+A11+A13
EN60335-2-77:2010
EN62233:2008
EN5014-1:2017
EN55014-2:2015
Cugnaux, 10/07/2019
Philippe MARIE / CEO
Responsible of technical file: M. Olivier Patriarca
Table of contents
Other Energizer Lawn Mower manuals