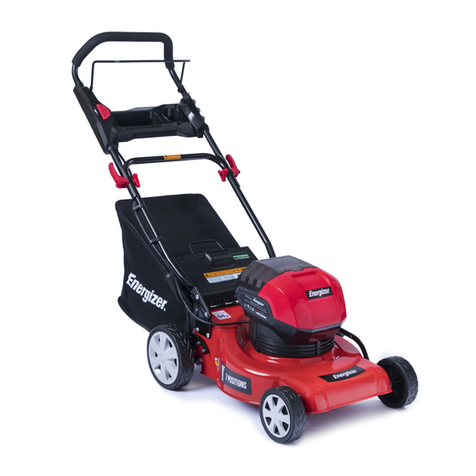
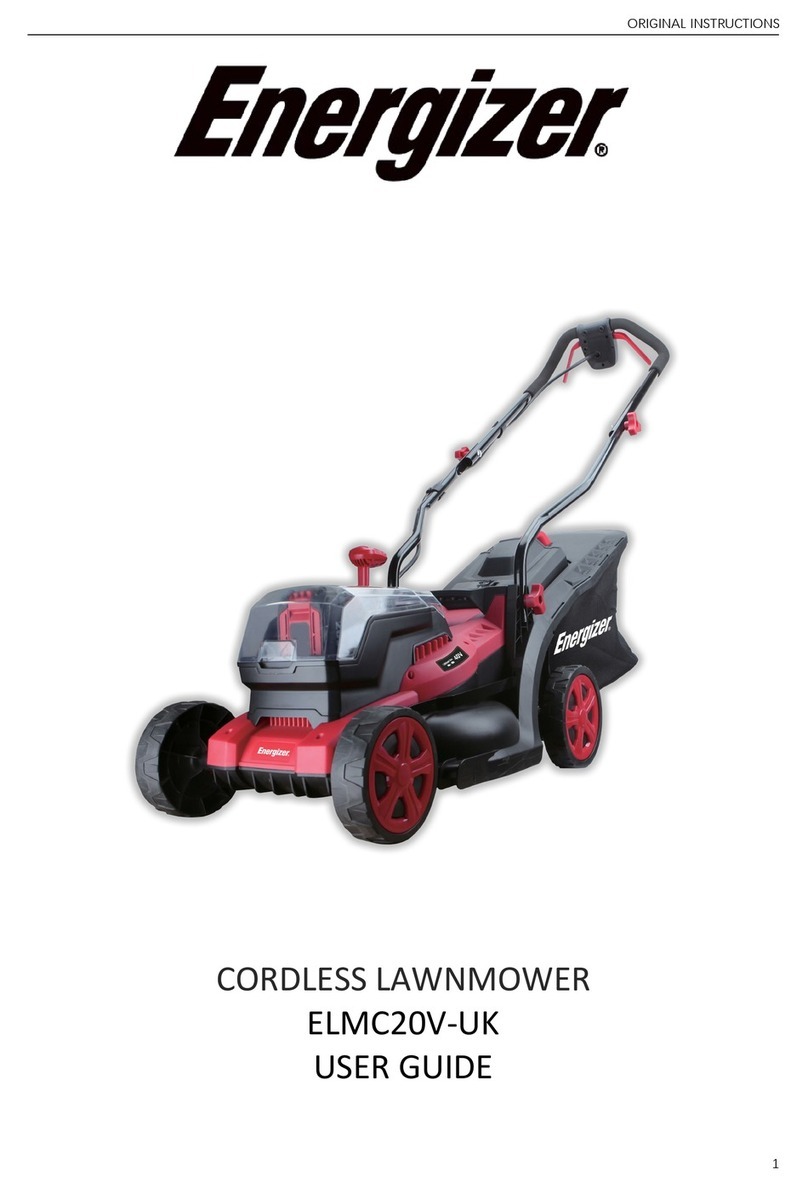
Energizer EZ40VTDE46N User manual


©2018 Energizer. Energizer and certain graphic designs are trademarks of Energizer Brands,
LLC and related subsidiaries and are used under license by Builder SAS.
All other brand names are trademarks of their respective owners. Neither Builder SAS nor Energizer
Brands, LLC is affiliated with the respective owners of their trademarks.

Let's get started.
You're excited to power up, so we'll keep this brief!

SAFETY WARNINGS
IMPORTANT
READ CAREFULLY BEFORE USE
KEEP FOR FUTURE REFERENCE
Safe operating practices for lawnmowers
Training
a) Read the instructions carefully. Be familiar with the controls and the correct use of the machine.
b) Never allow children or people unfamiliar with these instructions to use the machine. Local regulations can restrict
the age of the operator.
c) Never operate the machine while people, especially children, or pets are nearby.
d) Keep in mind that the operator or user is responsible for accidents or hazards occurring to other people or their
property.
Preparation
a) While operating the machine always wear substantial footwear and long trousers. Do not operate the machine when
barefoot or wearing open sandals. Avoid wearing clothing that is loose fitting or that has hanging cords or ties.
b) Thoroughly inspect the area where the machine is to be used and remove all objects which can be thrown by the
machine.
c) Before using, always visually inspect to see that the blade, blade bolt and the blade assembly are not worn or
damaged. Replace worn or damaged components in sets to preserve balance. Replace damaged or unreadable labels.
Operation
a) Operate the machine only in daylight or in good artificial light.
b) Avoid operating the machine in wet grass.
c) Always be sure of your footing on slopes.
d) Walk, never run.
e) Mow across the face of slopes, never up and down.
f) Exercise extreme caution when changing direction on slopes.
g) Do not mow excessively steep slopes.
h) Use extreme caution when reversing or pulling the machine towards you.
i) Stop the blade(s) if the machine has to be tilted for transportation when crossing surfaces other than grass, and when
transporting the machine to and from the area to be used.
j) Never operate the machine with defective guards or shields, or without safety devices, for example deflectors and/or
grass collector, in place.
k) Switch on the motor carefully according to instructions and with feet well away from the blade(s).
l) Do not tilt the machine when switching on the motor, except if the machine has to be tilted for starting. In this case, do
not tilt it more than absolutely necessary and lift only the part, which is away from the operator.
m) Do not start the machine when standing in front of the discharge opening.
n) Do not put hands or feet near or under rotating parts. Keep clear of the discharge opening at all times.
o) Do not transport the machine while the power source is running.
p) Stop the machine, and remove the battery. Make sure that all moving parts have come to a complete stop:
- whenever you leave the machine,
- before clearing blockages or unclogging chute,
- before checking, cleaning or working on the machine,
- after striking a foreign object.
Inspect the machine for damage and make repairs before restarting and operating the machine;

If the machine starts to vibrate abnormally (check immediately):
−inspect for damage,
−replace or repair any damaged parts,
−check for and tighten any loose parts.
Maintenance and storage
a) Keep all nuts, bolts and screws tight to be sure the machine is in safe working condition.
b) Check the grass collector frequently for wear or deterioration.
d) On machines with multi blade, take care as rotating one blade can cause other blades to rotate
e) Be careful during adjustment of the machine to prevent entrapment of the fingers between moving blades and fixed
parts of the machine.
Additional instructions
- Do not use this tool in wet weather.
- Do not use the tool in bad weather conditions (rain, thunderstorms, storms, etc.) and when there is a risk of
lightning
- The handling / connection of the cables must be dry.
- An incorrect connection can cause serious injury or death.
- Check that the battery is in good condition. Do not use the appliance if the appliance is damaged or worn.
- Never use the appliance if the guards are defective or without safety devices, for example the grass catcher in place.
- Mow by day or under adequate artificial light.
- Avoid operating the unit in wet grass or in the rain.
- Make sure the battery is inserted correctly in the machine.
- Do not expose the cable to sources of heat. Do not allow it to come into contact with solvents, oil, fuels, or smudged
objects.
- Stop and remove the battery:
oWhenever you leave the device
oBefore solving a problem.
oBefore checking, cleaning or working on the unit.
oIf the unit starts to vibrate abnormally
- Always ensure your position on the slopes.
- Mow facing slopes, never up and down.
- Be extremely careful when changing direction on slopes.
- Do not mow on slopes of more than 20 °.
- Walk, never run, do not get pulled by the lawn mower.
- Be extremely careful when pulling the lawn mower toward you.
- Stop the engine if you must tilt the lawnmower for transport, when crossing areas other than grass, and when
transporting it to another area to be mowed.
- Never operate the lawn mower with defective protections, or without a safety device, such as a deflector or grass
catcher that is not in place.
- Start the engine with the switch on, cautiously as instructed, and feet well away from the blade.
- Do not tilt the mower when starting the engine.
- Start the engine on a flat surface with no obstacles or grass too high.
- Do not put your hands or feet under rotating parts.
- When working on the grass catcher or on the ejection duct, stop the engine.
- Never lift or carry a lawnmower with the engine running.
- When mowing, always keep a safe distance from the rotating blade. This distance is the length of the handlebars.
- After a breakdown, stop the engine immediately, do not continue mowing, take the machine to an authorized
service center and ask qualified personnel to eliminate the problem.

Residual risks
Even if you use this product in compliance with all safety requirements, the potential risks of injury and damage remain.
The following hazards may arise in the structure and design of this product.
- There are adverse health consequences resulting from the emission of vibration if the product is used for long
periods of time or not properly managed and properly maintained.
- There are risks of injury and property damage due to attachments or broken the sudden impact of hidden objects
when using cutting.
- Risk of injury to persons and property caused by flying objects.
- Prolonged use of this product exposes the operator to vibrations and can produce so-called "white finger" disease.
To reduce the risk, wear gloves and keep your hands warm. If any of the symptoms of "white finger syndrome"
occur, seek immediate medical attention. Symptoms of "white finger" include numbness, loss of sensitivity, tingling,
tingling, and pain, loss of strength, color changes or skin condition. These symptoms usually appear on the fingers,
hands or wrists. Risk increases at low temperatures.
Intended use
This lawnmower is designed for natural grass mowing. Any other use is prohibited.
It is suitable only for private use in a garden or plot. Lawnmowers designed for private plots or gardens are those used
for the maintenance of grassy areas and private lawns and should not be used in public areas, parks, sports,
agricultural or forest areas.
Symbols
Read instructions manual
Risk of projections; Keep bystanders away
Beware of sharp blades. Blades continue to rotate after the motor is switched off – Remove disabling device
before maintenance
Do not touch the accessible hot parts.

Do not touch rotate blades
Wear ocular protection and hearing protection
Do not start the tool on a slope
DESCRIPTION

TECHNICAL DATA
CORDLESS LAWNMOWER
Model
EZ40VTDE46N
Voltage
36V , Max. 40V
Charge time
3 hours (4.0 Ah battery)
No-load speed
2800-3300/min
Cutting width
457 mm
Grass catcher capacity
60 L
Height adjustments
2.5 - 7.5 cm (6 positions)
Functions
3-in-1: Mulch, side discharge and grass catcher
weight (with 4.0Ah battery)
28 kg
Sound power level
94 dB(A)
Sound pressure level
88,4 dB(A) K= 3 dB(A)
Vibration
2,2 m/s² K= 1,5 m/s²
ASSEMBLY
UNFOLDING AND ADJUSTING LOWER HANDLE
WARNING
Folding or unfolding the handle improperly can damage the cables, causing an unsafe operating condition.
• Do not damage the cables when folding or unfolding the handle.
• If a cable is damaged, contact an Authorized Service Dealer.

UNFOLDING AND ADJUSTING HANDLE ASSEMBLY
a. To raise handle assembly:
• Pull up and back on the lower handle (1) until it is aligned with the hole
position of the arm support and the mower housing.
• To secure the lower handle (1) in place, lock the lower screw (3).
• Open the upper cam locks (2).
• Pull up and back on the upper handle to raise it into operating position.
• To secure the upper handle in place, close the upper cam locks (2).
NOTE: If the upper handle is loose or separated from the lower
handle, tighten the knobs on the upper handle locks by turning them clockwise.
INSTALLING THE GRASS CATCHER BAG
• Lift the rear discharge door (1).
• Lift the grass cat her by its handle (2) and place under the rear
discharge door so that the hooks (3) on the grass catcher are seated
on the door rod (4).
• Release the rear discharge door. When installed correctly, the
hooks on the grass catcher will extend through the openings on the
rear discharge door.
NOTE: When using the grass catcher, do not install either the
side discharge deflector or the mulching plug.
INSTALLING/REMOVING THE MULCHING PLUG
• To remove the mulching plug, lift the rear discharge door
(1).
• Grasp the handle (2) of the mulching plug.
Lift and pull the mulching plug out using the handle.
• The mulching plug (3) is inserted at an angle, so it requires
some force to remove it.
• The mulching plug must be removed in order to install the
grass catcher bag.

• The mulching plug must be re-installed when the grass catcher bag is removed.
NOTE: When mulching, do not install either the side discharge deflector or the grass catcher bag.
INSTALLING SIDE DISCHARGE CHUTE
• Lift the side discharge cover (1).
• Align the grooves (2) on the discharge chute (3) with the
pins (4) on the underside
of the discharge cover (1).
• Lower the discharge chute until the hooks on the mower
deck are secured in the openings in the discharge chute.
• Release the side discharge cover.
NOTE: When using side discharge, do not install the
grass catcher bag. Ensure the mulch plug is installed.
TO INSTALL BATTERY PACK
• Lift and hold up the battery door.
• Align the battery with the mower battery port.
• Make sure the battery release button snaps in place and that battery is fully seated and secure in the mower before
beginning operation.
• If the machine is not going to be used immediately, remove the battery.
TO REMOVE BATTERY PACK
• Release the bail lever to stop the mower.
• Press the battery release button (3) on the mower. Open the battery door.
• Remove battery from the mower.

USING THE PRODUCT
STARTING/STOPPING THE MOWER
TO START THE MOTOR:
• Open the battery door.
• Insert the battery.
• Press and hold the safety lock-out button
(1).
• Pull the bail lever (2) upward to the handle to start the mower and release the button.
TO STOP THE MOTOR:
• Release the bail lever.
SOFT-START
This LI-ION mower is equipped with a “soft- start” feature. When initially starting up, the mower will take approx. 3
seconds to get up to full speed. If the mower does not initially start: Remove the battery and check under the mower
deck to ensure there is nothing obstructing the blade and that the blade can spin freely by hand. Even a small amount
of grass on startup will prevent the “soft start” from turning the mower on.
CAUTION
Do not attempt to override the operation of the safety lock-out button or bail lever.
WARNING
The operation of any mower can result in foreign objects being thrown into the eyes, which can cause
severe eye damage. Always wear safety glasses while operating the mower and while performing any
adjustments or repairs.
WARNING
Ensure that other people and pets remain at least 100 feet (30 m) away when the mower is in use.
INSPECT THE CUTTING AREA
Remove all stones, sticks, wire, bones, and other debris that might be thrown by the rotating blades.

CUTTING HEIGHT ADJUSTMENT
When shipped, the wheels on the mower are set to a
low-cutting position. Before using the mower for the first time,
raise the cutting position to the height best suited for your lawn.
The average lawn should be between 1”to 2” (2.5 to 5 cm) during
cool months and between 2”and 3” (5 to 7.5 cm) during hot
months.
ADJUST THE BLADE HEIGHT:
• To raise the blade height, grasp the height adjustment lever
(1) and move it toward the back of the mower.
• To lower the blade height, grasp the height adjustment lever
and move it toward the front of the mower.
SLOPE GAUGE
WARNING
Slopes are a major factor related to accidents involving slips and falls, which can result in severe injury.
Operating the mower on a slope requires extra caution. If you feel uneasy on a slope, do not mow it. For your
safety, use the slope gauge that is included as part of this manual to measure slopes before operating this unit
on a sloped or hilly area.
• Mow across the face of a slope, and never up and down. Exercise extreme caution when changing direction on a
slope.
• Watch for holes, ruts, rocks, hidden objects, or bumps that may cause a slip or a trip. Tall grass can hide obstacles.
• Always be sure of your footing. If you feel like you are losing your balance, release the blade/ motor control handle
immediately. The blade will stop rotating within 3 seconds.
• Do not mow near drop-offs, ditches, or embankments, because you could lose your footing or balance.
• Do not mow a slope that has an angle of greater than 15°, as determined using the slope gauge.
• Do not mow wet or damp grass. Unstable footing can cause slipping.
WARNING
Do not mow a slope that has an angle of greater than 15° (a rise of approximately 2 1/2 feet [.75 m] every 10
feet [3 m]). Mow across the face of a slope, and never up and down.

MOWING TIPS
NOTE: A sharp blade will greatly enhance the performance of the mower, especially when cutting high grass. Be sure
to check the blade and to sharpen it at least once per year, as described in the Maintenance section.
• Verify that the lawn is free of stones, sticks, wires, and other objects that could damage the blades or the motor.
These objects could be accidentally thrown by the mower in any direction, and could cause serious personal injury to
the operator and to others. In order to prevent electric shock, do not operate the mower in damp or wet conditions.
• Do not mow in circles. Travel back and forth across the lawn.
• When cutting thick grass, reduce walking speed in order to allow for a more effective cut and a proper discharge of
the clippings.
• Always cut off one-third or less of the total length of the grass. The average lawn should be approximately 1” to 2”
(2.5 to 5 cm) long during cool months, and between 2” to 3 1/4” (5 cm to 8.3 cm) long during hot months. If there is
growth, the lawn should be cut in the fall.
MULCHING TIPS
NOTE: Inspect the area where the mower is to be used, and remove all stones, sticks, wire, bones, and other
debris that might be thrown by the rotating blade.
• Release the bail lever to turn the mower OFF when crossing any graveled area (stones can be thrown by the
blade).
• Set mower to the highest cutting height when mowing on uneven ground or in tall weeds.
• For effective mulching, do not cut wet grass, because it tends to stick to the underside of the deck, preventing
proper mulching of grass clippings. New or thick grass may require a narrower cut. The ground speed should be
adjusted to the condition of the lawn. If mowing has been delayed and the grass has been allowed to grow longer than
4” (10 cm), mow the lawn twice in order to reduce the grass height to a maximum of 3 1/4” (8.3 cm).
• Walk at a steady pace. Overlap the cutting rows. Do not let the grass get too tall. If the grass gets too long, start at
the highest cutting position and work down to the desired cutting height.
WARNING
If you strike a foreign object, stop the motor and remove the battery. Thoroughly inspect the mower for any damage.
Repair any damage before operating the mower. Excessive vibration of the mower during operation is an indication of
damage. Thoroughly inspect the mower and repair any damage before operating the
mower.
EMPTYING THE GRASS CATCHER BAG
• Stop mower, allow blades to completely stop, and remove the battery.
• Lift the rear discharge cover.

• Lift the grass catcher bag by its handle to remove from mower.
• Empty grass clippings.
• Lift the rear discharge cover and reinstall the grass catcher bag as described earlier in this manual.
CARE AND MAINTENANCE
REPLACING THE CUTTING BLADE
WARNING
Always protect your hands by wearing heavy gloves and/or wrapping the cutting edges with rags or other
materials when performing any maintenance on the blades. ALWAYS remove the battery when servicing or
transporting the mower.
REMOVE BATTERY
While wearing leather padded gloves, wedge a block of wood between the blade and the mower deck in order to
prevent the blade from turning when the bolt (1) is being removed.
• Using an adjustable wrench or 27 mm socket, loosen the bolt (1) and remove the blade (2). Turn the bolt
“COUNTERCLOCK WISE “to loosen it and “CLOCKWISE” to tighten it.
• Remove the bolt (1) and the blade (2).
• To re-install the blade, position the blade with the cutting edges toward the ground. Assemble the bolt as shown.
Using a 27 mm socket or wrench, turn the blade nut “CLOCKWISE” in order to secure the blade.
NOTE: Be sure to replace the parts in the exact order in which they were removed. When installing the cutting blade,
verify that it is installed with the curved ends pointing toward the mower deck, and not toward the ground.

CLEANING THE MOWER
WARNING
In order to reduce the risk of electric shock, do not expose the mower to water. The underside of the mower
deck should be cleaned after each use, because grass clippings, leaves, dirt, and other debris will accumulate,
which will cause rust and corrosion.
Remove any build-up of grass and leaves on or around the motor cover (do not use water). Occasionally wipe the
mower clean with a dry cloth. If debris builds up on the underside of the mower during use, stop the motor, disconnect it
from the battery, and then tilt the mower on its side, and scrape it clean using an appropriate tool.
SERVICE AND ADJUSTMENTS
• Identical replacement parts those are available from the manufacturer. In order to obtain replacement parts, the use of
parts that do not meet the original equipment specifications may lead to improper performance, and may compromise
safety.
• Before cleaning, repairing, or inspecting, verify that the blade and all moving parts have come to a complete stop.
Remove the battery when making any adjustments or when any of the four wheels must be lifted off the ground.
• Keep the handles dry, clean, and free of oil and grease.
• In order to reduce the risk of fire, keep the motor free of grass, leaves, and debris build-up.
• Check the blade and motor mounting bolts for proper tightness frequently. Visually inspect blade for damage (e.g.,
bent, cracked, or worn).
• For best and safest performance, maintain the mower with care. Keep the mower blade sharp and clean. Mower
blades are sharp, and can cut. Wrap the blades or wear gloves, and use extra caution when servicing.
• Keep all nuts, bolts, and screws tight in order to be sure that the equipment is in safe working condition.
• Never tamper with safety devices. Check them regularly for proper operation.
• After striking a foreign object, stop the motor. Thoroughly inspect the mower for any damage. Repair any damage
before operating the mower.
• The grass catcher components, discharge cover, and trail shield are subject to wear and damage, which could expose
moving parts or allow objects to be thrown. As a safety precaution, check these components frequently, and
immediately replace any parts that show signs of wear, or that are cracked or broken. Use original equipment
manufacturer’s parts only.
• When it is not in use, store the mower indoors in a dry area, and out of the reach of children.

Always remove battery when servicing or transporting the mower.
PROBLEM
POSSIBLE CAUSE
SOLUTION
The mower does -not
start.
The battery is not charged.
The switch is defective.
Grass jammed between the deck and blade.
The battery is not fully inserted in the mower.
Battery may require service or replacement.
Charge the battery.
Replace the switch
Remove battery; check under deck
for jams.
Check the connection between the
battery and the mower. Make sure
the battery clicks into place.
Replace battery.
The mower cuts the grass
unevenly.
The lawn is rough or uneven.
The cutting height is not set properly.
Check the mowing area.
Move the wheels to a higher
setting.
The mower does not
mulch properly.
Wet grass clippings are sticking to the
underside of the deck.
The mulching plug is missing.
Wait until the grass dries before
mowing.
Install the mulching plug.
The mower is hard to
push.
The grass is too tall, or the cutting height is
too low.
The rear of the grass catcher bag is dragging
in thick grass.
Raise the cutting height.
Empty the grass clippings from the
grass catcher bag.
The mower is excessively
noisy and vibrates.
The motor shaft is bent.
The blade is unbalanced.
Stop the motor, and inspect for
damage.
Repair before restarting.

The manufacturer warrants the product against defects in materials and workmanship for a period of 2 years from the
date of purchase to the original purchaser. The guarantee applies when the product is used as a home tool. The
warranty does not extend for failures due to normal wear and tear.
The manufacturer agrees to replace the spare parts that are classified as defective by a designated distributor. The
manufacturer will not accept responsibility for the replacement of the machine, either partially or in full, and / or
consequential damages.
The warranty does not cover failures due to:
• Insufficient maintenance.
• Assembly, adjustment or abnormal operation of the product.
• Spare parts that are subject to wear.
Nor does the guarantee extend to:
• Cost of freight and packaging.
• The use of the tool for any other purpose than for which it was designed
• Use and maintenance of the machine in a manner not described in the user's manual.
As part of our policy of continuous product improvement, we reserve the right to alter or modify specifications without
prior notice. As a result, the product may differ from the information contained herein, but any alteration will only be
implemented without prior notice if it is classified as an improvement of the previous specification.
READ THE MANUAL CAREFULLY BEFORE USING THE MACHINE.
When ordering spare parts, please quote the part number or code, this can be found in the parts list included in this
manual.
Keep the purchase receipt; Without it, no guarantee will be valid.

In order to get help about your lawn mower we invite you to go through this link or to call us by phone
+33 (0)8.20.20.22.68:
https://services.swap-europe.com/contact
You need to create a "ticket" via their platform.
•Login or create your account
•Put your tool reference
•Choose the subject of your request
•Explain your problem
•Attach these files: the invoice or receipt, the nameplate picture (serial number), the picture of the part you need (for
example: pins on the transformer plug that broke away)
We offer you a warranty extension to 1 year. To profit it, please follow the below proceeding:
•Connect on the website:
•Insert your contact details
•Register your tool with:
oThe reference
oThe serial number
oThe date you bought the tool
•Generate automatically the PDF warranty certificate and print it.

TRANSPORTING LITHIUM BATTERIES
Transport the battery in accordance with local and national provisions and regulations.
Follow all special requirements on packaging and labeling when transporting batteries by a third party. Ensure that no
batteries can come in contact with other batteries or conductive materials while in transport by protecting exposed
connectors with insulating, non-conductive caps or tape. Do not transport batteries that are cracked or leaking. Check
with the forwarding company for further advice.
DISPOSAL
Electrical products should not be discarded with household products. According to the European Directive 2012/19/EU
on waste electrical and electronic equipment and its implementation into national law, electrical products used must be
collected separately and disposed of at collection points provided for this purpose. Talk with your local authorities or
dealer for advice on recycling.

GB / DECLARATION OF CONFORMITY
BUILDER SAS
ZI, 32 rue Aristide Bergès – 31270 Cugnaux - France
Tel: +33 (0)5.34.502.502 Fax: +33 (0)5.34.502.503
Declares that the machines:
CORDLESS LAWN MOWER
Model: EZ40VTDE46N
Serial No.:
have been designed in compliance with the following standards:
EN 60335-1:2012+A11+A13, EN 60335-2-77:2010, EN 62233:2008
EN 55014-1:2006+A1:2009+A2:2011, EN 55014-2:2015
And in accordance with the following directives:
Directive Machine 2006/42/EC
Directive EMC 2014/30/EU
Noise Directive 2000/14/EC Annex VI & Directive 2005/88/EC
Notified body
Intertek Testin & Certification Ltd.
Davy Avenue, Knowlhill, Milton Keynes, MK5 8NL
Telephone : +44 (0)1908 857777 Fax : +44 (0)1908 857830
Web : www.intertek.com
Sound power level: 94 dB(A)
The people name holding the technical file:Mr. Olivier Patriarca
Philippe MARIE / PDG
Cugnaux, 14-11-2018
Table of contents
Other Energizer Lawn Mower manuals