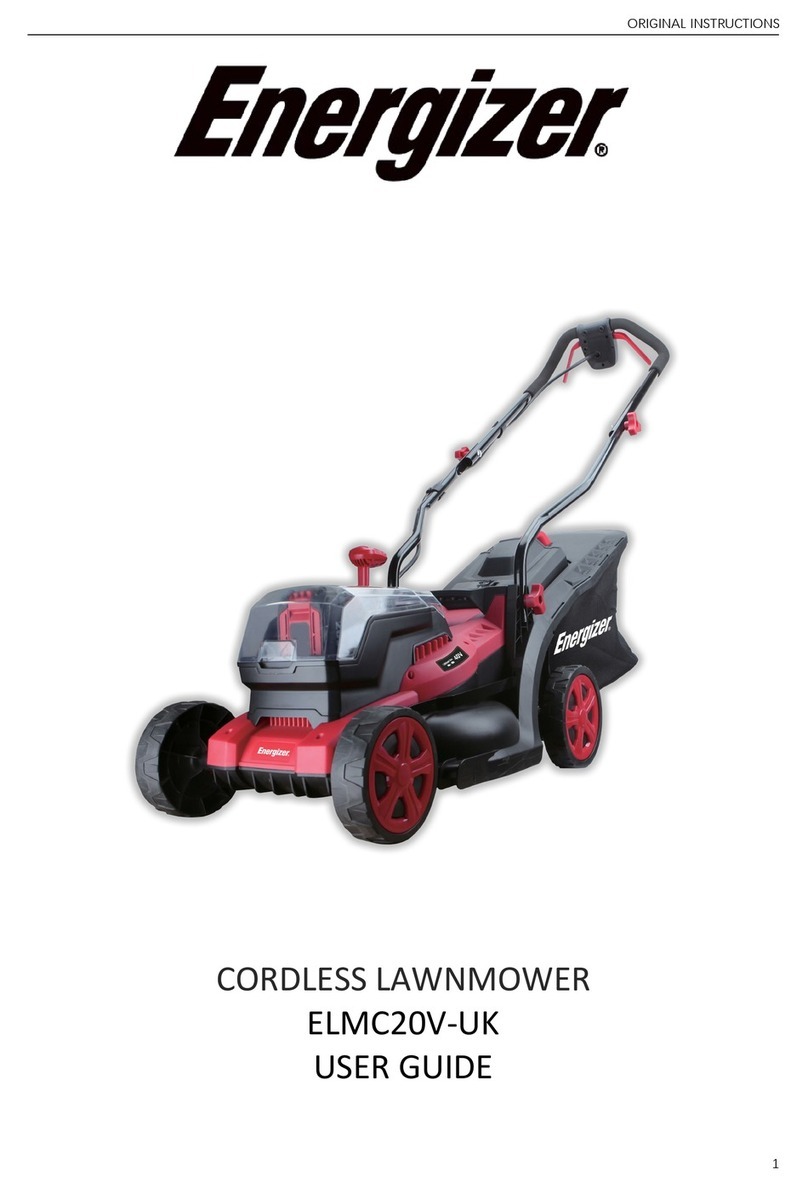
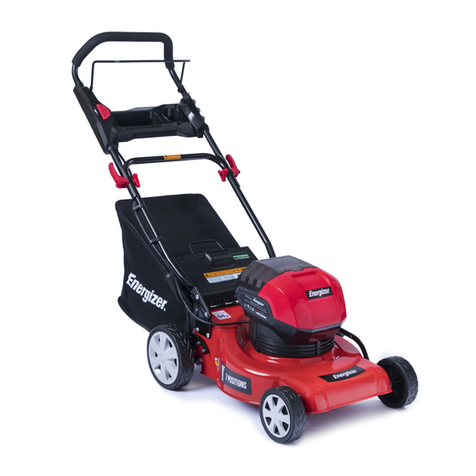
Energizer EZ40VTDE46TC User manual

ORIGINAL INSTRUCTIONS >EN
CAUTION Read the instructions before using this machine.
40V CORDLESS LAWN MOWER
EZ40VTDE46TC
EZ40VTDE46TC-UK
USER GUIDE

©2022 Energizer. Energizer and certain graphic designs are trademarks of Energizer
Brands, LLC and related subsidiaries and are used under license by Builder SAS.
All other brand names are trademarks of their respective owners. Neither Builder SAS
nor Energizer Brands, LLC is affiliated with the respective owners of their trademarks.

Let’s get started.
You’re excited to power up, so we’ll keep this brief!

CONTENTS
1. INTENDED USE 5
2. SAFETY WARNING 5
3. SYMBOLS 10
4. THE PRODUCT 11
5. ASSEMBLY 13
6. OPERATION 16
7. CARE AND MAINTENANCE 18
8. SERVICE AND ADJUSTMENTS 19
9. TRANSPORTING LITHIUM BATTERIES 20
10. RECYCLING AND DISPOSING 20
11. CE DECLARATION OF CONFORMITY 21
12. WARRANTY 22
13. PRODUCT FAILURE 23
14. WARRANTY EXCLUSIONS 24

1. INTENDED USE
This mower is designed for natural grass mowing. Any other use is prohibited. It is suitable only for
private use in a garden or plot. Lawnmowers designed for private plots or gardens are those used
for the maintenance of grassy areas and private lawns and should not be used in public areas,
parks, sports, agricultural or forest areas.
1)Read the instructions carefully. Be familiar with the
controls and the proper use of the equipment.
2)Never allow children or people unfamiliar with these
instructions to use the lawnmower. Local regulations
can restrict the age of the operator.
3)Never mow while people, especially children, or pets
are nearby.
4)Keep in mind that the operator or user is responsible
for accidents or hazards occurring to other people or
their property.
5)While mowing, always wear substantial footwear and
long trousers. Do not operate the equipment when
barefoot or wearing open sandals. Avoid wearing
clothing that is loose fitting or that has hanging cords
or ties.
6)Thoroughly inspect the area where the equipment is
to be used and remove all objects which can be
thrown by the machine.
7)Before using, always visually inspect to see that the
blades, blade bolts and cutter assembly are not worn
or damaged. Replace worn or damaged blades and
bolts in sets to preserve balance. Replace damaged
or unreadable labels.
8)Mow only in daylight or in good artificial light.
2. SAFETY WARNING
IMPORTANT! READ CAREFULLY BEFORE USE,
KEEP FOR FUTURE REFERENCE.
05

9)Avoid operating the equipment in wet grass.
10) Always be sure of your footing on slopes.
11) Walk, never run.
12) Mow across the face of slopes, never up and down.
13) Exercise extreme caution when changing direction
on slopes.
14) Do not mow excessively steep slopes.
15) Use extreme caution when reversing or pulling the
lawnmower towards you.
16) Stop the blade(s) if the machine has to be tilted for
transportation when crossing surfaces other than
grass, and when transporting the machine to and
from the area to be used.
17) Never operate the machine with defective guards or
shields, or without safety devices, for example
deflectors and/or grass collector, in place.
18) Switch on the motor carefully according to
instructions and with feet well away from the blades.
19) Do not tilt the machine when switching on the motor,
except if the machine has to be tilted for starting. In
this case, do not tilt it more than absolutely necessary
and lift only the part, which is away from the operator.
20) Do not start the motor when standing in front of the
discharge opening.
21) Do not put hands or feet near or under rotating parts.
Keep clear of the discharge opening at all times.
22) Do not transport the machine while the power
source is running.
06
23) Stop the motor and switch off isolator key. Make
sure that all moving parts have come to a complete
stop:

for damage and make repairs before restarting and
operating the lawnmower.
24) If lawnmower starts to vibrate abnormally (check
immediately):
equipment is in safe working condition.
26) Check the grass catcher frequently for wear or
deterioration.
27) Be careful during adjustment of the machine to
prevent entrapment of the fingers between moving
blades and fixed parts of the machine.
28) Always allow the machine to cool down before
storing.
29) When servicing the blades be aware that, even
though the power source is switched off, the blades
can still be moved.
30) Replace worn or damaged parts for safety.Use only
original spare parts and accessories.
31) Children are not allowed to use the machine.
32) This appliance is not intended for use by persons
with reduced physical, sensory or mental capabilities,
or lack of experience and knowledge, unless they
have been given supervision or instruction concerning
use of the appliance by a person responsible for their
Whenever you leave the machine.
Before clearing blockages or unclogging chute.
Before checking, cleaning or working on the lawnmower;
After striking a foreign object. Inspect the lawnmower
Inspect for damage.
Replace or repair any damagedparts.
Check for and tighten any loose parts.
25) Keep all nuts, bolts and screws tight to be sure the
07

though the power source is switched off, the blades
can still be moved.
other metal objects like, paper clips, coins, keys,
nails, screws, or other small metal objects that can
make a connection from one terminal to another.
Shorting the battery terminals together may cause
burns or a fire.
Liquid ejected from the battery may cause skin
irritation or burns.
from the battery:
by children.
If contact accidentally occurs, flush with water.
If liquid contacts eyes accidentally, seek medical help.
08
safety.
33)After use and before storage, remove the battery
from the machine and check for damage.
34)When servicing the blades be aware that, even
35)Recharge only with the charger specified by the
manufacturer. Using a chargerwith an
incompatible battery pack may create a risk of fire.
)
36 When battery pack is not in use, keep it away from
37)Under abusive conditions, liquid may be ejected
38)Children shall not play with the appliance.
39)Cleaning and user maintenance shall not be made

this mower. Children who are 14 years of age and
older must read and understand the operating
instructions and safety rules in this manual and must
be trained and supervised by a parent.
CHILD SAFETY
Tragic accidents can occur if the operator is not aware
of the presence of children.
Keep children out of the mowing area and under the
watchful care of a responsible adult.
Do not allow children under the age of 14 to operate
Stay alert and turn the mower offif a child or any other
person enters the mowing area.
Look behind and down for small children before and
while moving backwards.
Use extreme care when approaching blind corners,
doorways, shrubs, trees, or other objects that may
obscure your view of a child who may run into the path
of the mower.
09

Risk of projections. Keep bystanders away.
Beware of sharp blades. Blades continue to
rotate after the motor is switched off. Remove
disabling device before maintenance.
Guaranteednoise level.
3. SYMBOLS
Read this instruction book carefully before
using the lawn mower and keep it in a safe
place for future reference.
10

4.THE PRODUCT
4.1 PRODUCT DESCRIPTION
This lawnmower is provided without battery and battery charger. Please buy a battery pack
(battery + charger) from the same trademark of this tool. The recommended product is:
ENERGIZER 40V LITHIUM-ION BATTERY CHARGER. Do not use a non recommended battery.
Before using the battery and the charger, carefully read the instruction manuals provided
with these products. In case of questions, please contact our customer service.
11

Voltage
36Vd.c. (max. 40V d.c.)
No load speed
2800-3300/min
Cutting height
35-90mm (6 positions)
Volume of grass catcher
60 L
4.2 TECHNICAL DATA
Model EZ40VTDE46TC
Cutting diameter 457 mm
Charger type Input:100-240V~ 50/60Hz, 1.8A
Output:36V d.c., 1.8A
Battery type
36V d.c. (40V d.c. Max) 4.0Ah Lithium-ion
Sound power level LwA
90.9 dB(A) K= 3 dB(A)
Sound pressure level LpA 80.3dB(A) K= 3 dB(A)
Vibration
<2,5 m/s² K= 1,5m/s²
12
Net weight 31.5 kg(with battery)
Guarantee sound power level LwA 96dB(A)

5. ASSEMBLY
5.2 UNFOLDING AND ADJUSTING LOWER HANDLE
WARNING:
Folding or unfolding the handle improperly can damage the cables, causing an unsafe operating condition.
Do not damage the cables when folding or unfolding the handle.
If a cable is damaged, contact an Authorized Service Dealer.
To raise handle assembly (Fig. A):
1) Pull up and back on the lower handle (1) until it is aligned with the hole position of the arm support and the
mower housing.
2) To secure the lower handle (1) in place, lock the lower screw (3).
3) Open the upper cam locks (2).
4) Pull up and back on the upper handle to raise it into operating position.
5) To secure the upper handle in place, close the upper cam locks (2).
(Fig. A)
NOTE: If the upper handle is loose or separated from the lower handle, tighten the knobs on the upper handle
locks by turning them clockwise.
INSTALLING THE GRASS CATCHER BAG (Fig.B):
1) Lift the rear discharge door (1).
2) Lift the grass catcher by its handle (2) and place under the rear discharge door so that the hooks (3) on
the grass catcher are seated on the door rod (4).
3) Release the rear discharge door. When installed correctly, the hooks on the grass catcher will extend
through the openings on the rear discharge door.
5.1 UNPACKING
Before beginning assembly of the product, make sure all parts are present. Compare parts with
package contents list and hardware contents list. If any part is missing or damaged, do not
attempt to assemble the product.
Carefully remove the product and any accessories from the box. Make sure that all items listed in
the packing list are included.
Inspect the product carefully to make sure no breakage or damage occurred during shipping.
Do not discard the packing material until you have carefully inspected and satisfactorily operated
the product.
If any parts are damaged or missing, please call the dealer for assistance.
13

(Fig. B)
INSTALLING/REMOVING THE MULCHING PLUG (Fig C):
1) To remove the mulching plug, lift the rear discharge door (1).
2) Grasp the handle (2) of the mulching plug.
3) Lift and pull the mulching plug out using the handle.
4) The mulching plug (3) is inserted at an angle, so it requires some force to remove
it.
5) The mulching plug must be removed in order to install the grass catcher bag.
6) The mulching plug must be re-installed when the grass catcher bag is removed.
(Fig. C)
INSTALLING SIDE DISCHARGE CHUTE (Fig. D)
1) Lift the side discharge cover (1).
2) Align the grooves (2) on the discharge chute (3) with the pins (4) on the underside of the discharge cover
(1).
3) Lower the discharge chute until the hooks on the mower deck are secured in the openings in the
discharge chute.
4) Release the side discharge cover.
NOTE: When using the grass catcher, do not install either the side discharge chute or the mulching plug.
NOTE: When mulching, do not install either the side discharge chute or the grass catcher bag.
14

(Fig D)
TO INSTALL BATTERY PACK (Fig. E):
1) Lift and hold up the battery door (1).
2) Align the battery (2) with the mower’s battery port.
3) Make sure the battery release button (3) snaps in place and that the battery is fully seated and secure in
the mower before beginning operation.
4) If the machine is not going to be used immediately, remove the battery.
TO REMOVE BATTERY PACK (Fig. E):
1) Release the bail lever to stop the mower.
2) Press the battery release button (3) on the mower. Open the battery
door.
3) Remove the battery from the mower.
Fig.E
NOTE: When using side discharge, do not install the grass catcher bag. Ensure the mulch plug is installed.
15

6. OPERATION
6.1 STARTING/STOPPING (FIG F)
Open the battery cover.
Install the battery.
Close the battery cover.
Press and hold the safety lock-out button (1).
Pull the bail level (2) upward to the handle to start the mower and release the
button.
To stop the mower, release the bail level (2).
(Fig. F)
6.3 SOFT-START
This LI-ION mower is equipped with a “soft-start” feature. When initially starting up, the mower will take approx.
3 seconds to get up to full speed. If the mower does not initially start: Remove the battery and check under the
mower deck to ensure there is nothing obstructing the blade and that the blade can spin freely by hand. Even a
small amount of grass on start-up will prevent the “soft start” from turning the mower on.
6.4 INSPECT THE CUTTING AREA
Remove all stones, sticks, wire, bones, and other debris that might be thrown by the rotating blades.
6.5 CUTTING HEIGHT ADJUSTMENT
When shipped, the wheels on the mower are set to a low-cutting position. Before using the mower for the first
time, raise the cutting position to the height best suited for your lawn. The average lawn should be between 1”
to 2” (2.5 to 5 cm) during cool months and between 2” and 3” (5 to 7.5 cm) during hot months.
6.6 TO ADJUST THE BLADE HEIGHT
To raise the blade height, grasp the height adjustment lever (1) and move it toward the back of the mower.
To lower the blade height, grasp the height adjustment lever (1) and move it toward the front of the mower.
6.2 TO OPERATE THE SELF-PROPEL SYSTEM (FIG.F)
Pull the self-propel control bar (3) to the handle.
To turn the self-propel off, release the self-propel control bar (3).
The system has variable speed. To increase the speed, turn the self-propel speed control knob (4) counter
clockwise. To decrease the speed, turn the self-propel speed control knob (4) clockwise.
cause severe eye damage. Always wear safety glasses while operating the mower and while performing
any adjustments or repairs.
CAUTION: Do not attempt to override the operation of the safety lock-out button or bail lever.
WARNING: The operation of any mower can result in foreign objects being thrown into the eyes, which
can
WARNING: Ensure that other people and pets remain at least 100 feet (30 m) away when the mower is in
use.
16

Slopes are a major factor related to accidents involving slips and falls, which can result in severe injury.
Operating the mower on a slope requires extra caution. If you feel uneasy on a slope, do not mow it. For your
safety, use the slope gauge that is included as part of this manual to measure slopes before operating this unit
on a sloped or hilly area.
Mow across the face of a slope, and never up and down. Exercise extreme caution when changing
direction on a slope.
Watch for holes, ruts, rocks, hidden objects, or bumps that may cause a slip or a trip. Tall grass can hide
obstacles.
Always be sure of your footing. If you feel like you are losing your balance, release the blade motor control
handle immediately. The blade will stop rotating within 3 seconds.
Do not mow near drop-offs, ditches, or embankments, because you could lose your footing or balance.
Do not mow a slope that has an angle of greater than 15°, as determined using the slope gauge.
Do not mow wet or damp grass. Unstable footing can cause slipping.
motor. These objects could be accidentally thrown by the mower in any direction and could cause serious
personal injury to the operator and to others. In order to prevent electric shock, do not operate the mower
in damp or wet conditions.
Do not mow in circles. Travel back and forth across the lawn.
When cutting thick grass, reduce walking speed in order to allow for a more effective cut and a proper
discharge of the clippings.
For a healthy lawn, always cut off one-third or less of the total length of the grass. The average lawn
should be approximately 1”to 2”(2.5 to 5cm) long during cool months, and between 2” to 3 1/4" (5cm to
8.3cm) long during hot months. If there is growth, the lawn should be cut in the fall.
6.9 MULCHING TIPS
NOTE: Inspect the area where the mower is to be used, and remove all stones, sticks, wire, bones, and other
debris that might be thrown by the rotating blade.
Release the bail lever to turn the mower OFF when crossing any graveled area (stones can be thrown by
the blade).
Set mower to the highest cutting height when mowing on uneven ground or in tall weeds.
For effective mulching, do not cut wet grass, because it tends to stick to the underside of the deck,
preventing proper mulching of grass clippings. New or thick grass may require a narrower cut. The ground
speed should be adjusted to the condition of the lawn. If mowing has been delayed and the grass has
6.7 SLOPE GAUGE
WARNING:
WARNING:
Do not mow a slope that has an angle of greater than 15°(a rise of approximately 2 1/2 feet [.75m] every 10
feet [3m]). Mow across the face of a slope, and never up and down.
6.8 MOWING TIPS
NOTE: A sharp blade will greatly enhance the performance of the mower, especially when cutting high
grass. Be sure to check the blade and to sharpen it at least once per year, as described in the maintenance
section.
Verify that the lawn is free of stones, sticks, wires, and other objects that could damage the blades or the
17

been allowed to grow longer than 4” (10cm), mow the lawn twice in order to reduce the grass height to a
maximum of 3 1/4” (8.3cm).
Walk at a steady pace. Overlap the cutting rows. Do not let the grass get too tall. If the grass gets too long,
start at the highest cutting position and work down to the desired cutting height.
6.10 EMPTYING THE GRASS CATCHER BAG
Stop mower, allow blades to completely stop, and remove the battery.
Lift the rear discharge cover.
Lift the grass catcher bag by its handle to remove from mower.
Empty grass clippings.
Lift the rear discharge cover and reinstall the grass catcher bag as
described earlier in this manual.
7.CARE AND MAINTENANCE
7.1 REPLACING THE CUTTING BLADE
REMOVE THE BLADE
While wearing leather padded gloves, wedge a block of wood between the blade and the mower deck in order
to prevent the blade from turning when the bolt (1) is being removed.
Using an adjustable wrench or 27mm socket, loosen the bolt (1) and remove the blade (2). Turn the bolt
shown. Using a 27 mm socket or wrench, turn the blade nut “CLOCKWISE”in order to secure the blade.
“COUNTERCLOCKWISE”to loosen it and “CLOCKWISE” to tighten it.
Remove the bolt (1) and the blade (2).
To re-install the blade, position the blade with the cutting edges toward the ground. Assemble the bolt as
WARNING:
If you strike a foreign object, stop the motor and remove the battery.
Thoroughly inspect the mower for any damage. Repair any damage before operating the mower. Excessive
vibration of the mower during operation is an indication of damage. Thoroughly inspect the mower and repair
any damage before operating the mower.
WARNING:
Always protect your hands by wearing heavy gloves and/or wrapping the cutting edges with rags or
other materials when performing any maintenance on the blades. ALWAYS remove the battery when
servicing or transporting the mower.
18

7.2 CLEANING THE MOWER
8. SERVICE AND ADJUSTMENTS
PROBLEM
POSSIBLE CAUSE
SOLUTION
The mower does not start.
The battery is not charged.
Charge the battery.
The switch is defective.
Replace the switch.
Grass jammed between the deck
and blade.
Remove battery; check under
deck for jams.
The battery is not fully inserted in
the mower.
Check the connection between
the battery and the mower. Make
sure the battery clicks into place.
Battery may require service or
replacement.
Replace battery.
The lawn is rough or uneven.
Check the mowing area.
The cutting height is not set
properly.
Move the wheels to a higher
setting.
Identical replacement parts are available from the manufacturer. The use of parts that do not meet the
original equipment specifications may lead to improper performance and may compromise safety.
Before cleaning, repairing, or inspecting, verify that the blade and all moving parts have come to a
complete stop. Remove the battery when making any adjustments or when any of the four wheels must be
lifted off the ground.
Keep the handles dry, clean, and free of oil and grease.
In order to reduce the risk of fire, keep the motor free of grass, leaves, and debris build-up.
Check the blade and motor mounting bolts for proper tightness frequently. Visually inspect blade for
damage (e.g., bent, cracked, or worn).
For best and safest performance, maintain the mower with care. Keep the mower blade sharp and clean.
Mower blades are sharp and can cut. Wrap the blades or wear gloves and use extra caution when
servicing.
Keep all nuts, bolts, and screws tight in order to be sure that the equipment is in safe working condition.
Never tamper with safety devices. Check them regularly for proper operation.
After striking a foreign object, stop the motor. Thoroughly inspect the mower for any damage. Repair any
damage before operating the mower.
The grass catcher components, discharge cover, and trail shield are subject to wear and damage, which
could expose moving parts or allow objects to be thrown. As a safety precaution, check these components
frequently, and immediately replace any parts that show signs of wear, or that are cracked or broken. Use
original equipment manufacturer’s parts only.
When it is not in use, store the mower indoors in a dry area, and out of the reach of children.
The mower cuts the grass
unevenly.
WARNING:
In order to reduce the risk of electric shock, do not expose the mower to water.
The underside of the mower deck should be cleaned after each use, because grass clippings, leaves, dirt, and
other debris will accumulate, which will cause rust and corrosion.
Remove any build-up of grass and leaves on or around the motor cover (do not use water).
Occasionally wipe the mower clean with a dry cloth. If debris builds up on the underside of the mower during
use, stop the motor, disconnect it from the battery, and then tilt the mower on its side, and scrape it clean using
an appropriate tool.
NOTE: Be sure to replace the parts in the exact order in which they were removed. When installing the
cutting blade, verify that it is installed with the curved ends pointing to the mower deck, and not toward the
ground.
WARNING:
Always remove battery when servicing or transporting the mower.
19

Wet grass clippings are sticking to
the underside of the deck.
Wait until the grass dries before
mowing.
The mulching plug is missing.
Install the mulching plug.
The mower is hard to push.
The grass is too tall, or the cutting
height is too low.
Raise the cutting height.
The rear of the grass catcher bag
is dragging in thick grass.
Empty the grass clippings from
the grass catcher bag.
The mower is excessively noisy
and vibrates.
The motor shaft is bent.
Stop the motor and inspect for
damage.
The blade is unbalanced.
Repair before restarting.
9. TRANSPORTING LITHIUM BATTERIES
Transport the battery in accordance with local and national provisions and regulations.
Follow all special requirements on packaging and labelling when transporting batteries by a third party. Ensure
that no batteries can come in contact with other batteries or conductive materials while in transport by
protecting exposed connectors with insulating, non-conductive caps or tape. Do not transport batteries that are
cracked or leaking. Check with the forwarding company for further advice.
10. RECYCLING AND DISPOSING
When you decide to get rid of the machine, make sure to follow the local regulation.
The batteries used in this mower’s battery pack contain the following toxic and corrosive material: LITHIUM-
ION.
eyes or on the skin, and do not swallow it.
Do not place batteries in regular household trash.
Do not incinerate batteries.
Do not place batteries where they will become part of any waste landfill or municipal solid waste stream.
Package materials are recyclables. Please, throw them away on the appropriate trash can.
Electrical products should not be discarded with household products. According to the European
Directive 2012/19/EU on waste electrical and electronic equipment and its implementation into
national law, electrical products used must be collected separately and disposed of at collection
points provided for this purpose. Talk with your local authorities or dealer for advice on recycling.
The mower does not mulch
properly.
BATTERY PACK
This product contains Li-ion. To preserve natural resources, please recycle or dispose of batteries
properly. Local, state or federal laws may prohibit disposal of Li-ion batteries in ordinary trash.
Consult you local waste authority for information regarding available recycling and/or disposal
options.
WARNING:
Not intended for use other than what’s listed above.
WARNING:
Toxic materials must be disposed of in a specified manner in order to prevent contamination of the
environment. Before disposing of damaged or worn out Lithium-Ion battery packs, contact your local waste
disposal agency for information and specific instructions. Take the battery to a local recycling and/or disposal
centre that are certified for disposal. If the battery pack cracks or breaks, whether it leaks or not, do not
recharge it and do not use it. Dispose of it and replace it with a new battery pack. DO NOT ATTEMPT TO
REPAIR IT!
Follow these instructions in order to avoid injury and the risk of fire, explosion, or electric shock, and to avoid
damage to the environment:
Cover the battery’s terminals with heavy- duty adhesive tape.
Do not attempt to remove or destroy any of the components of the battery pack.
Do not attempt to open the battery pack.
If a leak develops, the electrolytes that are released are corrosive and toxic. Do not get the solution in the
20
This manual suits for next models
1
Table of contents
Other Energizer Lawn Mower manuals
Popular Lawn Mower manuals by other brands

DR
DR SPRINT PRO Safety & Operating Instructions

Makita
Makita PLM4110 Original instruction manual

AL-KO
AL-KO Robolinho 500 Original instructions for use

Ariens
Ariens 991085-Max Zoom 48 Owner's/operator's manual

Jacobsen
Jacobsen 62230 Operator's manual and parts list

Bosch
Bosch ARM 320 operating instructions

Toro
Toro Z Master 3000 SERIES Operator's manual

Craftsman
Craftsman 917.250261 owner's manual

Garland
Garland APACHE KEEPER 40V 395 S instruction manual

EINHELL
EINHELL GE-CM 36/37 Li-Solo Original operating instructions

GreenWorks
GreenWorks 2544302 Operator's manual

Neuton
Neuton CE 5.3 Safety & Operating Instructions