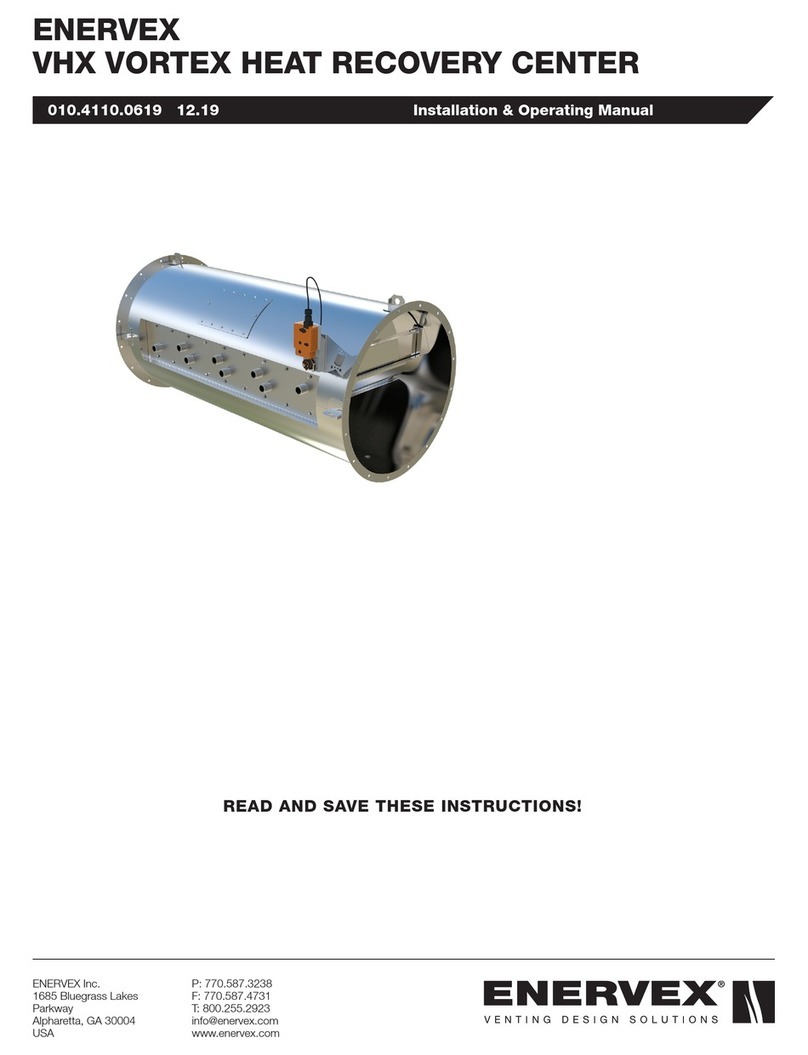
ENERVEX VHX-DR Installation instructions

010.4150.0720 08.21 Installation & Operating Manual
ENERVEX
VHX-DR VORTEX HEAT RECOVERY CENTER
ENERVEX Inc.
1685 Bluegrass Lakes
Parkway
Alpharetta, GA 30004
USA
P: 770.587.3238
F: 770.587.4731
T: 800.255.2923
www.enervex.com
READ AND SAVE THESE INSTRUCTIONS!

2
010.4150.0720 08.21
TO: Owners, Operators and/or Maintenance Personnel
This operating manual presents information that will help to properly operate and care for the equipment. Study its contents
carefully. The unit will provide good service and continued operation if proper operating and maintenance instructions are
followed. No attempt should be made to operate the unit until the principles of operation and all of the components are
thoroughly understood. Failure to follow all applicable instructions and warnings may result in severe personal injury or death.
It is the responsibility of the owner to train and advise not only his or her personnel, but the contractors’ personnel who are
servicing, repairing or operating the equipment, in all safety aspects.
ENERVEX equipment is designed and engineered to give long life and excellent service on the job. The electrical and
mechanical devices supplied as part of the unit were chosen because of their known ability to perform; however, proper
operating techniques and maintenance procedures must be followed at all times. Although these components afford a high
degree of protection and safety, operation of equipment is not to be considered free from all dangers and hazards inherent in
handling and firing of fuel.
Any ”automatic” features included in the design do not relieve the attendant of any responsibility. Such features merely free
him of certain repetitive chores and give him more time to devote to the proper upkeep of equipment.
It is solely the operator’s responsibility to properly operate and maintain the equipment. No amount of written instructions
can replace intelligent thinking and reasoning and this manual is not intended to relieve the operating personnel of the
responsibility for proper operation. On the other hand, a thorough understanding of this manual is required before attempting
to operate, maintain, service, or repair this equipment.
Because of state, local, or other applicable codes, there are a variety of electric controls and safety devices which vary
considerably from one boiler to another. This manual contains information designed to show how a basic burner operates.
Operating controls will normally function for long periods of time and we have found that some operators become lax in
their daily or monthly testing, assuming that normal operation will continue indefinitely. Malfunctions of controls lead to
uneconomical operation and damage and, in most cases, these conditions can be traced directly to carelessness and
deficiencies in testing and maintenance.
It is recommended that a boiler room log or record be maintained. Recording of daily, weekly, monthly and yearly
maintenance activities and recording of any unusual operation will serve as a valuable guide to any necessary investigation.
Most instances of major boiler damage are the result of operation with low water. We cannot emphasize too strongly the need
for the operator to periodically check his low water controls and to follow good maintenance and testing practices. Cross-
connecting piping to low water devices must be internally inspected periodically to guard against any stoppages which could
obstruct the free flow of water to the low water devices. Float bowls of these controls must be inspected frequently to check
for the presence of foreign substances that would impede float ball movement.
The waterside condition of the pressure vessel is of extreme importance. Waterside surfaces should be inspected frequently
to check for the presence of any mud, sludge, scale or corrosion.
It is essential to obtain the services of a qualified water treating company or a water consultant to recommend the proper
boiler water treating practices.
The operation of this equipment by the owner and his or her operating personnel must comply with all requirements or
regulations of his insurance company and/or other authority having jurisdiction. In the event of any conflict or inconsistency
between such requirements and the warnings or instructions contained herein, please contact ENERVEX before proceeding.
DO NOT OPERATE, SERVICE, OR REPAIR THIS EQUIPMENT UNLESS YOU FULLY
UNDERSTAND ALL APPLICABLE SECTIONS OF THIS MANUAL.
DO NOT ALLOW OTHERS TO OPERATE, SERVICE, OR REPAIR THIS EQUIPMENT UNLESS
THEY FULLY UNDERSTAND ALL APPLICABLE SECTIONS OF THIS MANUAL.
FAILURE TO FOLLOW ALL APPLICABLE WARNINGS AND INSTRUCTIONS MAY RESULT IN
SEVERE PERSONAL INJURY OR DEATH.
WARNING

3
010.4150.0720 08.21
Content
1. PRODUCT INFORMATION
1.1 Function............................................................4
1.2 Components.....................................................5
1.3 Shipping ...........................................................5
1.4 Warranty ...........................................................5
2. SPECIFICATIONS AND DIMENSIONS
2.1 Dimensions and Capacities...............................6
3. PRE-INSTALLATION INFORMATION...............7
4. MECHANICAL INSTALLATION
4.1 General.............................................................8
4.2 Positioning........................................................8
4.3 Vertical Installation.............................................9
4.4 Horizontal Installation ........................................9
4.5 Connection to Chimney (Bolted Flange)............10
4.6 Modulating Bypass with Flow Control ...............10
5. PLUMBING INSTALLATION
5.1 General.............................................................11
5.2 Connecting Piping ............................................11
5.3 Mounting of Temperature Sensor ......................12
5.4 Safety Relief Valves...........................................12
5.5 Mouting of Flow Meters (if applicable)...............12
5.6 Special Installation Considerations....................12
6. ELECTRICAL INSTALLATION
6.1 General.............................................................14
6.2 Modulating Bypass Damper..............................14
7. STARTUP AND CONFIGURATION
7.1 General.............................................................15
8. MAINTENANCE AND TROUBLESHOOTING
8.1 General.............................................................16
8.2 Removal of Heat Modules.................................16
8.3 Maintenance.....................................................16
8.4 Cleaning...........................................................16
9. APPLICATION EXAMPLES
9.1 Preheating Boiler Return Water .........................18
9.2 Preheating Circulating Feed Water ....................18
9.3 Preheating Boiler Make Up Water .....................19
9.4 Preheating Steam Boiler Feed Water.................19
9.5 Circulating Make Up Water Heating ..................20
9.6 Condensate Return Heating .............................20
9.7 Calorifier Heating Loops ...................................21
9.8 Process Water Heating.....................................21
10. ECONOMIZER CONTROLS (HRC 80)
4.1 General.............................................................22

4
010.4150.0720 08.21
1. PRODUCT INFORMATION
1.1 FUNCTION
The VHX-DR, Vortex Heat Recovery Center, is a unique and
highly efficient economizer system with a built-in bypass.
It is a fully packaged light weight product with a round
configuration for ease of installation. The all 316L stainless
steel construction allows it to be used for both condensing
and non-condensing applications without any modifications.
It is extremely compact compared to traditional economizers
as it utilizes a modular design with one or more heat modules
that each have supply and return connections representing
individual liquid circuits. Individual circuits can be connected
to one or more common headers in accordance with the
specific application.
The modular design allows the economizer to be used for
multiple applications at the same time: one module can be
used for preheating of feedwater, one module for domestic
hot water, and one module for direct pool heating etc.
The unique economizer design creates a turbulent flow
across the module surface, thus maximizing heat transfer.
The modules are designed to handle asymmetric volume
flows with exceptionally high performance and are mounted
in individual slots - an easily serviceable configuration.
A modulating, multi-blade damper design provides bypass
capabilities for use with dual fuel applications, and also
prevents over-heating of the heat modules.
In most applications, the economizer is fully designed and
packaged with an automated mechanical draft system
capable of optimizing the exhaust rate of the appliance to
completely stabilize the appliance efficiency combustion
as well as to assure a proper and constant draft for the
appliance. This allows a single economizer to serve multiple
boilers no matter whether they are of atmospheric, fan-
assisted or forced draft design.
The VHX-DR is virtually maintenance free, having no moving
parts except the internal gas bypass assembly.
The performance of this type of exchanger is ultimately
dependent upon the dynamic conditions of temperature,
pressure and massflow available on both the liquid and gas
side.
The custom transitions offered fit most commercial pre-
fabricated chimney systems.
The VHX-DR Heat Recovery Module should only be used
with appliances operating on Natural Gas, LP-Gas/Butane
or low sulfur fuel oil (#2 through #6). In some exhaust
applications containing debris etc., cleaning may be required
periodically.

5
010.4150.0720 08.21
1.2 COMPONENTS
The VHX-DR Heat Recovery Center can be supplied
in several configurations with single or multiple heating
modules. A modulating bypass damper controlled by a
modulating damper actuator is standard for all. The major
components are shown in Fig 1.
Components such as headers, pressure relief valves,
temperatures sensors, flowmeters and controls are optional
but can be supplied by ENERVEX.
1.3 SHIPPING
ENERVEX inspects all equipment prior to shipment and
cannot be held responsible for damage caused in transit. In
addition, all electrical devices are also thoroughly tested to
assure that they operate according to design specifications.
All economizers are shipped via common carrier. Take care
to inspect the economizer when you receive it and make
any claims for damages immediately to the carrier within the
allowable time limit.
The VHX-DR product line units are shipped on pallets. To
remove the economizer, first position the unit, while either
still in the shipping container or on the skid, as close to the
installation site as possible. Then attach a lifting hoist to all
the lifting lugs located on the top of the housing or on the
side.
If other components are shipped, these will appear as
separate items on the shipping packing list.
If there are any questions during the removal and installation
of the exchanger please do not hesitate to contact your
authorized ENERVEX representative for suggestions.
1.4 WARRANTY
2-Year Factory Warranty. Complete warranty conditions are
available from ENERVEX, Inc.
Fig 1
1. Economizer housing
2. Mounting Flanges (bolt flange)
3. Damper (not pictured)
4. Modulating actuator
5. Header (optional)
6. Connection flange
7. Flexible connectors
8. Connection for pressure relief valve
9. Connection for water temperature sensor
10. Cover for heat module chamber
11. Lifting lugs

6
010.4150.0720 08.21
2. SPECIFICATIONS AND DIMENSIONS
2.1 DIMENSIONS AND CAPACITIES
1) NPT adaptors available from ENERVEX, Inc.
Larger sizes available upon request; contact ENERVEX, Inc. with specifications.
Specifications
Double Row Models VHX
1600-22DR
VHX
3200-33DR
VHX
4200-44DR
VHX
5400-55DR
VHX
6400-66DR
VHX
7400-77DR
VHX
8400-88DR
Housing Material ASTM 316L / 1.4404
Heat Exchanger Material ASTM 316L / 1.4404
No. Heat Modules 4 6 8 10 12 14 16
Heat Module Type Cross
30-140
Cross
30 - 140
Cross
30 - 140
Cross
30 - 140
Cross
30 - 140
Cross
30 - 140
Cross
30 - 140
Heat Exchanger Plate
Surface Area Ft2416 624 832 1040 1248 1456 1664
Operating Pressure
Max PSI 230
Water Connection NPT1) 1 1/4” NPT MALE
Weight (Dry) lbs/kg 350 / 159 512 / 232 667 / 303 824 / 374 982 / 445 1139 / 517 1297 / 588
Weight (Wet) lbs/kg 394 / 179 578 / 262 755 / 342 934 / 424 1114 / 5 0 5 1293 / 586 1473 / 668
Length in/mm 39.0 / 991 50.0 / 1270 65.0 / 1651 78.0 / 1981 96 / 2438 102 / 2591 130 / 3302
ID in/mm 36.0 / 914 42.0 / 1067 42.0 / 1067 48.0 / 1219 48 / 1219 54 / 1372 54 / 1372
OD in/mm 39.0 / 965 45.0 / 1143 45.0 / 1143 51.0 / 1295 51 / 1295 57 / 1448 57 / 1448
No. of Flange Bolt Holes 16
Dimensions
flange

7
010.4150.0720 08.21
3. PRE-INSTALLATION INFORMATION
The VHX-DR Heat Recovery Center is used with a liquid in
the circuit with connections and a gas on the open side. The
heat exchanger must operate in line with approved design
parameters: temperatures, pressures and flow rates.
Liquid side
Typical medias are ethylene/propylene glycol, thermal oil,
and water. It is important that the liquid is of good quality
without contamination or corrosive substances. The medias
should not contain particles or any other undissolved matter,
we recommend that a strainer with a size of 16-20 mesh
(number of openings per inch) is installed before the fluid
inlet. The particles could otherwise block the channels,
causing bad performance, increased pressure drop and the
risk of boiling.
Systems with water or another evaporating liquid must
be equipped with the necessary bleed valve mounted in
a position higher than the heat exchanger. Air/gas inside
the liquid channels will reduce heat transfer and water
circulation, which also could cause boiling.
The liquid flow must be constant and with sufficient pressure
to keep its evaporating/boiling temperature above the plate
temperature. Local evaporation/boiling will adversely affect
heat transfer and water circulation, and may lead to a risk of
serious damage to the heat exchanger.
NOTE: The pressure at the coolant outlet must be high
enough to avoid boiling.
The VHX heat modules must always have the cooling fluid
circulating fully before the hot gas enters the heat exchanger.
The coolant must NEVER be allowed to freeze.
Never expose the VHX Heat Modules to excessive liquid
pulsations (i.e. cyclic pressure or temperature changes).
Gas side
The gas media should not be corrosive to the heat modules.
The gas flow must be started after, or simultaneously to, the
start of the liquid flow. If the liquid flow is interrupted, the
gas must be stopped or caused to bypass the VHX heat
modules to avoid boiling on the liquid side.
The VHX-DR Heat Recovery Center must not be operated
in such a manner that stagnant condensate is allowed to
accumulate. Never expose the Cross heat exchanger to
excessive gas pulsations (i.e. cyclic pressure or temperature
changes).
The VHX-DR Heat Recovery Center must NEVER be
operated without a coolant flow.

8
010.4150.0720 08.21
4. MECHANICAL INSTALLATION
4.1 GENERAL
WARNING
Failure to install, maintain and/or operate the
VHX-DR Heat Recovery Center in accordance
with the manufacturer’s instructions may result
in conditions which can produce bodily injury
and property damage.
The VHX-DR must be installed by a qualified installer in
accordance with these instructions and all local codes, or in
their absence, with the latest edition of The National Fuel Gas
Code (NFPA54/ANSI223.1), NFPA 211, NFPA 31 or Canada
CAN/CSA-B149.1-05 National Gas and Propane Installation
Code when applicable. The VHX-DR must be mounted so
the clearance to combustibles is at least 18 inches.
Preferably, the VHX-DR should be installed as close to the
heating appliance as possible — vertically or horizontally in
the breeching. It can also be installed near the termination
or on a roof. In addition, it can be used for sidewall
vented applications where it discharges through a wall. A
condensate drain is provided with the VHX-DR to be installed
by the user.
The VHX-DR is for indoor and outdoor installation. If installed
outdoors, steps must be take to prevent freezing of water
in the VHX-DR housing and pipes (see Section 4.3). The
vent pipe must be installed and supported according to the
chimney manufacturer’s instructions and/or in accordance
with NFPA54, NFPA211 and Canada CAN/CSA-B149.1-05.
4.2 POSITIONING
Consult “2. Specifications” for specific weights and
dimensions to ensure a well designed and safe installation
when either hanging or supporting the exchanger. The
exchanger is shipped ready to be mounted in the vertical or
horizontal position. Make sure to check the actual number of
lugs and their positions on the spec drawings before planning
the installation.
For existing retrofit installations, ensure that the combustion
source has been turned off and has cooled. A condensate
drain connection is provided at the bottom of the unit.
Header manifold inlet/outlet connections for water supply and
return are optional. For retrofit installations the economizer is
installed in line with the existing exhaust stack or duct unless
otherwise noted
Generally a section of the exhaust stack is removed to
accommodate the insertion of the economizer. The remaining
portion of the exhaust stack above the cut should not exceed
a static load of 500 lbs. or exert any moments on the outlet
flange, and must be adequately supported.
In some cases the economizer may be placed directly on top

9
010.4150.0720 08.21
Fig 2
Fig 3
of the combustion source, in effect forming the first section of
the exhaust duct, with the existing exhaust stack lifted or cut
to accommodate the economizer.
NOTE: Structural integrity of the building should be veried (by
others) prior to installing an economizer by suspending from
the ceiling.
4.3 VERTICAL INSTALLATION
For vertical flow units it is recommended that the unit be
completely supported either by a floor support structure or by
threaded rods from the ceiling (design and supply of support
by others).
In no case should the static load on the economizer inlet
or outlet flange exceed 500 pounds. In no case should any
moment be applied to the economizer inlet or outlet. Lifting
lugs are placed on top of the economizer and on each side.
Actual number depends on the model, please refer to the
specification drawing for the specific VHX model.
Apply expansion joints (supplied by others) as required by
the installation to ensure that no outside forces from thermal
expansion to either the exhaust gas connections or to the
piping will be permitted.
4.4 HORIZONTAL INSTALLATION
For horizontal flow units the economizer must be suspended
from the ceiling as permitted or set in place on a structural
support (designed by others) as permitted.
Lifting lugs are placed on top of the economizer and on each
side. Actual number depends on the model, please refer to
the specification drawing for the specific VHX model.
Structural integrity of the building should be verified (by
others prior to installing an economizer by suspending from
the ceiling. Apply expansion joints (supplied by others) as
required by the installation to ensure that no outside forces
from thermal expansion to either the exhaust gas connections
or to the piping will be permitted.

10
010.4150.0720 08.21
4.6 MODULATING BYPASS WITH FLOW CONTROL
The VHX-DR is equipped with a modulating bypass damper
and flow control system.
Fig 5 shows the inlet of the VHX-DR and the damper in
“open” and “closed” positions.
The exhaust flow enters through the top part of the housing,
where it is forced down through the heat modules as long as
the damper is closed (default position).
In the event the heat modules are over-heating or the system
set temperature has been reached, the damper will begin to
open and reduce the flow through the heat modules, which
will provide a a reduction in heat recovery. Eventually, if the
reduction is inadequeate, the damper will open completely
which will make the exhaust flow bypass the heat modules.
Fig 4
Fig 6
4.5 CONNECTION TO THE CHIMNEY (BOLTED
FLANGE)
Exhaust connections are generally mated with optional
mating flanges and/or stack transitions.
Connection to the economizer flange is either by a gasket
provided by others or applying a continuous 1/3 inch bead of
the appropriate sealant around both the economizer flange
and the corresponding chimney flange adaptor.
The chimney flange adaptor is then bolted to the economizer
flange. Please note that neither the gasket nor the required
nuts and bolts are provided with this component. Ensure that
the economizer is level before final bolting into position.
Fig 5

11
010.4150.0720 08.21
Fig 9
Fig 7
5. PLUMBING
5.1 GENERAL
It is not within the scope of this manual to provide specific
plumbing installation instructions as the installation should
follow the design specifications of the design engineer,
architect, or contractor. However, measures must be taken
to prevent the water from stagnating within the economizer
while the boiler(s) are in operation. Also, the water side of
the economizer must be kept free of grease and other foreign
material which can shorten the life of the economizer and
possibly interfere with the operation of controls and safety
devices. Proper feedwater treatment is a major factor in
preventing economizer failure.
Only low sulfur fuels should be used with the VHX-DR. if
fuels other than natural gas are used, there is a risk of “cold
end corrosion” when the entering water temperature falls
enough to cause condensation of the flue gases so verify the
feasibility of the application with the design engineer prior to
installation.
Generally, schedule 40 steel pipe is used in the piping
installation. In some applications other piping material may be
needed. Consider the type of liquid, operating pressures and
temperatures, and any corrosive elements in the liquid or in
the atmosphere when determining the best piping material
for your installation. The use of valves is recommended
where isolation might be required. Non-ferritic piping is
recommended if using non-deaerated water.
5.2 CONNECTING PIPING
Actual piping depends on how the heating modules are
configured. Water should flow counter flow to the exhaust.
If the heat modules are connected to a common header,
supply and return liquid pipes must be connected directly to
the common header. This is shown in Fig 7. Balancing valves
should be installed in order to ensure that the flow is equally
distributed.
If the VHX-DR is used for multiple applications, e.g. one heat
module is used for domestic water while the other is used
for boiler feed-water, each application must be connected
directly to the supply and return connections on the heat
module. See Fig 8.
Liquid connections are connected with NPT threaded fittings.
The maximum allowable connection loads given in Fig 9 are
valid for low cycle fatigue. If high cycle fatique is involved, a
special analysis should be carried out
Liquid piping should include shut-off, drain and bypass valve
piping in the event the exchanger is required to be isolated.
Drain piping should include valves of dependable
manufacture in order to further reduce the possibility of an
undetected leak.
Outlet
Headers Flexible
Water Connection
Inlet
Fig 8
Max. Bending Torque Torque Moment
Connections 20 Nm 70 Nm

12
010.4150.0720 08.21
The installation of a vent valve at the highest point in the
piping system is recommended in order to purge air out
especially during initial start up.
Safety relief valves, as required, should be located at the
exchanger and piped separately and safely to the drain.
5.3 MOUNTING OF TEMPERATURE SENSORS
There are four temperature sensors. Two flue gas high
temperature sensors (PT1000) and two Hi-Temp water
sensors (HT-NTC).
Install the flue gas temperature sensors before and after the
economizer. The minimum recommended distance is three
times the diameter (3xID) of the flue. See Fig 10.
The installation order and parts involved is shown in Fig 11.
Temperature sensors are installed on the water lines inlet
and outlet of the heat exchanger. The water temperature
sensors should be installed as close as possible to the heat
exchanger. See Fig 12.
NOTE: Ensure that the water temperature sensor is
fully inserted into the socket after the electricians have
nished running the wires. If it is not fully inserted the
system will not read the correct temperature and will not
be able to react appropriately.
5.4 SAFETY RELIEF VALVES
A Safety Relief Valve(s) is required for every installation. In a
system with headers, they must be installed according to
Fig 13
NOTE: The safety relief valves must be located between
any isolation valves and the VHX-DR and within close
proximity of the heat module e.g. in the common header.
Liquid piping to and from the heat modules should allow
the heat modules to be lled at all times especially when
ow could stop.
5.5 MOUNTING OF FLOWMETERS (IF APPLICABLE)
A flowmeter is an optional, but highly recommended
accessory. There are multiple models available depending
on flow and pipe size. The Flowmeter should be installed at
the inlet of the heat exchanger. Please refer to the Installation
Manual for HRC 80 Heat Exhanger Controller.
5.5 SPECIAL INSTALLATION CONSIDERATIONS
The VHX-DR economizer may be installed inside or outside
with appropriate drain piping installed for shutdown periods.
If there is a remote chance the temperatures outside might
fall below freezing it is recommended that care be taken to
avoid potentially freezing the heat transfer core.
A condensate drain connection is provided in the bottom
for all economizers and should be piped to a floor drain
using a water trap and neutralizer to prevent the escape of
flue gases. Please note the submittal drawing or consult
ENERVEX regarding location of the economizer condensate
drain.
Fig 10
Fig 12
Fig 11

13
010.4150.0720 08.21
Freeze protection concerns: During a system shutdown
where combustion halts for an extended period of time
(other than normal cycling), cold air will travel back down the
stack and exhaust breechings, through the economizer and
into the combustion source. If the cold air is below freezing,
it could freeze the plates and cause a rupture, ultimately
destroying the economizer. For potential freezing applications
where the water flow might stop, a manual system shut
down routine should be incorporated. It is not recommended
to use solenoid type drain valves for auto draining in subzero
environments unless absolutely necessary.
Do not insulate the economizer where factory insulation has
already been applied or damage to the exchanger can occur.
Insulate piping and exhaust ducting as required.
Ensure that no liquid connections interfere with the opening
of recovery unit trays. Economizer relief valves shall not have
set pressure ratings higher than the rated pressure of the
heat modules. Liquid storage tank relief valves shall not have
discharge pressure ratings higher than the rated pressure of
the storage tank. To avoid safety valve leakage, ensure that
safety valve set pressure is sufficiently higher than dead head
pressure of the feed pump.
It is recommended that the pipe and circulating tank (if
included) be insulated to reduce heat loss.
If existing conditions may subject the heat modules to
internal scale build up, pressure gauges (furnished by others)
should be installed on the liquid inlet and outlet sides of
the economizer. This will enable monitoring of liquid flow
restriction. Capped tees, one on the liquid inlet side and
one on the liquid outlet side, incorporated into the piping
installation may allow a descaling solution to be used with
the economizer in place. Consult the factory for suitable
descaling solutions.
Fig 13

14
010.4150.0720 08.21
6. ELECTRICAL INSTALLATION
6.1 GENERAL
All wiring must be in compliance with the local codes, or, in
their absence, the National Electric Code, NFPA70. All wiring
should be appropriate Class 1 wiring as follows: installed in
rigid metal conduit, intermediate metal conduit, rigid non-
metallic conduit, electrical metallic tubing, ir be otherwise
suitably protected from physical damage.
6.2 MODULATING BYPASS DAMPER
The only electrical part of the VHX-DR is the actuator
serving the Modulating Bypass Damper. The actuator can
be controlled by a 0-10VDC signal either from an ENERVEX
HRC80 or from a third-party supplied controller.
DANGER
Turn off electrical power before servicing.
Contact with live electric components can
cause shock or death.
NOTICE
If any of the original wire supplied with the
system must be replaced, use similar wire
of the same temperature rating. Otherwise,
insulation may melt or degrade, exposing bare
wire.

15
010.4150.0720 08.21
7. STARTUP AND CONFIGURATION
7.1 GENERAL
During the initial startup and before combustion heat can be
applied to the exchanger, ensure that liquid is flowing through
the economizer.
NOTE: ENERVEX recommends that liquid is owing
through the economizer at all times to avoid damage
to the heat module(s) from stack exhaust overheat.
Upon cold startup of a full boiler, provisions must be
made to ensure water ow through the VHX-DR. Assure
sufcient ow to prevent any unwarranted temperature
and pressure buildup within the liquid side of the heat
module. When the boiler reaches the operating steam
pressure of the system and begins to take on feedwater,
normal operation can resume.
! Important
If liquid is introduced into a hot exchanger, severe
damage can result and will void any warranty. Contact
ENERVEX for applications where the exchanger is
requested to run dry.
If the final exhaust temperatures are too low, pressure drop
across the economizer is too high, or if the desired water
temperature is exceeded, adjust the gas bypass damper to
attain the desired objective.
While the exchanger is in a clean, like-new condition, note
and record the following at a specified condition:
• Liquid inlet and outlet temperatures
• Exhaust gas inlet and outlet temperatures
• Pressure gauge reading (if applicable)
This information will provide a point of reference in the event
of a future fouling condition.
MONITORING PERFORMANCE
It is recommended to inspect the core or coil if the
performance (liquid temperatures leaving and Btu/
hr. recovery) begins to decrease. A good practice of
maintenance is to keep a performance schedule starting
when the economizer is installed to compare with any future
changes.
Operational start-up
Make sure that:
If there is a risk of high temperatures, the unit is insulated as
a precaution to avoid injuries.
Installation has been carried out according to the flow
schedule / drawing and recommendations.
• Connections are tight.
• No vibrations or pulsations are transferred to the Cross
30.
• The liquid side is filled and deaerated.
• The flow rate and pressure on the liquid side are correct
before gas flow is started.
• The temperature and flow rates are according to
specification.
• There is appropriate drainage to deal with any
condensation.
NOTE: Ensure that the combustion source is off
and is cool, and the economizer is cool before
attempting to inspect or clean the coil(s).

16
010.4150.0720 08.21
8.1 GENERAL
The VHX-DR economizer is virtually maintenance free.
Nevertheless, periodic inspections will ensure trouble-free
operation and long equipment life.
A routine physical inspection of the heat transfer core area
will depend on the conditions of temperature and the quality
of combustion within the flue gas stream.
NOTE: Ensure that the combustion source is off and is
cool, and that the economizer is cool before attempting
to inspect or clean the heat exchanger.
With clean exhaust conditions, physical inspection will
be minimal if proper combustion at the heat source is
maintained. The inspection and maintenance procedure can
be performed without dismantling any of the piping or the
stack connections.
8.2 REMOVAL OF HEAT MODULES
The heat module(s) is installed in a slot.
Before removing the module, drain the system of water.
Follow this procedure (See Fig 15):
1. To remove module, disconnect flexible piping from the
the heat module.
2. Remove all bolts from the cover plate.
3. Remove the cover plate, which gives full access to the
heat modules.
4. Slide modules out individually.
8.3 MAINTENANCE
The module has no moving parts or electrical components.
The following should be inspected regularly:
• Operational design conditions for the system being
maintained, and meeting the calculated / design values
(leaving temp., pressure drop).
• Increased pressure drop and decreased thermal
efficiency over time are signs of possible fouling.
• Connections for tightness.
• Gas channels for accumulated dirt.
• Plate surfaces for corrosion.
• Seal and gaskets.
• External components such as valves, dampers and
controls.
8.4 CLEANING
The normally high degree of turbulence in the module gives
a self-cleaning effect in the liquid channels, which reduces
fouling and the build-up of contamination, which can
seriously reduce heat transfer capacity and increase pressure
drop.
Cleaning liquid side
In some applications, the fouling tendency can be very high,
for example with extremely hard water at high temperatures.
Fig 15
Header
Flexible
Connectors Cover
Plate Gasket
Removeable
Heat Modules
Fig 14
8. MAINTENANCE AND TROUBLESHOOTING

17
010.4150.0720 08.21
In such cases, the module can always be cleaned by:
• Circulating a cleaning liquid (CIP – Cleaning In Place).
• A solution of 5% phosphoric acid or 5% oxalic acid in
water is recommended to chemically clean the channels.
• The flow rate of the cleaning liquid should be greater
than the design liquid flow, and the flow should be in the
opposite direction through the heat exchanger relative to
the flow in normal operation.
ATTENTION: After cleaning, it is very important to flush the
heat exchanger thoroughly with clean water before start-up.
Cleaning gas side
Heavy condensation can have a self-cleaning effect, washing
the Cross and reducing dirt build-up on the gas side. The
module has open gas channels at both ends that can be
checked visually. For dry dirt such as carbon, ashes or
dust, most of the dirt sticks to the inlet surface. Cleaning
with compressed air or high-pressure water up to 200 bar
is normally effective. Exhausts from diesel, vegetable oils or
biogas combustion may require regular cleaning.
For greasy dirt such as oil, a suitable cleaning liquid is
recommended. When using cleaning liquid it is important to
flush the module thoroughly with clean water before start-up.
Storage
Some users store spare modules that are used to replace
dirty modules to reduce downtown.
The module must always be stored in a dry and protective
environment. The temperature should not be below 35°F
(1°C) and not above 120°F (50°C) for extended periods of
time (4 weeks or more).
During long operational stand-by periods, the system should
be inspected for contamination on the liquid and gas sides.
If necessary, clean the module according to the cleaning
instructions.
Liquid sides containing water should always be drained.

18
010.4150.0720 08.21
9. APPLICATION EXAMPLES
9.1 PREHEATING BOILER RETURN WATER
9.2 PREHEATING CIRCULATING FEED WATER

19
010.4150.0720 08.21
9.3 PREHEATING BOILER MAKE UP WATER
9.4 PREHEATING STEAM BOILER FEEDWATER WITH MODULATING FEED WATER VALVE

20
010.4150.0720 08.21
9.6 CONDENSATE RETURN HEATING
9.5 CIRCULATING MAKE UP WATER HEATING
This manual suits for next models
7
Table of contents
Other ENERVEX Heating System manuals
Popular Heating System manuals by other brands
ThermoSoft
ThermoSoft NeverFreeze SX-0810-24 manual

aldes
aldes EXHAUSTO InspirAIR Top Assembly instructions
Horizon Fitness
Horizon Fitness ecoSAVER Installation & operation manual
Daikin
Daikin Rotex E-Pac EP HT 3H manual
Patlite
Patlite NE-24A Series Complete Operation Manual
Suburban
Suburban P-40 installation instructions
Heatit
Heatit HIP 24-12A manual
AirTechnic
AirTechnic ENERGY BOX - TO 350 Assembly & maintenance guide

Daikin
Daikin VRV R-407C PLUS Series Service manual
Envirovent
Envirovent heatSava installation guide
Venmar
Venmar 6LC Installation, operation and service instructions
Bard
Bard EHP513-A05 installation instructions
