Enpirion EN5367QI User manual

EN5367QI Evaluation Board User Guide
Jan. 2012
Page 1 of 8
Enpirion EN5367QI DC-DC Converter
w/Integrated Inductor Evaluation Board
Introduction
Thank you for choosing Enpirion, the source for ultra small foot print power converter
products! This evaluation board user guide applies to EN5367QI. The EN5367QI is a 6A
device. In addition to this document, you will also need the latest device datasheet.
•The EN5367QI features integrated inductor, power MOSFETS, controller, a bulk
of the compensation network, and protection circuitry against system faults. This
level of integration delivers a substantial reduction in footprint and parts count
over competing solutions. The evaluation board is optimized for engineering ease
of testing through programming options, clip leads, test points etc.
•The EN5367QI features a customer programmable output voltage by means of a
resistor divider. The resistor divider allows the user to set the output voltage to
any value within the range 0.75V to (VIN-VDROPOUT). The evaluation board, as
shipped is populated with a 4 resistor divider option. The upper resistor is fixed
and has a phase lead capacitor in parallel. One of 4 lower resistors is selected
with the jumper option for different output voltages to change VOUT, retain the
upper resistor and capacitor values and change only the lower resistor.
•This device has no over-voltage protection feature. If making modifications to the
board, we strongly recommend the customer to ensure the feedback loop is truly
closed before powering up the device especially if the load can not withstand the
input voltage.
•The input and output capacitors are X5R or X7R multi-layer ceramic chip
capacitors. The Soft-start capacitor is a small 47nF X7R MLCC. Pads are
available to have multiple input and output capacitors. This allows for evaluation
of performance over a wide range of input/output capacitor combinations.
•The jumper labeled LLM/SYNC pin controls the SYNC pin. LLM (light-load mode)
function is not available on this part. This pin should be pulled LOW if the SYNC
function is not to be used. Do not leave this pin floating or high.
•The jumper labeled VDROOP should be left grounded. This function is not
available on this part.
•Clip-on terminals are provided for POK, and ENA, pins.

EN5367QI Evaluation Board User Guide
Jan. 2012
Page 2 of 8
•Banana jacks are provided for VIN and VOUT power terminals. Several signal and
GND clip-on test points are also provided to measure VIN, VOUT, and GND nodes.
•A jumper is provided for controlling the Enable signal. Enable may also be
controlled using an external switching source by removing the jumper and
applying the enable signal to the ENA clip-on terminal.
•A jumper is also provided to connect a POK pull-up resistor to the input supply.
This jumper is especially useful to measure the disable current and eliminates
having to subtract the current drawn by the POK resistor.
•Foot print is also provided for a SMA connector to SYNC input. A switching input
to this pin allows the device clock to be phase locked to an external signal. This
external clock synchronization allows for moving any offending beat frequency to
be moved out-of-band. A swept frequency applied to this pin results in spread
spectrum operation and reduces the peaks in the noise spectrum of emitted EMI.
•The board comes with input decoupling and reverse polarity protection to guard
the device against common setup mishaps.
Quick Start Guide
STEP 1: Set the “ENABLE” jumper to the Disable Position, as shown in Figure 1.
Figure 1: Shows POK, Enable, VDROOP and SYNC/LLM Jumpers.
POK PWR jumper as shown connects the pull-up resistor to VIN.
Enable jumper shown is in DISABLE position. SYNC/LLM jumper as
shown ties this pin Low. VDROOP jumper as shown is low, and
should stay grounded.
STEP 2: Connect Power Supply to the input power connectors, VIN (+) and GND (-) as
indicated in Figure 1 and set the supply to the desired voltage. The device disable
current may be measured in this configuration.
CAUTION:be mindful of the polarity. Even though the evaluation board comes with
reverse polarity protection diodes, it may not protect the device under all conditions.

EN5367QI Evaluation Board User Guide
Jan. 2012
Page 3 of 8
STEP 3: Connect the load to the output connectors VOUT (+) and GND (-), as
indicated in Figure 1.
STEP 4: Select the output voltage setting jumper. Figure 2 shows what output voltages
are achieved by selecting each jumper position. Populating multiple jumper positions
will allow you to select higher output voltages. You can populate up to all four jumper
positions for the highest VOUT of approximately 3.73V with the resistors populated on the
board.
Figure 2: Output Voltage selection jumpers
Jumper shown selects 1.55V output
(Jumper positions from left to right are: 2.25V, 1.55V, 1.2V and 1.0V)
STEP 5: Set the POK PWR and SYNC/LLM jumpers to desired positions (see Figure 1).
You should disable POK when measuring low value input currents. The SYNC/LLM
jumper should be tied low unless external frequency synchronization is required.
STEP 6: Apply VIN to the board and move the ENA jumper to the enabled position. The
EN5367QI is now powered up! Various measurements such as efficiency, line and load
regulation, input / output ripple, load transient, drop-out voltage measurements may be
conducted at this point. The over current trip level, short circuit protection, under voltage
lock out thresholds, temperature coefficient of the output voltage may also be measured
in this configuration.
CAUTION: The maximum allowable VIN for this device is 5.5V.
STEP 6A: Power Up/Down Behavior – Remove ENA jumper and connect a pulse
generator (output disabled) signal to the clip-on test point below ENA and Ground. Set
the pulse amplitude to swing from 0 to 2.5 volts. Set the pulse period to 10msec. and
duty cycle to 50%. Hook up oscilloscope probes to ENA, POK and VOUT with clean
ground returns. Apply power to evaluation board. Enable pulse generator output.
Observe the VOUT voltage ramps as ENA goes high and again as ENA goes low. The
device when powered down ramps down the output voltage in a controlled manner
before fully shutting down. The output voltage level when POK is asserted /de-asserted
as the device is powered up / down may be observed as well as the clean output
voltage ramp and POK signals.
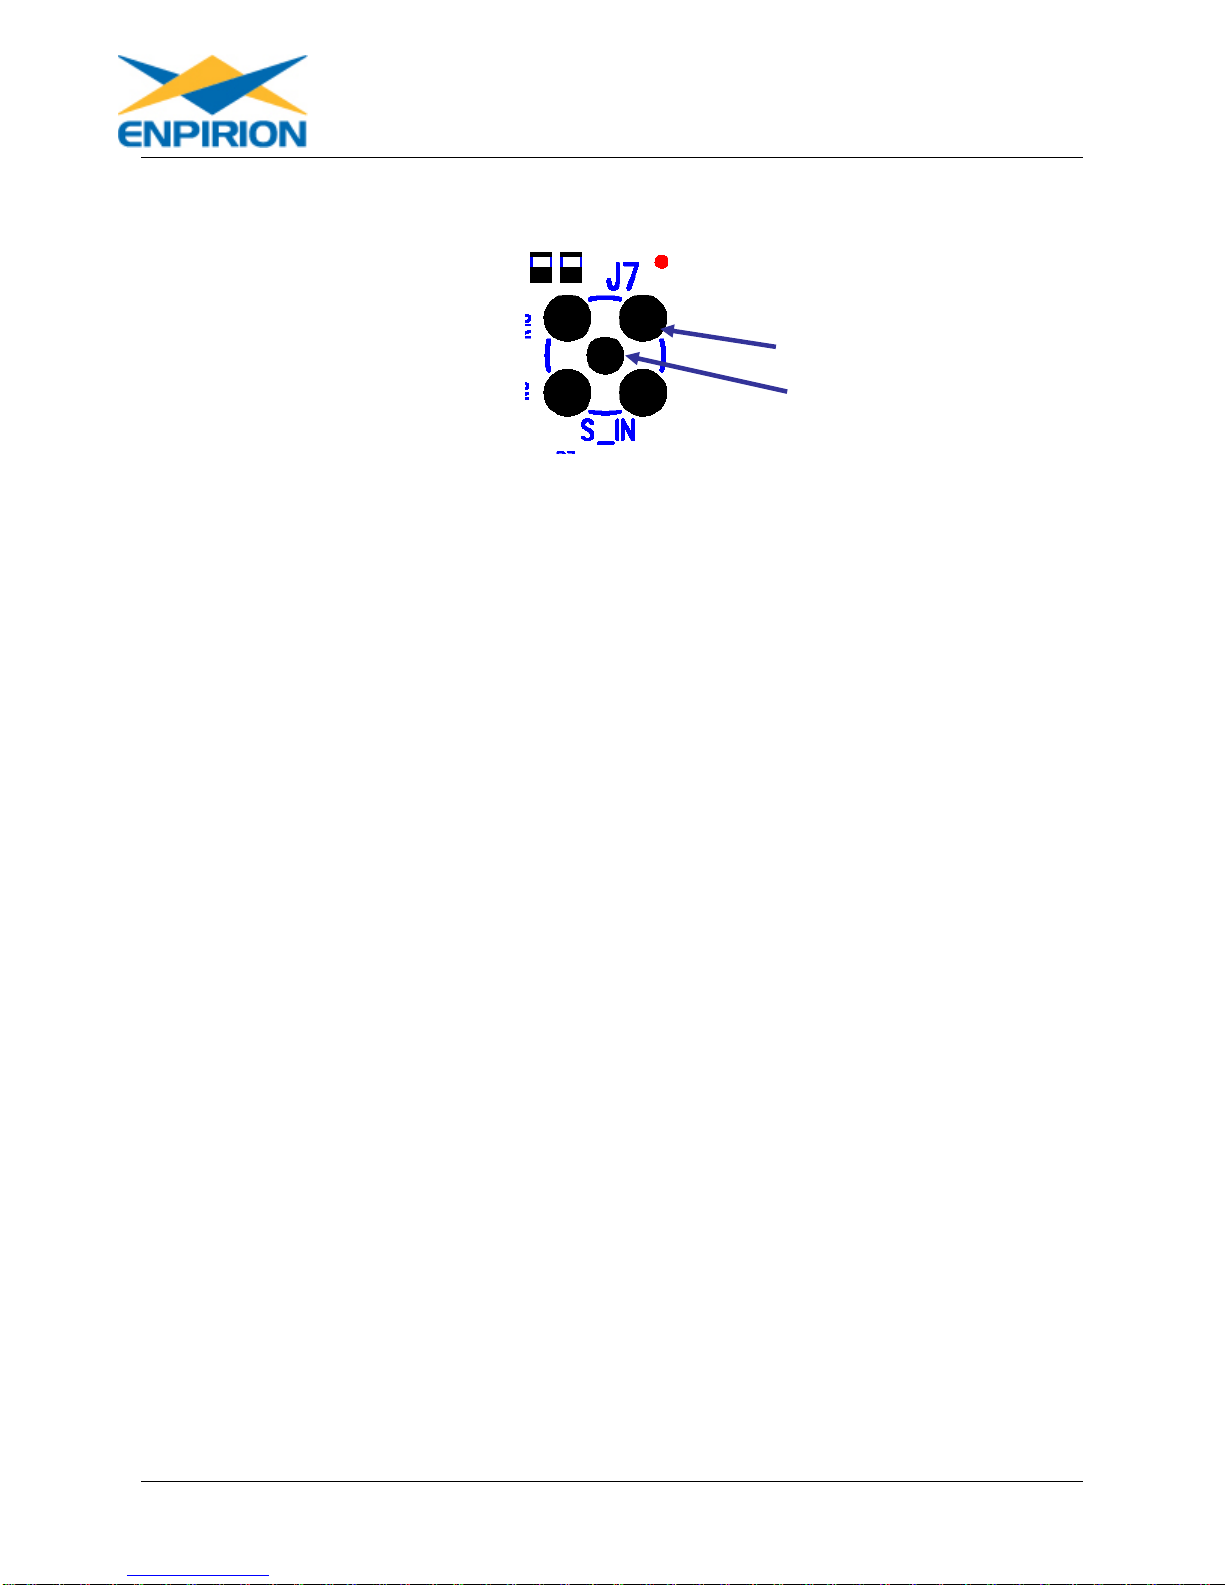
STEP 7: External Clock Synchronization / Spread Spectrum Modes: In order to
activate this mode, it may be necessary to a solder a SMA connector at J7. Alternately
EN5367QI Evaluation Board User Guide
Jan. 2012
Page 4 of 8
the input clock signal leads may be directly soldered to the through holes of J7 as
shown below.
Figure 3: SMA Connector for External Clock Input
Power down the device. Move ENA into disable position. Connect the clock signal as
just indicated. The clock signal should be clean and have a frequency in the range of
the nominal frequency ±15%; amplitude 0 to 2.5 volts with a duty cycle between 20 and
80%. With SYNC signal disabled, power up the device and move ENA jumper to
Enabled position. The device is now powered up and outputting the desired voltage.
The device is switching at its free running frequency. The switching waveform may be
observed between test points SW and GND. Now enabling the SYNC signal will
automatically phase lock the internal switching frequency to the externally applied
frequency as long as the external clock parameters are within the specified range. To
observe phase-lock connect oscilloscope probes to the input clock as well as to the SW
test point. Phase lock range can be determined by sweeping the external clock
frequency up / down until the device just goes out of lock at the two extremes of its
range.
For spread spectrum operation the input clock frequency may be swept between two
frequencies that are within the lock range. The sweep (jitter) repetition rate should be
limited to 10 kHz. The radiated EMI spectrum may be now measured in various states –
free running, phase locked to a fixed frequency and spread spectrum.
Before measuring radiated EMI, place a 10uF/0805, X7R capacitor at the input and
output edges of the PCB (C14 and C15), and connect the input power and the load to
the board at or near these capacitors. The added capacitor at the input edge is for high-
frequency decoupling of the input cables. The one added at the output edge is meant to
represent a typical load decoupling capacitor.
GND
Ext. Clock

EN5367QI Evaluation Board User Guide
Jan. 2012
Page 5 of 8
Figure 4: Evaluation Board Layout Top and Assembly Layers

EN5367QI Evaluation Board User Guide
Jan. 2012
Page 6 of 8
Use combination
1206/0805 footprint C6-7
0805 0805
0805
0805
1206
1206 1206
1206
0805
0402
0402
0805
0805
0805
0805
0805
0805
PVIN
PVIN
S_IN
C16
0402
J1
1
2
3
5
6
7
9
10
11
13
14
15
17
18
19
R2
C1
C2
R5
R3
R4
TP23
TP24
U1
EN5367QI
NC1
1
NC2
2
NC3
3
NC4
4
NC5
5
NC6
6
NC7
7
NC8
8
NC9
9
VOUT
10
VOUT
11
VOUT
12
VOUT
13
VOUT
14
VOUT
15
VOUT
16
VOUT
17
NC18
18
NC(SW)19
19
NC(SW)20
20
PGND
21
PGND
22
PGND
23
PGND
24
PGND
25
PGND
26
PGND
27
SYNC/LLM 36
BGND 35
VDDB 34
BTMP 33
PG 32
PVIN 31
PVIN 30
PVIN 29
PVIN 28
NC54 54
NC53 53
NC(SW)52 52
NC(SW)51 51
NC(SW)50 50
NC(SW)49 49
NC48 48
AVIN 47
AGND 46
NC45 45
VFB 44
SS 43
RLLM 42
EAOUT 41
NC40 40
POK 39
ENABLE 38
VDROOP 37
ENA
VDROOP
SYNC/LLM
0805
POK
R8
J7
C10
TP26 TP27
C17
R10R11R12
R13
TP3TP4
TP5 TP6
TP7
TP8
TP9
Provision for
dynamic voltage
adjustment
R9 C11
EAOUT VFB
VFB
EAOUT
VFB
TP29
C3
TP30
FB1
C4
C5
C6
C7
TP10 TP11 TP12
R14
C8
TP13
TP14
TP15
C9R1
TP16
AVIN
J2
1
3
5
2
4
6
87
ENA
VDROOP
SYNC/LLM
POK
AGND
N/U
0805
0805
0805
0805
TP17
J3
J4
J5
J6
+
C13D1U2
R15
C14
TP1
1
2
TP2
1
2
R6
C15
VOUT
VOUT
PVIN
SMA 2
TP22
1
2
SCH 05820
PCB 05707
05837 Caps on back
05839 Caps on top and back
SMA 2
TP25
1
2
R7
VIN
GND
VOUT
GND
TP18TP19
TP20
TP21
VIN
GND
VOUT
0402
GND
C18
C12
Use combination
1206/0805 footprint C4-5
Figure 5: EN5367QI Evaluation Board Schematic
EN5367QI Evaluation Board User Guide
Jan. 2012
Page 7 of 8
Test Recommendations
Recommendations
To guarantee measurement accuracy, the following precautions should be observed:
1. Make all input and output voltage measurements at the board using the test
points provided (TP18 to TP21). This will eliminate voltage drop across the
line and load cables that can produce false readings.
2. Measure input and output current with series ammeters or accurate shunt
resistors. This is especially important when measuring efficiency.
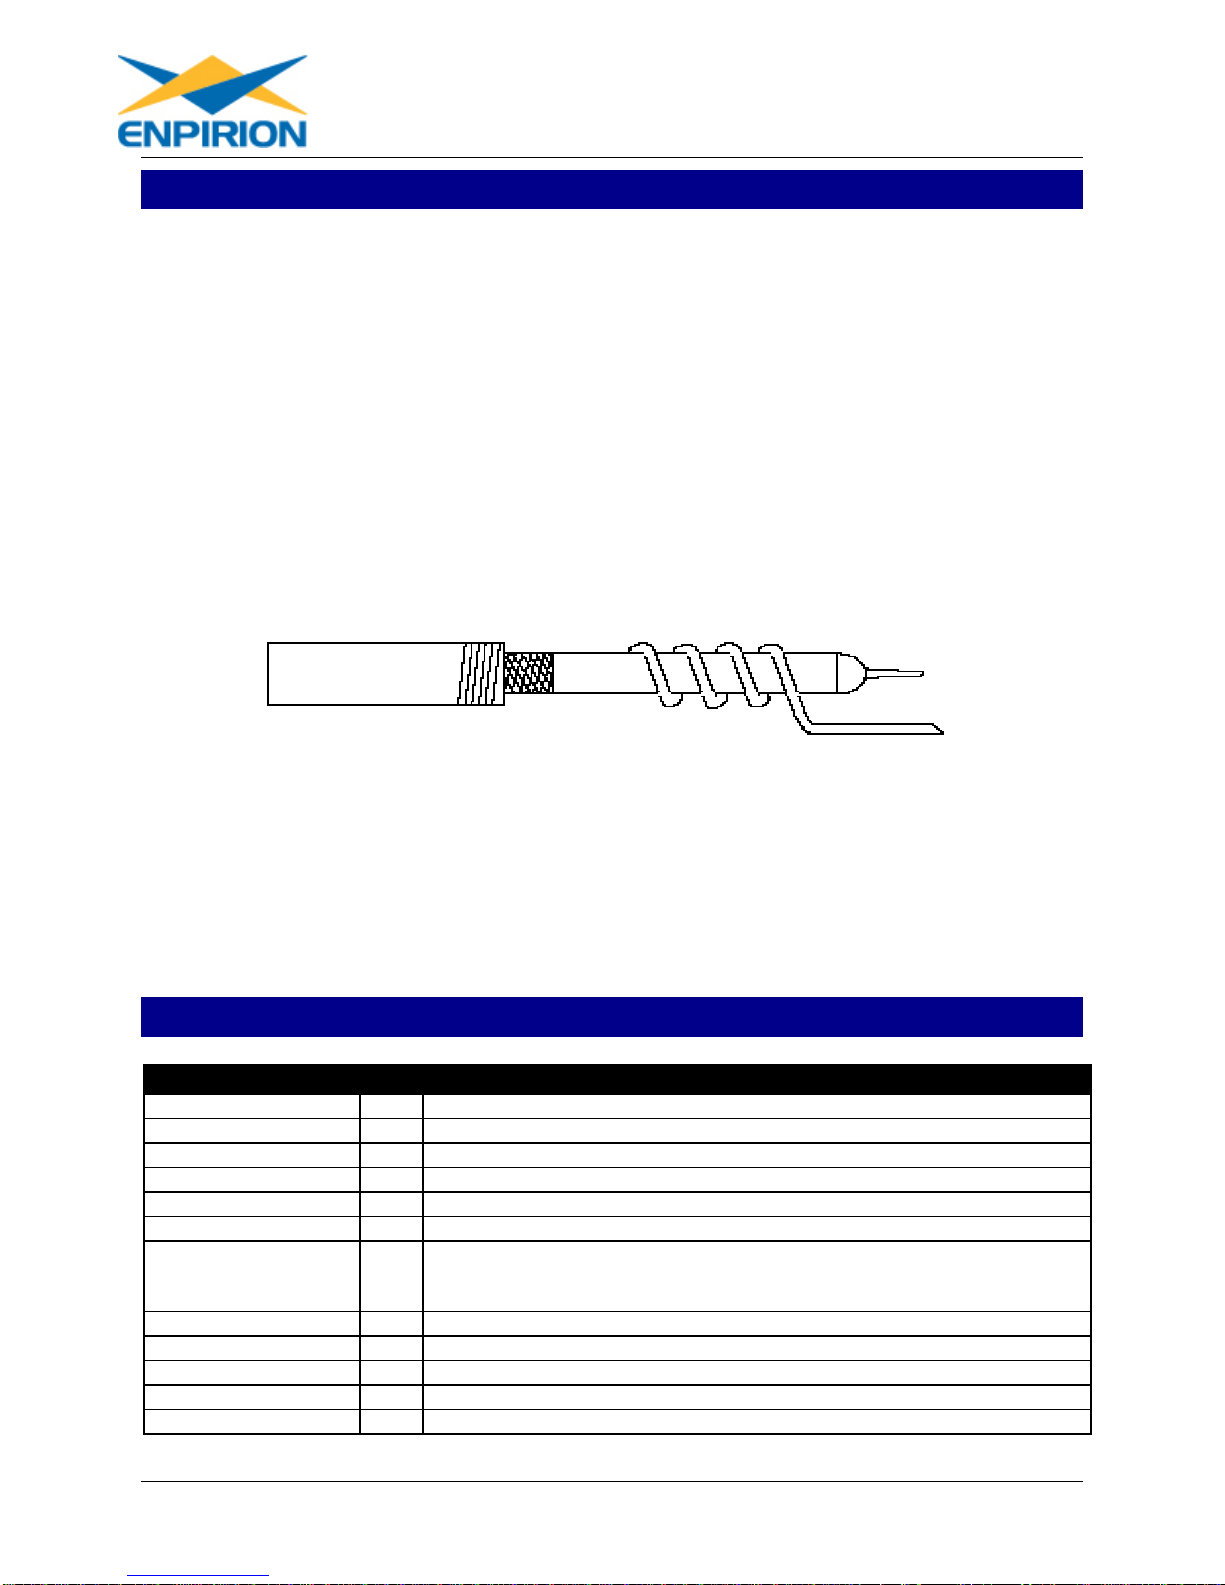
3. Use a low-loop-inductance scope probe tip shown below to measure
switching signals and input / output ripple to avoid noise coupling into the
probe ground lead. Input ripple, output ripple, and load transient deviation are
best measured near the respective input / output capacitors. For more
accurate ripple measurement, please see Enpirion App Note regarding this
subject.
4. The board includes a pull-up resistor for the POK signal and ready to monitor
the power OK status at clip lead marked POK.
5. A 47nF soft-start capacitor is populated on the board for ~3msec soft-start
time.
6. The over-current protection circuit typically limits the maximum load current to
approximately 1.5X the rated value.
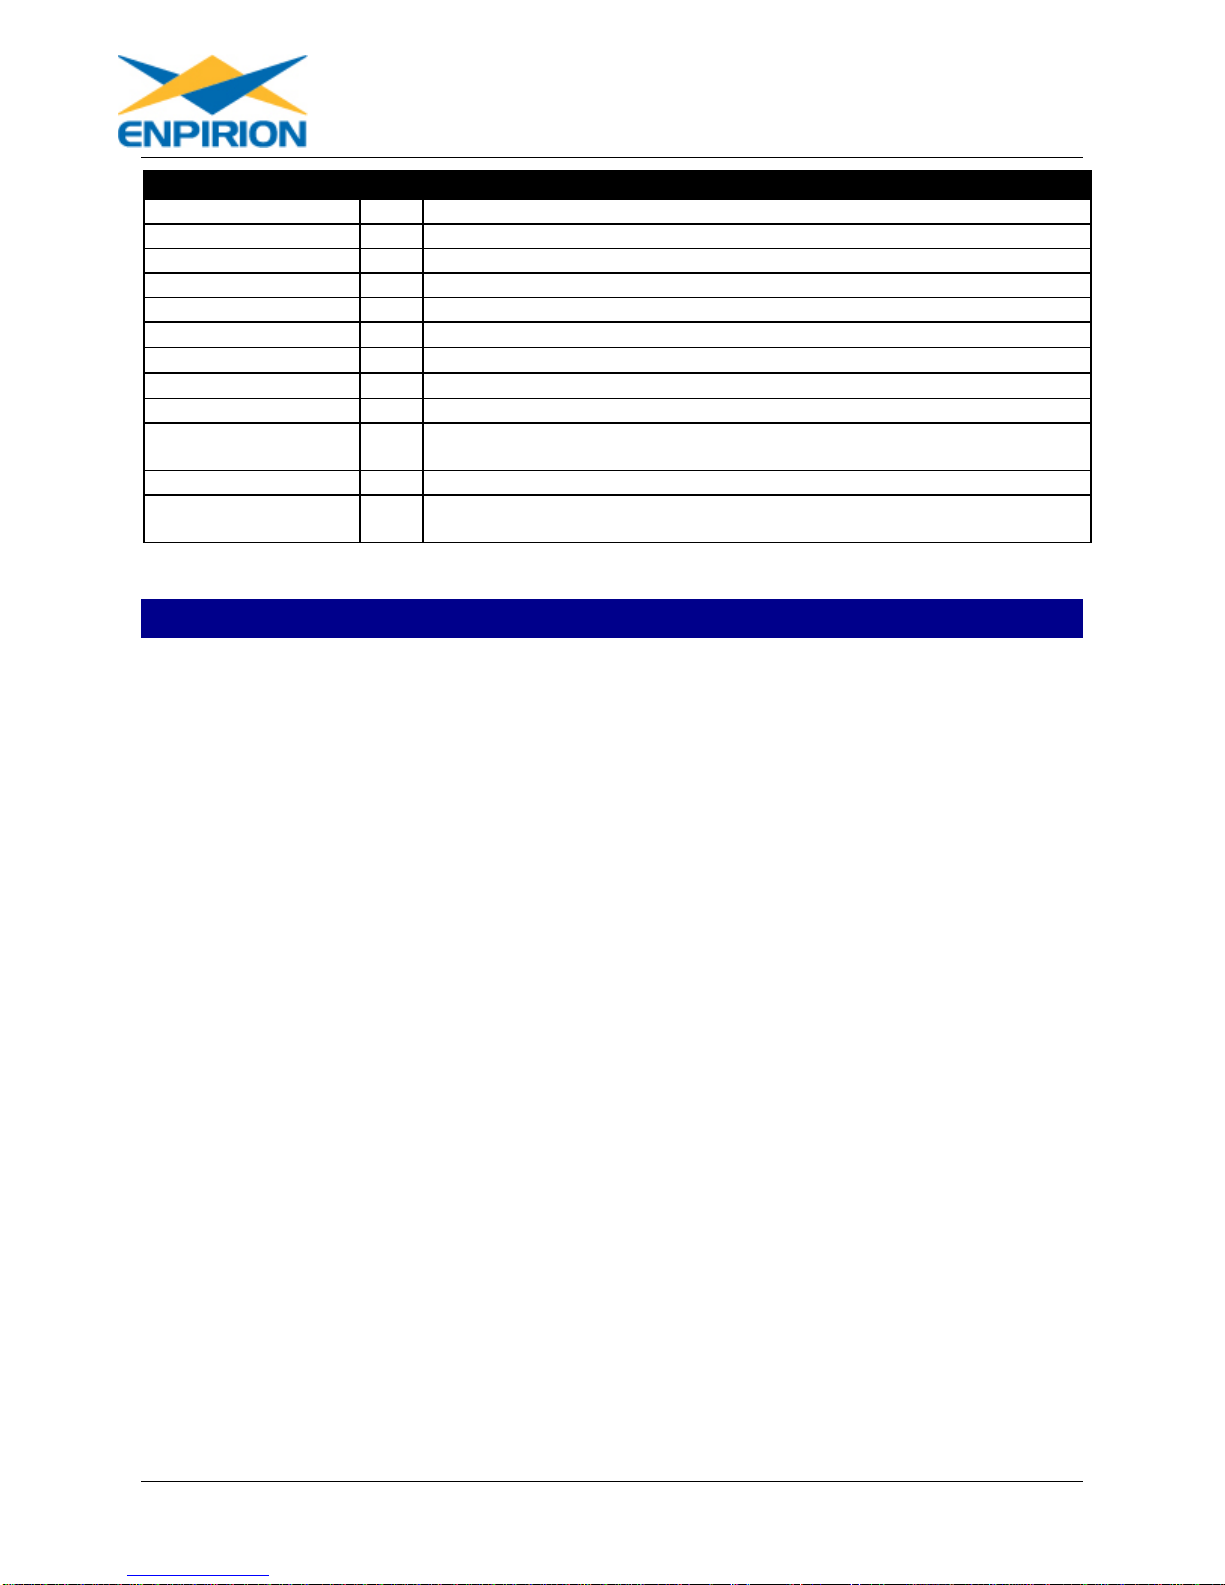
Bill of Materials
Designator Qty Description
C1, C2, C16 3 CAP, 0.1UF 10V X7R 0402 10%
C3, C7 2 CAP, 10UF 0805 X7R 10% 10V CERAMIC
C4, C10 2 CAP, 47000PF 50V X7R 0805
C5, C6 2 CAP, 47UF 10V X5R 1206, CERAMIC
C9 1 CAP, CERAMIC 18PF 5% 50V NP0 0805
C13 1 CAP, 150UF 20% 10V ALUMINUM ELECTROLYTIC
C8, C11, C12, C14,
C15, C17, C18, J7,
R6, R9-R13 14
NOT USED
D1 1 S2A DIODE
FB1 1 SMT FERRITE BEAD 4000MA 0805 (Wurth Electronik 742792012)
J1 1 CONNECTOR, CUSTOM, VERTICAL HEADER, SMT
J2 1 CONNECTOR HEADER 8POS. 100” STR TIN (Molex 90131-0124)
J3-J6 4 BANANA JACK (Keystone 575-4)
EN5367QI Evaluation Board User Guide
Jan. 2012
Page 8 of 8
Designator Qty Description
R1 1 RESISTOR 150KOHM 1/8W 0.1% 0805 SMD
R2 1 RESISTOR 442KOHM 1/8W 0.1% 0805
R3 1 RESISTOR 0.125W 249KOHM 0.1% 0805
R4 1 RESISTOR 140KOHM 1/8W 0.1% 0805 SMD
R5 1 RESISTOR 75.0KOHM 1/8W 0.1% 0805 SMD
R7 1
RESISTOR 10 OHM 0.1% 0402
R8 1
RESISTOR 200K OHM 0.1% 0805
R14 1
RESISTOR 100K OHM 0805 1%
R15 1 RES 3.57K OHM 1/8W 1% 0805
TP6-TP9, TP18-
TP21, TP29, TP30 10 TEST POINT SURFACE MOUNT (Keystone 5016)
U1 1 EN5367QI 6A QFN GOOD TESTED PRODUCT
U2 1
TRANSIENT VOLTAGE SUPPRESSOR, 6.5V, BIDIRECTIONAL
(Fairchild SMBJ6V5CA)
Contact Information
Enpirion, Inc.
Perryville III Corporate Park
53 Frontage Road - Suite 210
Hampton, NJ 08827 USA
Phone: +1-908-894-6000
Fax: +1.908-894-6090
www.enpirion.com
Enpirion reserves the right to make changes in circuit design and/or specifications at
any time without notice. Information furnished by Enpirion is believed to be accurate and
reliable. Enpirion assumes no responsibility for its use or for infringement of patents or
other third party rights, which may result from its use. Enpirion products are not
authorized for use in nuclear control systems, as critical components in life support
systems or equipment used in hazardous environments without the express written
authority from Enpirion.

Mouser Electronics
Authorized Distributor
Click to View Pricing, Inventory, Delivery & Lifecycle Information:
Intel:
EN5367QI-E EVB-EN5367QI
Table of contents
Other Enpirion Motherboard manuals


