EnPointe Piste Box EP-G01 User manual

Piste Box (EP-G01)
User Manual

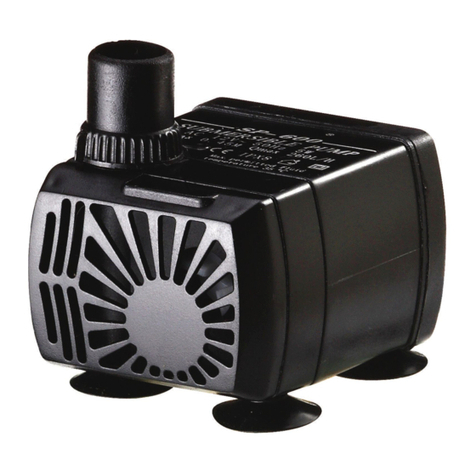
The Piste Box
Updating your Wireless System
Batteries and Power
Checking the Battery Level
Replacing the Batteries
Turning on/Switching off
Cancelling Hits to a Metallic Piste
Preparing the Piste
Touching On the Piste Box
Connecting the Wires
Tips and Troubleshooting
FAQs
Important Information
Wireless Specs
Warranty and Disclaimer
Safety Message
Compliance Information
The EnPointe Wireless Fencing System
1
2
3
-
-
-
4
-
-
5
6-7
9
-
-
10
11
12

The Piste Box
This Piste Box is designed to be used with the EnPointe Wireless Fencing System
(EP-R01, EP-P01). The EnPointe Wireless Fencing System is not included in this set.
This Piste Box, in conjunction with an EnPointe Wireless System and Scoring Machine, cancels
hits to a metallic piste. For more information about the system, its features and setup, please
You can revisit the EnPointe Wireless System User Manual at enpointefencing.com/downloads,
or view our instructional video on setting up the Piste Box at enpointefencing.com/videos.
Included in this purchase:
1x Piste Box
1x Piste Manual
1x Protective Case
Additional items required for the operation of the Piste Box:
• Conductive Tape (recommended 25mm width, ~50m length)
• 2x connector wires (where each wire has one end with a banana plug, and one end with a
crocodile clip)
• Insulation Tape: Gaffer tape, duct tape or cloth tape should all work well for this purpose.
• 2x AAA batteries
A. Socket A, for connecting to the conductive tape
B. Socket B, for connecting to the piste
C. EnPointe Logo/Battery Indicator Light
D. Battery Compartment
Crocodile clip
Piste Box
Connector Wires
Banana plug
A.
C.
D.
B.
The Piste Box | 1

Updating your Wireless System | 2
UpdatingYour Wireless System:
In order to use the Piste Box with an existing wireless system, you will need to update your
Relay Box. You can do this by downloading the most recent update from enpointefencing.com/
downloads. Please refer to the instructions given at enpointefencing.com/downloads, or on
page 5 of your original Wireless Fencing User Manual for more details.
Please Note: If you purchased your EnPointe Wireless Fencing System after 20/12/2018, you
will not need to install an update, as your system should come preloaded with the latest Piste
Box rmware.
Batteries and Power:
Checking the battery level:
To check the battery level of the Piste Box, rstly look at the top of the box. Then use two
ngers to touch the outer pins [A] and [B], at the same time. The battery indicator light will
shine through the EnPointe logo [C], between the pins.
Green indicates that the battery is full (approximately 100 hours of use from one
set of batteries), orange indicates the battery is half-full, and red indicates that the box
is on low battery (approximately 20% battery remaining), and that the batteries may need to
be changed soon.
A.
Connects to
conductive tape
EnPointe logo
C .
B.
Connects
to Piste

Batteries and Power | 3
Replacing the batteries:
The Piste Box uses two (2) standard AAA batteries, and lasts for approximately 100 hours of
continuous fencing, or around three months of regular club use.
The Piste Box batteries can be replaced by pulling the lift tab shown in [D].
Turning on the Piste Box:
Once a Piste Box is paired to a Relay Box, it will switch on with the rest of the system, and
begin cancelling the piste immediately. There is no need to separately turn on the Piste Box
each time you use it.
Switching off the Piste Box:
When you turn off your Relay Box, the Piste Box will switch off at the same time. If you
remove the batteries from your Relay Box for any reason, you will need to touch on the
Piste Box again.
D.

Cancelling Hits to a Metallic Piste Using the Piste Box
To start you will need a ‘conductive tape’ (described above), and an ‘insulation tape’ (a non-
conductive tape that can be used to secure and protect the conductive tape). The following
Piste Box setup will cancel hits to either a grounded, or a non-grounded metallic piste.
Preparing the piste:
1. Roll out the conductive tape at a distance of approximately 5cm away from the
side of the piste.
2. When placing the tape in a border around the piste, fold at the corners so that the tape
remains unbroken. Stick down the conductive tape with a bit of insulation tape every few
metres, to ensure it doesn’t move.
3. If the conductive tape requires connection to another piece or part of conductive tape in
order for it to remain in a continuous loop, pull the adhesive layer apart, and slot the new
piece of tape between the existing conductive tape’s adhesive layer and its backing.What’s
important is that both pieces of conductive tape are directly contacting, and that they are
not separated by an insulating layer.
4. Cover over the rest of the conductive tape with insulation tape, leaving around 20cm
underneath the scorebox free of the insulation tape for now.
Cancelling Hits to a Metallic Piste | 4
Please note: It is important that the conductive tape forms a continuous circuit around the
piste, and is not broken at any point. It is also important that the conductive tape does not
make contact with the piste at any point.
Touching on the Piste Box:
Please note: With this software version, the Piste Box is paired at rst ‘touch-on’, and
remains paired to that Relay Box.You should only need to touch on the Piste Box once, unless
the batteries are removed from the Relay Box.
1. When you turn on the Relay Box, it will prompt you to touch on as normal (all orange
lights are lit). Touch on the Piste Box rst. This can be done by holding the Piste Box and
using three ngers to touch pins [A], [B], and the EnPointe logo [C]. Hover the Piste Box
over the centre of the Relay Box. The three green lights on the Relay Box will ash once
to indicate the Piste Box has touched on.Then touch on the Pocket Boxes as normal.
If a Piste Box has been paired to a Relay Box, the second fencer will not be able to touch on
unless the Piste Box is powered and in range.The Piste Box will remain paired to this Relay
Box, even if the system is turned off and on again. If you wish to completely de-pair the Relay
Box from the Piste Box, just remove and replace all the batteries from the Relay Box.You can
re-pair your Piste Box by repeating the procedure outlined above.

Connecting the wires to the Piste Box:
1. Plug one of the connector wires into pin [A] (as shown in the diagram below).
Attach the crocodile clip on the other end of the wire to the conductive tape.
Attach where the conductive tape is left uncovered (this is why 20cm was
left bare).
2. Plug the other wire into the [B] pin. Attach the crocodile clip on the other end
of the wire to the piste. It can attach to either the piste’s existing grounding wire,
or to the piste itself.
3. Tape over the last 20cm of conductive tape with the insulation tape, making sure that
the crocodile clip does not detach.
Cancelling Hits to a Metallic Piste | 5
A.
Connects to
conductive tape
B.
Connects
to Piste
Piste Box
Connecting
wire (B)
Connecting
wire (A)
Conductive tape, covered by the insulation tape
Metallic Piste
EnPointe logo
C .

Tips and Troubleshooting
Hits are not being cancelled properly.
When attempting to touch on, both of the
orange error lights on the left and right of
the Relay Box are alternately ashing.
The Connectivity Error lights on
the Relay Box ash three times in quick
succession, every second.
Error
1. Firstly check that the Piste Box
has sufcient charge, and has not
disconnected from the Relay Box.
2. Then check the connections between
piste>wire>box, and tape>wire>box.
To help diagnose the issue, you can have
the fencers test the wire/piste grounding
screw or wire directly, to see if it’s a
broken connection, or an issue with the
Piste Box itself.
3. Check that the loop of conductive tape
has not become torn or disconnected
in any way.
4. Check that the piste is not touching the
conductive tape at any point.
This error indicates that the Relay Box
cannot establish a wireless connection
to the Piste Box. This could be because:
1. The Piste Box is out of charge, or the
batteries have become dislodged from
their compartment.
2. The Piste Box’s antenna is blocked from
communicating with the Relay Box,
possibly due to a metal object placed on
top of the Piste Box.
This indicates that the conductive tape is
shorted out to the metallic piste. Please make
sure that the insulation tape is covering the
entire length of conductive tape, and that no
metal objects (like weapons, reel boxes or
spare wires/conductive tape) are bridging
the conductive tape and piste.
Solution
Tips and Troubleshooting | 6

Tips and Troubleshooting | 7
The connectivity error lights are
constantly ashing.
This indicates that there is a wireless
connectivity issue between the Piste Box
and the Relay Box, or the Pocket Boxes and
the Relay Box.The Relay Box will attempt to
reconnect, and the off-target lights will display
if the box is disconnected for a long enough
period of time that a hit could have occurred.
Firstly check that the wireless antennas on
the Relay and Piste Boxes are unobstructed.
See that:
1. No large metal objects are placed next
to either box, and that the boxes are
not closely surrounded by metal on all
sides.
2. Check that they are not located in a
place where signals are absorbed, or
dissipate into the environment - like a
wide open eld.
If you still encounter wireless connectivity
problems, try locating the Piste Box at
the middle of the piste, rather than at the
end. Or try moving the Pocket Boxes into
a front pocket of the fencer. If problems
persist, please contact our support team at
specic help with this issue.
If you encounter a dead spot on the piste. This is likely an indication that parts of the
piste are not totally connected to each other.
Dead spots on the wired system are often
caused by the same issue.The connection
between these parts of the piste may depend
on where there is weight on the piste, so
it is a good idea to test a ‘dead spot’ while
standing on different sides of the
affected area.
Tip: A small amount of the conductive tape
can connect the affected area to the rest
of the piste, as a short-term solution
to dead spots.

Tip for referees when testing weapons. For best results when testing weapons as a
referee, please make sure you are located
on the same surface as the fencer whose
weapon you are testing, i.e. only test
the weapon if both the referee and
fencer are located either wholly on,
or wholly off, the piste.
If you prefer the Piste Box is not located
directly next to the piste.
To avoid a tripping hazard or for convenience,
you can extend the connection of the tape
loop, by attaching a length of conductive
tape to the loop (as described above), and
running the tape away from the fencing
area to a place where the Piste Box can be
safely placed. The same can be done with
the connection to the piste, but remember
that the loop of conductive tape must be
insulated, and the piste must not short out
to the loop of tape. The Piste Box can be
moved 1-2m away from the piste and Relay
Box without issue. It is recommended to
move the Piste Box further away if it is in
danger of being stepped on (by referees,
fencers, etc). Not only is that a tripping
hazard, but can damage the connection
between the Piste Box and the piste/loop.
If you have any difculties setting up or using the Piste Box, please contact us at
[email protected], and our support team would be more than happy to assist you!
Tips and Troubleshooting | 8

FAQ | 9
Frequently Asked Questions (FAQs)
Does my metallic piste need to be grounded, in order for the Piste Box to work?
No. Both grounded and non-grounded pistes will be cancelled with a Piste Box attached.
Where can I get more conductive tape?
You can purchase conductive tape separately from our online shop. Similar items
can be purchased online, or from hardware and electronics stores.
Can I use similar items/wires in place of the conductive tape for the same effect?
Most kinds of tape with a similar size, shape and conductivity to the tape we provide, will be
suitable for this purpose. We can guarantee that the tape we provide will work with the Piste
Box. Other kinds of conductive tape may not have the same level of compatibility. If you have a
specic tape in mind, you can contact our support team at [email protected], and
we will advise you on the suitability of the proposed substitute product.
Generally, most wires do not have the surface area required for the optimal functioning of our
system, but some clubs have tested with them and found them to work.
Important Information:
Technical Specications:
Power Supply
Battery Life
Size and Weight (inc. batteries)
Size and Weight (inc. carry case)
Radio Transmission Frequency
Encryption Protocol
Operating Temperature Range
Two (2) x AAA batteries
Approximately 100 hours
Size: 10cm x 6cm x 1.5cm / Weight: 111g
Size: 12cm x 8.5cm x 4cm / Weight: 156g
2.4 GHz ISM band
AES-128 authenticated encryption
0-50 degrees Celsius

Important Information | 10
Warranty:
The warranty is valid for twelve months from the date of purchase. It includes free repair
for any defects in materials or assembly. It does not include international shipping costs.
If the consumer encounters a major fault or defective system, they must stop using
the system, and contact the manufacturer immediately. This ensures they are eligible
for a warranty claim.
business address: EnPointe Fencing, 5a Hartnett Close, Mulgrave 3170,Victoria, Australia.
Our goods come with guarantees that cannot be excluded under Australian Consumer Law.
You are entitled to a replacement or refund for a major failure and compensation for any
other reasonably foreseeable loss or damage.You are also entitled to have the goods
repaired or replaced if the goods fail to be of acceptable quality and the failure does
not amount to a major failure.
The intended use for this product is for fencing, under safe conditions and in accordance
with health and safety guidelines.We cannot take responsibility for damage that results from
improper use of the system, or use of the system in a manner outside of its intended purpose.
Disposal of Product:
The electronics contained in this system must not be disposed of with normal household
waste. Instead, it is your responsibility to dispose of your system by arranging to return it to a
designated collection point for the recycling of waste electrical and electronic equipment.
By separating and recycling your system at the time of disposal you will help to conserve
natural resources and ensure that the system is recycled in a manner that protects
human health and the environment.
For more information about how to designate your EnPointe Fencing System or Piste Box for
recycling, please contact our customer services team on +613 9015 4441, or
When Using Batteries
• Always insert the batteries correctly, and following the manufacturer’s instructions.
• Do not mix new and old batteries (replace all batteries at the same time).
• Do not mix standard, rechargeable and alkaline batteries together.
• Only use the kind of batteries recommended in this manual (AAA).
• Do not attempt to charge non-rechargeable batteries.
• Do not leave dead or depleted batteries inside the product.
• Do not dispose of batteries in a re, batteries may leak or explode.
• Always remove the batteries from the device before extended periods of storage.
• Do not short-circuit the supply terminals.
• Batteries may leak or explode if misused.

Important Information | 11
Disclaimer and Safety Message
All our wireless fencing products have been designed for fencing under normal conditions,
and to the FIE rules and scoring specications. If fencers use the system under non-standard
or unsafe fencing conditions (for example, not wearing shoes, or not wearing a glove on the
weapon hand) we cannot guarantee the reliability of the system.
We encourage all fencers to keep their protective gear and equipment up to date with
regulatory safety standards, and to only fence in conditions and environments that adhere to
health and safety guidelines.
For more information about our products, updates or innovations, please visit our website at

CE Compliance Notice:
The EnPointe Piste Box (EP-G01) meets the minimum requirements for
safety and electromagnetic compatibility of electronic devices, and conforms with the relevant
European Union directives and recommendations:
Directive 2011/65/EU
Directive 2014/53/EU
Directive 2014/30/EU
Council Recommendation 1999/519/EC of 12th July 1999
More information about our compliance, including the relevant harmonised standards, can be
found in our declaration of conformity, available at enpointefencing.com/downloads.
FCC Compliance Notice:
Contains FCC ID: SQGBL652
This device complies with part 15 of the FCC Rules. Operation is subject to the following two
conditions: (1) This device may not cause harmful interference, and (2) this device must accept
any interference received, including interference that may cause undesired operation.
This equipment has been tested and found to comply with the limits for a Class B digital
device, pursuant to part 15 of the FCC Rules. These limits are designed to provide reasonable
protection against harmful interference in a residential installation. This equipment generates,
uses and can radiate radio frequency energy and, if not installed and used in accordance with
the instructions, may cause harmful interference to radio communications. However, there is
no guarantee that interference will not occur in a particular installation. If this equipment does
cause harmful interference to radio or television reception, which can be determined by turning
the equipment off and on, the user is encouraged to try to correct the interference by one or
more of the following measures:
—Reorient or relocate the Relay Box.
—Increase the separation between the equipment and system.
—Move or shorten the length of the connector cables.
—Consult the dealer or an experienced technician for help.
Note: The system is intended to be used with an FCC compliant scoring machine. If the scoring
machine is not compliant, the system as a whole may not be. Connector cables of up to 1.8m in
length were tested with this system and found to comply.
Pacemaker Notice: This product contains strong magnets and utilises wireless technology.
Consult with a medical professional before using.
Contains small parts. Keep out of reach of children.
All companies and products referenced herein are trademarks or registered
trademarks of their respective holders.
The ‘EnPointe’ logo is a registered trademark.
Patent Pending. ID: 2017902406
Made in Australia.
Important Information | 12
Table of contents
