Environdata WeatherMaster 2000 User manual

WeatherMaster
2000
Handbook
Revision
4.4 26102104
ndata
ENVIRONMENTAL
MONITORING&MANAGEMENT
EnvirondataAustralia
Pty
Ltd
zt4
Percy
St,Warwick
Queensland,
Australia,
4370
Phone:
(07)
46614699
+617 466L4699
Fax: (07)46612485+617 46612485
http://www.environdata.com.a
u
Material
inthis
handbookis
copyright
Allrights
reserved
bythepublishers.
Noreproduction
without
thepriorpermission
ofthepublishers.
#
Envrno
vl
,
N:\BS91FM-
1\H0F1OX-K\WOIDMO-S\WeatherMaster
2000Handbook
01.03.04.doc

'......,..,.,..,
I
++ Srennue
rne
werrnenMnsniJ600
),6 ann"ffiMdfr6 "..............8
=.::::::::::::::::::::::::::::::::::::::::::::::::::::
:::::
::::
;
Fyfflt-coweunnnonr ....................10
LoGGTNG
SYmM ......,...10
Loeenc
Pnocnruq ........11
PowERsYmM ............,12
AIRTEMPERAruRE/RELATIVE
HUMIDTTY........
3.1
3,2
3,3
3d
TJ
L2
x3
4.1
L,l
grql
62
Gl
&.
5J
g6
LZJ
Z,Z
7-1
7.4
RrunGeuce.
WU.ID
SPEED/WIND
DIREcnoN
SotAR
RAplAnoN ..........14
ErrennelSenson
(Omonn-)
s ItrtsTAu-ATIoNGUIDE ,...,...,..,,..,.. .......,..,....,.15
Al lHsnr-umonOvenwru .,..........,........15
52 Smucrne
Wenrnenl4rmn2000 ......15
5.3 MoUNTTNG
TF|E
WFTTHERMASTER
2000 ...................15
5-J FINALASSEMBLYoF
THEWEATHERMASTER
?000.
.......... ...........,....18
5.4.1 Assemblino
dte WndSrcd cups .....'....'...'18
$il AssemblinotheWindDirrction
wne........ ...,,...,....,....19
5J SETnNG
THENoRTH
PoINTFoRWINDDIREcnoU ..'...19
sJi CHECK$,|G
THEWEATilERMASTER
2000 ..........20
coMifuNlcATrot{
oPTroNs .,.,...2r
INTRoDUcTIo{,t ..,..-.,,.....21
DTRECTCABLE
Cor'tNEcnoN '.............,'21
TELEPHONE
MODEM
CONNECNON
GSM/CDMA
CoNNEcTIoN .................21
RApro
LINK
IPorNT-TGPOINT'I ..22
RFADING
YOIJR
DATA
CoRREcnNG
fiE WEATHERMASTER
2OOO
TIME ,....,...23
CHANGTNG
fiE BAuD
RATE ........'....'...24
RECOVERTNG
LOrDATA ................,...24
&I.IAIilTENANCE
GUIDE
&1 INTRODTJCTTCI,|
25
,25
N
:\BS9
lFM-1\H0F1OX-K\WOIDM$-S\WeatherMaster
2000
Handbook
01.03.04.doc 3

EnvirondataWeatherMaster2000
-UserGuide 3
&2 MATNE:runcrScxeouLE
E*? WEATHERMASTER
2000DATALocicER .........25
.........26
g.{ SounnPenel
S.5 SENsoRs...... .........26
gd PoTA,ERTNGnJESYs'rEM ...................29
9'.1 lNrRoprrnoN .........,.30
9-2 OPENTNGTHEoUTERCASTNG
93 RepucrNcrHeAnTuMpERnruRdRErATrveHurlronySENSoR ,..,.,.3t
%l Accessncn{eDRrnloecen ...............32
95 REMOING/REDI"ACINeWEAfiERUAStrR2000BA]-rERY ...................33
9.1[ REcHARGINGAWEATHERMASTER2000BATTERv .......33
9J RESETnNGA
WEATHERMASTER2OOO ...33
9A qPLoADIIt$
CALIBMTIoNANDSEruPFILES ................'..34
aHoonm File ..,....,.3:;
Sending
(Upleadinqt
theWeatherMasH{onftouratlonfriles..... ..........35
9.9 ADJUSINGftE WIND
SPEED
AND
WIND
DIRECTIoN
SErINGS .............3:;
9.10 Cmmrvcnre
RnrnGruceFuuurl
9*U RepulcrrucnreOrnEn
Clsrnc ........35
9.T2 REPI.ACINGn.IEWEATTIERMASTER2OOOPROGRAMCHIP ...,.,,,,,..,35
AperoxA.. .....,.3'7
HARDWAREINTERFACE
(IHE
CABLE
TorHE
WEATFTERMASTER2000) ..,........37
APPENDD(8.. .......38
WEATHERMASIERCOT'IMANDSETSUMI,4ARY ,.,.,.38
APPENDD(C..
TRou$E$HoorrNcGUUE .....39
APPENDD(D.. ...................41
WEATHERMASTER2000coMMANp
sETsuMMARy:BcrENgEg ....,..........,....41
APPENDD(E..
How
ro pAcK
AWEAFERMASTER2000 ...........52
AppenoDlE
WEAJHERMASTER2000
SERVTCE
REcoRp ........54
APPENDD(G..
SHUITTNGDoWNTHFWEATHERMASTER2000FoRLol.rc-TERMSToRAGE .......................55
APPENDD(H..
EVAPOMTIO}I
APPENDX
I...........
ADVICEFOR
BEGINNERS .............59
)
N:\BS9lFM-
1\H0F1OX-KWOIDM0-5\WeatherMaster
2000Handbook
0
1.03.04.doc

Environdata
WeatherMaster2000
-User
Guide 4
1, Introduction
Welcometo Environdata.
Weappreciate
your
purchase
ofour
WeatherMaster
2000system,
and
trust
thatitwill
giveyou
longanduseful
service.
Wewelcome
your
comments
andsuggestions
atany
time. If you
experience
any
difficultiesinInstallingandusingthe
WeatherMaster,
please
contactus
immediately
so
thatwe
can
provide
asolution
foryou.
Nodoubt
you're
keento install
your
new
weather
station,and
readingChapter
2will
give
you
basic
instructionsonhowtodothis. However,westrongly
recommendthat
you
readChapter
3
first
to give
you
anunderstanding
ofhowtheWeatherMaster
2000
worK.
Wewish
you
well
with
your
application,
andhopethatthe
WeaherMaster
2000
is
allthat
you
o<pect
itto be,and
more.
I
N:\BS91FM-
l\H0F1OX-KWOIDMO-S\WeatherMaster
2000
Handbook
0
1.03.04.doc

EnvirondataWeatherMaster
2000
- USerGuide 5
2. Quick-staft
Guide
2,L Overuiew
TheWeatherMaster
2000hasbeenspecially
designed
foreaseofinstallaUon,
and
you
willfind
thatonce
youhavefollowed
theinstallation
procedure,
re-siting
your
stationshouldbe
easyif
you
ever
needtiodothis.
Important: Starting the WeatherStation
The
Weather
Station
is
delinercdcalibrated
with
itsprogram
fileloaded.However,theWeather
Station
isshut
downduringtrans'rtso
it willneedto be
staftedagain.
This
can
be
donebefore
installation,
orwhilethesystem
isinstalledinthefield.Normally,
connecting
acomputer
willstart
theWeatherMaster,
indicatedby
a2-secondflash
rate.This
requiresthat
thecomputer
systemis
setcorectly. If this
isnotpossible,
astaft
plug
can
beusedtostafttheWeatherMaster.
Thefirststeptowards
installing
your
WeatherMaster
willbe
tobecome
familiar
withthesoftware
supplied
with
your
station,
and
optionallytoinstall
itontothehard
diskofyour
laptop/notebooVdesktop
IBMcompatiblecomputer.
You
shouldbecome
familiarwiththe
software
immediately,
because
you
willneedtoconnect
your
laptop
computerto$e station
on-
siteduring
installation
and
set-up.
2.2 SoftwareInstallation
Step
t - Caringforyour
disk(s)
Floppy
Disks
Pleasemakeabackupcopyofany
floppy
disk(s)suppliedtoyou
byEnvirondata.fiis willprotect
you
incase
theoriginalbecomesdamaged.
If necessary,consult
your
operating
system'smanual
forinstructionsonhowtocopyadisk.
CD-ROMs
Please
ensure
thatanyCD-ROMssuppliedbyEnvirondataarestored
inasecure
place.
It is
also
agood
idea
to makeacopyofthese.
Step2- Installing
and
usingtheEasiAccess
software
Toinstallthesoftware,
first
check
$at you
havesufficient
free
space.
Theremustbe
atleast
20Mb
free.If there
isnot,
please
clearsome
roombeforecontinuing.Consult
your
operating
system'smanual
forinstructionabouthow
tofree
disk
space.
Now,followtheinstructions
supplied
withEnvirondata's
EasiAccess
softrruare.See
Page
3ofthe
FasiAccess
Quick
StaftGuide
inyour
manual.
2.3 Assembling
theSystem
TheWeatherMaster2000isshipped
withouttheMounting
Arm,SolarPanel,WindSpeed
Cups
andWindDirectionVaneattached.
Thisist0ensure
that
these
itemsare
not
damaged
during
transitorinstallation.Please
retain
thepackaging
carton,
asit hasbeenspecificallydesignedto
protect
theweather
station,
especiallythespindle,duringtranspott.
N
:\BS91FM-1\H0F1OX-KWOIDM0-5\WeatherMaster
2000Handbook01.03.04.doc

Environdata
WeatherMaster
2000
- User
Guide 6
Auxiliary SerEor
Comms
& Solar
Air Temperature
RelativeHumidity
Wnd Speed
\MndDirection
2.3.L Assembling
the WindSpeedcups
TheWind
Speed
cups
needtobernountedon
tothelower
shaft.
Thisisachieved
by
threadingthecup
assembly
on
tothe
shaft,andthensliding
itupuntil
the
innerhub
fitsupinto
thedelrin
(black
plastic)piece.
The
recessedmountingscrewscanthenbe
tightened
until
thecupassembly
iscaptured
inthe
delrin
piece.
Once
mounted,spinthecups
afewtimestoensure
theyare
freetoturnunder
theinfluence
of
airflow.
N:\BS9lFM*
1\H0F1OX*KWOIDM0-5\WeatherMaster
2000Handbook
01.
03.
04.doc

EnvirondataWeatherMaster
2000
-User
Guide 7
2.3.2
Assembling
theWindDircctionvane
OncetheWind
SpeedCupshavebeenmounted,theWind
Directionvane
needs
to bethreaded
ontotheshaft
andslid
upwards
untilthe
vane's
hub
justcoversthe
endofthe
shaft.The
actual
vane
shouldbefacingupwards,
andthereshouldbesufficient
clearance
betweenthevane
and
cups
toensurecorrectoperaUon.Checkthat
the
vane
moves
freely
under
theinfluence
of
airflow.
2.4 Sitingthe WeatherMaster2000
TheweafferstaUonwill
accurately
measureib ownimrnediateenvironment,regardlessofits
surroundings.
However,
choosing
anopenenvironmentwillmean
thedatacollected
willbemore
representativeofthe
wider
area,
rather
thantheimmediatevicinity.
Guidelinesforchoosingasuitablesiteinclude:
Flat,levelground
atleast20metresby20metres
Trees,
bushesand
otherobstacles
atleast
fourtimes
theirown
height
away
Preferably,
aminimumofdustand
other
pollutants
Securefromthe
infrusion
ofanimals
Thereare
situations
where
theapplicaUondemandsthattheweather
staUonbe
sited
within
a
confinedarea
to measuretheensuing
microclimate,anexampleofwhich
isbetween
rowswithin
avineyard.
In situations
like
thistheabove
guidelines
canbe
ignored,
although
you
must
beawarethatthe
resultingdata
will
beindicaUve
of
theimmediate
areaonly,andshouldbeidentified
assuch.
Besuretoconsiderthat,
unless
it isunavoidable,
the
weather
station'ssolar
panel
shouldnot
be
shaded
fromsunlight
duringthesunniest
periods
ofthedaybetween9amand3pm.
MountingtheWeather
Station
Thestandardmounting
pole
is
designed
to beconcretedintotheground.
Thiswillprovide
the
mostrigid
andstable
long-termrnounting.An
alternativeshort-termmounting,
consistingofa
metal
post
(star
picket)
and
four
guy
wiresis
alsoawilable.See
Chapter5br detailed
instructions.
N:\BS91FM-l\H0F1OX-KWOIDM0-S\WeatherMaster2000
Handbook
01.03.04.doc

Environdata
WeatherMaster
2000
- User
Guide 8
2.5 Stafting
theWeatherMaster2000
TheWeatherMaster
2000
is
suppliedswitched
off. Connecting
acomputerand
initially
communicating
withtheWeatherMasterisallthatis
requiredto start
theWeatherMaster.
Tip: Connecting
Pin
6to Pin4ontheRS232communications
poft
will
activate
theweather
staUon
ifyou
don'thaveacomputer.
SeeAppendixAforpin
details.
2.6 Connecting
acomputer
Acommunications
cable
[C840]
issuppliedwiththesystem
toconnecttheWeatherMaster
2000
totheserial
port
ICOM
port]
ofa PC
[9pin
"D"
type
connector.]
Forolder
PCs
with
a25pin
"D"
typeconnector,
a 9-25
pin
convefter
issupplied.
Veryrecentcomputers
might
nothaveaserial
orCOM
port. These
computers
haveaUSB
[Universal
Serial
Bus]
port
instead,
forwhicha USB-serial
converter
isrequired.Theseare
generally
available
from
local
computer
dealers.
Alternatively,
Environdata
can
supply
one,atan
approximate
costof$100.00.
Atest
plug,
alsoknown
as
a"loop"
plug,
is
supplied,
attached
tothecommunicaUons
cable
[CB40].
Whenthis
plug
is
connected
totheCB40
inplace
ofthe
weatherstation,
it"loops"
or
returnsanysignals
sent
from
thecomputer
backtothecomputer.
This
allowstheusertotest
thecomputer,
itssettings,and
thecommunicationscable,
independentlyoftheweather
staUon.
See
EasiAccesssoftware
formore
information.
lSelect
theSetup
menu
'Configuration
-
GommunicaUons.l
2.7 Setting
theNofthPointforWindDirection
OncetheWea$erMaster
2000
isinstalled,
it isnecessaryto orientthewlnddirectionsensorby
setting
theNofth
point.
Step
1- Preparingthe prcgram
Make
sure
EasiAccess
isrunning
onyour
computer,andthatyou
are
connected
tothe
weather
staUon
Step2 - Preparingthe vane
Spinthe
Wind
Direction
Vane
completely
aroundtwice,
andthen
point
itdue
nofth.
It isimportantthatthevanebe
pointing
otactly
north.
If this
isnot
thecase
during
this
calibration
procedure,
thenallsubsequent
WindDirecUonmeasurements
taken
by
the
weather
staUon
willbe
inaccurate.
Step3 - Settingthe North point
Whileholdingthe
vaneinthenorth
position,
select
the
"setthewinddirection
North
point"
option
from
the
ToolsMenu.
Be
sureto keep
holding
the
vaneso
ftat it ispointing
nofthuntil
the
program
hasfinishedcalibrating
theweatherstition.
2.8 Checking
theWeatherMaster
2000
Oncethesystem
isrunning,
you
shouldcheck
thecurrentdate
andtime,andall
thesensorsto
ensure
theyareworking
correctly.
By
following
thestepsoutlined
below,
you
canbesure
your
system
will
provide
bue
andreliabledata.If,duringanyofthe
followingsteps,
you
areunsure
whetherthereadings
you
are
getting
are
correct,
please
contactEnvirondata
on(07)466L4699.
N
:\BS9lFM-1\H0F1OX-KWOIDM0-5\WeatherMaster
2000Handbook01.03.04.doc

EnvirondataWeatherMaster2000
- UserGuide
Step1
Startupthesoftwaresupplied,
connecttotheweatherstation.
Typical
RangesofCurrentReadings
Check
thatthereading
you
are
receivingfrom
thestation
is
correct.[Note
that
sensorreadings
areupdatedonce
every3seconds
while
thedisplayisshown,butnormally
only
onceevery
minute.lThetablebelow
showstypical
rangesfor
allthesensors
- ifyouget
any
readings
oubide
these
ranges,
contactEnvirondata.
x Readingsfrom
therain
gauge
areonlyupdatedevery
minute,even
when
connected.
9
I
Sensor Action TynicalRanoe
AirTemoerature None 0-40c
RelaUveHumidity None l0 - 90o/o
WindSpeed Solnbv hand 0-20koh
WindDirection Rotatebvhand 0-360
RainGauge
xPourinwater
(be
sureto
haveacollectioncontainer
ready
ifdone
indoors)
0.2mm
per
tipor6.5m1
water
poured
in
Solar
RadiaUon Placeindirectsunlight 500
- 1200
Wm2inbright
sunlioht.0inside
Battery
Voltage 6- 7volts,
under6volts
is
flat
SolarPanel 6- 7.5
volts
insunlight,0.5
inshade
N
:\BS91FM-1\H0F1OX-KWOIDM0-5\WeatherMaster2000Handbook
01.03.04.doc

Environdata
WeatherMaster
2000
- User
Guide 10
3. System
Overuiew
3.1 System
Configuration
TheWeatherMaster
2000arrives
asacomplete,self-containedsystem,
whichmakes
installation
andset-up
mucheasier,
However,it will
still
beusefulforyou
to understand
alitde
about
the
internalstructureoftheWeatherMasterandits
sensors.
WeatherMaster
2000
?.2 Logging
System
Thecenual
componentoftheweatherstaUon
is
amicroprocessordata
logger,
which
coordinates
allthe
activitiesoftheweather
staUon.
Thedatalogger
collects
readings
fromthesensors,
checks
thesensors'calibration,accumulates
valuesifthey
needtobe
averagedortotaled,and
thenstores
themintomemory.
Thedata
logger
isequipped
withib own
internal
battery
toensure
that
data
canberecorded
and
retained
forlong
periods
oftime
without
interruption.This
battery
is
chargedduring
sunny
periods
bythesolar
panel.
Thedata
logger
is
also
responsibleforcommunicating
with
theuse/scomputer
totransfer
ldownload]
data
storedinthelogger'smemory
and
todisplay
currentsensor
readings.
N
:\BS91FM-
1\H0FlOX-KWOIDMO-S\WeatherMaster
2000Handbook01.03.04.doc

EnvirondataWeatherMaster
2000
- UserGuide 11
3.3 LoggingProgram
The
WeatherMaster2000's
powerful
microprocessor
iscapableofmonibring
anumberofsensors
whilealso
storing
dataandcommunicatingwithauser'scomputer.
The
data
loggerreads
thesensorsand
maintainsanuptodate
record
ofthecurrent
readings
from
eachsensoreveryminute.
Totals,
averages,maximumsorminimumsofthesereadings
can
becalculated
overanumber
ofperiods
oftime,
and
theresults
canbe
recorded
atratesranging
betweenonce
aminute
and
onceaday.
Thereare
fourmemories
available
forstoring
mainmemorydata.
Each
ofthesememoriesisconfigured
as
a"rollingdrum".Thismeansthat
over
timethememon'
will
accumulatedata,andonce
it isfullitwillroll
aroundand
begin
tooverwritetheearliest
storeddah. Thus,
themernoryshouldbedownloadedbefore
it isfull,
ortheearliestdab
recorded
willbe
lost.
The
rolling
drum
system
issimilar
toarevolvingdrumchartrecorder,becauseoncethe
drumhas
doneacomplete
rotationitwillbegintooverwrite
theearliestdata.Onlyacertainnumber
of
valuescan
be
stored
within
thememory,
sooldvalues
willbe
sacrificed
infavour
ofnew
ones,
Normally,dailydata
isstored
intoMemory1at9am,and
hourlydatastoredintoMemory2on
thehour. Datacanalsobecollectedmoreoftenthanonceanhour. However,
this
willusemore
memoryand
reduce
theoverall
period
thatdatacanbe
storedbeforedownloading
isrequired.
If data
needs
to be
collectedmoreoften
than
onceanhour,10-minute
data
isnormally
stored
into
Memory3,and
if required,l-minute
data
issbredintoMemory4.
Aswell
as
thefour
standard
memories,thereisaspecial
diagnosticmemory
[Memory
0] into
whichdiagnosticinformation
abouttheweatherstation
isrecorded.
Oneofthevaluesthatare
N
:\BS9lFM-1\H0F1OX-KWOIDM0-5\WeatherMaster
2000Handbook
01.03.04.doc

Environdata
WeatherMaster
2000
- UserGuide 12
regularly
stored
either
inthis
memory
orinthedailysummary
lMemory
1]isbattery
voltage.
Thisallows
arecord
to bekepttocheckthebattery
isingood
condition.
3.4 Power System
TheWeatherMaster
2000
is
designedto be
aself-containedsystem
requiring
verylittle
maintenance.
However,
it is
still
necessary
to understandsomeoftheissuesaffectingthebattery
lifeoftheweather
station.
Thesolar
panel
on
theWeatherMaster2000should
provide
enough
power
to keep
thesystem
charged
and
runningindefinitely.
Thisassumes
thatthe
solar
panel
will
not
be
in
the
shade,orin
overcast
conditions
formorethan2weeks
atatime.
If the
WeatherMaster
2000is
to bestored
foraperiod
oftime
without
recording
data,
orifthe
system
is
to bedisconnected
fromitssolar
panel,
orstored
inadark
place,
it willbenecessary
to
place
thesystem
into
shutdown
mode.
Inthisstate
alllogging
stops
andthesystem
goes
intoalow
power
mode,
allowing
itto last
withoutsolar
power.
Select
the
"Shutdown
Logger"
menuoption
withthesoftware
supplied.Whentheprogram
indicates
thatshutdown
hasbeenachieved,checkthattheindicator
LEDonthesideofthe
WeatherMaster
hasstoppedflashing.
If theLEDhas
stopped
flashing,thecommunications
cable
can
bedisconnected
andthesystem
can
bestored.
TheWeatherMaster
caneasilybe
re-startedandrefurnedto normaloperation
by
connecting
the
communicationscable
tothestaUonand,
using
theEasiAccess
program,
clickingonthebutton
to
connect
tothestation.
Wheninshutdown
mode,
the
system'sbatteryshould
lastabout
5months
withoutbeing
rechargedby
thesolar
panel.During
normal
operuffon,
it should
lastabout
4weeks.
The
system
incorporates
anumber
ofspecial
features
tro
reduce
itspower
consumption.
However,
these
featuresbecome
ineffective
while
theloggeriscommunicating
withauser's
computer.
Thismeansthatthesystem's
power
consumption
increasesbyafactorof 10whilethe
user
isdownloading
data.
For
ftis reason,
it isadvisablenotto leaveacomputer
connected
totheWeatherMaster
forlong
periods
ofUme,
unlessthis
is
absolutely
necessary.If acomputer
isleft
connected,
thetime
the
system
can
lastwithout
solar
energywillbe
reduced.
Environdatasupplies
amainscharger
asastandard
itemwith
your
system.Use
thistorecharge
thebateryifit isflat[notflashing].
You
shouldalso
usethisifyou
operate
your
system
indoors,
as
tre solar
panel
is
onlyeffective
outside
indirectsunlight.
If leavingthesystem
instorage
formorethan
afewmonths,thebest
decision
is
to leavethe
WeatherMaster
permanenUy
connectedtothemains
charger.
N:\BS91FM-
1\H0F1OX-KWOIDM0-5\WeatherMaster
2000Handbook
01.03.04.doc

EnvirondataWeatherMaster2000
- User
Guide 13
4. Sensors
4.1 AirTemperature/RelativeHumidity
The
WeatherMaster2000contains
bothanAirTemperature,
andaRelafiveHumidity
sensor.
These
sensorsareacfuallycombined
internally,
but
forallintents
and
purposes
canbe
considered
to betwoseparatesensors,
The
Air
Temperature
sensor
has
aresolution
of0.1"
C
and
anaccuracyof1 0.5'C. Long-term
stabilityiso<pected,andthesensor
shouldbereasonably
immune
toexternalfactors.One
situation,whichwillhaveanadverseimpactonthesensor'saccuracy,isifdewcondensesonto
the
sensingtip. This
wlllresultin
atemporary'wetbulb'
reading
whichwillreturn
tonormal
once
the
dewdries.
TheRelative
Humiditysensorhasaresolution
of0.1olo,
wifrranaccuracyoft 3o/oorbetter.
Unfortunately,this
sensor
isinherently
susceptible
to externalfactorsbecauseitssensing
tip
needs
toabsorbmoisture
from
thesurroundingatmosphere.In so
doing,
itabsorbs
air-borne
pollutants.
Thus,
despiteafilteronthesensingtip,thesensor
willlose
calibrationover
aperiod
ofUme.Atypicalsymptomoflossofcalibration
isreadings
thatare
regularlyinexcessof 100o/o.
TheRHsensorisalso
susceptible
totheformation
ofcondensationonitssensing
Up.
When
this
occurs,theRHreading
will
quite
likely
o<ceed
1000/oforaperiod
ofuptoafewhours.
This
is
unavoidable,andthereading
willcomebackwithin
range
as
thecondensaUonevaporates.
Dependingonthecleanlinessof
air
intheweatherstation'senvironmentthe
RHsensorshould
last
approximately
30monthsbefore
needing
replacement.
Deweffectswillmostlikely
occurduring
earlymorning
and
the
hours
aroundsunrise.
If RH
reading
deviationsoccurconsistently
forperiods
outside
thesetimes,
please
contactEnvirondata
fortechnicaladvice.
TheAirTemperature
and
RelativeHumidity
sensorsaredesignedas
arnodule
that
can
beeasily
removed
andreturned
to Environdata
ifnecessary.
Inthis
event,
refertosection
9.3,and
consult
withanEnvirondata
technician.
Apaftfrom
this,
there
isnoregular
maintenancerequired.
4,2 RainGauge
TheRain
Gaugehasaresolutionof0.2
mm,
andthisshouldbestableovertime.
The
systemwillrequireregularmaintenance,which
consists
of keeping
thefunnelfreefromany
foreignmatterthat
falls
intoit,and
checkingthe
water
path.
TheRain
Gaugefunnelhasafilterinthe
middle,
which
shouldstopanything
getting
inside
that
might
block
thewater
path. However,it ispossible
forenough
materialto buildupatthisfilterto
obsbuctwater
flow
intothesensor.Leavesand
anyother
material
shouldbedisposedofbefore
takingthis
ftlter
out.
Onceallleaves,
etc.,
have
been
removed,
the
filter
can
belifted
out,
cleaned,
and
re-inserted.
It isimpoftant
that
you
checktheRain
Gaugeeverytime
you
visitthestaUon.Otherwise,
you
couldbe
getting
zerorainfallreadingsforsome
timebefore
you
notice
abloclcge.
N
:\BS9
1FM-l\H0FlOX-IQWOIDM0-S\WeatherMaster2000Handbook0
1.03.04.doc

Environdata
WeatherMaster2000
- UserGuide 14
4,3 WindSpeed/Wind
Direction
TheWindSpeed
sensorhas
aresolufion
of0.1
km/h,
and
astart-up
velocityofless
than
2
kilometres
per
hour.
Earlier
loptical]
WindDirectjonsensors
havearesolutionof6 Degrees,
+3 Degrees.
More
recentWindDirectionsensors
[since
April2001]usearesistance
winding
lpotentiometer].
Resolution
forthismodel
is1-2
degrees,
withanaccuracyoft 5degrees.
Thereisalso
approximately
a l0-degree
gap
between
thestartandendofthe
winding.This
isnot
necessarily
atNortr
whenthesystem
is
calibrated
on-site,
and
results
inanarbitrary
direction
inwhich
the
10degrees
resultinaconstant
direction
reading.
Once
fittedduring
installation,the
Wind
Speedand
Directionsensors
should
requirenofurther
maintenance.
However,it isimportant
tocheckregularly
thatthey
arebothsUllturning
freely
under
Sreinfluence
ofairflow.
4,4 Solar
Radiation
TheSolar
Radiationsensor
has
aresolution
ofapproximately
t5 Wm2.
It isimpoftantto keep
the
topofthesensorcleanby
wipingitwithasoft
clothortissue
onsite
visits,
toallow
satisfactory
light
penetraUon.
Otherwise,dtis
sensorshould
require
little
maintenancethroughout
itslifetime.It is
alsoimpoftantthat
theweatherstation
ismounted
plumb
vertical.
If it is
not,thesensing
suface
oftheSolar
Radiationsensor
willnot
be
horizonbl,
andtheresultingreadingswitlbeflawed.
4,5 ErGernalSensor
(Optional)
The
WeatherMaster
2000includesafacilitytoallowconnectionofone
externalsensor
from
Environdata's
standard
rangeofsensors
- e.9.,leaf
wetness,barometric
pressure,
soil
temperature,
etc.
- orfromceftainother
manufacturers'sensors.
BecauseoftheWeatherMaster'slow
power
consumptionand
various
other
factors,
thereare
limitaUonstothe
type
ofe><ternalsensorthatcanbeconnected
tothe
auxiliarysensor
port.
Sensors,
whichmonitor
sporadicevents,suchas
rain
gauges,
are
notsuitable.
Please
consult
Environdatatofind
outiftheadditionalsensor
you
areconsidering
is
compatible
withtheWeatherMaster
2000.
The
elternal
sensor
isonly
powered
upfor4 secondseachminute
- l-secondwarm-upUme
and
3 seconds
measurementtime. If youwishto testthe voltage
supply
to thissensor,
youcan
activate
it continuously.
In the EasiAccess
program.
Selectthe communications
terminal
[F2];
connect
tothestation
[F3],
andafter
receiving
thesign-on
message,
type:
TEST<
space>
1
<space>
1
<enter>
Notethatthis
mightdrawahighcurrentfromthebattery
continuouslyandwill
flattenthebattery
if it isleft
on
formorethan
afew
hours.Tocanceltestmode,type:
TEST<enter>
Alternatively,
just
disconnectthe
communicationscable.
N:\BS91FM-
1\H0FlOX-KWOIDM0-S\WeatherMaster
2000Handbook01,03,04,doc

5.
EnvirondataWeatherMaster
2000
-UserGuide 15
Installation
guide
5.1 InstallationOveruiew
Installationwillnormally
take2
- 4 hours.You
willneedthefollowing
basictools:
Quick-set
concrete
Spade
Small
shiftingspanner
Screwdrivers
[Philips
head]
Compass
Laptopcomputeror DataCourier
5.2 Siting
theWeatherMaster2OOO
The
weather
station
willaccuratelymeasureits
own
immediateenvironment.regardless
ofits
surroundings.However,
choosinganopenenvironmentwillmeanthedata
collectedwillbemore
representative
ofthewider
area,rather
than
theimmediate
vicinity.
Guidelines
for
choosingasuitable
site
include:
Flat,
level
ground
at least20metresby20metres
Trees,
bushes
andotherobstaclesat leastfour
timestheirown
height
away
Preferably,a minimum
ofdustandother
pollutants
Secure
from
theintrusion
ofanimals
There
aresituationswheretheapplicationdemandsthatthe weather
stationbesitedwithin
a
confinedareato measure
theensuing
microclimate,
anexampleofwhich
is
beh^/een
rowswithina
vineyard.
In situations
like
thistheabove
guidelines
canbeignored,
although
youmust
be
awarethatthe
resulting
data
will
be
indicative
oftheimmediate
area
only,
andshould
be
identified
assuch.
Besureto consider
that unless
it isunavoidablgtheweatherstation's
solar
panel
should
not
be
shaded
from
sunlight
duringthesunniest
periods
ofthedaybetween9am
and3pm.
5,3 Mountingthe WeatherMaster2000
Thestandardmounting
pole
isdesignedto beconcreted
into
theground. Thiswillprovide
themost
rigidandstablelongterm mounting.Analtemativeshort-termmounting,consisting
ofa metal
post
(star
picket)
andfour
guy
wires
is
alsoavailable.
5.3.1.Installation
of StandardMount
Step1 - Site
preparation
Dig
anappropriatelysizedholeapproximately
0.5metresdeep.
Step2 - Foundation
Cementthepost
intothehole,withthe
drainage
holesin
thepost
justabove
ground
level. Forinstallationsinthe southern
hemisphere,
it is veryrimpodant to ensure
thatthesides
of the post
withthemountingholes
init facedue South and due
Nofth, The
post
must
also
be
plumb
vertical.
Step
3 -Assembly
Oncethecement
has
set,inseft
the mountingarm inthetop of the mounting
post
so
thatthe lowerhole
inthe mounting
post
linesupwiththe hole
nearest
theendof the
Inli>
[[[t*-"F
\r\_
\M
{o
l.l"l
I lf l
(
lll$
-u.
P:\Handbooks\Cunent
Handbooks\WeatherMaster\WeatherMaster
2000Handbook
01.0..,-..."

Environdata
WeatherMaster
2000
-UserGuide 16
mounting
arm. Inseftthebolt
rightthrough
themounting
post
andthemounting
arm,addthe
washer
andnut,
and
douptight.
Step4 - Mounting
Slide
theweather
stationmountingbracket
overthemounting
arm
and
fixinplace
usingfour
(4)M5x12mm
bolts
provided.
Step5 - LevelingProcedure
Insedtheeight
(8)M6
x 12mm
SS
boltsinto
theeight
(B)
weldednutsat
the
topofthemounting
post.
Using
thelevel
on
theWm20
mounting
bracket,
Adjust
these
eight
(B)
bolts
until
thebubblein
thelevelis
centered.
NOTE:
Thesearc not mounting bolts (only levelling bolts) and
shouldbe doneup only'finger-tight." Doingup the bolts too
tightly might result in the lossof damping prcvided by the
rubber layer around the gooseneck bracket. Then, vibration due
to wind might Gtusethe rain gauge's tipping mechanism to tip,
giving unexpected and inaccurate rainfall registrations.
Bolt
thesolar
panel
onto themountingarm.The
solar
panel
should
faceNofth
forinstallations
in
thesouthem
hemisphere.Adjust
itsveftical
angleto suit
theapproximate
latitude
ofthesite. That
is,if the weather
station
isatthe equator,
thesolar
panel
shouldbehorizontal,
andat a latitude
of
45
degrees,
thepanel
shouldbeat45
degreestothehorizontal.This
isimportantbecause
it
ensures
thatthesolar
panel
will
receivesufficientsunlight
during
bothsummerand
winter.
5.3,2
Installation of Short-termTripod Mount
Step1- Posttioning
Positionthetripodonfirmground
withitslegsfullyextended.Using
a spanner
adjusttheheight
ofthecentral
post
sothat
theWeatherstation
willbe
about180cmabove
ground,
andsecure
with
the
captive-pinattached.
Positionthepost
so
that itcanbeguyed
securely
to allow
the "gooseneck"
to point
NORTH
[see
next
page].
Step
2 -Guying
Donot
guy
the
gooseneck
asshownonthenext
page.
Using
thefitted
shackles,
guywires
and
pegs
provided
guy
thetripod
securely.
IT ISIMPORTANT
TOSECURETHEMOUNTINGSAFELYAND
TOMAINTAINITSORIENTATION
P:\Handbooks\Current
Handbooks\WeatherMaster\WeatherMaster
2000
Handbook
01.03.04.doc

EnvirondataWeatherMaster2000
-UserGuide 17
Step3- Mounting
Slide
theweatherstaUonmounUngbracketover
themountingarmand
Ughten
up
the
twobolts.
North
Au,
Nh.
!o
I o.
N:\BS91FM-1\H0F1OX-K\WOIDM0-S\WeatherMaster
2000Handbook01.03.04.doc

Environdata
WeatherMaster
2000
- UserGuide 18
Boltthesolar
panel
ontothemounfing
arm.
The
solar
panel
should
face
Northforinstallationsin
theSouthern
Hemisphere.Adjustitsverticalangletosuit
theapproximate
latitude
ofthesite.
Thatis,ifthe
weatherstationisattheequator,thesolar
panel
should
be
horizontal,and
ata
latitude
of45
degrees,
thepanel
shouldbeat45degrees
tothehorizontal.
Thisisimportant
because
itensures
thatthesolar
panel
willreceivesufficientsunlightduring
boiltsummerand
winter.
5.4 FinalAssembly
of theWeatherMaster
2000
TheWeatherMaster
2000isshipped
withouttheMounting
Arm,SolarPanel,
Wind
Speed
Cups
and
Wind
DirectionVane
attached.
Thisistoensurethat
these
items
are
not
damagedduring
transit
orinstallaUon.
Please
retain
thepackaging
carton,
as
it hasbeenspcifically
designed
to
protect
theweatherstation,especially
thespindle,
during
transport.
ra^
o"r",,
\i ti\
5.4.1 Assembling
the WindSpeed
cups
The
Wind
Speed
cups
needtobemountedontothelowershaft.
This
is
achieved
bythreading
thecup
assemblyontotheshaft,and
thensliding
it upuntilthe
inner
hubfitsupintothedelrin
(blackplastic)
piece.
Therecessed
mounting
screws
canften betighteneduntil
the
cupassembly
iscaptured
inthe
delrin
piece.
Once
mounted,spin
thecups
afewtimestoensure
they
are
freetoturnunderthelnfluenceof
airflow.
AuxiliarySensor
Comms& Solar
Air Ternperature
RelativeHumidity
WindSpoed
Wnd Direction
......_-.*
..* MountingBracket
+ Mounting
Arm
N
:\859
1FM-1\H0F1OX-KWOIDM0-5\WeatherMaster
2000Handbook
01.03.04,doc

EnvirondataWeatherMaster2000
-UserGuide 19
5.4.2
Assembling
theWindDircctionvane
OncetfieWind
SpeedCupshavebeenmounted,theWindDirectionvaneneeds
tobethreaded
ontotheshaftandslidupwardsuntilthevane's
hub
justcoverstheendoftheshaft.Theactual
vane
shouldbefacingupwards,andthere
should
besufficientclearancebetweenthevaneand
cupstoensure
correct
operation.Check
thatthe
\€nemovesfreelyundertheinfluence
of
airfrow.
5,5 Setting
theNofth
Point
forWind
Direction
Once
the
WeatherMaster
2000
isinstalled,it isnecessary
toorientthe
wind
directionsensorby
settingtheNofth
point.
Step1- Preparing
the prcgram
Make
sureEasiAccess
isrunning
onyour
computer,
and
connectedtotheweather
station
Step2 - Preparing
the vane
Spin
the
Wind
DirectionVanecompletelyaroundtwice,andthen
point
itdue
north.
It isimpoftant
thatthevanebe
pointing
o<acily
north.If this
isnot
thecaseduringftis
calibration
procedure,
thenallsubsequentWindDirection
measurements
takenbyfte weather
stationwillbe
inaccurate.
N:\BS91FM-1\H0F1OX-IQWOIDMO-S\WeatherMaster2000Handbook01.03.04.doc

Environdata
WeatherMaster
2000
- User
Guide 20
Step3 - Settingthe Nodh point
While
holding
thevane
inthenorth
position,
selectthe
"Set
thewinddirection
Nofth
point"
option
fromthe
Toolsmenu
inEasiAccess,Besureto keep
holdingthevanesothatit ispointing
north
untiltheprogram
hasfinishedcalibratingtheweather
station.
5,6 Checking
the WeatherMaster
2O0O
Once
thesystem
isrunning,
you
shouldcheckthecurrent
dateandtime,
andallthesensorsto
ensure
they
areworkingcorrectly.
Byfollowingthesteps
outlined
below,
you
canbe
sure
your
system
will
provide
Uue
andreliabledab. If,duringany
ofthe
followingsteps,
you
are
unsure
whether
thereadings
you
are
gefring
arecorrect,
please
contact
Environdataon(07)466L4699.
Step 1
Start
upthesoftwaresupplied.
TypicalRangesofCurrent
Readings
Checkthat
thereading
you
are
receivingftomthestation
is
correct.
[Note
that
sensorreadings
areupdated
once
every3seconds
whilethe
display
isshown,but
normally
only
once
every
minute.l
Thetablebelowshows
typicalrangesforallthesensors
- ifyouget
any
readings
oubide
these
ranges,contact
Environdata.
x Readings
fromtherain
gauge
areonlyupdatedevery
minute.
Sensor Action TvoicalRanoe
Air
Temperature None 0-40c
RelaUve
Humidity None 10- 90o/o
WindSpeed Soinbyhand 0-20koh
Wind
Direction Rotatebyhand 0-360
RainGauge
*Pour
inwater
(be
sure
to
haveacollectioncontainer
ready
ifdoneindoors)
0.2mm
per
Up
or6.5m1
water
poured
in
Solar
RadiaUon Placeindirectsunlight 500
- 1200
Wlmz
inbright
sunlioht.0inside
Batery
Voltage 6- 7volts,under6voltsis
flat
Solar
Panel 6
-7.5
volts
in
sunlight,0.5
in
shade
N
:\BS91FM-1\H0F1OX-KWOIDM0-S\WeatherMaster
2000Handbook
01.03.04.doc
Table of contents
Popular Weather Station manuals by other brands
La Crosse Technology
La Crosse Technology WS-8610 instruction manual

WEATHER DIRECT
WEATHER DIRECT Weather Direct WA-1440U owner's manual
La Crosse Technology
La Crosse Technology WS-9023U instruction manual
Dynamax
Dynamax InteliMet Advantage 6 user manual
Radio Shack
Radio Shack 6301469 user manual
BALDR
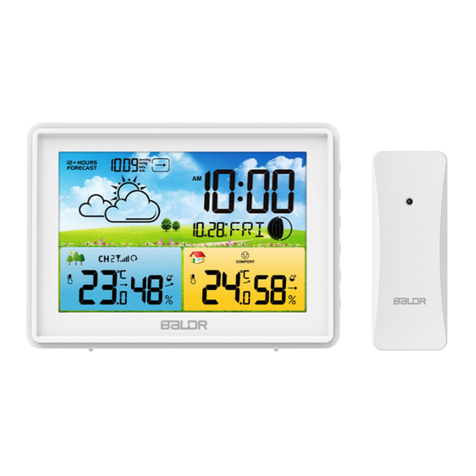
BALDR B0359WST2H2PR-V1 Quick setup guide
