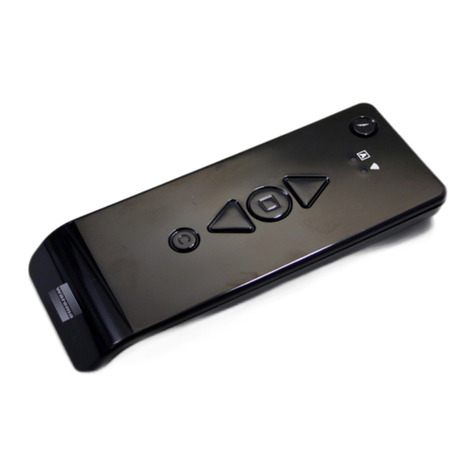
EnvironmentalLights.com 5-in-1-Remote User manual

Product Manual
EnvironmentalLights.com • P: 888.880.1880 • 11235 West Bernardo Ct., Suite 102, San Diego, CA 92127
© EnvironmentalLights.com
5-in-1 Remote and Receiver Manual
Part numbers: 5-in-1-Remote/5-in-1-Receiver/RGBTW-3030-LW-48-
24-1m
The 5-in-1 Wireless Remote can control up to 8 zones of LED lighting when paired with the 5-in-1 Wireless Receiver or the
LumenWash LED Wall Washer. The 5-in-1 Wireless Receiver is designed for use with our 5-in-1 RGB LED Strip Light. It works with
monochrome, Tunable White, RGB, RGB ColorPlus and 4-in-1 LED Strip light as well. The 5-in-1 Wireless Remote features 9-preset
modes and controls each zone independently from one another. Set any color of RGB with the color wheel, then blend the additional
two white channels for the perfect color mix. The 5-in-1 Wireless Remote has a range of 30 meters in an ideal environment.
Features
•Wirelessly controls up to 8 separate zones
•9 preset modes
•Works with monochrome up to 5-in-1 LED Strip Light
•30-meter range
Applications
•Great for testing functions of 5-in-1 LED Strip Light
•For use in 5-in-1 Strip Light and LumenWash LED Wall
Washer applications.

5-in-1 Remote and Receiver Manual
EnvironmentalLights.com • P: 888.880.1880 • 11235 West Bernardo Ct., Suite 102, San Diego, CA 92127
© Environmental Lights
2
5-in-1 Receiver Wiring
1. Confirm that the power supply voltage matches the LED Strip Light voltage and that the power supply is unplugged.
2. Connect the power supply to the 5-in-1-Receiver using either the screw terminals or the DC barrel input. Do not use the DC
barrel input if using more than 5A of strip light. Power supply positive and ground should be connected to “V+” and “V-”
terminals respectively when using the screw terminals.
3. Connect the LEDs and power supply to the 5-in-1-Receiver using the screw terminals. The positive wire should be connected
to the “V+” terminal. Connect LED negatives to output channels 1-5 as appropriate for the installation. Follow the label and
use the wiring diagrams below to put the correct wire into each screw terminal. Do not connect more than 6A per channel or
over 15A total.
For 5 channel control, connect red to R, green to G, blue to B, cool white to CW and warm white or amber to WW. The positive wire
connects to the V+ terminal. Once connected, press the switch button until the indicator light shows blue.
For 4 channel control, connect red to R, green to G, blue to B, and the white to W. The positive wire connects to the V+ terminal.
Once connected, press the switch button until the indicator light shows green.

5-in-1 Remote and Receiver Manual
EnvironmentalLights.com • P: 888.880.1880 • 11235 West Bernardo Ct., Suite 102, San Diego, CA 92127
© Environmental Lights
3
For RGB control, connect red to R, green to G, and blue to B. The positive wire connects to the V+ terminal. Once connected, press
the switch button until the indicator light shows red.
For tunable white control, connect the warm white wires to WW and the cool white wires to CW. The positive wire connects to the V+
terminal. Once connected, press the switch button until the indicator light shows yellow.
For single color, connect each wire to a separate channel on the receiver. The positve wire connects to the V+ terminal. Once
connected, press the switch button until the indicator light shows white.

5-in-1 Remote and Receiver Manual
EnvironmentalLights.com • P: 888.880.1880 • 11235 West Bernardo Ct., Suite 102, San Diego, CA 92127
© Environmental Lights
4
Operation
Linking
1. Disconnect the 5-in-1-Receiver or LumenWash LED Wall Washer from power. Wait 5 seconds and then reconnect power.
2. On the the 5-in-1-Remote, locate the zone 1 power buttons. The button turns the zone on and the button
turns the zone off.
3. Press the button three times within three seconds of reapplying power. The lights will blink three times to indicate a
successful link.
4. The and will work as on and off buttons for the selected zone.
5. Repeat steps 1-3 for each receiver or wall washer. You can set up 8 different zones that will work in sync. Unlimited receivers
or wall washers can be linked to each zone as long as they are within 30 meters of the remote.
Unlinking
1. Disconnect the 5-in-1-Receiver or LumenWash LED Wall Washer from power. Wait 5 seconds and then reconnect the power.
2. Press the button five times on the corresponding zone within three seconds of reapplying power. The lights will blink ten
times to indicate a successful unlink

5-in-1 Remote and Receiver Manual
EnvironmentalLights.com • P: 888.880.1880 • 11235 West Bernardo Ct., Suite 102, San Diego, CA 92127
© Environmental Lights
5
Setting a constant color
The 5-in-1 Remote allows you to tune RGB and CCT separately to hone in on the exact color you want. For white only mode, simply
press the and use the to select the proper balance of each white channel.
For 5-in-1 mode, first adjust the white balance using the key. After you have tuned in the proper white using the
slider, press anywhere on the color wheel to begin RGB control. The ratio of each white channel will stay the same as you change the
RGB colors.
Use the slider to adjust the saturation and use the slider to adjust the brightness.
The remote will auto-adjust your control capabilties based on the receiver’s setting. Color control options are more limited when the
receiver is set to the other modes.
Controlling Dynamic Modes
Access the dynamic modes using the button. The controls adjust based on what mode the receiver is set in. See table 1 for the
modes available in RGB, RGBW and 5-in-1 mode. See table 2 for the the modes available when the receiver is set to single color or
tunable white mode.
Brightness can be controlled using the slider. Speed can be controlled using the and buttons.
Saturation can be adjusted using the slider for RGBW and 5-in-1 RGB modes. For modes 6-8, the white stays on during the
blinking pattern. See table 1 for more information.
As in the static modes, the white balance in 5-in-1 RGB Mode can be set using the key and then returning to the dynamic
modes.
Dynamic Modes
Mode
RGB/RGBW/5-in-1 RGB Modes
Saturation Slider Function
1
All colors gradual change
Adjusts constant white input
2
White fade in and fade out
Brightness control
3
RGB gradual change
Adjusts constant white input
4
7 color step change - RGBYMCW
Adds constant white input
5
Random color step change
Adds constant white input
6
Red fade in and out and three blinks
Adds constant white input
7
Green fade in and out and three blinks
Adds constant white input
8
Blue fade in and out and three blinks
Adds constant white input
9
White fade in and out and three blinks
No control
Table 1: RGB/RGBW/5-in-1 RGB modes
Mode
Single Color/Tunable White Modes
1
White fade in and out
2
White blinking
3
White fade in and out and three blinks
Table 2: Single Color/Tunable White modes

5-in-1 Remote and Receiver Manual
EnvironmentalLights.com • P: 888.880.1880 • 11235 West Bernardo Ct., Suite 102, San Diego, CA 92127
© Environmental Lights
6
Safety Precautions
Please take the following precautions:
1. This equipment, like all electrical equipment, should be installed by a qualified person.
2. Do not expose these LEDs, dimmers or power supplies to intense electro-magnetic fields, including lightning.
3. The controllers and power supplies are not waterproof. Keep them dry.
4. Always observe proper polarity.
When installing LED lighting, it is a good idea to follow this “dry-run” procedure:
1. Be sure you have everything you need before you start.
2. Lay out your lights and power supply on the floor or table.
3. There is some resistance in the LED lighting. If you see any color fading or dimming at the end of a long run, you may have
too many LEDs for your power supply and you might need a bigger supply or shorter runs. Use a bus structure as described
in rgb_manual.pdf. Call if you need assistance with larger projects.
4. Connect everything and test it to be sure it works and you have it connected properly. It is unlikely, but possible, that some
part of your system is defective or was damaged during shipment. If that is the case, it will be very helpful to you to know that
before you do all the work involved in installing custom LED lighting systems. You will also know if you damage anything
during installation, which is really helpful in trouble-shooting because manufacturing defects and installation damage typically
have very different solutions.
Once you have tested the system successfully, you are ready to install it. We recommend you install LEDs, electronic controls and
dimmers in such a way that you have access to them in case they fail. All electrical components can fail.
This manual suits for next models
2
Table of contents
