EPICT WatchAir OpenArms EPUS-100 User manual

WatchAir OpenArms EPUS-100
Quick Installation Guide
WatchAir OpenArms EPUS-100
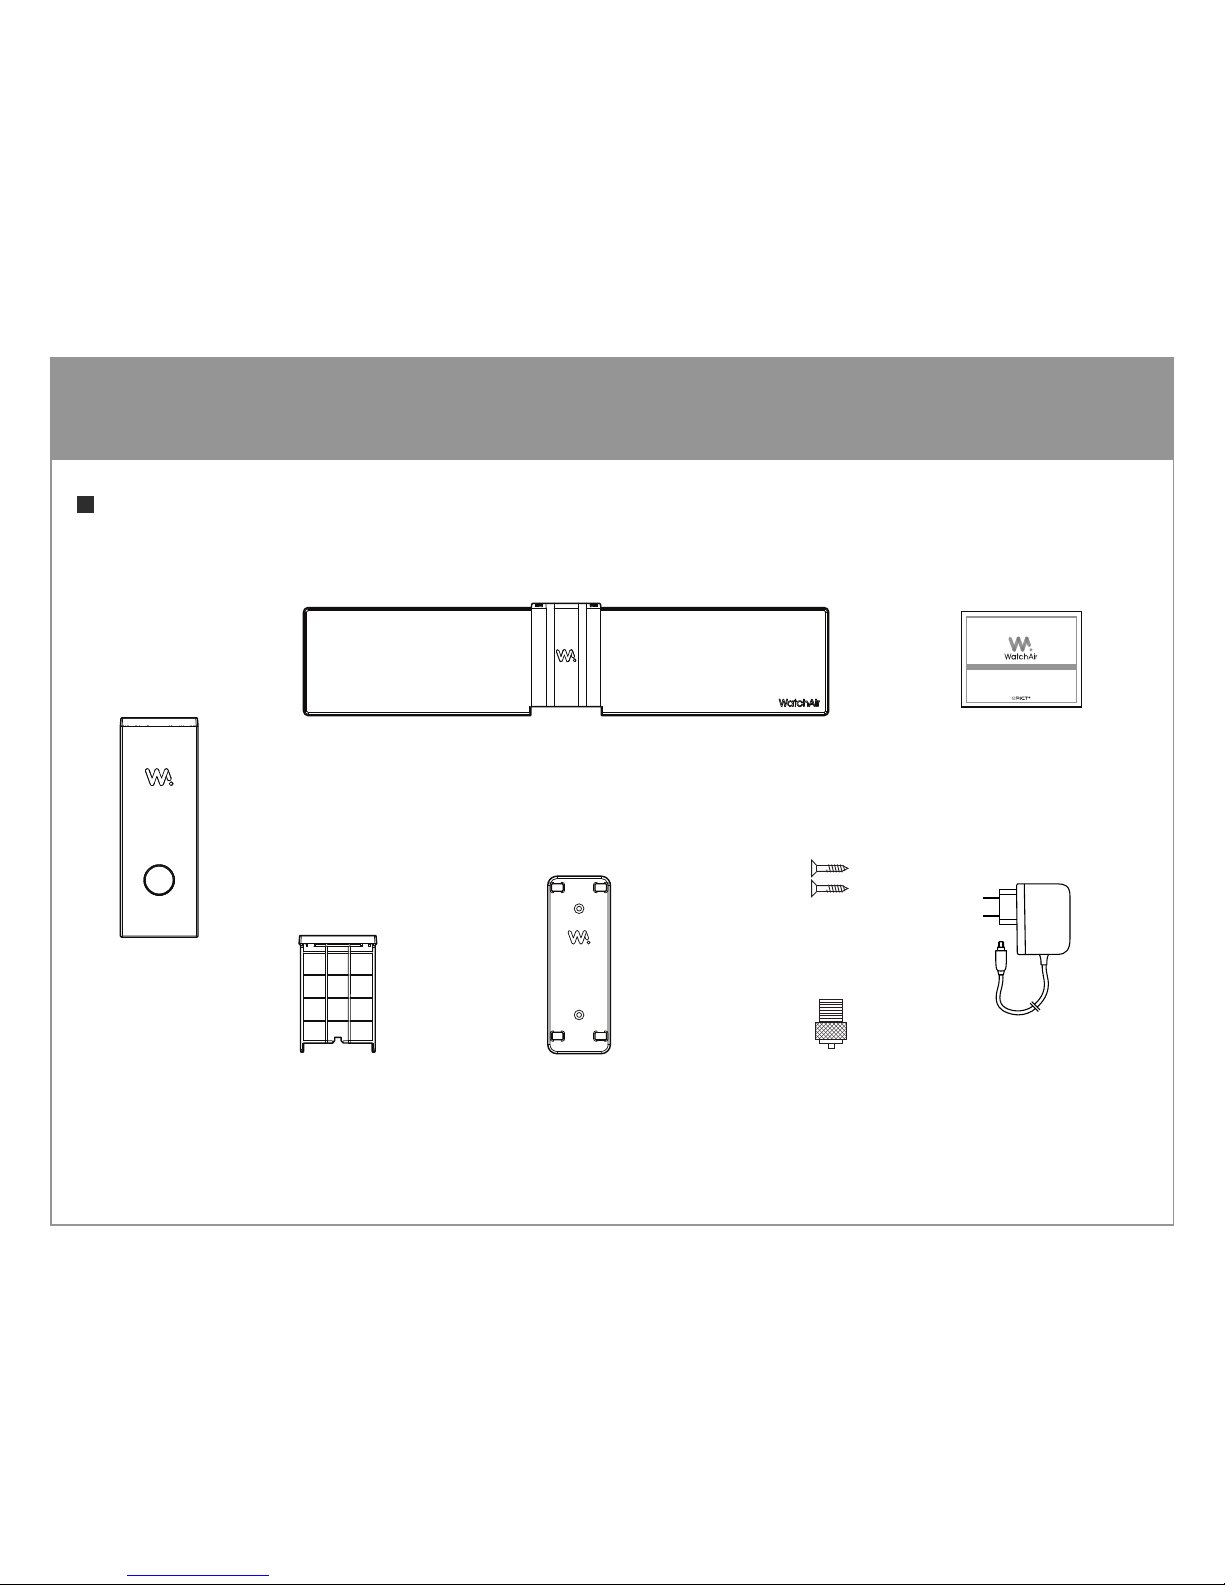
Package Contents
CONTENTS
External antenna
connector
TV Antenna
Desktop mode
bracket
Upright mode bracket
(with double-sided tape)
Smart bar
AC/DC Adapter
(5V/2.5A)
Screw 2p
Quick Installation
Manual
WatchAirOpenArms EPUS-100
Quick Installation Guide
WatchAir OpenArms EPUS-100
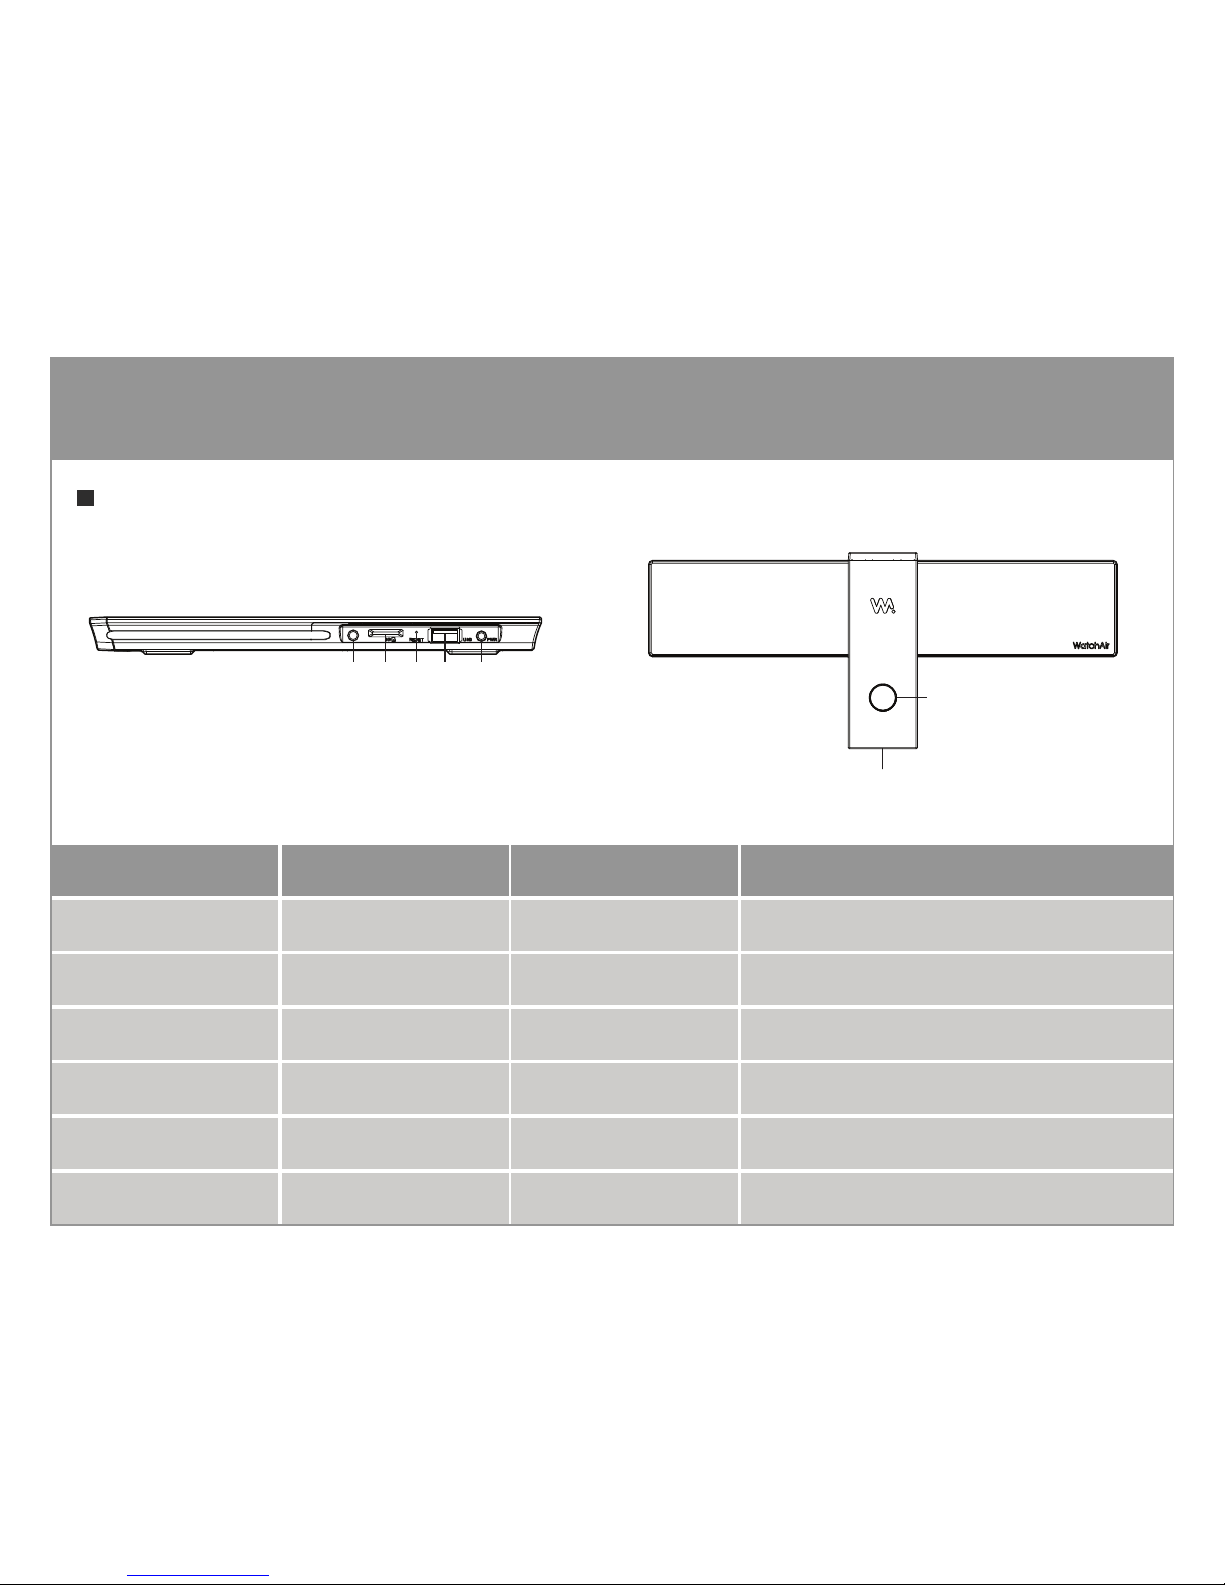
Product Ports / Status by LED
CONTENTS
External antenna
connector
Micro SD Card slot
Type A USB Port
Reset hole
Live TV antenna
LED Lights
Smart bar
Power connect
Power connect
WatchAir Status LED Color Duration Initiated by
Booting Green Solid About 30 seconds Power cord reconnected, or resetting
Normally Operating Blue Solid Until abnormal Any stand by, or streaming
Normally Recording Purple Solid Until nished Starting recording
Lost Networking Blue Blinking Until reconnected Something wrong with WiFi router
Updating Software Red Solid About 20 seconds Automatic detection and update
Reset user data Green/Red Solid About 30 seconds Push the reset hole for 7 second

Using The Built-in Antenna in WatchAir (Upright mode)
1. Unplug the desktop mode bracket from the smart bar. 2. Plug the built-in antenna into the smart bar.
3. Make sure the antenna is connected to the smart bar
without any gap.
4. Mount the upright mode bracket on the rear side
of the smart bar.
Get Ready
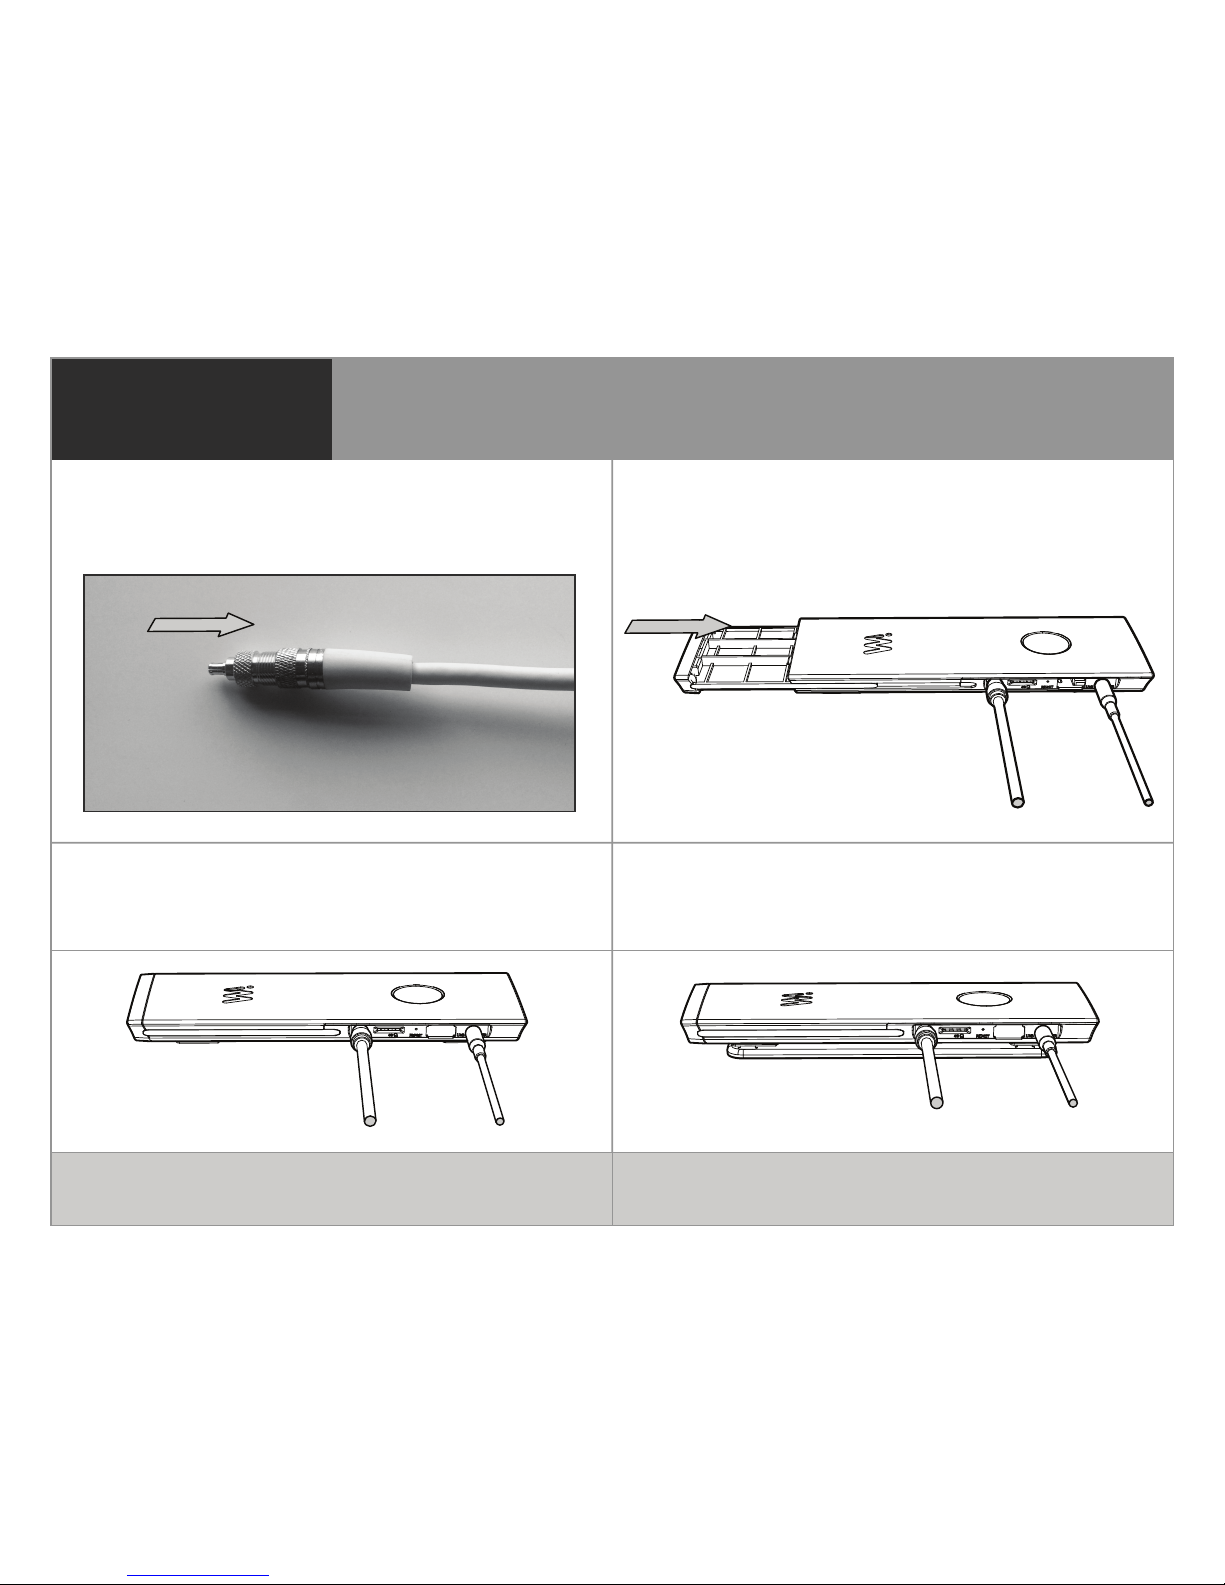
Using Your Existing Antenna (Desktop mode)
1. Connect the external antenna connector to your
existing antenna.
2. Plug the desktop mode bracket, the antenna
connector and the power plug to the smart bar.
3. Locate the smart bar on an appropriate location such
as table or cabinet.
4. May use the upright installation bracket to tighten
the installation.
Get Ready
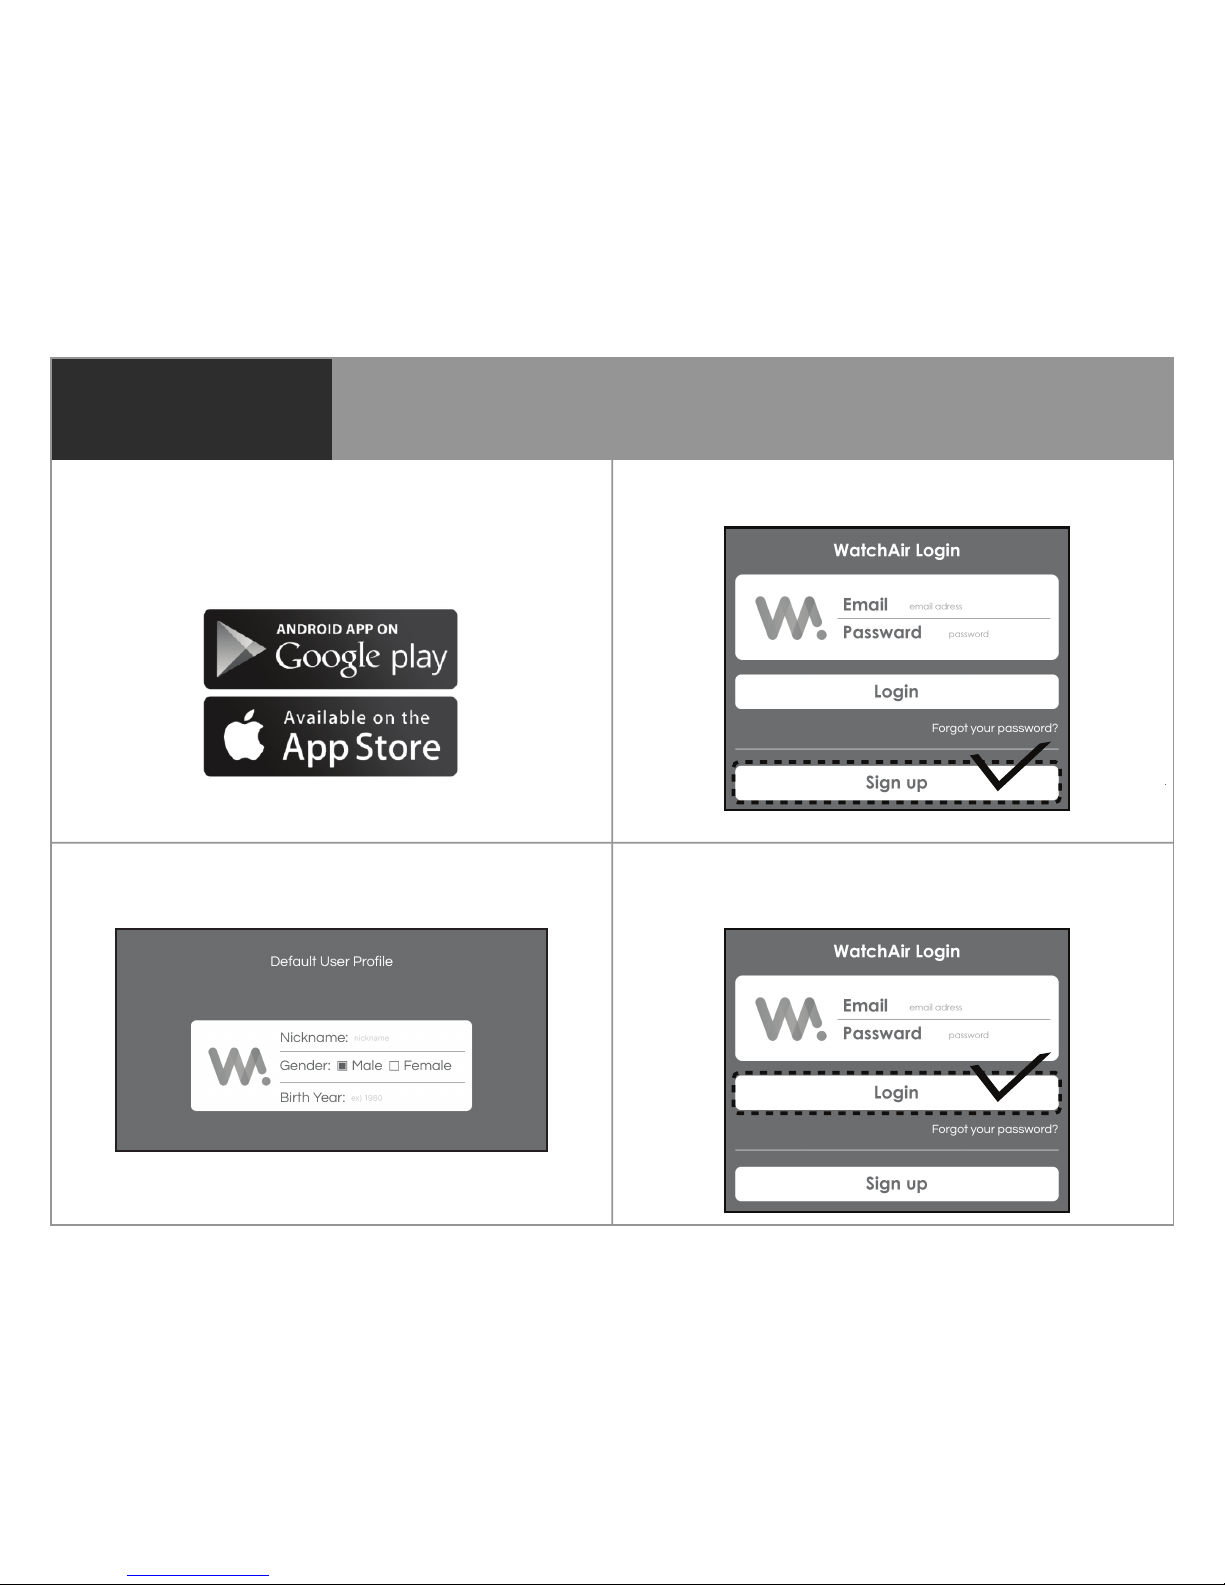
Download WatchAir App & Register
1. Please download WatchAir app on your mobile device.
Do not use WatchAir app on your streaming boxes and
smart TV’s to set up WatchAir for the rst time.
The prole is only used to serve your better. Your personal
information will not be shared with any 3rd party company.
2. Sign up : one WatchAir needs at least one account.
3. Make your prole: one account can have up to eight
proles for eight dierent users.
4. Login: once you veried your email and reset your
password, please login.
1. Sign Up

Hang WatchAir on a Window or Wall
1. Follow our GPS-based guideline.
2. Find a better or good spot using the compass
direction, as shown below.
3. Install WatchAir on the window with
double-sided tapes on the bracket.
Please remember the higher and less
metal, the better. (no windows with
mosquito netting!)
If your location is over 110F° during
the summer, please install WatchAir
on a dry wall.
4. Or install WatchAir on the dry
wall with screws through the
bracket. Please make sure the
dry wall does not have any ne
metal beams at the installation
position.
2. Installation
Beer
Beer
GoodGood
GoodGood
WorstWorst
Window 1
Window 2
Compass direcon
Now, enjoy your local live TV! This installation is an
one-time process, so you don’t have to repeat this
on the other devices. Just log in once. That’s it.
Welcome to WatchAir!
1. Channel scanning can take a few minutes.
You don’t have to scan channels again unless
you change the location of your antenna.
2. After channel scanning, WatchAir will
automatically detect and download any
additionally required software.
3. Connection
4. Channel Scanning & More 5. Done !
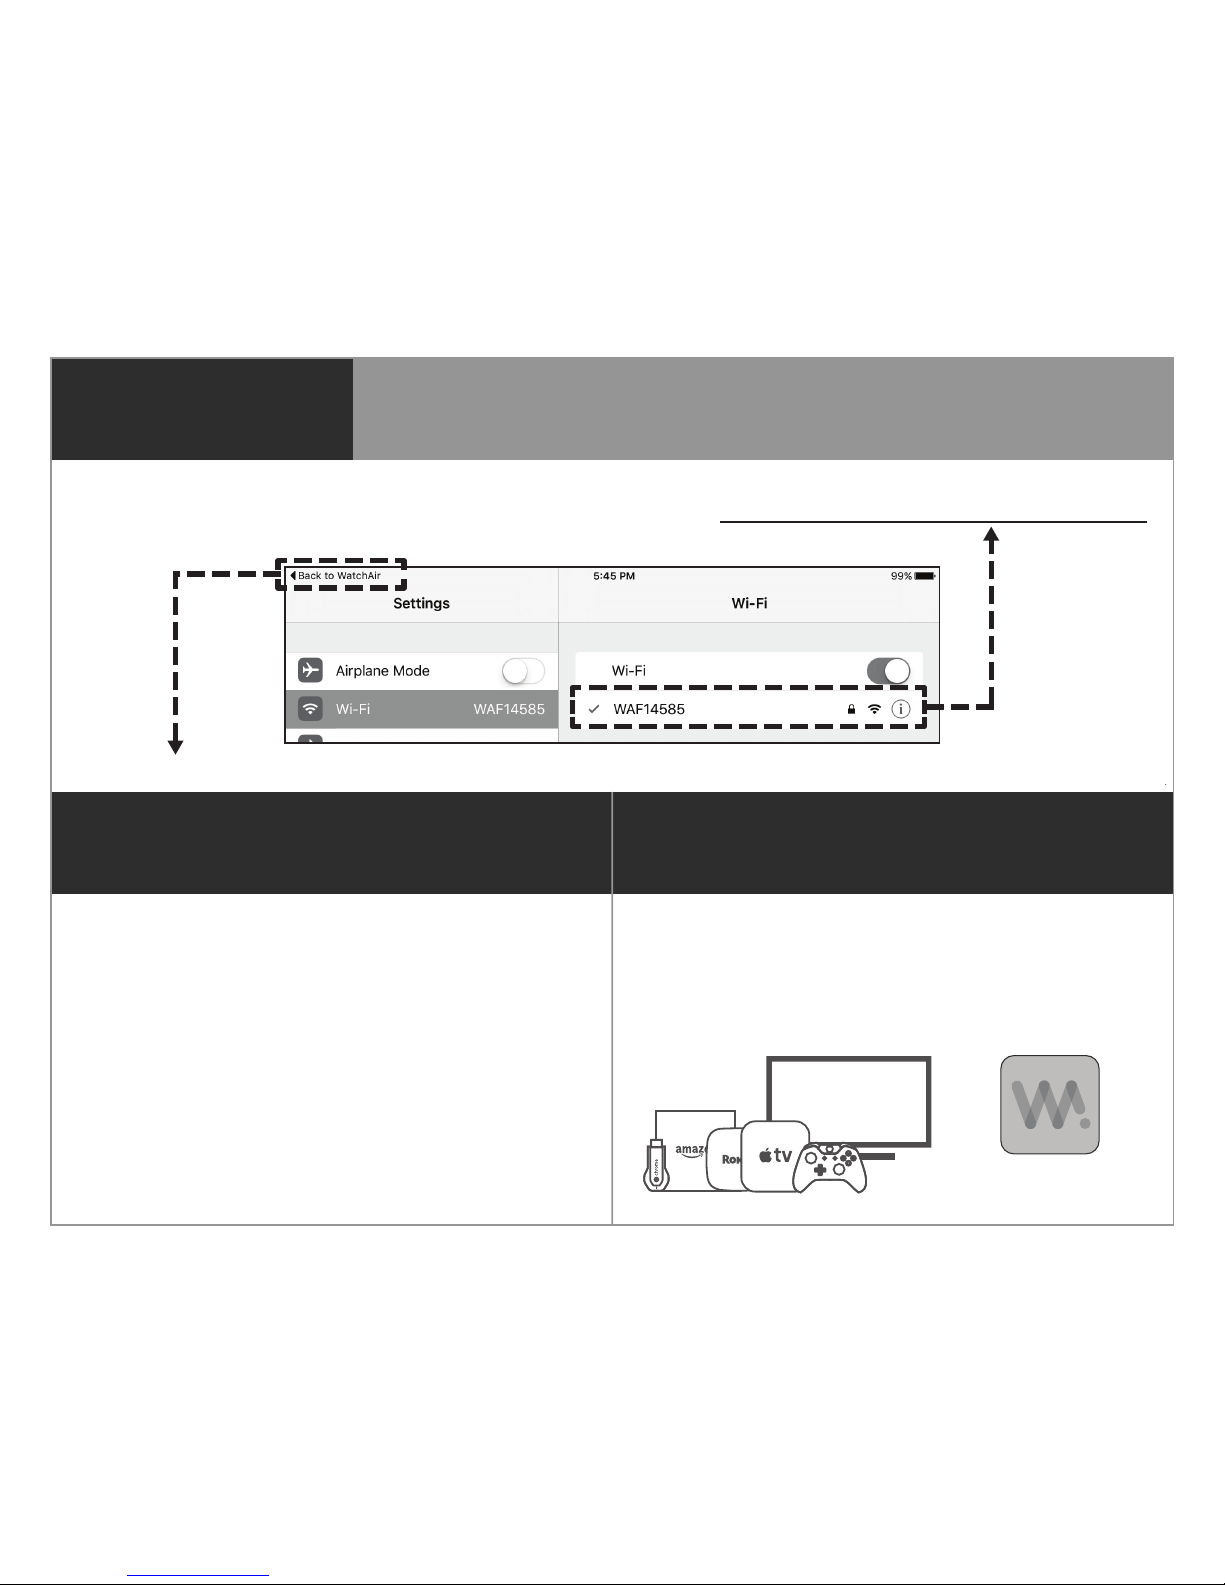
Wireless Connection Over Your WiFi Router
1. WatchAir app will take you to“Settings”, as shown below. You need to choose WatchAir SSID from your WiFi list.
Your WatchAir SSID is printed on your gift box, and it should start with “WA” with addtional six more letters or numbers.
The password is same as your WatchAir SSID.
2. Touch “Back to WatchAir” to go back to WatchAir app, and choose your own WiFi router one more time. That’s all.

WatchAir US Warranty Policy
Product Original WatchAir and other accessories packaged with product
Warranty Period 1 Year
Scope of Warranty Labor & parts
Warranty Service Carry in
※Such defect(s) will be repaired or replaced (with new or rebuilt parts) at the company’s option without charge for parts
or labor directly related to the defect(s). This Limited Warranty is conditioned upon proper use of the Products.
This Limited Warranty does not cover:
a. Defects or damage resulting from accident, misuse, abnormal use, abnormal conditions, improper storage, exposure to
liquid, moisture, dampness, sand or dirt, neglect, or unusual physical, electrical, or electromechanical stress;
b. Scratches, dents, and cosmetic damage, unless caused by WatchAir;
c. Equipment that has the serial number or the enhancement data code removed, defaced, damaged, altered, or made
illegible;
d. Ordinary wear and tear;
e. Defects or damage resulting from the use of the products in conjunction or connection with accessories, products, or
ancillary/peripheral equipment not furnished or approved by WatchAir;
f. Defects or damage resulting from improper testing, operation, maintenance, installation, service, or adjustment not
furnished or approved by WatchAir; or
g. Defects or damage resulting from external causes such as collision with an object, re, ooding, dirt, windstorm,
lightning, earthquake, exposure to weather conditions, theft, blown fuse, or improper use of any electrical source;
h. For questions regarding your product’s warranty, contact WatchAir Support at support@watchairtv.com or
via our support page at www.watchairtv.com/support. Once your warranty is veried, you will be issued a return
authorization and instruction for return shipment.
ⓒEPICT, Inc. All rights reserved. WatchAir and the WatchAir Logo are trademarks of EPICT, Inc.
Any non-EPICT trademarks are used for reference purposes only.
Table of contents


