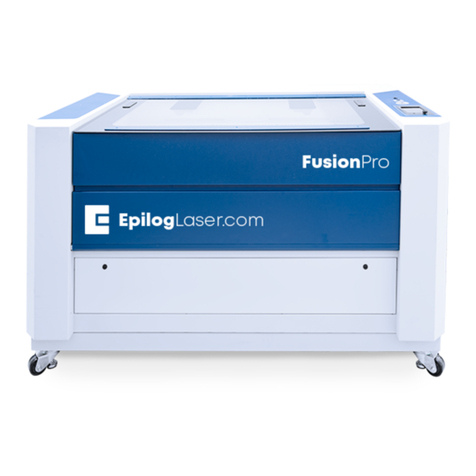
Epilog Fusion M2 32 User manual

FUSION M2 32 / 40
LASER SYSTEM MANUAL | MODEL 13000 / 14000
Technical Support: +1 (303) 215-9171
Knowledge Base: support.epiloglaser.com
System Registration: epiloglaser.com/register
Driver/Firmware: epiloglaser.com/fusion-drivers
Registeryoursystemnowfordriverupdatenotifications
and FREE files! EPILOGLASER.COM/REGISTER
UPDATED MAY 2018 | EPILOGLASER.COM/MANUALS


- i -
TABLE OF CONTENTS
Fire Warning 1
Introduction 2
How to Use This Owner’s Manual..............................................................................................................................................2
Icons Used in this Manual.........................................................................................................................................................2
Section 1: Safety 3
Laser Safety ..............................................................................................................................................................................3
Electrical Safety.........................................................................................................................................................................4
Fire Warning..............................................................................................................................................................................5
Safety Features and Regulatory Compliance .............................................................................................................................6
Do’s and Don’ts.......................................................................................................................................................................10
Section 2: Getting Started 11
1. Unpacking the Laser System...............................................................................................................................................11
2. Choose Where to Locate the System...................................................................................................................................12
3. Connecting the Exhaust.......................................................................................................................................................13
4. Connecting Electrical Power................................................................................................................................................15
5. Setting Vector Cutting Table Default....................................................................................................................................15
6. Connect the Laser to Your Computer ..................................................................................................................................15
7. Set the Fusion’s IP Address.................................................................................................................................................16
9. Sign Up for Driver Updates and Register Your System .......................................................................................................18
Section 3: Driver Installation 19
Windows 7: Ethernet Installation.............................................................................................................................................19
Windows 7: USB Installation...................................................................................................................................................22
Windows 8 and 10: Ethernet Installation.................................................................................................................................25
Windows 8 and 10: USB Installation .......................................................................................................................................28
Setting Up CorelDRAW Beziers Setting ...................................................................................................................................31
Mac Driver Installation ............................................................................................................................................................32
Section 4: The Epilog Job Manager 37
Epilog Job Manager Instructions.............................................................................................................................................37
How to Install the Epilog Job Manager....................................................................................................................................37
Trouble Shooting Job Manager Installation.............................................................................................................................39
Important Epilog Job Manager Notes......................................................................................................................................40
Using the Epilog Job Manager ................................................................................................................................................40
Section 5: Using The Laser Dashboard™ 49
Changing Laser Dashboard Defaults .......................................................................................................................................49
General Tab .............................................................................................................................................................................50
Advanced Tab..........................................................................................................................................................................54
Color Mapping Tab..................................................................................................................................................................56
Additional CorelDRAW Laser Dashboard Features ..................................................................................................................57
Section 6: Using The Epilog Mac Driver 59
Mac Driver Settings.................................................................................................................................................................59
Project Setup...........................................................................................................................................................................62
Vector Cutting Lines................................................................................................................................................................63
Section 7: Fusion Control Panel 65
Display ....................................................................................................................................................................................65

- ii -
TABLE OF CONTENTS
Joystick...................................................................................................................................................................................74
Job Storage: Temporary Memory............................................................................................................................................75
Section 8: Quick Start Guide 77
Artwork Setup .........................................................................................................................................................................77
Setting a Vector Cutting Line...................................................................................................................................................78
Resolution...............................................................................................................................................................................79
Piece and Page Size ................................................................................................................................................................83
Section 9: Cleaning & Maintenance 85
Reduce Fire Risk with a Clean Laser........................................................................................................................................85
Cleaning the Optics .................................................................................................................................................................85
Cleaning and Lubricating the Bearing Rails.............................................................................................................................87
Cleaning the Exhaust Plenum..................................................................................................................................................88
Laser Tube...............................................................................................................................................................................91
Laser Tube Air Filter ................................................................................................................................................................91
Section 10: System Features 93
Air Assist.................................................................................................................................................................................93
Auto Focus vs. Manual Focus..................................................................................................................................................93
Crash Bar ................................................................................................................................................................................95
Image Dithering.......................................................................................................................................................................96
Color Mapping.........................................................................................................................................................................97
Reset Home Position.............................................................................................................................................................104
Red Dot Pointer.....................................................................................................................................................................104
Movable Home Position ........................................................................................................................................................105
Center Engraving...................................................................................................................................................................106
Emergency Stop Button ........................................................................................................................................................108
Front Access Door.................................................................................................................................................................109
Task Plate/Vacuum Hold-Down Table ....................................................................................................................................109
Exhaust Plenum ....................................................................................................................................................................110
Safety Interlock / Laser Status Indicators..............................................................................................................................111
Rulers..........................................................................................................................................................................................
Section 11: Optional Features 113
Vector Cutting Table/Vacuum Hold-Down Table ....................................................................................................................113
Pin Table ...............................................................................................................................................................................114
Fusion Rim-Drive Rotary Attachment....................................................................................................................................117
3-Jaw Chuck Rotary Attachment ..........................................................................................................................................125
eView Camera Module...........................................................................................................................................................135
Dual Source Option ...............................................................................................................................................................146
PhotoLaser Plus....................................................................................................................................................................148
Section 12: Upgrading the Operational Firmware 155
How to Upgrade Your Firmware ............................................................................................................................................155
Section 13: Printing From AutoCAD 159
How to Print from AutoCAD to the Laser...............................................................................................................................159
Section 14: Material Engraving Techniques 161
CO2 Laser Materials/Techniques ..........................................................................................................................................161
3D Engraving.....................................................................................................................................................................161

- iii -
TABLE OF CONTENTS
Acrylic ...............................................................................................................................................................................162
Anodized Aluminum ..........................................................................................................................................................163
Brass - Painted ..................................................................................................................................................................164
Glass .................................................................................................................................................................................165
Notary Seals: Delrin...........................................................................................................................................................166
Plastic Engraving/Cutting ..................................................................................................................................................167
Rubber Stamps..................................................................................................................................................................168
Wood.................................................................................................................................................................................172
Fiber Laser Materials/Techniques..........................................................................................................................................175
Metal Annealing.................................................................................................................................................................175
Metal Etching ....................................................................................................................................................................175
Metal Polishing..................................................................................................................................................................176
Plastic Marking .................................................................................................................................................................176
Section 15: Specifications 179
Fusion Laser Technical Specifications...................................................................................................................................179
Compatibility .........................................................................................................................................................................180
Recommended PC.................................................................................................................................................................180
About The CO2 Laser Source ................................................................................................................................................181
About the Fiber Laser Source................................................................................................................................................182
Federal Communications Commission (FCC) Notice .............................................................................................................182
Section 16: Technical Support 183
Contacting Technical Support................................................................................................................................................183
Frequently Asked Questions .................................................................................................................................................184
Section 17: Material Suppliers 187
Industry Material Supplier List ..............................................................................................................................................187
Appendix A: Warranty Statement 191
Warranty Statement for the Fusion Laser..............................................................................................................................191
Appendix B: Material Settings 193
Fusion Series Suggested Material Settings (CO2).................................................................................................................193
Fusion Series Suggested Material Settings (Fiber)................................................................................................................196
Index 199

- iv -

- 1 -
Fire Warning
Your laser system uses a high intensity beam of light that can generate extremely high temperatures when
it comes into contact with the material being engraved, marked or cut. Some materials are extremely
flammable and can easily ignite and burst into open flame setting the machine afire. This open flame is very dangerous
and has the potential to destroy not only the machine, but the building in which it is housed.
Experience shows that vector cutting with the laser has the most potential to create an open flame. Many materials are
susceptible to igniting, but acrylic, in all its different forms, has been shown to be especially flammable when vector
cutting with the laser.
Please read the following warnings and recommendations and follow them closely at all times!
• Stay with the laser. Never operate the laser system while unattended.
• Keep the area clear. Clean around the machine and keep the area free of clutter, combustible materials, explosives,
or volatile solvents such as acetone, alcohol, or gasoline.
• Be prepared with a fire extinguisher. Always keep a properly maintained and inspected fire extinguisher on hand.
Epilog recommends a Halotron fire extinguisher or a multi-purpose dry chemical fire extinguisher. The Halotron
extinguishers are more expensive than a dry chemical, but offer certain advantages should you ever need to use an
extinguisher. The Halotron extinguisher discharges a clean, easily removable substance that is not harmful to the
mechanics or wiring of the laser system. The dry chemical extinguisher discharges a sticky, corrosive powder that is
very difficult to clean up.
• Use Air Assist. Always use the system’s Air Assist feature when vector cutting.
• Use caution when vector cutting. Many materials have the potential to suddenly burst into flames when cut with a
laser – even materials that may be very familiar to the user. Always monitor the machine when it is operating.
• Clean the laser. A buildup of cutting and engraving residue and debris is dangerous and can create a fire hazard in
its own right. Keep your laser system clean and free of debris. Regularly remove the Vector Cutting Table to clean
any small pieces that have fallen through the grid.
FIRE WARNING

- 2 -
How to Use This Owner’s Manual
How to Use This Owner’s Manual
Thank you for purchasing an Epilog Fusion Laser system. Your Epilog system has been designed to be easy to operate,
but you will utilize it to its fullest potential by taking some time to read this owner’s manual prior to use. You will be ready
to use the Epilog Laser system as soon as you read the first few sections. Then you can refer to topics in the remaining
sections, as you work.
Icons Used in this Manual
Look for these symbols to help you find valuable information throughout the text:
Helpful notes to keep in mind when running the laser!
This icon signifies advice you can try that will save you significant time.
This icon highlights current contact information for receiving help.
Warnings and cautions to keep in mind when running the laser.
This icon indicates the potential for fire damage when operating the laser.
INTRODUCTION

- 3 -
Laser Safety
Laser Safety
The Epilog Model 13000/14000 Laser System is a Class 2 laser product, as defined in International Standard IEC 60825-1.
The Epilog Model 13000/14000 complies with 21 CFR 1040.10 and 1040.11, the Federal Performance Standards for Light-
Emitting Products, except for deviations pursuant to Laser Notice No. 50, dated July 16, 2001. The Center for Devices and
Radiological Health, of the US FDA, issued Laser Notice No. 50 to permit manufacturers to classify and manufacture their
products in accordance with the International Standard.
The output of the embedded laser is fully contained. The laser cabinet has safety interlocks that turn the laser off if any
access door is opened during operation, and no special precautions are necessary to operate the laser safely. Access
doors are interlocked and can be opened without the use of a tool. Any interlocked door that is opened while the machine
is operating will immediately stop the laser from firing.
Access panels are not interlocked and require a tool for opening or removal. Access panels should always be installed
when the laser is operating. Never operate the laser system with an access panel removed.
The visible output beam of the Laser Diode Pointer (Red Dot Pointer) is accessible to the operator. While this device
employs the same technology as the familiar laser pen-pointers, like them it is potentially hazardous if its beam is directed
into the eye.
We have made every effort to make the Laser Diode Pointer (Red Dot Pointer) as safe as possible. Its beam path is located
well inside the cabinet, and under normal conditions, no hazardous levels of laser radiation can escape.
The operator of the Epilog Model 13000/14000 should observe the following general precautions:
• DO NOT disassemble the machine or remove any of its protective covers while the unit is plugged in.
• DO NOT attempt to defeat the door interlocks.
• DO NOT view directly into the beam of the Laser Diode Pointer (Red Dot Pointer).
• DO NOT operate the Laser Diode Pointer (Red Dot Pointer) without the machine’s focus lens in place. If the
unfocused beam strikes a reflective surface, it could be directed out of the cabinet.
• Caution – Use of controls or adjustments or performance of procedures other than those specified herein may
result in hazardous radiation exposure.
SECTION 1: SAFETY

- 4 -
SECTION 1: SAFETY
Electrical Safety
The standard reference for laser safety is the American Standard for the Safe Use of Lasers, Z136.1-2000, developed
by the American National Standards Institute (ANSI). This reference is the basis for many of the federal regulations for
laser and laser system manufacturers, and for the Occupational Safety and Health Administration (OSHA) laser safety
guidelines. It contains detailed information concerning proper installation and use of laser systems.
While the ANSI standard itself does not have the force of law, its recommendations, including warning signage, training,
and the designation of a laser safety officer, may be compulsory under local workplace regulations when operating laser
systems above Class I. It is the operator’s responsibility to ensure that the installation and operation of the Epilog Model
13000/14000 Laser System is performed in accordance with all applicable laws.
Copies of ANSI Standard Z136.1-2000 are available from Epilog Corporation or from:
Laser Institute of America
12424 Research Parkway, Suite 125
Orlando, FL 32826
(407) 380-1553
Electrical Safety
The AC input power to the Epilog Model 13000/14000 Laser System is potentially lethal and is fully contained within the
cabinet.
• DO NOT open any of the machine’s access panels while the unit is plugged in. Opening a panel
may expose the operator to the unit’s AC input power.
• DO NOT make or break any electrical connections to the system while the unit is turned on.

- 5 -
SECTION 1: SAFETY
Fire Warning
Fire Warning
Didn’t you see this already? Yes! That’s how important we think it is for you to read this information.
Your laser system uses a high intensity beam of light that can generate extremely high temperatures when it comes into
contact with the material being engraved, marked or cut. Some materials are extremely flammable and can easily ignite
and burst into open flame setting the machine afire. This open flame is very dangerous and has the potential to destroy
not only the machine, but the building in which it is housed.
Experience shows that vector cutting with the laser has the most potential to create an open flame. Many materials are
susceptible to igniting, but acrylic, in all its different forms, has been shown to be especially flammable when vector
cutting with the laser.
Please read the following warnings and recommendations and follow them closely at all times!
• Stay with the laser. Never operate the laser system while unattended.
• Keep the area clear. Clean around the machine and keep the area free of clutter, combustible materials, explosives,
or volatile solvents such as acetone, alcohol, or gasoline.
• Be prepared with a fire extinguisher. Always keep a properly maintained and inspected fire extinguisher on hand.
Epilog recommends a Halotron fire extinguisher or a multi-purpose dry chemical fire extinguisher. The Halotron
extinguishers are more expensive than a dry chemical, but offer certain advantages should you ever need to use an
extinguisher. The Halotron extinguisher discharges a clean, easily removable substance that is not harmful to the
mechanics or wiring of the laser system. The dry chemical extinguisher discharges a sticky, corrosive powder that is
very difficult to clean up.
• Use Air Assist. Always use the system’s Air Assist feature when vector cutting.
• Use caution when vector cutting. Many materials have the potential to suddenly burst into flames when cut with a
laser – even materials that may be very familiar to the user. Always monitor the machine when it is operating.
• Clean the laser. A buildup of cutting and engraving residue and debris is dangerous and can create a fire hazard in
its own right. Keep your laser system clean and free of debris. Regularly remove the Vector Cutting Table to clean
any small pieces that have fallen through the grid.

- 6 -
SECTION 1: SAFETY
Safety Features and Regulatory Compliance
Safety Features and Regulatory Compliance
Epilog has incorporated specific safety features into the Model 13000/14000 Laser System in order to meet the requirements
of 21 CFR 1040 and the International Standard IEC 60825-1. These safety features include:
• A safety enclosure (cabinet), which fully encloses the engraving laser and its beam path.
• Dual redundant interlock systems that turn off the engraving laser when the window is opened.
• A visible emission indication when the Laser Diode Pointer (Red Dot Pointer) is operating. There is an LED indicator
on the machine’s front panel.
21 CFR 1040 and IEC 60825-1 require that certification, identification, and warning labels be placed on laser products.
Reproductions of labels on the Epilog Model 13000/14000 Laser System follow, with their locations specified:
1. Certification/Identification Plate: This engraved plate is located on the left rear of the machine’s cabinet.
2. Warning Logotype: This label is located on the left rear of the machine’s cabinet, above the Certification/
Identification plate.
Patents
Pending Made in
USA
Epilog Corporation
16371 Table Mountain Pkwy.
Golden, CO 80403 USA
Model Number: 14000 Laser System
Serial Number: 14060- 1512383220
Date of Manufacture: May, 2015
Class 2 Laser Product
This product complies with 21 CFR 1040.10 and
1040.11 except for deviations pursuant to Laser
Notice No. 50, dated July 26, 2001.
This product complies with IEC 60825-1: 2007.
Mass:
35 kg max
cameo Laser Franz Hagemann Gmbh
Stuhrbaum14
28816 Stuhr
Deutschland
Tel: 0421 80 95 60-0
Fax: 0421 80 95 60-25
E-Mail: info@cameolaser.de
Authorized Representative:

- 7 -
SECTION 1: SAFETY
Safety Features and Regulatory Compliance
3. Descriptive Label: This label identifies the classification of the Model
13000/14000 in accordance with 21 CFR 1040.10 and IEC 60825-1. It
is located on the left rear of the machine’s cabinet, below the Warning
Logotype.
4. Non-interlocked Protective Housing Safety Labels: These labels are located
on, or adjacent to, removable access covers on the machine’s cabinet as
shown in the diagrams to follow. Where a label is located on a removable
cover, there is an additional label under the cover so that it will be visible
when the cover has been removed.
5. Defeatably-interlocked Protective Housing Safety Labels: There is one label
on each of the machine’s cabinet doors; one on the front door and one on the
top door.
6. Emergency Stop Label: This label is located above the red Emergency Stop
switch on the right front of the
machine’s cabinet.
7. Electrical Safety Label: This label is
located on the power supply module,
inside the bay at the lower right-
hand side of the machine.
8. Main Breaker Label: This label
is located on or below the power
module panel at the left rear of the
machine’s cabinet.
9. Air Assist Label: This label is located
on the laser bay cover, at the left rear
of the machine’s cabinet.
10. Aperture Safety Label: This label is
located above the aperture, inside
the cabinet, where laser beams enter
the machine’s engraving area.
11. Power Labels: The appropriate label
for the machine is located on or
above the power module panel at the
left rear of the machine’s cabinet.
12. Fire Warning Label: There are
two labels on top of the machine’s
cabinet; one to the left and one to the
right of the top cabinet door.
11
10
9
7
8
6
4
5
3
12

- 8 -
SECTION 1: SAFETY
Safety Features and Regulatory Compliance
The following diagrams show the location of each specific label.

- 9 -
SECTION 1: SAFETY
Safety Features and Regulatory Compliance

- 10 -
SECTION 1: SAFETY
Do’s and Don’ts
Do’s and Don’ts
Don’ts
Do Not Run the Laser Unvented: Never operate the machine without a properly operating vent to the outside or to a
filtration unit! Most material will only produce an irritating smoke when engraved. Some materials, including but not
limited to paint, varnish, composition board and plastics, produce compounds that can be harmful if concentrated. A
properly installed vent is the only way to ensure that problems do not occur.
Do Not Engrave or Cut PVC: Never engrave or cut any material containing PVC or vinyl. When engraved, a corrosive agent
is produced that will destroy your machine. Your warranty will be void if your machine is damaged by corrosion from
engraving or cutting PVC or Vinyl.
Do Not Operate Machine While Unattended: Never operate your machine without someone watching the system. There
is a significant risk of fire if the machine is set improperly, or if the machine should experience a mechanical or electrical
failure while operating.
Do Not Vector Cut While Machine is Unattended: Never laser cut any material with the laser without someone watching
the system. Because vector cutting moves relatively slowly compared to raster engraving, a tremendous amount of heat
is applied to the material being cut. This buildup of heat can cause significant fire risk and the machine should always be
monitored. Additionally, the Air Assist should always be turned on when vector cutting to reduce the risk of fire.
Do Not Operate The System While Doors are Open: Never operate with any of the covers or enclosures removed, and
never modify the enclosure. The laser beam is invisible and is very dangerous!
Do’s
Clean the System: Please allow a few minutes a week for cleaning your machine. Just a small amount of
effort at the end of the week will pay off with years of trouble free operation of your machine.
See the “Section : Cleaning & Maintenance” on page 85 for specifics.

- 11 -
1. Unpacking the Laser System
Setting up your Epilog Laser System is easy to do! If you’ve ever installed a paper printer, this is only slightly more difficult.
The following information will help you understand the entire system and how it works.
Your Fusion laser system consists of the following components:
1. Fusion Laser System
2. Epilog Driver Disc
3. USB and Ethernet Cables
4. A Preprogrammed Router (eView Camera Module only)
You will also need:
1. A computer or laptop.
2. An exhaust fan: The exhaust fan is mandatory and is used to remove smoke and debris from the Fusion work area.
The exhaust air can be ported to the outside or into a filter box.
Follow these steps to setup your Fusion Laser system:
1. Unpack the laser system.
2. Choose where to locate the system.
3. Connect the exhaust system to your laser.
4. Connect the electrical power.
5. Connect the laser to your computer through USB or Ethernet.
6. Sign up for driver update and register your system at www.epiloglaser.com/register.
1. Unpacking the Laser System
Unpack the laser system from the crate provided by Epilog. Please be sure to hold on to all packing
materials and crating in case you need to move the system in the future.
SECTION 2: GETTING STARTED

- 12 -
SECTION 2: GETTING STARTED
2. Choose Where to Locate the System
2. Choose Where to Locate the System
Cooling Requirements and Operating Temperatures
All Epilog Laser systems use air-cooled laser tubes. Laser technology is such that the laser tubes generate a lot of excess
heat and the tubes must be cooled for proper operation. There are cooling fans located at the back of the laser. The fans
and vents should always be clear of restrictions and should never be covered.
Warning: The cooling fans and vents are located at the back of the Fusion and should never be covered
or blocked in any way. Lasers that overheat will not operate properly and may begin to produce erratic
laser output or possibly complete failure.
Ambient air temperature where the laser system is operating should not exceed 90 degrees F (32 C). Operating in an
environment where the ambient air temperature is above 90 degrees F (32 C) will void the Epilog warranty.
Cooling Fans
Laser Tube Air Filter is a standard 12” x 20”
x 1” (304 x 762 x 25 mm) furnace filter and
can be found at any home store. This is more
likely to need to be changed in a dustier shop
environment.

- 13 -
SECTION 2: GETTING STARTED
3. Connecting the Exhaust
3. Connecting the Exhaust
In this manual, the term “exhaust” refers to either an exhaust fan or a filter unit and the term “exhaust” is used for
simplicity. The important point is that it is mandatory that an exhaust unit or filter system is incorporated as part of your
laser system. Never operate your laser system without a properly functioning exhaust. The exhaust removes the dust,
debris and smell from the engraving cavity and exhausts it to the outside of the building or to the filter unit. Prior to the
installation of the laser system, you may need a contractor to install the exhaust system. The blower should be mounted
outside your building for noise considerations. Ideally, the blower should not be more than twenty feet (6 meters) from the
laser. You should provide a metal duct (flexible aluminum or galvanized sheet metal) from the blower to the laser. All Epilog
model 13000/14000 laser systems require an exhaust fan that is rated at a minimum of 650 CFM for external exhaust.
Epilog provides recommended exhaust flow rates (CFM) only for direct ventilation exhaust systems that are ported to the
outside. Please note that this is also a recommendation and not a requirement because factors such as length and type
of tubing from the Epilog laser to the exhaust fan and from the exhaust fan to the outside of the building can produce
significant losses on the true amount of air that is drawn from the Epilog laser.
Exhaust flow rates (CFM) for filter systems are not specified in this document. However, exhaust flow rates for filtration
units will be lower than a direct ventilation exhaust systems because filters are designed to be placed directly adjacent to
the laser system and do not exhibit the air-flow losses that are typically found with direct exhaust fans. Epilog has worked
with most major filter manufacturers to recommend a specific filter system for each model of Epilog laser. Please contact
your Epilog distributor to match a filter to the Epilog laser system you are using.
Note: Remember to put the blower switch for the laser system in an obvious and accessible place so it can
be routinely switched on prior to using the engraver. Please connect the exhaust blower to the laser as
shown below and on the following
pages.
Remember, you may need a contractor to install the
exhaust. This must be done PRIOR to installation of
the laser system.
Warning: It’s important that either rigid
or flexible metal ducting be used for all
connections leading to and from the
laser system and the exhaust fan. Vinyl, plastic, or
any type of “soft” ducting is potentially flammable
and should not be used unless provided by the
filtration system manufacturer and made from fire-
proof materials.

- 14 -
SECTION 2: GETTING STARTED
3. Connecting the Exhaust
Epilog Exhaust/Filter Connections
There are two 4” (102 mm) ports attached to the back of the laser system. Attach your ducting to the machine as shown
in the diagram.
Check your exhaust system for leaks. Most small leaks can be remedied with duct tape. DO NOT OPERATE
your laser with inadequate or leaking exhaust.
Roof or Exterior Wall
4” (102 mm) flexible
aluminum duct or
rigid galvanized sheet
metal (do not use
vinyl, plastic or “soft”
flexible duct). Exhaust Blower
Roof or Exterior Wall
Exhaust Blower
4” (102 mm) flexible aluminum
duct or rigid galvanized sheet
metal (do not use vinyl, plastic or
“soft” flexible duct).
This manual suits for next models
3
Table of contents
Other Epilog Printer manuals

