Epiqur EpiqurGear User manual

Welcome to Epiqur user manual.
1

Introduction to EPIQUR Gear
Installation of Gear
Connecting Gear to WiFi
Activation of Gear
Create an Event/Broadcast Page
Streaming via Epiqur Gear
Offline Records
Gear Share
CONTENTS
2
Setup of Audio Stream
Setup of Video Stream (Optional)
Video Streaming via Smartphones
Video Streaming via Encoder
Go Live
11
14
29
37
40 Multi Camera Angle Setup
14
Start Offline Record
29
Stop Offline Record
32
Upload an Offline Record
34
19
26
19
23

3
EpiqurGear allows you to capture the audio directly
from the source (sound mixers etc.). By using the device,
you can stream or record the audio.
What is Epiqur-Gear?
INTRODUCTION TO EPIQUR GEAR
*Outputs are not available for now.
Micro USB Power Adapter Input
Left Audio Input
Right Audio Input
LED Screen
Ventilation Area

4
INSTALLATION OF GEAR
Step 1: Connect the Micro USB Power Adapter to the
‘Micro USB Power Adapter Input’.
Step 2: Connect the left and right audio input cables
to capture audio from audio source.
Then, the LED screen will be seen.

5
Step 1: If there is no Epiqur Gear device that is
connected before, click “Register Your EpiqurGear”
button. If there is, click “Control Room” under Manage
tab to open device control panel.
If you have an Ethernet cable with Internet connection,
you can directly plug it into your Epiqur Gear to connect
Internet. Alternatively, you can connect it to WiFi as
described in this section.
CONNECTING GEAR TO WI-FI

6
Step 3: Click “Connect” to connect to your device.
Then the device online status will be seen.
Then the devices around will be listed.
CONNECTING GEAR TO WI-FI
Connect
Step 2: Use “Scan Devices” button to scan and list
all devices around you. Please make sure that your
Bluetooth is activated before scanning.

7
Step 4: Click “Manage” to see the action menu and
detailed information in the device
Step 5: Click the ‘Wi-fi’ button to connect the device
to a Wi-Fi network. If the network requires a password,
you will need to enter it.
CONNECTING GEAR TO WI-FI
Manage >

Offline Records
Gear Share
8
Step 6: If the network requires a password, you will
need to enter it.
Once you are connected, you will see the check mark
next to the Wifi in the list.
CONNECTING GEAR TO WI-FI

9
ACTIVATION OF GEAR
Step 1: As described in Connecting Wi-Fi, connect to
the device and open the action menu. Then, click to
“Activate Device”.
10
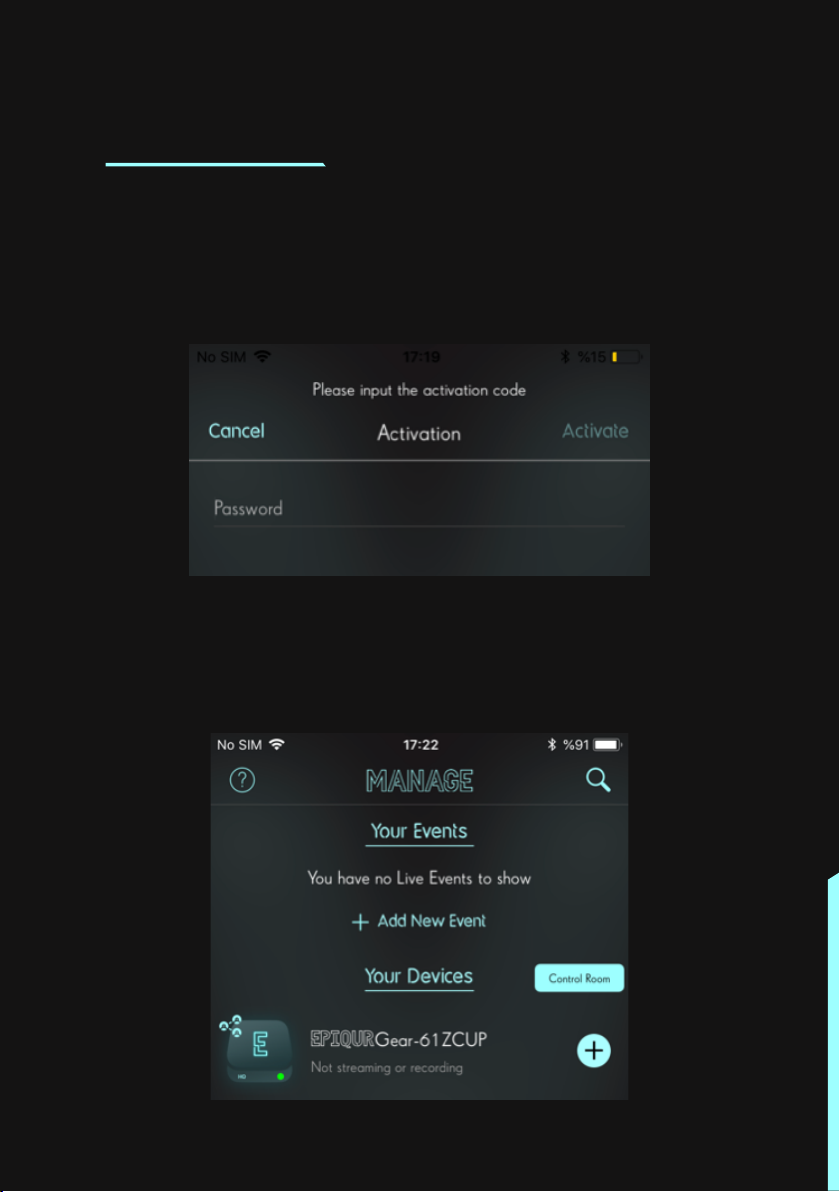
ACTIVATION OF GEAR
Step 2: Enter the code given together with your
Epiqur Gear. Then your device should successfully be
activated.
After the activation, you will see your Epiqur Gear in
the Manage tab, under “Your Devices”.

11
CREATE AN EVENT/BROADCAST
PAGE
Step 1: Click “Add New Event” under Manage tab to
open device control panel.
Add New Event
12
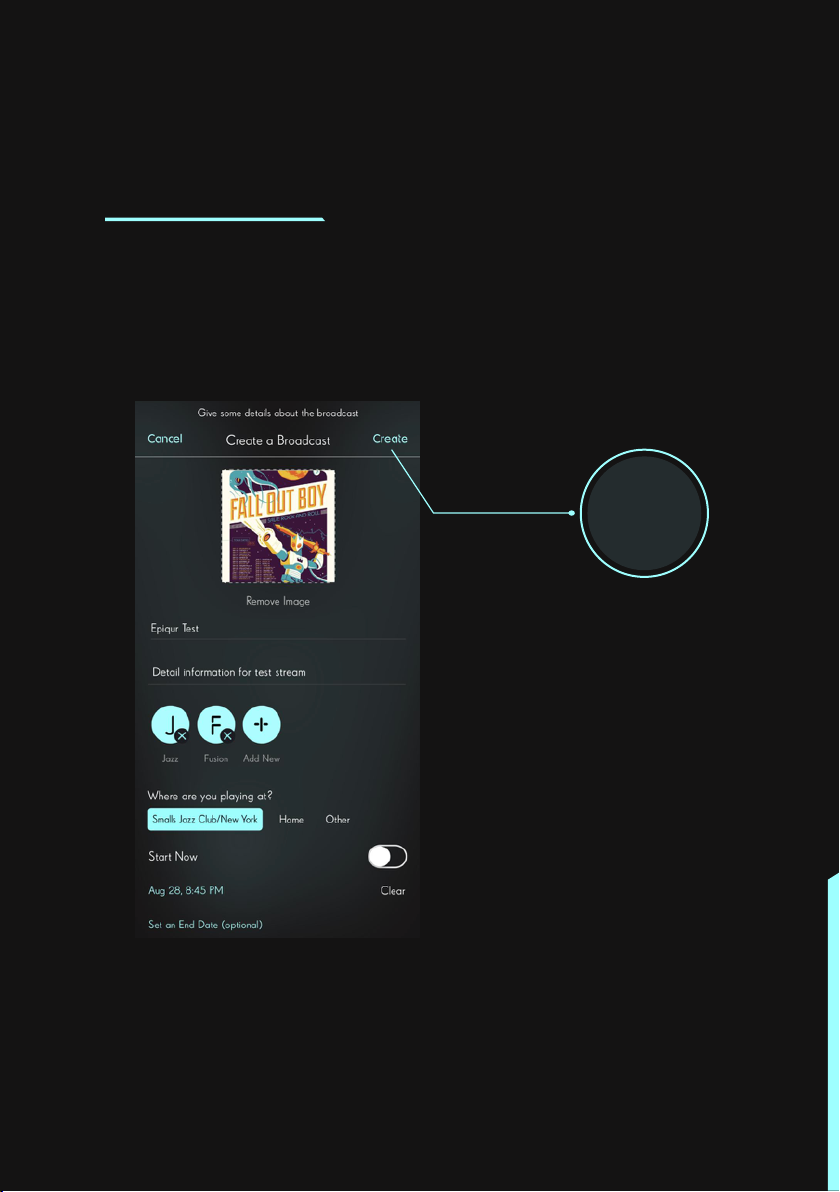
CREATE AN EVENT/BROADCAST
PAGE
Step 2: Add an Event Poster, Name & Description,
pick Genre, Location and Time information. Then click
‘Create’ to generate the dedicated event page.
Create
After creation of the event, the event will be seen
in the “Manage” page.
13
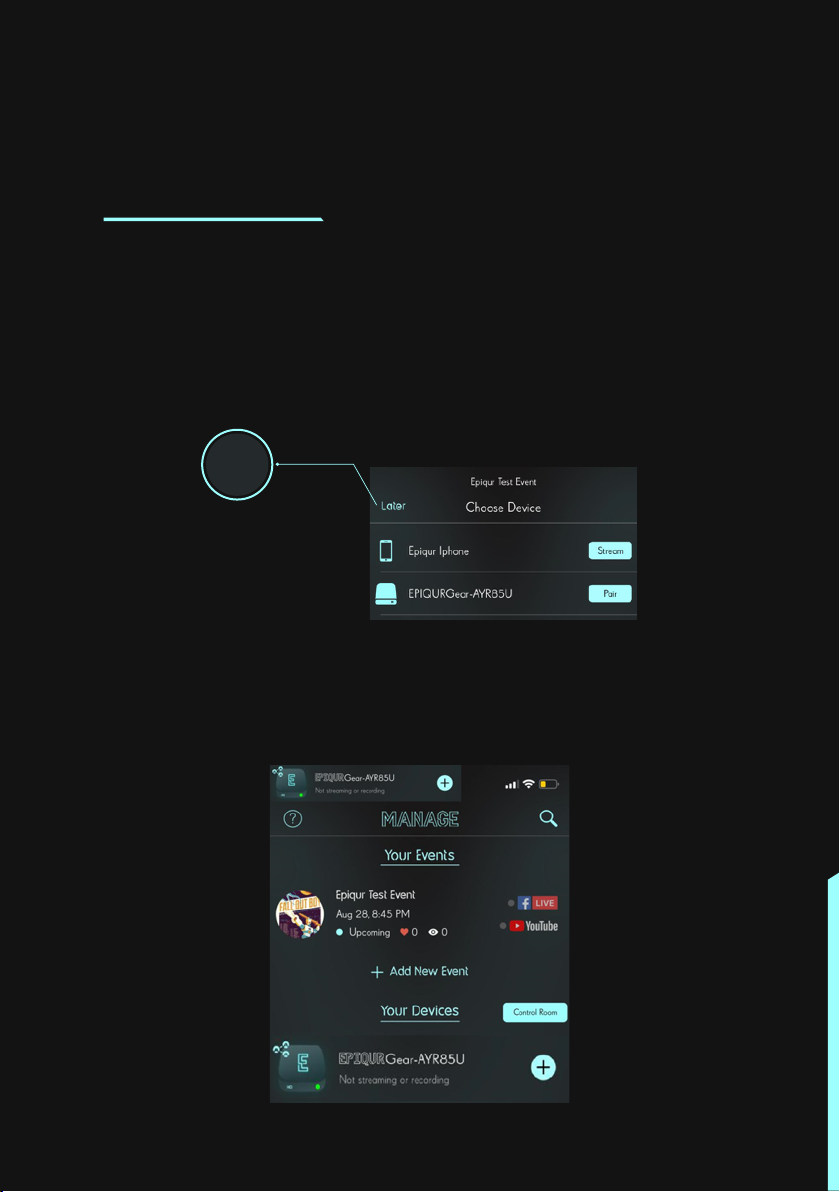
CREATE AN EVENT/BROADCAST
PAGE
Later
Step 3: If you wish to broadcast later, click “Later”
to proceed. Otherwise follow the instructions in the
next sessions to start an audio-only or audiovisual
live broadcast.

14
Step 1: Click on your Event name on “Manage” page
and open the “Event Action Menu” as shown.
STREAMING VIA EPIQUR GEAR
Setup of Audio Stream
Step 2: Click on “Start Streaming to Your Event” and
click “Pair” button next to your Epiqur Gear to start
streaming audio.

15
STREAMING VIA EPIQUR GEAR
Pair

16
Step 3: Configure the Stream.
Audio Bitrate: Select quality of audio stream.
Record Audio/Video: If selected, the stream stays online
as an on-demand video on EPIQUR platform after the
live broadcast. Otherwise it will not be available after
the broadcast.
Offline Record: If selected, the audio will be saved in
the device memory in WAV format and it can later be
downloaded. Especially useful when there is no Internet
connection in order to save the sound in high quality.
Stream to Facebook/YouTube: If selected, a live stream
on these platforms will be started automatically. Please
note that it does not work for audio only streams, it is
only valid for audiovisual streams.
STREAMING VIA EPIQUR GEAR

17
After configuring the stream, click “Start” to initiate the
Preview mode. Then the status of the stream will change
into “Preview” and the streaming status of the device will
be “Streaming”. Besides “Preview” will be written on the
LED screen of your gear.
STREAMING VIA EPIQUR GEAR

18
Then the status of the stream will change into “Preview”
and the Gear status will change into “Streaming”.
After starting the audio setup, you can either add a
video by following “Setup of Video Stream” section
or directly go live audio only by following “Go Live”
section.
STREAMING VIA EPIQUR GEAR

19
Step 1: Click on the event again to open the
“Event Action Menu” as shown. Then click “Stream Video”
in order to use your smartphone as a camera.
Setup of Video Stream(Optional)
Video Streaming via Smartphones
STREAMING VIA EPIQUR GEAR

20
Step 2: Then select “Stream video using your phone”
in order to use your smartphone as a camera.
Step 3: The video is configured on this page. Then
click the blue button below to start the preview of
the stream.
STREAMING VIA EPIQUR GEAR
Table of contents


