manuals.online logo
Brands
  1. Home
  2. •
  3. Brands
  4. •
  5. Epson
  6. •
  7. Projector
  8. •
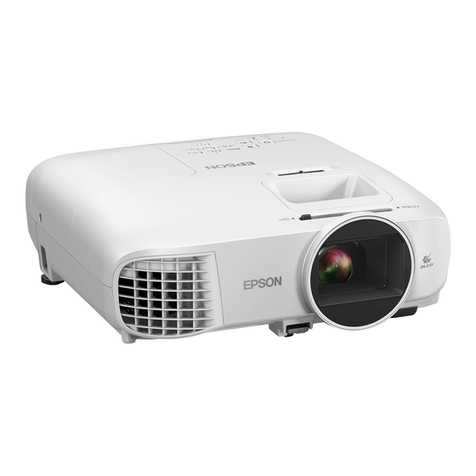
  9. Epson EH-TW5800 User manual

Epson EH-TW5800 User manual

User's Guide
Organization of the Guide and Notations in the Guide
1
Using Each Guide
The guides for this projector are organized as shown below.
Safety Instructions
Contains information on using the projector safely, as well as a support and service guide,
troubleshooting check lists, and so on. Make sure you read this guide before using the pro-
jector.
User's Guide (this guide)
Contains information on setting up and basic operations before using the projector, using
the Configuration menu, and handling problems and performing routine maintenance.
Quick Start Guide
Contains information on the procedures for setting up the projector. Read this first.
Organization of the Guide and Notations in the Guide
2
Notations Used in This Guide
Safety Indications
The documentation and the projector use graphical symbols to show how to use the projector safely and
avoid injury to persons or property.
The following shows the symbols and their meanings. Make sure that you understand these caution symbols
before reading this guide.
Warning
This symbol indicates information that, if ignored, could possibly result in personal injury or even death
due to incorrect handling.
Caution
This symbol indicates information that, if ignored, could possibly result in personal injury or physical
damage due to incorrect handling.
General Information Indications
Attention
Indicates procedures which may result in damage or malfunctions to occur.
c
Indicates additional information and points which may be useful to know regarding a topic.
sIndicates a page where detailed information regarding a topic can be found.
Menu Name Indicates Configuration menu items.
Example: Image - Color Mode
[Hardware
Names]
Indicates the buttons on the remote control or the control panel.
Example: [Menu] button
About the Use of "This Product" or "This Projector"
As well as the main projector unit, supplied items or optional extras may be referred to using the phrase "this
product" or "this projector".
Contents
3
Organization of the Guide and
Notations in the Guide
UsingEachGuide ..................... 1
NotationsUsedinThisGuide ........... 2
SafetyIndications .......................2
GeneralInformationIndications.............2
AbouttheUse of "ThisProduct"or "This Projector"
..................................... 2
Introduction
Projector Features .................... 6
Equipped with High-quality Image Resolution
OptimizedforFullHD ..................... 6
New Gaming Features that will Change the Way
YouEnjoyGames ........................ 6
Genuine Living Room Theater Experience . . . . . . 6
PartNamesandFunctions ............. 7
Front/Top ............................. 7
ControlPanel.......................... 8
Rear ................................. 9
Base ................................ 10
RemoteControl ........................ 11
Preparing
Installing ............................ 14
ProjectedImageandPositionofProjector.....14
Installinginparallelwiththescreen ........ 14
Installing the projector horizontally by
adjustingtheheightofeitherside ......... 14
VariousSettingMethods .................15
Placingonatableandprojecting.........16
Suspending from the ceiling and projecting
.................................. 16
Projection Distance and Lens Shift Maximum
Values ............................... 17
ConnectingaDevice ................. 20
ConnectingVideoEquipment .............. 20
ConnectingaComputer .................. 20
ConnectingExternalEquipment ............20
Connecting Bluetooth
®
devices..........20
Connectingexternalspeakers ............ 22
PreparingtheRemoteControl ........ 23
InstallingtheRemoteControlBatteries.......23
RemoteControlOperatingRange ........... 24
Operatingrange(lefttoright) ............ 24
Operatingrange(toptobottom) .......... 24
Basic Operations
Projecting Images ................... 25
TurningOntheProjector .................25
If the target image is not projected . . . . . . . . 26
TurningOff ........................... 26
Adjusting the Projected Image . . . . . . . . 27
AdjustingtheFocus ..................... 27
Adjusting the Projection Size (Adjust Zoom)
.................................... 27
AdjusttheHeightoftheImage ............. 27
AdjustingtheProjector'sTilt ............... 28
Adjusting the Position of the Image (Lens Shift)
(EH-TW5800Only) ...................... 28
CorrectingKeystoneDistortion ............. 29
Correct automatically (Auto V-Keystone) . . . . 29
Correct manually (H-KeystoneAdjuster) ..... 29
Correctmanually(H/V-Keystone) .......... 29
Correctmanually(QuickCorner)..........30
AdjustingtheVolume .................... 32
Hiding the Image and Muting the Audio
Temporarily(A/VMute) .................. 32
Adjusting the Image
AdjustingtheImage ................. 33
Selecting the Projection Quality (Color Mode)
.................................... 33
Switching the Screen Between Full and Zoom
(Aspect).............................33
AdjustingtheSharpness .................. 34
Adjusting Image Resolution (Image
Enhancement) ......................... 35
SettingAutoIris ........................ 35
SettingFrameInterpolation ...............36
SettingtheImageProcessingSpeed.........36
AdjustingtheColor .................. 38
Contents
4
AdjustingtheColorTemp. ................ 38
AdjustingtheRGB(OffsetandGain).........38
AdjustingHue,Saturation,andBrightness.....39
AdjustingtheGamma ................... 40
Select and adjust the correction value . . . . . . 40
Adjust using the gamma adjustment graph
.................................. 41
Viewing the Image at the Saved Image
Quality (Memory Function) . . . . . . . . . . . 42
SavingaMemory ....................... 42
Loading, Deleting, and Renaming a Memory
.................................... 43
Useful Functions
Enjoying3DImages .................. 44
PreparingtoView3DImages.............. 44
Ifthe3Dimagecannotbeviewed .........44
Using3DGlasses ....................... 45
Notifications Regarding Viewing 3D Images . . . . 45
UsingtheHDMILinkFunction ........ 47
HDMILinkFunction ..................... 47
HDMILinkSettings ...................... 47
Connecting ........................... 48
Configuration Menu
ConfigurationMenuFunctions ........ 49
ConfigurationMenuOperations ............ 49
ConfigurationMenuTable ................ 50
Imagemenu ........................ 50
Signalmenu ........................ 51
Settingsmenu ....................... 52
Extendedmenu ...................... 54
Infomenu .......................... 55
Resetmenu ......................... 56
Troubleshooting
ProblemSolving ..................... 57
ReadingtheIndicators ................... 57
Indicatorstatusduringanerror/warning....57
Indicator status during normal operation . . . . 59
WhentheIndicatorsProvideNoHelp........60
Checktheproblem .................... 60
Problemsrelatingtoimages ............. 61
Noiseproblems ...................... 64
Problemswhenprojectionstarts .......... 64
Problemswiththeremotecontrol ......... 65
Problemswiththecontrolpanel .......... 65
Problemswith3D ....................65
ProblemswithHDMI .................. 66
Bluetoothdeviceproblems .............. 67
Problems with a streaming media player . . . . 67
Maintenance
Maintenance ........................ 69
CleaningtheParts ...................... 69
Cleaningtheairfilter .................. 69
Cleaningthemainunit ................. 70
Cleaningthelens ..................... 71
ReplacementPeriodsforConsumables.......71
Airfilterreplacementperiod ............. 71
Lampreplacementperiod ..............71
ReplacingConsumables .................. 72
Replacingtheairfilter .................72
Replacingthelamp ...................72
Resettinglamphours .................. 74
Disconnecting a StreamingMediaPlayer......76
Appendix
Optional Accessories and
Consumables ........................ 77
OptionalItems ......................... 77
Consumables .......................... 77
SupportedResolutions ............... 78
PC .................................. 78
SD ................................. 78
HD ................................. 78
3D ................................. 79
Specifications ....................... 81
EH-TW5800/EH-TW5700 .................. 81
Appearance ......................... 83
Contents
5
ListofSafetySymbols ................ 84
Glossary ............................ 86
GeneralNotes ....................... 87
WarningLabels ........................ 88
Disposal ............................. 88
GeneralNotice ......................... 89
Introduction
6
Projector Features
Equipped with High-quality Image Resolution Optimized for Full HD
•You can play fast moving images smoothly using frame interpolation. sp.36
•You can project clear images that are rich in texture by using the noise reduction and detail enhancement features.
sp.35
New Gaming Features that will Change the Way You Enjoy Games
•With 21:9 input support, you can display game content to the full horizontal width of your screen.
•You can set the image processing speed and improve the response time for fast-moving images. sp.36
•The Dark Gamma Uplift feature allows you to adjust dark areas for greater visibility. sp.40
Genuine Living Room Theater Experience
•The built-in Android TVTM allows you to easily start viewing content by connecting to the Internet.
•Speaker enclosures allow you to enjoy realistic audio.
Introduction
7
Part Names and Functions
Front/Top
EH-TW5700
Name Function
aLamp cover
Open when replacing the projector's lamp. sp.72
bA/V mute slide lever
Slide the knob to open and close the lens cover.
By closing during projection you can hide the image and audio. sp.32
cAir exhaust vent
Exhaust vent for air used to cool the projector internally.
Warning
Do not look into the air exhaust vent. If the lamp explodes, scattered
small shards of glass and released gas may cause an injury. If any glass
gets into your eyes or mouth, contact your local physicians immediately.
Caution
While projecting, do not put your face or hands near the air exhaust vent,
and do not place objects that may become warped or damaged by heat
near the vent. Hot air from the air exhaust vent could cause burns, warp-
ing, or accidents to occur.
dLens cover
Close when not using the projector to protect the lens from being scratched
or soiled. sp.26
eFoot release lever
Press the foot release lever to extend and retract the front adjustable foot.
sp.27
fLens
Images are projected from here.
gRemote receiver
Receives signals from the remote control. sp.24
hAir intake vent
Intake vent for air used to cool the projector internally.
Introduction
8
Name Function
iAir filter cover
When replacing the air filter, open this cover and remove the air filter. sp.72
jSecurity slot ( )
The security slot compatible with the MicroSaver security system manufac-
tured by Kensington. For more details, visit the homepage of Kensington at
http://www.kensington.com/.
kFocus adjuster (EH-
TW5800)
Focus ring (EH-TW5700)
Adjusts the image focus. sp.27
lZoom adjuster (EH-
TW5800)
Zoom ring (EH-TW5700)
Adjusts the image size. sp.27
mLens shift dial (EH-
TW5800 only)
Moves the position of the image vertically. sp.28
nHorizontal keystone ad-
juster
Performs horizontal keystone correction. sp.29
oControl panel
Operates the projector. sp.8
Control Panel
Name Function
aStandby button
(Standby indicator)
Turns the projector on or off. sp.25
Shows the projector's status through a combination of other indicators lit and
flashing. sp.59
bStatus indicator
Flashes blue to indicate the projector is warming up or cooling down. Shows
the projector's status through a combination of other indicators lit and flashing.
sp.57
cLamp indicator
Flashes orange when it is time to replace the lamp. Shows the projector's errors
through a combination of other indicators lit and flashing. sp.57
Introduction
9
Name Function
dTemperature indicator
Flashes orange if the internal temperature is too high. Shows the projector's
errors through a combination of other indicators lit and flashing. sp.57
e[HDMI] button
Changes to the image from the HDMI port. sp.26
fVolume (Left/Right)
buttons
•
Adjusts the volume. sp.32
•
Selects menu items or adjustment values while displaying the projector's menu.
•
Performs horizontal keystone correction when the Keystone screen is displayed.
sp.29
gKeystone (Up/Down)
buttons
•
Adjusts keystone distortion in projected images. sp.29
•
Selects menu items or adjustment values while displaying the projector's menu.
h[Esc] button
Returns to the previous menu level when a menu is displayed. sp.49
i[Enter] button
Selects functions and settings when a menu is displayed. sp.49
j[Menu] button
Displays and closes the Configuration menu.
On the Configuration menu, you can make adjustments and settings for Sig-
nal, Image, Input Signal, and so on. sp.49
k[Home] button
Switches to the image from Android TV
TM
.
c
When the Illumination function is set to Off, all indicators are off under normal projection conditions.
s
Extended - Operation - Illumination p.54
Rear
Name Function
aRemote receiver
Receives signals from the remote control. sp.24
bService port
Service port. This is not normally used.
cAudio Out port
Outputs audio during playback to external speakers. sp.22
dHDMI port
Connects HDMI compatible video equipment and computers. sp.20
ePower inlet
Connects a power cord. sp.25
Introduction
10
Name Function
fStorage space cover
Remove the cover when connecting or removing a streaming media player.
sp.76
gSpeaker
The projector's built-in speaker. Outputs audio.
Base
Name Function
aCeiling mount fixing
points (three points)
Attach the optional ceiling mount here when suspending the projector from a
ceiling. sp.77
bSecurity cable sec-
tion
Secure a commercially available anti-theft wire lock through this section.
You can also attach a safety wire to prevent the projector from falling.
cRear feet
When setting up on a surface such as a table, extend the feet to adjust horizontal
tilt. sp.28
dAir exhaust vent
Air exhaust vent to cool the streaming media player.
eAir intake vent
Takes in air to cool the streaming media player.
fFront adjustable foot
When setting up on a surface such as a table, extend the foot to adjust the height
of the image. sp.28
Introduction
11
Remote Control
Projector remote control
Remote control for operating the projector and Android TV
TM
.
Unless stated otherwise, this guide describes operations for the projector remote control.
Name Function
aStandby button
Turns the projector on or off. sp.25
bEsc button
Closes the current function. Press when a menu is displayed to return to the
previous menu level. sp.49
cUp/Down/Left/Right
buttons
Selects menu items and adjustment values. sp.49
d[Enter] button
When a menu is displayed, it confirms the current item and moves to the next
level. sp.49
eMenu button
Displays and closes the Configuration menu.
On the Configuration menu, you can make adjustments and settings for Signal,
Image, and so on. sp.49
fVolume buttons
Adjusts the volume. sp.32
gPlayback control but-
tons
Operates Android TV
TM
and video devices compliant with the HDMI CEC stand-
ard. sp.47
Introduction
12
Name Function
hKeystone button
Corrects distortion in the image. sp.29
iMic button
Allows you to operate Android TV
TM
using voice commands. When you press
this button, the microphone on the remote control starts listening for voice
commands.
jSource button
Changes to the image from each input port.
kHome button
Displays or closes the Android TV
TM
home screen.
lApps button
Displays a list of apps for Android TV
TM
.
mYouTube button
Opens the YouTube app.
nA/V Mute button
Temporarily hides or shows the image and audio. sp.32
oIndicator
Turns on while operating the remote control.
pMicrophone section
This detects voice commands when you press the Mic button.
qRemote control light
emitting area
Outputs remote control signals.
Remote control for Android TVTM
Remote control for operating Android TV
TM
.
Introduction
13
Name Function
aStandby button
Turns Android TV
TM
on or off.
bUp/Down/Left/Right
buttons
Selects the Android TV
TM
menu items.
cEnter button
Confirms the current Android TV
TM
menu item and moves to the next level.
dEsc button
Press while Android TV
TM
is displayed to return to the previous menu level.
eVolume buttons
Adjusts the volume for Android TV
TM
.
fYouTube button
Opens the YouTube app.
gNetflix button
Opens the Netflix app.
hGoogle Play button
Connects to Google Play.
iHome button
Displays the Android TV
TM
home screen.
jApps button
Displays a list of apps for Android TV
TM
.
kIndicator
Turns on while operating the remote control.
lMic button
Allows you to operate Android TV
TM
using voice commands. When you press
this button, the microphone on the remote control starts listening for voice
commands.
mMicrophone section
This detects voice commands when you press the Mic button.
nRemote control light
emitting area
Outputs remote control signals.
Preparing
14
Installing
Projected Image and Position of Projector
Install the projector as follows.
Installing in parallel with the screen
If the projector is installed at an angle to the screen, keystone distortion occurs in the projected image.
Adjust the projector's position so that it is installed in parallel with the screen.
c
If the projector cannot be installed in parallel, use one of the following methods to adjust the
projected image.
•Correct distortion in the image using the horizontal keystone adjuster or H/V-Keystone sp.29
•Adjust the position of the projected image using lens shift (EH-TW5800 only ) sp.28
Installing the projector horizontally by adjusting the height of either side
If the projector is tilted, the projected image is also tilted.
Install the projector horizontally so that both sides are at the same height.
If the projector cannot be installed horizontally, you can adjust the projector's tilt with the rear feet.
s
p.28
Preparing
15
Various Setting Methods
Warning
•A special method of installation is required when suspending the projector from a ceiling (ceiling mount). If
it is not installed correctly, it could fall, causing an accident and injury.
•Failure to install the ceiling mount and projector may cause the projector to fall. Be sure to use the specific
Epson mount that supports this projector, and secure it to all of the projector's ceiling mount fixing points.
Also, make sure you secure the projector and the mount using wire and so on that is strong enough to hold
their weight.
•Do not apply adhesives, oils, lubricants, detergents, solvents, chemicals, and so on to the projector case or
the mount. Otherwise, the projector case may deteriorate or be damaged causing the projector to fall from
the mount.
•Do not set up the projector in locations exposed to humidity or dust, or in locations exposed to oil smoke or
steam such as on a kitchen counter, in the kitchen, or near a humidifier. Doing so could cause fire or electric
shock. In addition, the oil content could cause the projector’s outer case to deteriorate and could cause the
projector to fall off from the ceiling where it is suspended.
Examples of environments that could cause the projector to fall due to case deterioration/damage
•Locations subject to oily smoke, such as factories, restaurant kitchens, or home kitchens
•Locations containing volatile solvents or chemicals, such as factories or laboratories
•Locations where oil, detergents, chemicals, and so on could adhere to the projector such as factories, restaurant
kitchens, or home kitchens
•Locations in which aroma oils are often used, such as relaxation rooms
•Locations near devices that produce excessive smoke, airborne oil particles, or foam at events
•Do not install in locations where salt damage could occur, or in locations subject to corrosive gas such as
sulphuric gas from hot springs. Otherwise, corrosion could cause the projector to fall. It could also cause the
projector to malfunction.
•Do not install it on an unstable shelf or in a place out of load range. Otherwise, it could fall or topple causing
an accident and injury.
•When installing the projector in a high position such as on a shelf, take measures against falling by using
wires or belts to ensure safety in an emergency such as an earthquake, and to prevent accidents. If it is not
installed correctly, it could fall causing an accident and injury.
•Do not block the air intake vent and air exhaust vent of the projector. Blocking its air intake vent and air
exhaust vent may trap heat inside causing fire.
•Do not use or store the projector in dusty or dirty locations. Doing so could cause the quality of the projected
image to deteriorate, or the air filter to become clogged with dust which can cause malfunctions or a fire to
occur.
Attention
•Do not project under the following conditions. Doing so could cause a malfunction or accident to occur.
•Do not project by standing the projector vertically
•Do not project from above or below
•Do not project by tilting to the left or right
•Clean the air filter once every three months. Clean it more often if the environment is particularly dusty.
sp.69
Preparing
16
Placing on a table and projecting
You can install the projector on a table in your living room or on a low shelf to project images.
Suspending from the ceiling and projecting
You can suspend the projector from the ceiling with the optional ceiling mount to project images.
c
When suspending from the ceiling and projecting, set Projection to Front/Ceiling or Rear/
Ceiling.
s
Extended - Projection p.54
Preparing
17
Projection Distance and Lens Shift Maximum Values
The size of the projection increases as the projector is moved away from the screen.
Use the table below to setup the projector at the optimum position from the screen. The values given here
are for your reference only.
The maximum lens shift adjustment values are shown in the following table.
c
The projected image becomes smaller after correcting distortion. Increase the projection distance
to fit the projected image to the screen size.
A : Projection distance from the projector to the screen
B : Height from the center of the lens to the bottom edge of the projected image
C:Centerofthelens
EH-TW5800
Unit: cm
16:9 Screen Size Projection distance (A) Lens shift maximum values (B)
Minimum
(Wide)
Maximum
(Tele)
Highest Lowest
60" 133 x 75 176 286 -4 +7
80" 177 x 100 235 382 -5 +10
100" 221 x 125 295 478 -6 +12
120" 266 x 149 354 575 -7 +15
150" 332 x 187 443 719 -9 +19
200" 443 x 249 591 959 -12 +25
250" 553 x 311 740 1200 -16 +31
300" 664 x 374 888 1441 -19 +37
Preparing
18
EH-TW5700
Unit: cm
16:9 Screen Size A B*
Minimum
(Wide)
Maximum
(Tele)
60" 133 x 75 162 195 -5
80" 177 x 100 217 261 -7
100" 221 x 125 272 327 -8
150" 332 x 187 410 492 -12
200" 443 x 249 547 658 -16
250" 553 x 311 685 823 -20
332" 735 x 413 911 1094 -27
* Lens shift is not supported.
Preparing
19
Installation example (with 16:9 screen size, 100", and the EH-TW5800)
Side view
Overhead view

This manual suits for next models

1

Other Epson Projector manuals

Epson EB-X11 User manual

Epson

Epson EB-X11 User manual

Epson EpiqVision Ultra LS800 User manual

Epson

Epson EpiqVision Ultra LS800 User manual

Epson PowerLite Pro Z8050WNL System manual

Epson

Epson PowerLite Pro Z8050WNL System manual

Epson PowerLite 1266 Specification sheet

Epson

Epson PowerLite 1266 Specification sheet

Epson EX7230 Pro Specification sheet

Epson

Epson EX7230 Pro Specification sheet

Epson EH-TW6000W User manual

Epson

Epson EH-TW6000W User manual

Epson 7850p - PowerLite XGA LCD Projector Installation and operation manual

Epson

Epson 7850p - PowerLite XGA LCD Projector Installation and operation manual

Epson powerlite home cinema 3010+ User manual

Epson

Epson powerlite home cinema 3010+ User manual

Epson BrightLink 697Ui User manual

Epson

Epson BrightLink 697Ui User manual

Epson PowerLite 5300 User manual

Epson

Epson PowerLite 5300 User manual

Epson EMP-62 User manual

Epson

Epson EMP-62 User manual

Epson EMP-70 User manual

Epson

Epson EMP-70 User manual

Epson VS220 User manual

Epson

Epson VS220 User manual

Epson EH-TW9100W User manual

Epson

Epson EH-TW9100W User manual

Epson EMP EMP-1825 User manual

Epson

Epson EMP EMP-1825 User manual

Epson MOVIEMATE 62 Reference guide

Epson

Epson MOVIEMATE 62 Reference guide

Epson EMP-7850 User manual

Epson

Epson EMP-7850 User manual

Epson EB-465i User manual

Epson

Epson EB-465i User manual

Epson EasyMP EMP-735 User manual

Epson

Epson EasyMP EMP-735 User manual

Epson 880X Specification sheet

Epson

Epson 880X Specification sheet

Epson PowerLite 61p User manual

Epson

Epson PowerLite 61p User manual

Epson EF-100WATV User manual

Epson

Epson EF-100WATV User manual

Epson EX21 Specification sheet

Epson

Epson EX21 Specification sheet

Epson BrightLink 436Wi User manual

Epson

Epson BrightLink 436Wi User manual

Popular Projector manuals by other brands

Hitachi CP-X4020 user manual

Hitachi

Hitachi CP-X4020 user manual

Panasonic PT-TX320 operating instructions

Panasonic

Panasonic PT-TX320 operating instructions

Optoma TX776 Quick start card

Optoma

Optoma TX776 Quick start card

Naxa NVP-2500 user manual

Naxa

Naxa NVP-2500 user manual

Sony VPL-FHZ700L manual

Sony

Sony VPL-FHZ700L manual

ViewSonic PG603W user guide

ViewSonic

ViewSonic PG603W user guide

Hitachi CPX265 - XGA LCD Projector user manual

Hitachi

Hitachi CPX265 - XGA LCD Projector user manual

Optoma EP735 brochure

Optoma

Optoma EP735 brochure

ViewSonic PJ759 - 63 Tft LCD Projector Specification sheet

ViewSonic

ViewSonic PJ759 - 63 Tft LCD Projector Specification sheet

Acer P5206 Series user guide

Acer

Acer P5206 Series user guide

Videoseven PL701X user manual

Videoseven

Videoseven PL701X user manual

Mitsubishi Electric HOME THEATER DLP HC2000 quick start guide

Mitsubishi Electric

Mitsubishi Electric HOME THEATER DLP HC2000 quick start guide

NEC UM352W user manual

NEC

NEC UM352W user manual

Optoma ZU500TST user manual

Optoma

Optoma ZU500TST user manual

Lightware LightBook 30 user guide

Lightware

Lightware LightBook 30 user guide

Pyle PRJLE60 manual

Pyle

Pyle PRJLE60 manual

Acer K330 Multimedia user guide

Acer

Acer K330 Multimedia user guide

VIVIBright PLED-S200 Brochure & specs

VIVIBright

VIVIBright PLED-S200 Brochure & specs

manuals.online logo
manuals.online logoBrands
  • About & Mission
  • Contact us
  • Privacy Policy
  • Terms and Conditions

Copyright 2025 Manuals.Online. All Rights Reserved.