Equator BR 476 User manual
OWNER’S MANUAL
Please read the instructions carefully and keep for future reference. Information may be
updated from time to time so please refer to the website for the latest version of the manual.
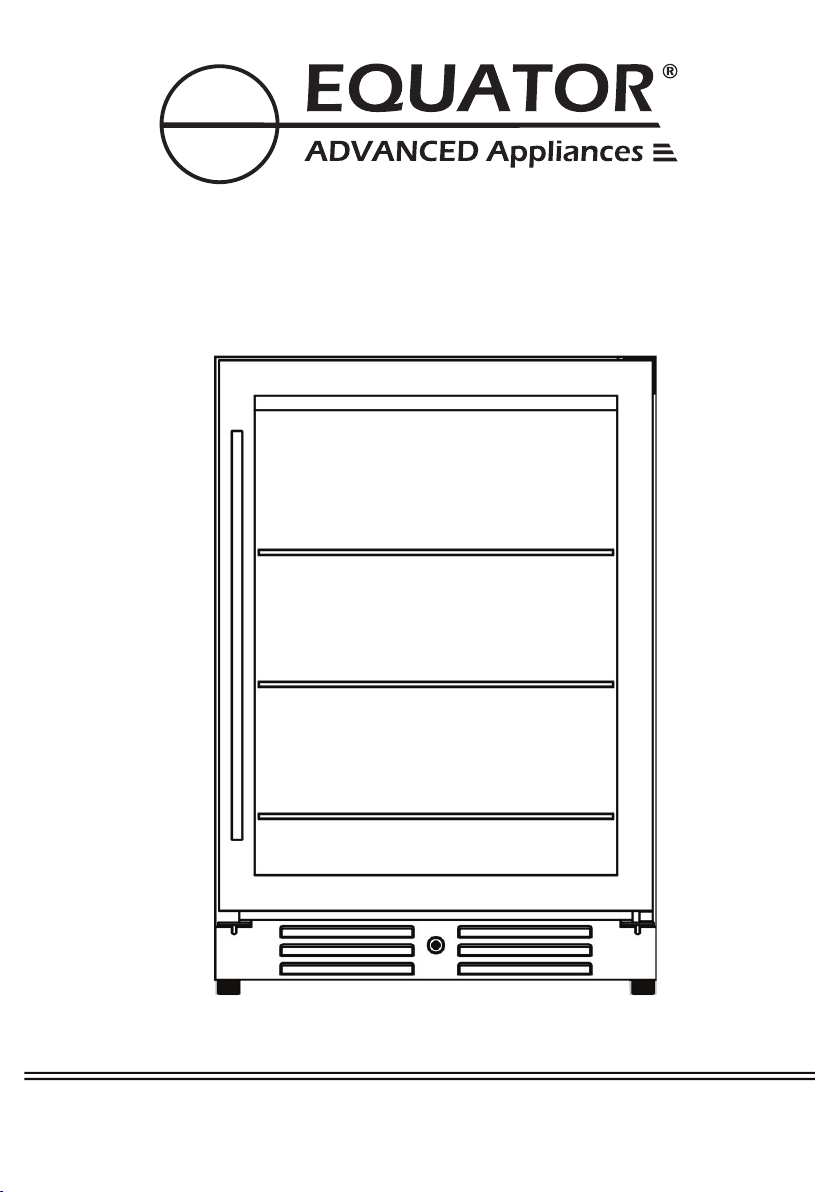
Model - BR 476
Beverage Refrigerator
Built-In / Freestanding


Installation - e.g. Insufficient spacing around appliance
Mishandling - e.g. Breakage of door handle
Maintenance - e.g. Cleaning the appliance using solvents
Most work is covered. The defining factor is, has the machine
malfunctioned (Equator Appliances is responsible) or has the
customer omitted or done something to cause the appliance to
malfunction (customer is responsible). Some states do not allow
the exclusion or limitation of incidental or consequential damages,
so the above limitation of exclusion may not apply to you.
Specifically, the following work is not covered under warranty and does
not constitute warranty work:
In no event shall Equator Appliances be liable for incidental or
consequential damages or for damages resulting from external
causes such as abuse, misuse, incorrect voltage or acts of God. This
warranty does not cover service calls which do not involve defective
workmanship or materials covered by this warranty. Accordingly,
diagnosis and repair costs for a service call which does not involve
defective workmanship or materials will be the responsibility of the
consumer-owner.
Equator Appliances undertakes to the consumer-owner to repair or,
at our option, to replace any part of this product which proves to be
defective in workmanship or materials under normal personal, family
or household use, in the USA and Canada, for a period of one year
from the date of original purchase. For commercial use, the product
is warranted for a period of 90 days. During this period, we will provide
all labor and parts necessary to correct such defect, free of charge, if
the appliance has been installed and operated in accordance with the
written instructions with the appliance. Ready access to the appliance,
for service, is the responsibility of the consumer-owner. Service would
be provided from Monday to Friday between normal business hours.
1
1. Open Smart Phone
2. Open Photo
3. Scan QR Code
4. Click the Link
You can register your warranty by either of the following methods:
1. Scan QR Code
2. Register online at ApplianceDesk.com/Warranty
Since it is the responsibility of the consumer-owner to establish the
warranty period by verifying the original purchase date, Equator
Appliances recommends that a receipt, delivery slip or some other
appropriate payment record be kept for that purpose.
This warranty gives you specific legal rights, and you may also have
other rights which vary from State to State.
Equator Appliances
2
QR Code

Children should be supervised to ensure that they do not climb on
or play with the appliance.
This appliance is not intended for use by persons (including children)
with reduced physical, sensory or mental capabilities, or lack of
experience and knowledge, unless they have been given supervision
or instruction.
!
3
in or near this appliance.
Leave the shelves in place.
ensure the correct voltage is 115V / 60Hz.
4
appliance
appliance
Ensure the bottom vent is not obstructed.
The appliance should be placed in a room where the temperature
is between 60℉-90℉.
.
and Preparation
When loading bottles and cans, ensure items are arranged evenly,
so that weight is not concentrated in one area of the unit.
Ensure items do not touch the back of the cabinet.
After moving the appliance in place, let it stand upright for at least
2 hours before turning it on.
direct sunlight and
Ensure the appliance is
level by adjusting the 4 levelling feet.

Installation Spacing Requirements
5
The appliance can be used as built-in or freestanding.
Place the appliance on a flat level surface. Whether installing under a
cabinet as a built-in unit or freestanding, ensure to leave adequate space
around the unit.
INSTALLING WITH THE
HINGE SIDE NEXT TO
A WALL - LEAVE
2 ¹⁄” (57mm) SPACE
DOOR MUST BE
o
ABLE TO OPEN 90
34 ¹⁄”
(870mm)
23 ⁴⁄”
(605mm)
7”
(180mm)
4”
(105mm)
23 ⁴⁄”
(605mm)

33 ⁴⁄”
(860mm)
23 ²⁄”
(595mm)
The depth is shown
without handle
with handle + 1 ³⁄” (45mm)
23 ²⁄”
(595mm)
Height
Width
Depth
This appliance is intended for indoor use only.
6

Installing Door Handle
Install the handle according to the following steps:
7
Pulling out Shelves
Push the handle tightly against the door
and tighten both of the 2 set screws (C)
with the hex key (D).
Keep the hex key in a safe place for future use.
Two extra set screws are included.
Ensure the door is completely open before pulling out the shelves.
This will prevent scratching and damage of the door and shelves.
Remove all bottles from the shelf.
Pull the shelf forward until the groove on either side of the shelf is level with the
plastic peg on the sides of the cabinet.
Then lift the shelf up from one side and gently pull it out.
Do the reverse to reinstall the shelf.
8
Door Reversal
Table of contents
Other Equator Refrigerator manuals

Equator
Equator Conserv 1200 Instruction Manual

Equator
Equator BR 317 User manual

Equator
Equator DRFC 5292 User manual

Equator
Equator Party Cooler none User manual

Equator
Equator BR 140 User manual

Equator
Equator RF 1000 User manual

Equator
Equator DR 5122 User manual

Equator
Equator RF 142 S User manual

Equator
Equator RF 1000 User manual

Equator
Equator PFF 07 User manual


