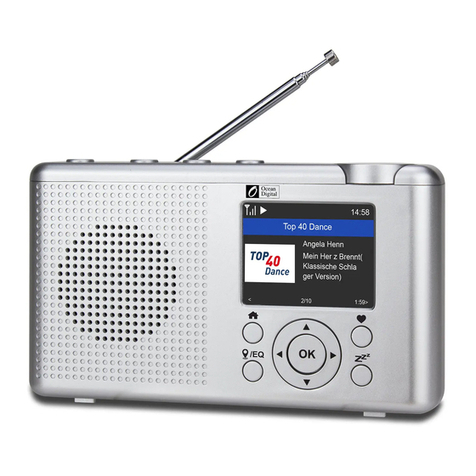
Erbauer ERD18-Li User manual

MNL_ERD18-Li_V01_BX220IM_220322
ERD18-Li
EAN. 5059340253237
ORIGINAL INSTRUCTIONS

2
Safety instructions
Product description
Assembly
Use
Care & maintenance
Guarantee
Declaration of Conformity

3
WARNING! Please read all safety warnings carefully and be sure
that they are fully understood before handling the tool.
x1

4
PRODUCT DESCRIPTION
1
2
6
1415
17
16
18
19
13
6
3
4
7
8
9
10
11
12
5
20 21
23
24
22

5
A1
1
2
A2
B C
D E
F G

6
H J
K L
M1 M2
N1 N2

7
SAFETY INSTRUCTIONS
GENERAL PRODUCT SAFETY WARNINGS
WARNING! Read all safety warnings, instructions,
illustrations and specications provided with this
product. Failure to follow all instructions listed below
may result in electric shock, re and/or serious injury.
Save all warnings and instructions for future
reference.
• Never expose the product to dripping or splashing ,no objects
lled with liquids, such as vases, shall be placed on it.
• No ame sources, such as lighted candles, should be placed on it.
• Never disassemble or modify this product in any way. Refer all
servicing to qualied service personnel.
• Before all work on the product (e.g. disassembly, maintenance
etc.) and during transportation or storage, remove the battery
from the device.
• Use the product only in dry conditions. Protect the product from
moisture and splash water.
• If the product is brought from a very cold to a warmer
environment or vice versa, you should allow the product to
acclimatise before using it. This will prevent condensation inside
the product.
• When using the product in combination with external products, it
is essential to observe the safety information and instructions in
the operating instructions of the external products.
• Keep the product clean. Through contamination there is a risk
of electric shock.

8
• Keep your work area clean and well lit. Cluttered or dark work
areas invite accidents.
• Use only power supplies listed in the user manual.
BATTERY PRODUCT USE AND CARE
a. Recharge only with the charger specied by the
manufacturer. A charger that is suitable for one type of battery
pack may create a risk of re when used with another battery
pack.
b. Use product only with specically designated battery
packs. Use of any other battery packs may create a risk of
injury and re.
c. When battery pack is not in use, keep it away from other
metal objects, like paper clips, coins, keys, nails, screws
or other small metal objects, that can make a connection
from one terminal to another. Shorting the battery terminals
together may cause burns or a re.
d. Under abusive conditions, liquid may be ejected from
the battery; avoid contact. If contact accidentally occurs,
ush with water. If liquid contacts eyes, additionally seek
medical help. Liquid ejected from the battery may cause
irritation or burns.
e. Do not use battery pack or tool that is damaged or
modied. Damaged or modied batteries may exhibit
unpredictable behaviour resulting in re, explosion or risk of
injury.
f. Do not expose a battery pack or tool to re or excessive
temperature. Exposure to re or temperature above 130 °C
may cause explosion.
g. Follow all charging instructions and do not charge
the battery pack or tool outside the temperature range
specied in the instructions. Charging improperly or at
temperatures outside the specied range may damage the
battery and increase the risk of re.

9
h. Use only batteries approved by the manufacturer.
CAUTION :“Risk of re or explosion if the battery is
replaced by an incorrect type”
i. Replacement of a battery with an incorrect type that can defeat
a safeguard.
j. Disposal of a battery into re or a hot oven, or mechanically
crushing or cutting of a battery, that can result in an explosion.
k. Leaving a battery in an extremely high temperature surrounding
environment that can result in an explosion or the leakage of
ammable liquid or gas.
l. A battery subjected to extremely low air pressure that may
result in an explosion or the leakage of ammable liquid or gas.
ADDITIONAL SAFETY WARNINGS FOR BATTERY
a. Do not connect the positive terminal and negative terminal of
the battery to each other with any metal object (such as wire).
b. Do not carry or store battery together with necklaces, hairpins
or other metal objects.
c. Do not pierce the battery with nails, strike the battery with a
hammer, step on the battery or otherwise subject it to strong
impacts or shocks.
d. Do not solder directly onto the battery.
e. Do not expose battery to water or salt water, or allow the
battery to get wet.
f Do not disassemble or modify the battery.
g. Do not place the battery in or near re, on stoves or other
high temperature locations. Do not place the battery in direct
sunlight, or use or store the battery inside cars in hot weather.
h. Do not place the battery in microwave ovens, high-pressure
containers or on induction cookware.

10
i. If you intend to store a battery for a period without use then
store battery at room temperature (19°C to 25°C), charged
to about 30 - 50% of capacity. When storing for very long
periods boost charge the battery once per year to prevent over
discharge.
j. Never service damaged battery packs. Service of battery packs
should only be performed by the manufacturer or authorized
service providers.

11
PRODUCT DESCRIPTION
1. FM Antenna
2. Handle
3. Power Bar Button
4. Battery Pack (not included)
5. Battery Release Button
6. Speaker
7. AC/DC Adaptor
8. AUX Cable
9. USB Output Port
10. AUX Input Port
11. DC Socket
12. Dust-Proof Cover
13. Preset List Button
14. Preset Button
15. Display
16. Play/Pause Button
17. Mode Button
18. Bass Button
19. Tune/Seek Down Button
20. On/Off/Volume Knob
21. Tune/Seek Up Button
22. Clock Button
23. Bluetooth®Button
24. Mute Button
01 TECHNICAL SPECIFICATIONS
Rated AC input for AC/DC Adaptor: 100-240V~ 50-60Hz, 0.7A
Rated output for AC/DC Adaptor: 18Vd.c. 1.2A, 21.6W
Rated DC input: 18V d.c.
Rated output power of Speaker: 15Wx2
USB port output: 5 V, Max. 2.1 A
AUX cable plug: 3.5 mm

12
Bluetooth®standard: V5.0
Bluetooth®Range: Up to 100 ft. (30 m)
Bluetooth®Frequency Range: 2402 MHz - 2480 MHz
Bluetooth®Max EIRP: -1.41 dBm (0.723 mW)
FM: 87.5MHz-108MHz
DAB: 174.928MHz-239.2MHz
IP class: IP64
LxWxH: 310 x 200 x 150 mm
Net weight (without battery): 2 kg
Operating temperature: 0 - 40°C
For use with battery pack and charger as below:
Battery pack model: EBAT18-Li-2 / EBAT18-Li-4 / EBAT18-Li-5 /
EHPB18-Li-4 EHPB18-Li-8
Charger model: EC18-Li / EFC18-Li / EMC18-Li
For use with AC/DC Adapter as below:
Model No.: MX24W1-1801200B
Manufacturer: Shenzhen Mingxin Power Technologies Co.,Ltd.
RATING LABEL EXPLANATION
ERD18-Li = MODEL NUMBER E = ERBAUER
RD = RADIO
18 = 18 V d.c.
Li = LITHIUM ION

13
ASSEMBLY
01 SYMBOLS
Caution / Warning.
Read the instruction manual.
Switch the product off and remove the battery pack to disconnect
from the power supply before assembly, cleaning, adjustments,
maintenance, storage and transportation.
IP64 Ingress protection degree
Do not dispose of battery packs in rivers or immerse in water.
Do not dispose of battery packs in re. They will explode and cause
injury.
Do not expose battery packs to heat in excess of 40°C
Keep Cool Battery Technology
USB output port
Only for indoor use
Double insulation
The output plug is with positive center pole and negative outer pole
Positive terminal
Negative terminal

14
Bluetooth®
DAB The name “DAB” in this manual indicates “Digital Radio”
yyWxx Manufacturing date code: Year of manufacturing (20yy) and week of
manufacturing (Wxx)
The product complies with the applicable European directives and
an evaluation method of conformity for these directives was done.
This product is in accordance with applicable UK legislation.
Radio Equipment Regulations 2017 (S.I. 2017/1206)
This symbol designates that this tool is listed by the Intertek Testing
Services, to Germany and EU Standards.
WEEE symbol. Waste electrical products should not be disposed of
with household waste. Please recycle where facilities exist. Check
with your Local Authority or local store for recycling advice.
02 UNPACKING
Unpack all parts and lay them on a at, stable surface.
• Remove all packing materials and shipping products, if applicable.
• Make sure the delivery contents are complete and free of any damage. If you nd that parts
are missing or show damage do not use the product but contact your dealer. Using an
incomplete or damaged product represents a hazard to people and property.
• Ensure that you have all the accessories and tools needed for assembly and operation.
This also includes suitable personal protective equipment.
WARNING! The product and the packaging are not children’s toys!
Children must not play with plastic bags, sheets and small parts! There is a
danger of choking and suffocation!
03 ASSEMBLING THE DEVICE
ASSEMBLY
CHARGING YOUR BATTERY PACK
The battery has been shipped in a low charge condition. Charge it fully before rst use.
Refer to the charger instruction manual for the details.
TO REMOVE OR INSTALL THE BATTERY PACK (A1, A2)
Depress the battery pack release button to release and slide the battery pack out from
your tool. After recharge, slide it back into your tool. A simple push and slight pressure
will be sufcient.

15
BATTERY PACK POWER BAR
The Li-Ion battery pack (4) is equipped with a POWER BAR which is used to give an
indication of the battery pack’s remaining charge. Press the POWER BAR button (3) to
check battery charge as below. The LED will stay lit for approximately 5 seconds.
3
76-100% Charge
51-75% Charge
26-50% Charge
5-25% Charge
Flash On Off under 5% Charge
USING SUPPLIED AC/DC ADAPTOR (B)
Open the dust-proof cover (12) on the right side of the radio, insert the AC/DC adaptor (7)
plug into the DC socket (11).
Plug the adaptor into a standard mains socket outlet. Whenever the adaptor is used, the
battery pack is automatically disconnected. The AC/DC adaptor should be disconnected
from the main supply when not in use.
NOTE: The battery cartridge is not charged by using AC/DC adaptor.
After using AC/DC adaptor, replace the dust-proof cover to protect the DC
socket against dust, dirt or moisture.
POSITIONABLE FLEXIBLE FM ANTENNA
To decrease interference or static noise, rotate the FM antenna (1) or move the unit to a
higher elevation. The antenna folds down and out of the way when not in use.

16
USE
01 INTENDED USE
This unit is intended:
- for reception and playback of FM and DAB radio stations
- for import audio sound from other products such as mobile phones, MP3 players, CD
players etc. for playing music through Bluetooth®or AUX cable
- for USB charging function with power supply
02 OPERATION
ON / OFF SWITCH (C)
Switching on:
Briey press the On/Off/Volume knob and the unit switches on. The display will show
“Welcome Erbauer” and after 1 second will shift to DAB operation mode.
Switching off:
Press the On/Off/ Volume knob and hold for 2 seconds. The display will show
“Power Off” and after 1 second will switch off.
STANDBY MODE (D)
When the unit is switch on, briey press the On/Off/Volume knob , the unit switches to
standby mode.
When the unit is in standby mode, all audio output will stop. Only the display will continue
showing the time and date, but the display brightness will dim after 30 seconds.
Briey press the On/Off/Volume knob to return to full operating mode.
NOTICE: When in standby mode, the unit will turn off automatically after
1 hour of inactivity.
When in standby mode, USB charging is available.
SETTING THE TIME
In any mode, press the CLOCK button for 2 seconds to set the time. The numbers
blink in this order: hour> minute> date > month > year.
Press the or button to change each value.
Press the button to switch to the next setting.

17
To save the time settings press the button again. If you don’t press it again and don’t
press any other button for 10 seconds, the procedure is interrupted and the changes you
have made are discarded.
NOTE: The unit default setting is 24 hour clock format.
SETTING THE VOLUME (E)
To increase the volume, rotate the On/Off/Volume knob clockwise. To reduce it, turn
the knob to the left.
Briey press the button to mute the sound. Briey press the button again or
rotate the On/Off/Volume knob to unmute the sound.
TONE ADJUSTMENT (F)
The low frequency (bass) boost can be turned on or off:
Briey press the BASS button. When the bass boost function is on, the Bass symbol
lights up.
SELECTING THE OPERATING MODE (G)
Briey press the MODE button for selecting the operating mode until the desired mode is
displayed.
The following operating modes are available:
- DAB Radio reception
- FM Radio reception
- Playback of music sources connected via Bluetooth®
- Playback of music sources connected via AUX cable
The selection is shown by means of the corresponding symbol on the top of the display
BLUETOOTH® OPERATING MODE (H)
Activate the Bluetooth®operating mode with the MODE button or press the Bluetooth®
button . Activate the Bluetooth®function on the device to be connected (smartphone
or similar) and select “ERBAUER ERD18-Li” as the target of the Bluetooth®connection.
For this purpose, follow the instructions in the operating manual of the paired device
(smartphone or similar).
Press the or button to change to previous or next song.
Press button to pause or play.

18
NOTICE: To disconnect (forget) the Bluetooth® device after successful
pairing, press the button and hold for 2 seconds. The paired device is
disconnected.
When in Bluetooth®operating mode, the unit will turn off automatically after
1 hour of inactivity.
AUX IN OPERATING MODE (J)
Select the AUX IN operating mode using the MODE button.
Open the dust-proof cover (12) and connect the external music source (MP3 player or
similar) to the AUX input port (10) of the unit using the included AUX cable. Switch on the
external music source and start the playback.
Set the volume with the regulator for the external music source or the volume knob of the
unit.
NOTE: Batteries of the connected devices cannot be charged via the
AUX input port.
When the unit is switched off, the connected devices are not switched off.
After using AUX input port, replace the dust-proof cover to protect the port
against dust, dirt or moisture.
CHARGING EXTERNAL DEVICES VIA THE USB PORT (K)
Open the dust-proof cover (12), insert the USB plug of the device to be charged into the
USB output port (9) of the unit.
The USB output port is a connection port for powering low power devices such as mobile
phones, MP3 players, etc.
Immediately disconnect the USB device after charging.
NOTE: No music playback available via USB connection.
After using the USB output port, replace the dust-proof cover to protect the
port against dust, dirt or moisture.
DAB OPERATION MODE
TUNING (DAB)
When the device is rst switched on in DAB mode, the radio will auto scan to nd
broadcast stations in the local area.
Briey press the MODE button or the Button to stop auto scanning.
Briey Press the or button to scroll through the stations.

19
FINDING NEW STATIONS (DAB)(L)
From time to time, new DAB radio stations may become available. Or you may have
moved to a different part of the country. In this case you may need to activate your radio
to scan for new stations. Press the button for 2 seconds, your radio will perform a
full scan of the DAB frequencies. You can also briey press the MODE button or the
Button to stop auto scanning. As new stations are found, the station counter on the right
side in the display will increase and stations will be added to the list.
FM OPEARATION MODE
Press the MODE button until FM is highlighted.
Manual tuning:
Briey Press the or button to set the desired frequency. Each press will
increase or decrease the frequency by 0.05MHz. The frequency is shown on the display.
Scan Tuning:
Press the or button and hold for 2 seconds, the tuner frequency will increase
to seek the rst radio station with strong signal and stop at that station. The frequency is
shown on the display. The right arrow button may be pressed for 2 seconds again to
continue seeking a radio station at higher frequencies. The left arrow button may be
pressed to seek radio stations at lower frequencies.
STORING STATIONS (DAB AND FM)
To store radio stations in preset list (M1)
- Tune to the current radio station and press the preset list button for 2 seconds
to enter “Preset Store”
- Press the or button or rotate knob to select the stored location, e.g.10
- Press the button to save it, P10 is shown on the display.
NOTE: You can store up to 10 radio stations.
If you select a stored location that is already lled, the station will be
replaced by the station you are listening to.
To recall the selected stations
- Press the preset list button to enter “Preset Store”
- Press the or button or rotate knob to nd the selected radio station, e.g.10
- Press the button to conrm, P10 will be played.
To store and recall stations in preset memories quickly (M2)
Additionally, the unit also provides 5 memory presets (1-5) for each DAB/FM waveband
to be stored and recalled quickly.
To store the current radio station, press and hold the selected preset button (1-5) until the
preset number is shown on the display. The station is then stored in the selected preset
button.

20
Repeat this procedure for the remaining presets. Stations stored in the preset memory
can be overwritten by following the procedures described above.
To recall stations from the preset memories, briey press the selected reset button while
the unit is in radio mode. The preset number and station frequency will appear on the
display.
SYSTEM MENU SETTING
In any mode, press the MODE button and hold on for 2 seconds to enter system menu
setting. Briey press the MODE button to return last function interface.
FACTORY RESET (N1)
If your radio fails to operate or some digits on the display are missing or incomplete,
carry out the following procedure.
- Press the MODE button to enter “System”
- Press the button to enter “Factory Reset”
- Press the button to enter “Yes or No”
- Press the or button or rotate knob to select Yes or No and press
the button to conrm the setting. After selecting Factory Reset/Yes, your radio will
be switched off automatically.
SW Version (N2)
The software display cannot be altered and is just for your reference.
- Press the MODE button to enter “System”
- Press the button to enter “Factory Reset”
- Press the or button or rotate knob to nd “SW Version” and press the
button. The software version will show on the display.
This manual suits for next models
1
Table of contents
